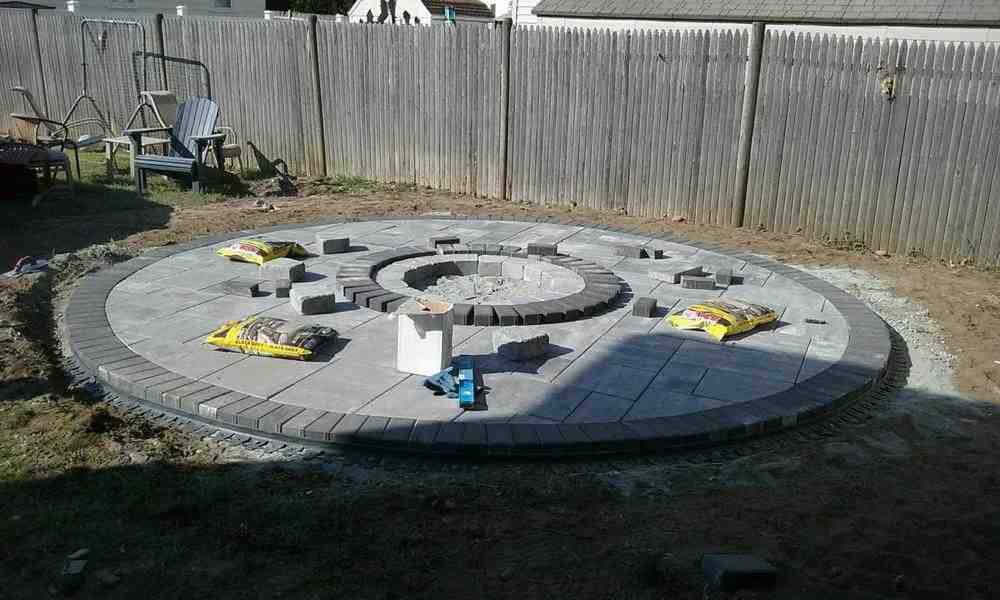
Essential Steps for Professional Paver Patio Installation
A successful paver patio installation depends on strict execution of every foundational phase by a qualified hardscaping team. Before excavation begins, the entire patio footprint should be professionally laid out using stake lines, mason string, or high-visibility marking paint. This layout phase verifies accurate dimensions, accounts for yard access and equipment navigation, evaluates site drainage, and helps refine material calculations.
Contacting 811 to locate and clear underground utility lines is a non-negotiable step prior to breaking ground. Striking buried electrical, gas, water, or telecom conduits is extremely hazardous and costly. High-level hardscaping demands rigorous physical labor, strict compaction standards, accurate elevation grading, and detailed installation precision. In Massachusetts communities such as Lexington, Concord, and Woburn, heavy clay content, dense rocky soil, and severe winter freeze-thaw cycles make professional site preparation especially critical. Hiring experts for Patio Installation Services or contacting our specialists at +781-713-1225 helps ensure your residential or commercial project receives direct owner oversight and seasoned craftsmanship.
Site Preparation and Excavation Requirements for Paver Patio Installation
Calculating accurate excavation depth is critical to building a hardscape that stands the test of time. Professional excavation depth is determined by combining the thickness of the pavers, the bedding sand layer, and the fully compacted gravel base aggregate. A typical residential paver assembly consists of pavers measuring approximately 2-3/8 inches thick, a 1-inch uniform bedding sand layer, and a dense gravel base of at least 6 inches. In region-specific areas subject to Massachusetts winter conditions, increasing the base to 8 inches or more is often recommended to resist soil movement. Consequently, total excavation depth usually ranges from 9 to 12 inches below final finished grade into native soil.
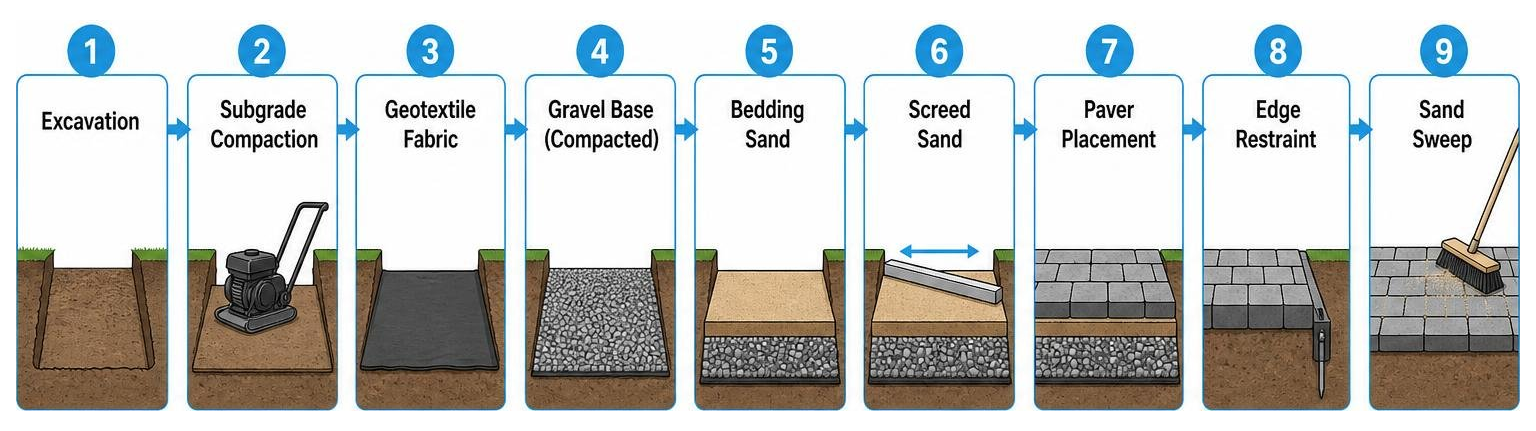
Subgrade soil compaction, precise slope control, and geotextile separation are vital for long-term structural integrity. Once all native topsoil and organic material are excavated, the underlying subgrade soil must be compacted with a heavy mechanical plate compactor to eliminate settling pockets. The finished surface of the patio must be pitched sloped away from house foundations and surrounding structures at a rate of approximately 1/4 inch per linear foot (or about 1 inch of drop across every 4 to 8 feet). Installing high-grade woven geotextile fabric directly over the raw compacted soil helps prevent native subgrade clay and silt from mixing into the gravel base while still permitting proper sub-surface moisture drainage. This layer stabilizes soft native soils, as discussed in this comprehensive resource on How to Install a Paver Patio (Step-by-Step + Cost Guide) DIY Guide. For homeowners in Massachusetts, taking these structural steps ensures high durability against seasonal ground shift.
Base Construction and Sand Screeding Techniques
The aggregate gravel base forms the structural core of any long-lasting patio installation. Professional hardscape installers typically utilize 3/4-inch crushed dense-grade processed aggregate (often referred to as crusher run or dense grade). The aggregate is spread evenly and compacted in controlled lifts no thicker than 2 inches at a time. Each lift undergoes multiple mechanical plate compactor passes in perpendicular directions, frequently dampened lightly with water to achieve optimum soil compaction density.
Once the aggregate base reaches the exact thickness and required slope, coarse concrete sand is screeded evenly across the surface to form a flat, uniform setting bed. Fine masonry sand, stone dust, and rock dust are strictly avoided as bedding layers because they absorb excessive moisture, freeze easily, and wash out over time.
Key professional tools and materials required for effective sand screeding include:
- Clean, coarse ASTM-C33 concrete sand for a consistent 1-inch bedding layer
- Screed pipes or rails, typically 1-inch outer-diameter PVC or steel pipes
- A rigid aluminum screed board or straight wooden 2×4 board
- Heavy-duty mechanical plate compactor with a rubber protective mat
- Mason line, line levels, laser levels, and steel pins for slope verification
The goal of screeding is to produce a smooth, uncompacted 1-inch bed of sand. Installers must carefully remove the screed rails and fill in any leftover voids with sand without stepping on or disturbing the prepared bedding plane.
Setting Pavers, Edge Restraints, and Polymeric Sand
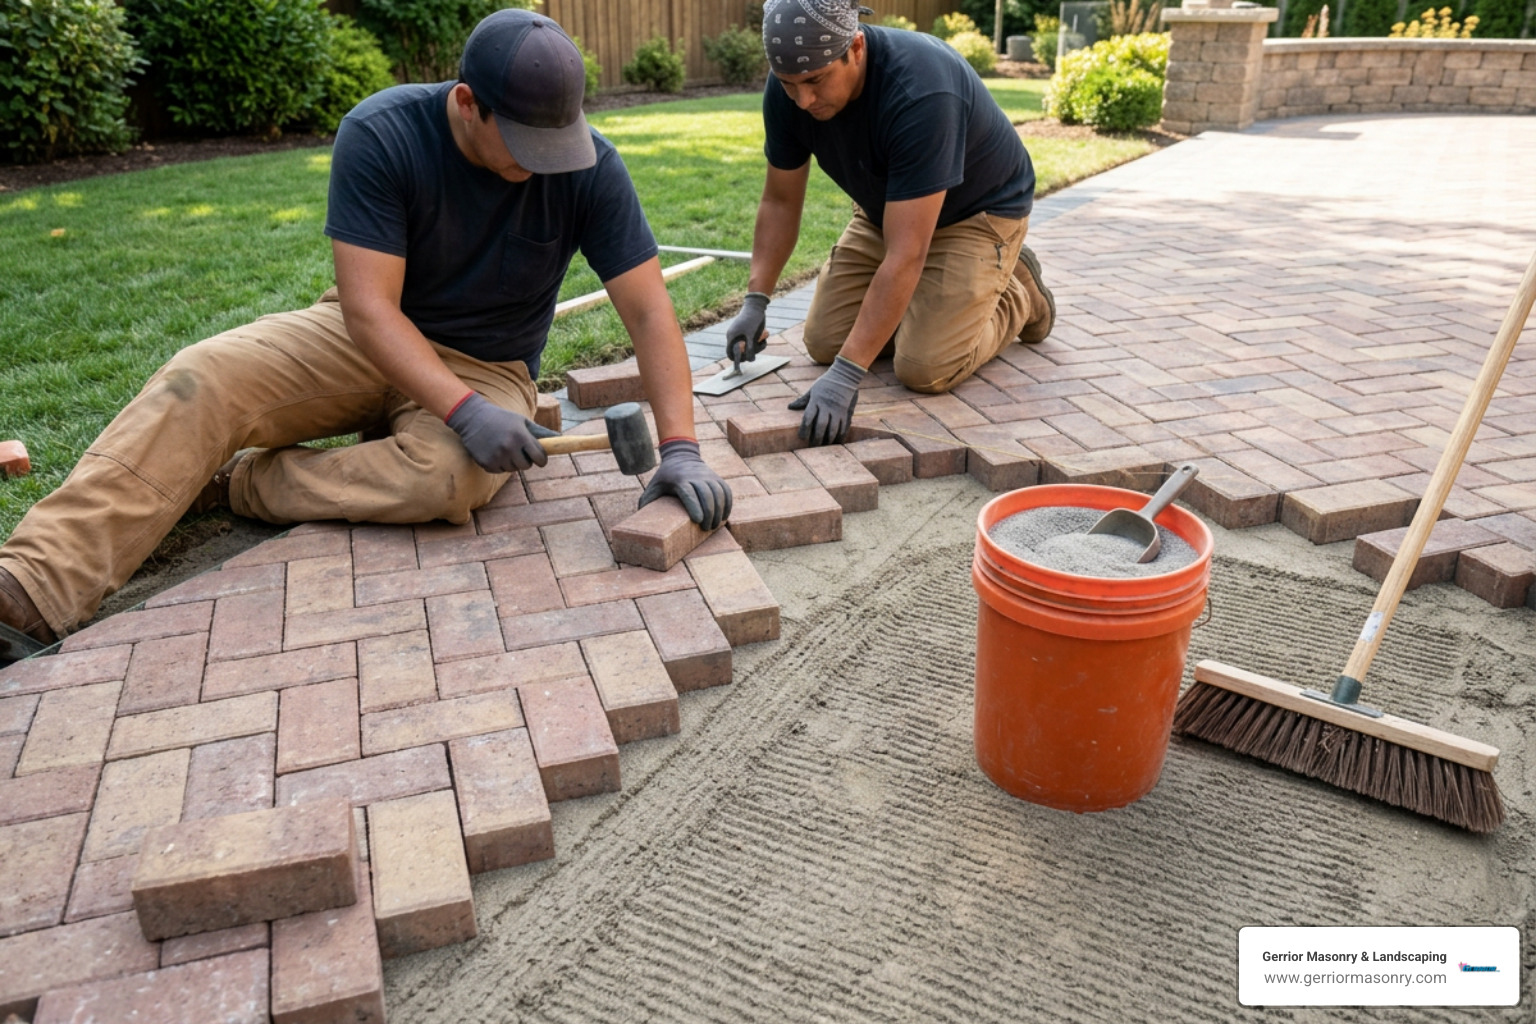
Pavers are systematically set starting from a fixed 90-degree corner or straight edge, such as a foundation wall or established border line. Crews lay pavers in selected bond patterns, working outward while kneeling on the newly laid pavers rather than disturbing the sand bed. Popular layout patterns include running bond, basketweave, and herringbone patterns. A 45-degree herringbone layout offers exceptional structural interlocking capabilities, distributing point loads evenly across driveways, walkways, and high-traffic residential or commercial patio spaces.
Perimeter cuts are executed using heavy-duty masonry saws, such as wet diamond saws or angle grinders equipped with diamond blades, accompanied by dust suppression and safety gear. Once edge units are placed, industrial plastic or aluminum edge restraints are positioned flush against the outer perimeter and firmly anchored into the base aggregate with 10-inch to 12-inch heavy steel landscape spikes spaced every 12 inches.
To lock the pavers into a unified slab, polymeric joint sand is swept thoroughly into all joints. A mechanical plate compactor outfitted with a rubber pad is run over the patio surface to settle the pavers and force sand deep into every seam. After sweeping off excess surface sand and blowing away fine dust, the polymeric sand is misted with water according to specific manufacturer guidelines to activate the chemical binding agents. For fundamental layout tips and construction techniques, consult How To Build a Paver Patio or explore our custom Paver Patios design solutions.
Planning, Costs, and Professional Maintenance for Long-Lasting Patios

A custom-built paver patio dramatically enhances outdoor living space and increases property value, but achieving lasting satisfaction depends on thorough advance planning, transparent budgeting, and consistent post-installation maintenance. Throughout Massachusetts communities like Lexington, Concord, and Woburn, severe winter frost heave conditions exert substantial hydraulic pressure on exterior stonework and hardscapes. Investing in quality materials and professional installation methods protects your investment against sub-zero freezes, thawing cycles, and heavy summer rainfall.
Evaluating Costs and Material Calculations for Paver Patio Installation
Accurate material estimation prevents costly project delays and unexpected budget overruns. To determine accurate requirements, calculate the total square footage of your intended patio area and include a 5% to 10% waste contingency factor. This extra material accounts for custom edge cuts, border trimming, angle adjustments, and potential transit breakage.
To assist homeowners and commercial property managers in planning project budgets, review these regional industry benchmarks. Note: All pricing mentioned below reflects average industry costs sourced from publicly available internet data and does not represent actual rates from Gerrior Corp.
| Project Option | Material & Equipment Cost | Professional Installation Cost | Expected Lifespan |
|---|---|---|---|
| DIY Installation | $2,400 – $7,200 | N/A (Owner Labor) | 10 – 25 Years (Varies by prep) |
| Professional Contracting | Included | $10,000 – $25,000+ | 30 – 50+ Years |
Industry averages sourced from publicly available market data indicate that turn-key professional hardscaping ranges between $20 and $125 per square foot installed. Total costs fluctuate based on site topography, soil conditions, excavation access, retainage requirements, and choice of materials (such as standard concrete pavers, clay brick, or natural stone slabs). In eastern Massachusetts markets, standard patio installations average $10,000 to $25,000, while multi-tiered outdoor living spaces with integrated steps, seating walls, and fire features often range from $25,000 to well over $35,000. To examine comprehensive material pricing considerations, consult our detailed Pricing Guide How Much Does A Patio Actually Cost.
Long-Term Maintenance, Seasonal Care, and Hiring a Professional
Maintaining a paver patio in peak condition requires routine care and seasonal upkeep. Regularly sweep away fallen leaves, organic debris, and pine needles to prevent natural tannin staining. For deeper surface cleaning, pressure wash the patio using a wide fan tip nozzle at low pressure (under 1,500 psi) to clean dirty surfaces without dislodging polymeric joint sand.
Winter snow removal requires careful handling: use plastic-edged shovels or snowblower shoes rather than sharp steel blades that can scratch paver surfaces. Avoid aggressive de-icing chemicals or rock salts; instead, use calcium chloride or safe traction sand to prevent surface spalling. Applying a breathable, penetrating water-based paver sealer every 3 to 5 years protects stone colors from UV fading, prevents oil penetration, and resists salt damage.
Effective surface and sub-surface water management prevents soil erosion, low spots, and foundation dampness. In yards with dense soil or slope challenges, integrating catch basins, channel drains, dry wells, or French drains directs heavy rainwater safely away from building foundations.
While minor DIY repair tasks are manageable, excavating tons of dense earth, hauling aggregate materials, operating heavy compaction equipment, and mastering complex geometry requires intensive physical effort and specialized tools. At Gerrior Masonry & Landscaping, based near Woburn, MA, our expert hardscaping team brings over 30 years of specialized masonry expertise to every project, providing direct owner oversight for top-quality results.
Whether your property is located in Woburn, Lexington, or Concord, our dedicated team is ready to design and construct your custom outdoor oasis. Visit our comprehensive Hardscaping Services page, explore options with a premier Paver Patio Contractor, or request a free project review by filling out our convenient online estimate form today!