Chimney Repair in Andover MA: Top 10 Trusted Tips 2025
Why Professional Chimney Repair Matters for Andover Homeowners
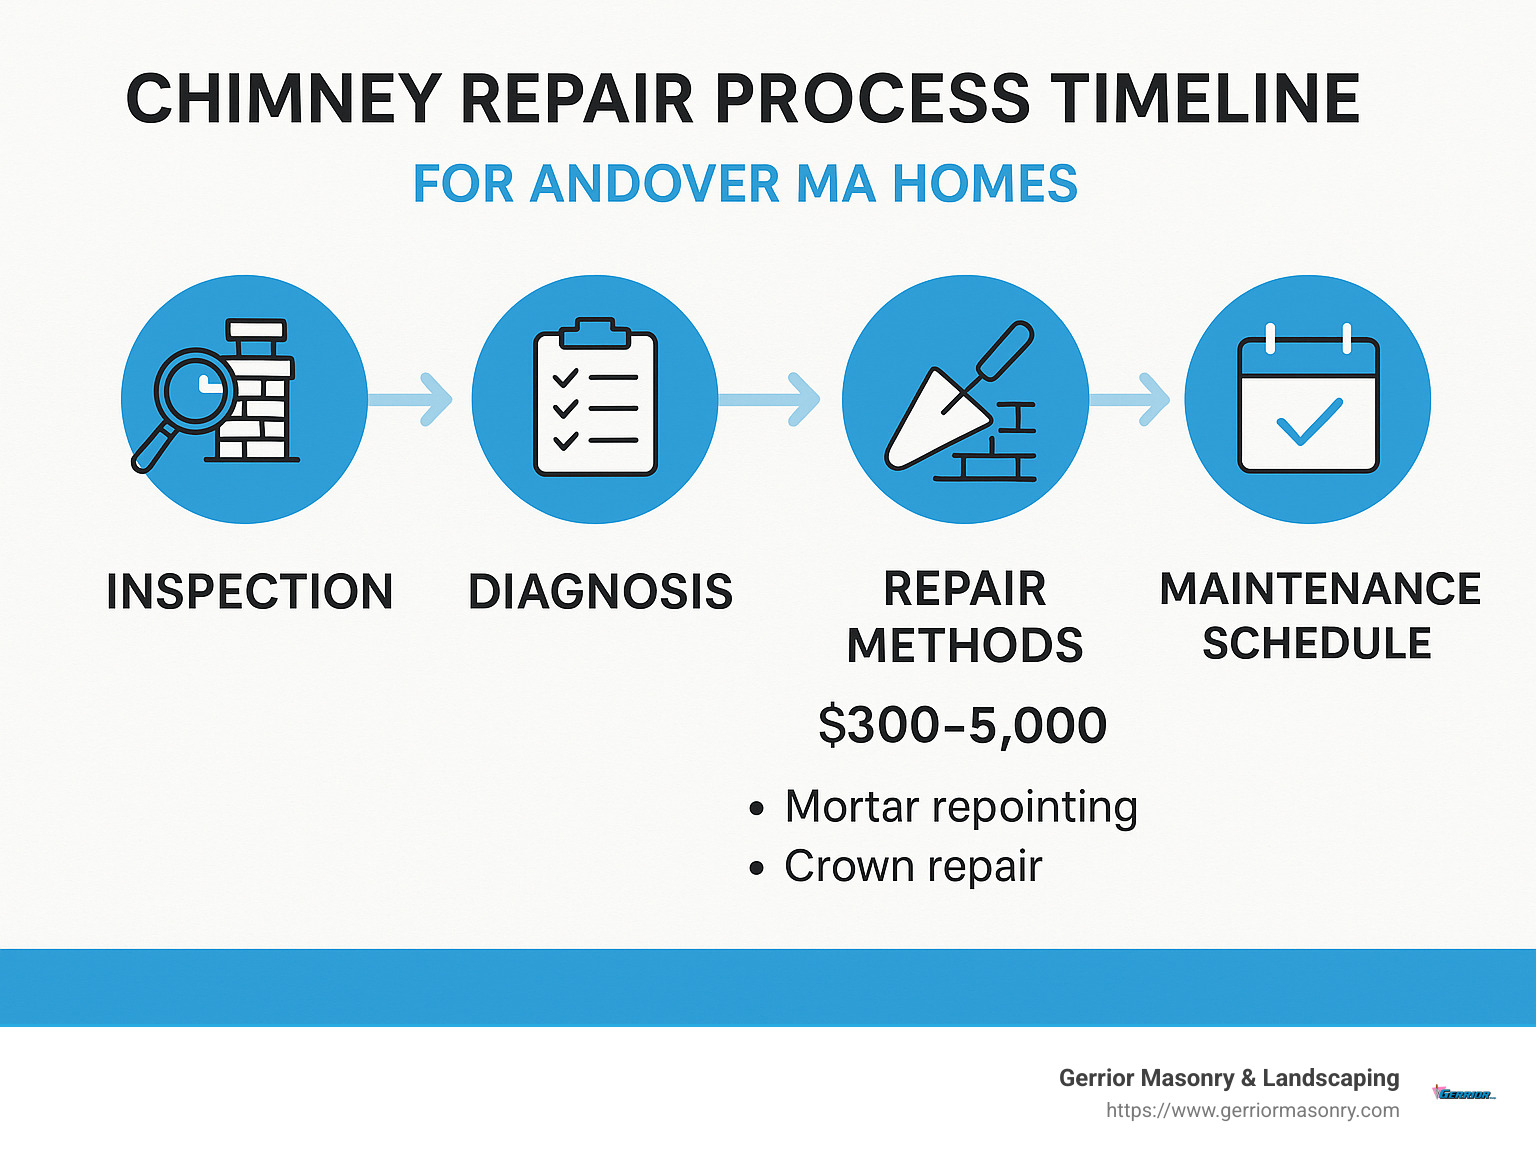
When it comes to Chimney repair in Andover MA needs, homeowners should be prepared for costs ranging anywhere from $300 to $5,000. Most typical repairs fall somewhere between $800 and $1,500, depending on the extent of damage and the specific work required. But what exactly might need fixing in your chimney, and why does it matter so much?
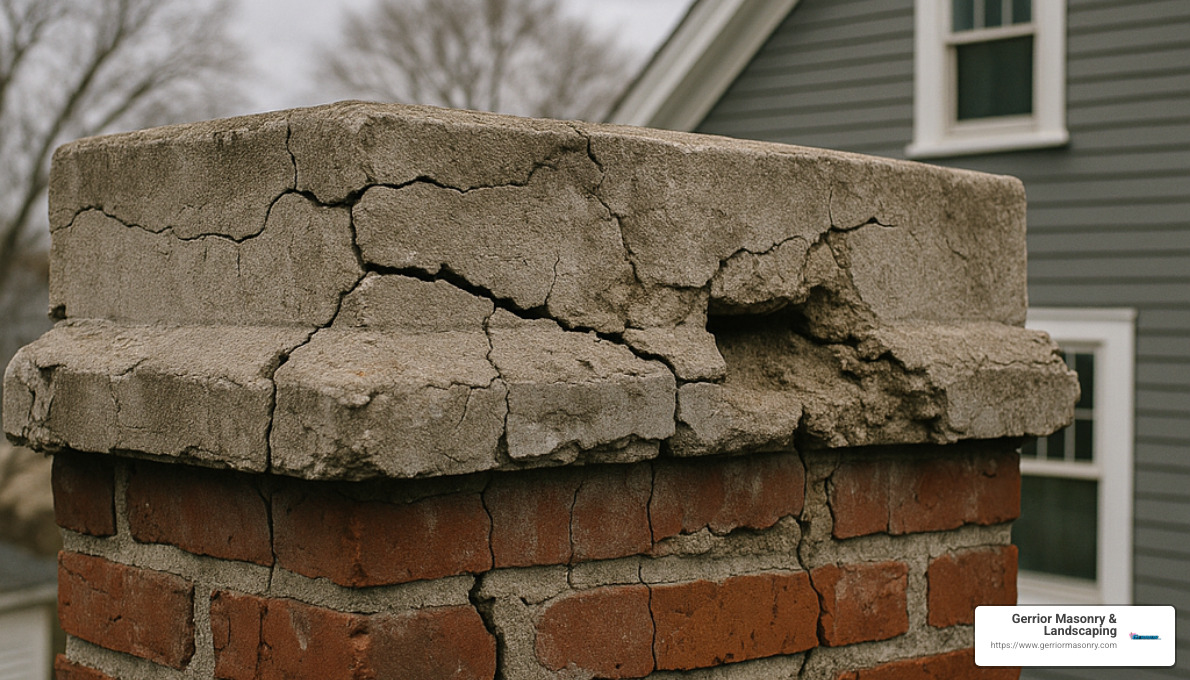
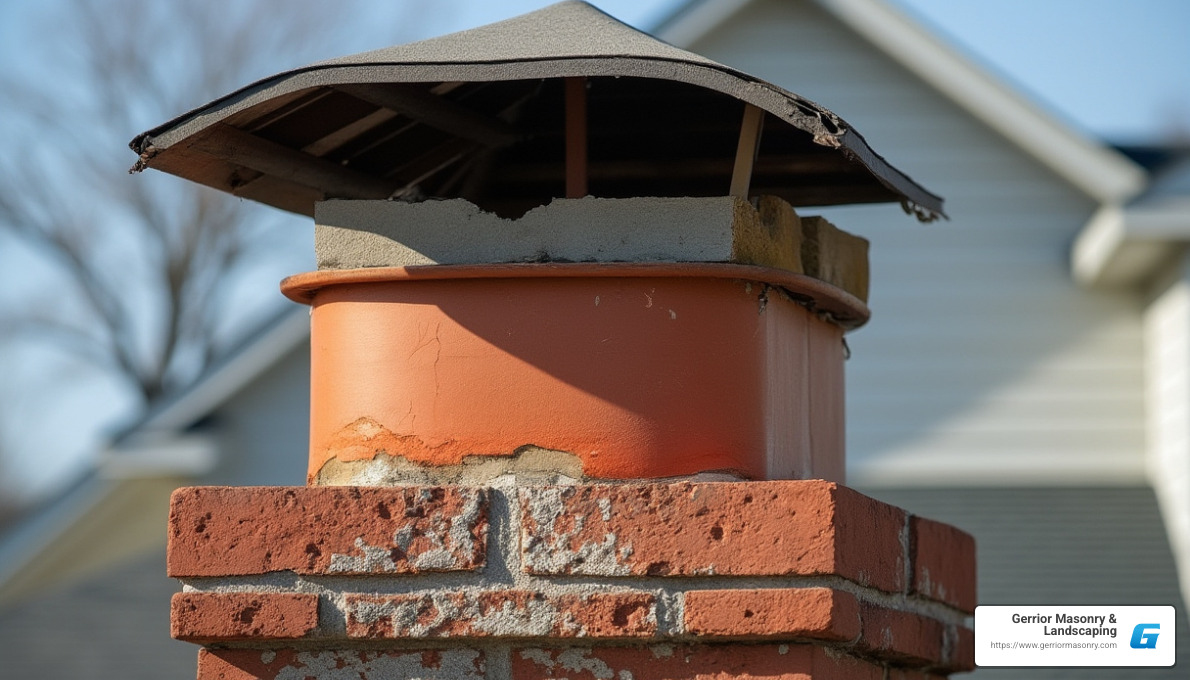
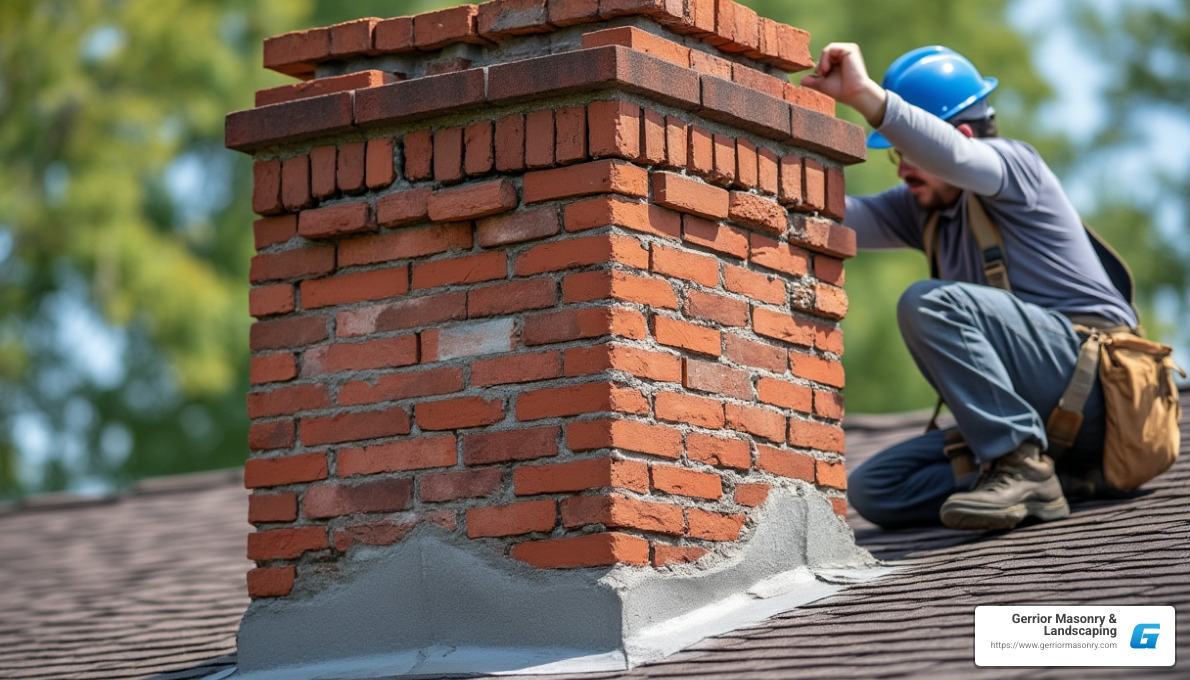
Those beautiful brick chimneys that dot Andover’s skyline face constant challenges from our unique New England weather. The mortar between bricks often needs repointing, crowns develop cracks that let water seep in, flashing around the chimney base can fail, and caps sometimes need replacement after years of exposure to the elements.
I’ve seen how our Andover winters can be particularly brutal on masonry. When water finds its way into tiny cracks and then freezes overnight, it expands with surprising force, creating larger structural issues that only worsen with each freeze-thaw cycle. This is why spring or early summer is ideal for inspections—before another season of heavy use begins.
“Preventative maintenance is always less expensive than emergency repairs,” as one local chimney professional with over 30 years of experience often reminds his clients. “Most Andover homeowners don’t realize their chimney needs attention until they notice water damage inside their home or experience drafting problems.”
The National Fire Protection Association reports something that keeps me up at night: neglected chimneys are a leading cause of home fires, with over 25,000 chimney fires occurring annually across the United States. This is precisely why annual inspections aren’t just a good idea—they’re recommended in the NFPA guidelines.
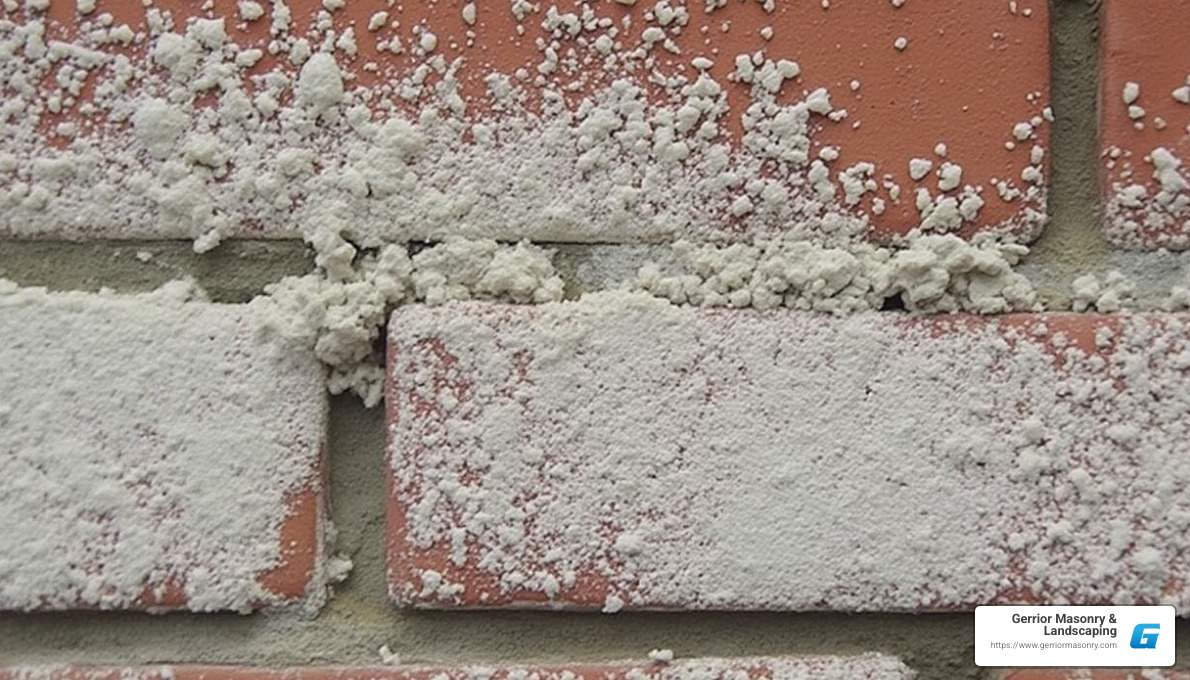
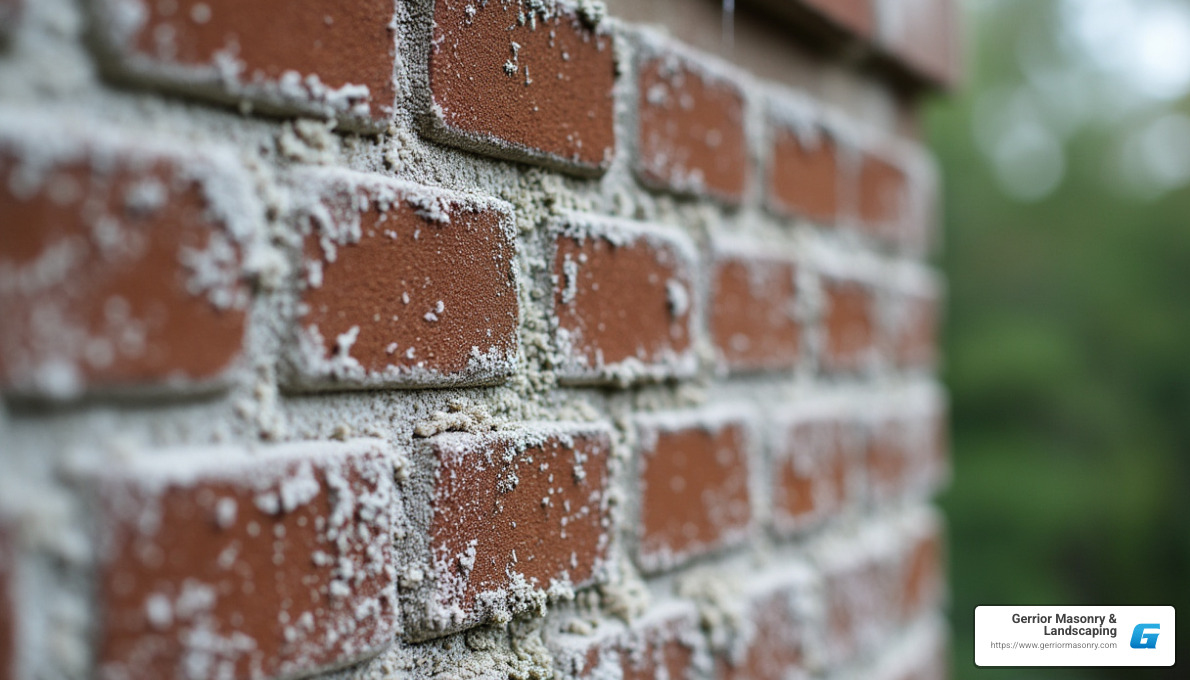
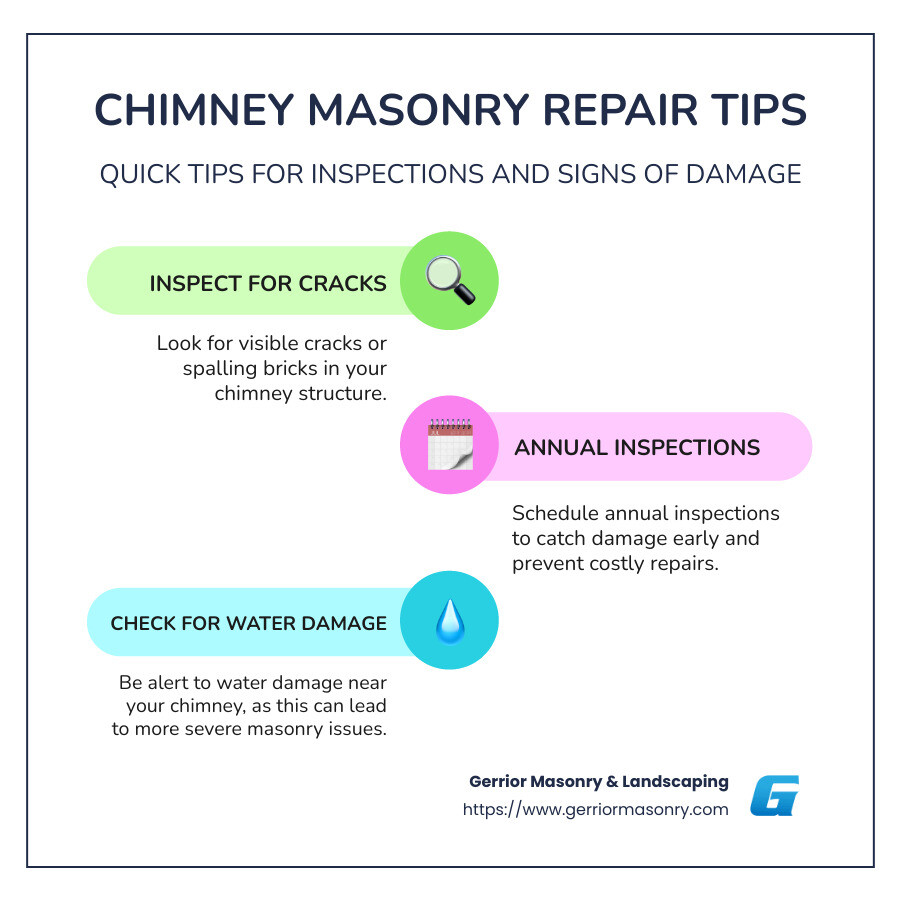
How do you know if your chimney needs attention? Watch for crumbling mortar, white staining (called efflorescence) on the brick, water leaks after rain, or problems with smoke drafting back into your home. These are all warning signs that shouldn’t be ignored.
I’m Joe Gerrior, owner of Gerrior Masonry & Landscape Construction Corp., and I’ve spent the last 34 years providing expert Chimney repair Andover MA services. In that time, I’ve helped countless homeowners restore their chimneys to safe, functional condition while preserving their homes’ architectural integrity.
What You’ll Learn Today
In this guide, I want to share everything Andover homeowners need to know about chimney care. Not just the basics, but the real insights I’ve gained from decades working on local homes.
We’ll explore the chimney issues that are particularly common in our New England climate—problems I see repeatedly in Andover homes. I’ll help you recognize those critical warning signs that indicate your chimney needs immediate attention, potentially saving you thousands in emergency repairs.
You’ll learn about the essential inspection and maintenance requirements that keep your family safe, along with a detailed breakdown of various repair services and how they’re performed. I believe an informed homeowner makes better decisions, so I’ll also guide you through choosing a qualified chimney contractor—what to look for and what questions to ask.
For the DIY-minded, I’ll share preventative measures that can extend your chimney’s lifespan, along with answers to the questions I’m most frequently asked about chimney safety and maintenance.
Whether you’re dealing with a minor issue like a damaged cap or considering a complete chimney rebuild, this guide will help you make informed decisions about your home’s safety, efficiency, and long-term value.
Common Chimney Issues & Warning Signs in Andover
Andover homes face unique challenges when it comes to chimney maintenance due to our distinctive New England weather patterns. After more than three decades providing chimney repair Andover MA services, we’ve seen how our local climate affects these important home structures.
If you’ve noticed brick spalling on your chimney (that’s when the face of bricks flake off), you’re not alone. This deterioration happens when moisture seeps into the brick, freezes, and then expands, causing the brick face to pop off. It’s incredibly common in our area, and left unchecked, it can compromise your entire chimney structure.
Another serious concern we frequently address is creosote buildup. The National Fire Protection Association recommends having your woodburning chimney swept after every cord of seasoned wood burned. Why? Because creosote is highly flammable, and excessive accumulation can lead to dangerous chimney fires that might spread throughout your home.
We also regularly repair flashing leaks. The metal flashing that seals the gap between your chimney and roof takes a beating during our harsh winters with heavy snow and ice. When flashing fails, water finds its way into your home, leaving ceiling stains, interior damage, and sometimes even mold growth in its wake.
Freeze-Thaw Damage & Masonry Deterioration
The freeze-thaw cycle in Andover is particularly brutal on masonry structures. During our winter months, temperatures frequently dance above and below freezing, creating perfect conditions for masonry damage. When water sneaks into tiny cracks in mortar or brick and then freezes, it expands by approximately 9%, creating pressure that gradually widens these cracks.
“We see accelerated deterioration in Andover chimneys compared to areas with more stable temperatures,” we’ve noticed after decades in the business. “A chimney that might last 50 years with minimal repairs in a milder climate often needs significant restoration work after just 20-25 years here.”
You might be experiencing freeze-thaw damage if you notice vertical cracks in your chimney structure, loose or missing bricks, crumbling mortar joints, a white powdery substance (called efflorescence) on your brickwork, or pieces of brick or mortar scattered around the base of your chimney.
Early intervention saves both your chimney and your wallet. What starts as a simple repointing job can quickly escalate to a complete rebuild if left unaddressed through multiple freeze-thaw cycles.
Creosote Buildup & Fire Risk
Creosote isn’t just a funny-sounding word—it’s a serious concern for Andover homeowners. This highly combustible byproduct of burning wood accumulates on the inner walls of your chimney in three progressive stages:
First-degree creosote looks like flaky soot and is relatively easy to remove. Second-degree creosote forms hardened, tar-like deposits requiring specialized tools. Third-degree creosote creates a glazed, extremely flammable substance that’s challenging even for professionals to remove.
According to chimney safety experts, just 1/8 inch of creosote buildup can fuel a dangerous chimney fire. These fires can reach temperatures exceeding 2,000°F, damaging the chimney structure and potentially spreading to your home.
Beyond the fire risk, creosote buildup causes unpleasant smoky odors (especially during humid summer months), reduced draft efficiency, increased smoke in your home when using the fireplace, and potential health issues from smoke exposure. None of which make for a cozy evening by the fire!
Carbon Monoxide & Drafting Problems
Perhaps the most dangerous issue with deteriorating chimneys is the risk of carbon monoxide entering your home. This invisible threat is colorless, odorless, and potentially fatal when inhaled in significant quantities.
A properly functioning chimney creates the draft necessary to carry combustion gases safely out of your home. When chimneys develop blockages or structural issues, these gases can back up into your living spaces.
You might have drafting problems if you notice difficulty starting or maintaining fires, smoke entering your home when the fireplace is in use, unusual odors from the fireplace, soot buildup on the glass doors of your fireplace, or back-puffing (those small, startling explosions of smoke into the room).
“Carbon monoxide is a silent killer you can’t smell or see,” as safety experts frequently remind us. This is why we strongly recommend carbon monoxide detectors on every floor of your home, especially near sleeping areas, in addition to regular chimney maintenance.
A well-maintained chimney isn’t just about aesthetics—it’s about keeping your family safe and your home protected through our challenging New England seasons.
Inspection & Maintenance Essentials for Andover Homes
Regular chimney inspections aren’t just a good idea—they’re a safety essential. The National Fire Protection Association (NFPA) requires all chimneys be inspected annually, even if you rarely light a fire.
For chimney repair in Andover MA homeowners, there’s a world of difference between inspection types. A basic Level 1 Inspection involves a visual check of accessible parts—perfect for annual maintenance when nothing’s changed with your system. When you’re buying a home or after a chimney fire, you’ll need the more thorough Level 2 Inspection with video scanning of the flue interior. And if we suspect serious hidden problems? That’s when a Level 3 Inspection comes into play, sometimes requiring removal of building components to access concealed areas.
Spring is your sweet spot for scheduling in Andover. As we often tell our customers, “Schedule your annual sweep and inspection early to avoid the fall rush.” This timing gives you plenty of breathing room to complete any necessary repairs before the heating season returns.
Research from the Chimney Safety Institute of America confirms that regular maintenance significantly reduces fire risks and extends chimney life.
NFPA & CSIA Guidelines Every Owner Should Know
The safety standards established by professional organizations aren’t arbitrary—they’re life-saving protocols developed from decades of research and real-world incidents.
The NFPA 211 standard requires annual inspections of all chimneys, fireplaces, and vents—no exceptions. This isn’t just bureaucratic red tape; it’s about keeping your family safe. Work should be performed by CSIA-certified chimney sweeps who have the training to spot potential hazards before they become dangerous.
When it comes to cleaning, the guideline is simple: wood-burning chimneys need cleaning when creosote reaches 1/8 inch thickness. For most Andover homes, this happens after burning roughly a cord of seasoned wood.
Your chimney must have a proper liner that matches your fuel type and remains in good condition. Proper clearance between chimney components and combustible materials isn’t negotiable—it’s essential fire prevention. And please, install carbon monoxide detectors on every level of your home, especially near bedrooms. These silent sentinels can save lives when chimney problems lead to dangerous gas leaks.
Finally, burn only seasoned hardwood with 15-20% moisture content. Green wood creates more creosote and less heat—a losing combination for chimney health.
How Andover Weather Accelerates Chimney Wear
Living in Andover means your chimney faces a perfect storm of weather challenges. Our distinct New England climate creates ideal conditions for accelerated deterioration.
The freeze-thaw cycles hit our chimneys particularly hard. Unlike more moderate climates, Andover can swing above and below freezing multiple times in a single week during late winter and early spring. Each cycle forces moisture deeper into tiny cracks, expanding as it freezes and creating increasingly larger fissures.
Those dramatic Nor’easters we experience bring driving rain and snow that can penetrate masonry, especially when powerful winds push moisture horizontally against chimney structures. And just when things should be drying out, our summer humidity often prevents chimneys from fully drying, keeping moisture trapped in the masonry.
Environmental factors play a role too. Slightly acidic precipitation gradually erodes mortar joints, while improperly directed roof drainage can consistently saturate portions of your chimney structure.
After three decades of chimney repair Andover MA work, we’ve seen how our local chimneys require more frequent maintenance than identical structures in gentler climates. What might last 50 years elsewhere often needs significant restoration after just 20-25 years here.
Spot-On Signs It’s Time for Service
Your chimney will tell you when it needs attention—if you know what to look for.
That powdery white substance on your brickwork? That’s efflorescence, and it’s a clear signal that moisture is penetrating your masonry. Similarly, rust appearing on your damper or firebox means unwelcome moisture has entered the system.
Watch for spalling bricks—when the face of the brick flakes, crumbles, or pops off. This classic freeze-thaw damage won’t heal itself. Neither will deteriorating mortar joints, which compromise your chimney’s structural integrity over time.
Any leaning or tilting of your chimney is a five-alarm situation requiring immediate professional attention. Water stains on ceilings or walls near the chimney are equally concerning, as they indicate active leaking.
Your nose can alert you too. Persistent smoky odors, especially during humid weather, suggest creosote buildup needing removal. Having trouble starting or maintaining fires? Draft problems often point to blockages or structural issues that need addressing.
Listen for animal sounds—chirping or scratching might mean unwelcome tenants have moved in. And if you spot pieces of tile or clay in your fireplace, that’s your flue liner deteriorating—a serious safety concern that shouldn’t wait.
Catching these issues early can transform a simple, affordable repair into protection against major structural problems. We’ve seen countless Andover homeowners save thousands by addressing minor issues before they escalated into complete rebuilds.
Gerrior Masonry & Landscape Construction is based in Woburn, MA, and services Middlesex and Essex County, Massachusetts, bringing expert chimney care to Andover homes throughout all seasons.
Chimney Repair in Andover MA: Services, Processes & Average Costs
When your chimney starts showing signs of wear, understanding your repair options helps you make smart decisions for your home’s safety and your wallet. Let’s break down what you can expect when you need chimney repair Andover MA services.
Most Andover homeowners are surprised to learn how affordable preventative maintenance can be compared to emergency repairs. A typical chimney sweeping might cost between $150-$350, while putting off that maintenance could lead to a full rebuild costing $3,000-$10,000 or more.
Here’s what you might expect to pay for common chimney services:
Repair Type
Average Cost Range
Typical Timeframe
Chimney Sweeping & Inspection
$150-$350
1-2 hours
Chimney Cap Installation
$250-$750
1-3 hours
Chimney Crown Repair
$350-$2,000
1-2 days
Flashing Repair/Replacement
$300-$1,200
2-4 hours
Chimney Repointing (partial)
$500-$2,500
1-3 days
Full Chimney Rebuild
$3,000-$10,000+
3-10 days
Chimney Liner Installation
$1,500-$5,000
1-2 days
Waterproofing
$300-$1,000
2-4 hours
Note: These are average costs based on internet data and not actual costs for Gerrior Masonry services. Actual prices vary based on chimney condition, height, accessibility, and extent of damage.
When we work on Andover homes, we always start with a thorough inspection. This lets us create a comprehensive repair plan custom to your chimney’s specific needs. We typically recommend addressing water issues first – they’re like the gateway problem that leads to most other chimney damage if left unchecked.
Chimney Repointing Explained
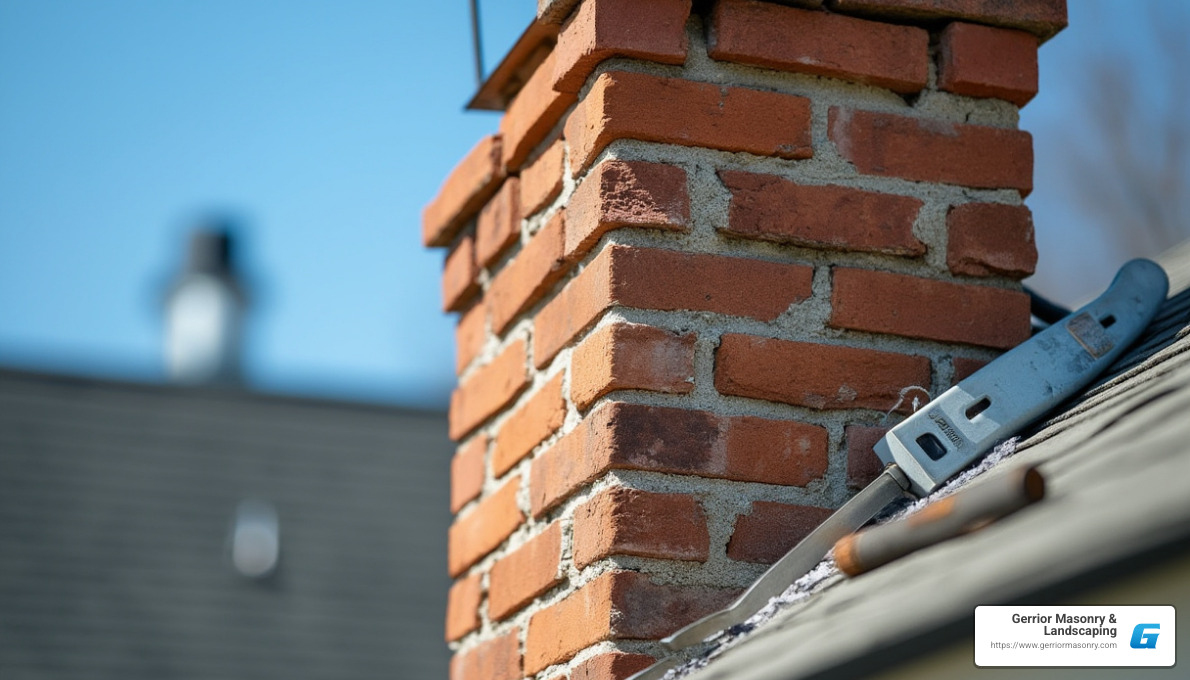
One of the most common services we provide is chimney repointing. Think of mortar joints as the glue holding your chimney together. Over time, these joints deteriorate faster than the bricks themselves because mortar is more porous.
“When we see failing mortar joints, we know water is getting into places it shouldn’t,” I often tell homeowners. “Left unaddressed, those little cracks become big problems during our freeze-thaw cycles.”
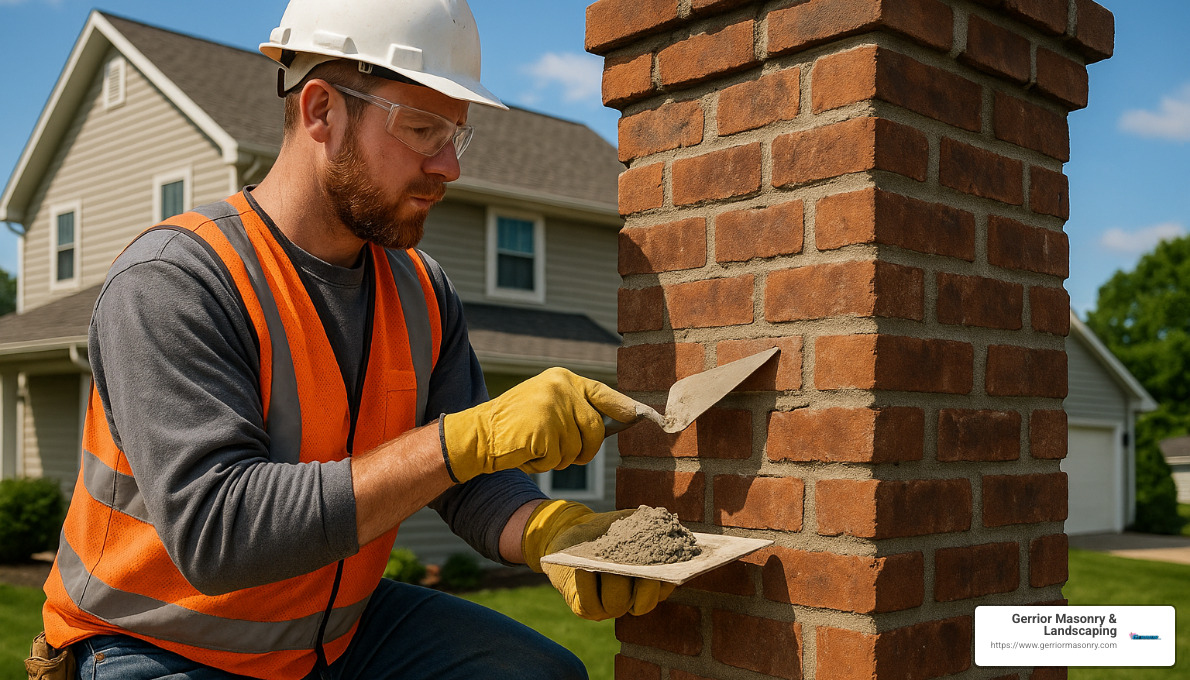
The repointing process is meticulous work that requires experienced hands. We start by carefully removing damaged mortar to a depth of at least ¾ inch without harming the surrounding bricks. After cleaning the joints, we create a custom mortar mix that matches your original mortar in color, texture, and composition – particularly important for Andover’s historic homes.
We then pack the new mortar into the prepared joints using specialized tools, shape it to match the original profile, and allow proper curing time. The result is a chimney that’s not only structurally sound but maintains its architectural character.
For more detailed information about this important service, check out our dedicated page on Chimney Repointing Andover MA.
Chimney Crown & Cap Repairs Step by Step
Your chimney crown and cap are your first line of defense against water damage. When these components fail, it’s like leaving your front door open during a rainstorm – water gets everywhere it shouldn’t.
For a chimney crown repair, we follow a systematic approach. First, we evaluate whether repair or replacement is needed. For full replacements, we remove the damaged crown completely and build wooden forms to shape the new crown with the proper overhang (at least 2 inches) and slope for effective water runoff.
We mix high-quality concrete specifically formulated to withstand New England’s harsh weather, carefully pour it ensuring the proper slope (minimum ¼ inch per foot), and create expansion joints to prevent future cracking. After allowing proper curing time, we apply a quality waterproof sealant for added protection.
Chimney caps are equally important, serving multiple purposes beyond just keeping water out. They also:
Keep animals from making your chimney their home (you wouldn’t believe how many squirrel and raccoon families we’ve evicted over the years!) Block those annoying downdrafts that send smoke back into your living room Stop sparks from landing on your roof – a serious fire hazard Reduce debris buildup that can block proper airflow
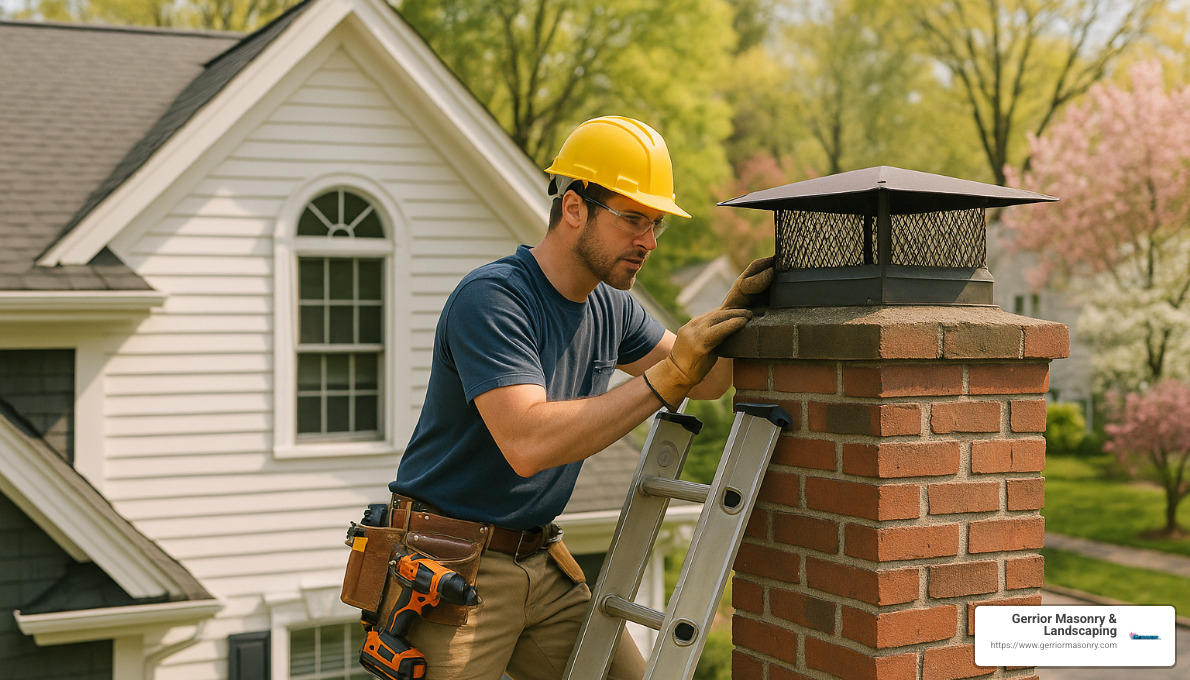
Installing a cap involves taking precise measurements, selecting appropriate materials (usually stainless steel or copper), and ensuring secure attachment that can withstand Andover’s notorious winter winds. For unusually shaped chimneys, we might custom fabricate a cap to ensure the perfect fit.
Chimney Repair Andover MA Cost Breakdown
When budgeting for chimney repair Andover MA services, it helps to understand what goes into the final price tag. Labor typically accounts for 60-70% of your total cost, including skilled mason rates ($65-$95/hour), helper labor ($35-$50/hour), and premiums for complex projects or difficult-to-access chimneys.
Materials make up the remaining 30-40%, covering everything from matching bricks and specialty mortar to flashing materials, crown concrete, waterproofing products, and chimney caps.
Don’t forget about additional factors that impact your bottom line: scaffolding rental can add $100-$500+, permit fees for structural work range from $50-$250, and homes in historic districts may have special requirements. Emergency service (like when your chimney is literally falling apart during a storm) naturally comes with a premium price.
I always tell Andover homeowners that postponing repairs is like ignoring a small leak in your roof – what starts as a minor issue inevitably becomes a major headache. That $800 repointing job you put off this year could easily become a $5,000+ rebuild after a couple of harsh winters.
“What surprises most people,” I often share with clients, “is how much more affordable regular maintenance is compared to emergency repairs. It’s like changing your oil versus replacing your engine.”
For a complete look at our chimney repair services, visit our Chimney Repairs page where we detail all available options to keep your home safe and sound.
Choosing & Working With a Certified Chimney Contractor
Selecting the right contractor for your chimney repair Andover MA project is crucial for ensuring safe, quality work. Given that chimney issues directly impact your home’s safety, this isn’t a decision to take lightly.
Certifications & Local Codes to Check
When evaluating chimney repair contractors in Andover, you’ll want to look beyond just the price quote. A true professional will have credentials that demonstrate their commitment to safety and quality.
The CSIA (Chimney Safety Institute of America) certification is considered the gold standard in the industry. This certification ensures technicians understand proper inspection, cleaning, and repair techniques. Similarly valuable is the NFI (National Fireplace Institute) certification for those working with various hearth systems.
Membership in professional organizations like the National Chimney Sweep Guild or the Massachusetts Chimney Sweep Guild indicates a commitment to ongoing education and industry best practices. These organizations keep members updated on changing codes and techniques.
From a legal standpoint, any contractor performing residential work over $1,000 in Massachusetts must have a Home Improvement Contractor (HIC) registration. They should also carry substantial general liability insurance (at least $1,000,000) and workers’ compensation for their employees. Don’t be shy about asking for proof of these coverages – reputable contractors expect these questions.
A knowledgeable chimney professional will also be familiar with the Massachusetts State Building Code (780 CMR) and NFPA 211 standards that govern chimney construction and repair. If your Andover home is in a historic district, they should understand any special regulations that might apply to your property.
Questions to Ask Chimney Repair Andover MA Pros
When you’re interviewing potential contractors, the conversation should feel like a two-way street. A good chimney professional will be happy to answer your questions thoroughly and without pressure tactics.
Start by asking about their specific experience with chimneys like yours. How many years have they been working in Andover specifically? What percentage of their business focuses on chimney repair versus other services? The answers will help you gauge their expertise with local conditions and your particular type of chimney.
Discuss their process in detail. How do they inspect, document, and plan repairs? What happens if they find additional issues once work begins? A professional should have clear answers that demonstrate a systematic approach.
Business practices matter too. Will they provide a detailed written estimate before beginning work? What payment schedule do they require? Do they offer any warranty on their workmanship? These questions help establish expectations and protect both parties.
“We always encourage homeowners to check references from previous Andover clients,” notes Joe Gerrior. “Nothing speaks louder than the experiences of your neighbors with similar chimney systems.”
Don’t forget to ask about how they’ll protect your home during the work. Chimney repair can be messy, and you want assurance that your property will be respected and protected throughout the process.
What Happens During an Inspection Visit
A professional chimney inspection should be thorough, educational, and respectful of your home. Here’s what you can expect when a qualified chimney repair Andover MA professional visits:
The visit begins with careful preparation. Good technicians arrive in clearly marked vehicles and take immediate steps to protect your home. Drop cloths are placed around work areas, shoe covers are worn, and HEPA vacuums are ready for dust control. As one professional humorously notes, “It seems like 80% of our customers have white carpets, but we always come prepared.”
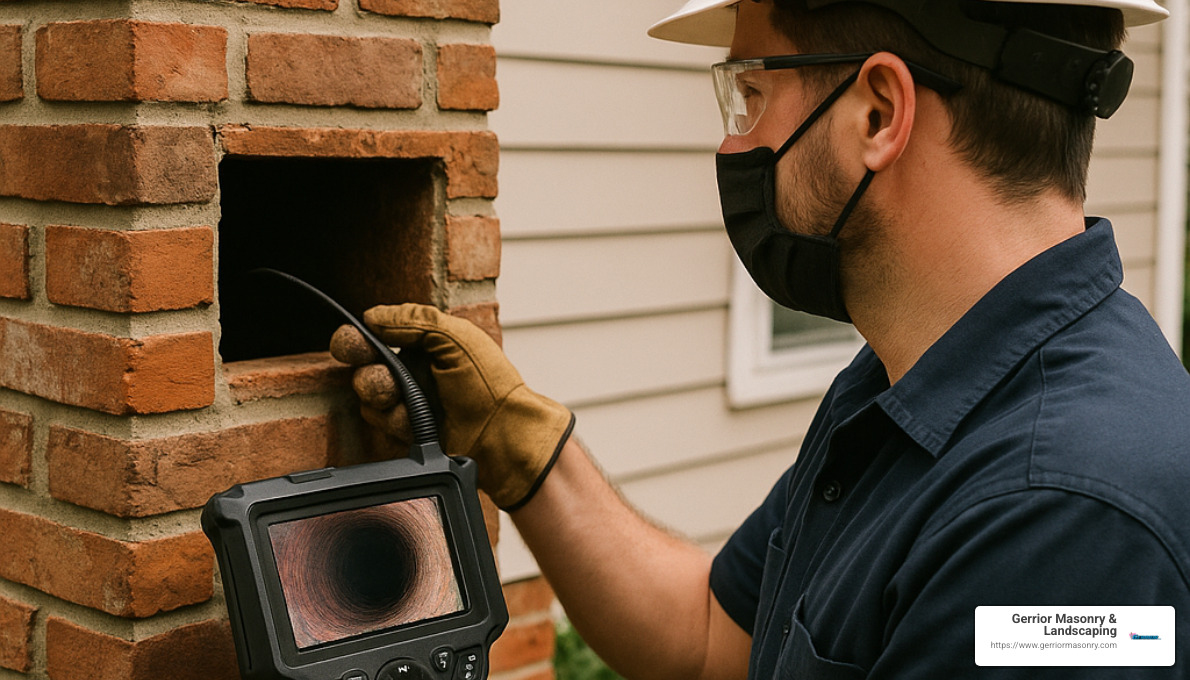
The exterior inspection examines your chimney from top to bottom. The technician will assess the crown condition, check flashing where your chimney meets the roof, evaluate brick and mortar integrity, and inspect the chimney cap and spark arrestor. They’ll look for signs of water damage, deterioration, and structural issues.
Inside your home, the inspection continues with an examination of your fireplace or heating appliance. The technician will check damper operation, assess the smoke chamber and firebox condition, evaluate creosote buildup, and test the draft. These elements are crucial for both safety and efficiency.
For Level 2 inspections (recommended during home sales or after system changes), advanced diagnostics come into play. Video scanning provides a clear view of your flue’s interior condition. Moisture meters might be used to detect hidden water issues, and thermal imaging can reveal problems not visible to the naked eye.
Documentation is a critical part of a professional inspection. Expect digital photos of any issues found, along with a detailed written report that clearly explains the findings. A good inspector will prioritize repairs based on safety concerns and provide clear cost estimates for the recommended work.
The visit concludes with a thorough discussion of the findings. Your technician should take time to explain what they’ve found, answer your questions, and help you develop a plan for any necessary repairs. You should never feel rushed or pressured during this conversation.
A comprehensive inspection typically takes 1-2 hours, depending on your chimney’s complexity and accessibility. The best professionals use this time not just to assess your chimney but also to educate you about your system and its maintenance needs.
Gerrior Masonry & Landscape Construction is based in Woburn, MA, and proudly services Middlesex and Essex County, Massachusetts, bringing decades of masonry expertise to every chimney project we undertake.
Prevention Tips, FAQs & Resources for Safe, Efficient Chimneys
Taking care of your chimney between professional visits isn’t just smart homeownership—it’s essential for your family’s safety. As someone who’s seen thousands of chimneys in various states of repair, I can tell you that a little prevention goes a long way in avoiding costly problems down the road.
DIY Seasonal Maintenance Checklist
You don’t need to be a masonry expert to keep an eye on your chimney’s health. Here in Andover, our seasonal extremes demand a year-round approach to chimney care.
When spring arrives, take a walk around your home and visually inspect your chimney for any winter damage. Those freeze-thaw cycles can be brutal! It’s also the perfect time to clean out any remaining ashes from your final winter fires and close your damper tightly to prevent downdrafts and keep critters out.
Summer offers ideal conditions to check your chimney cap and crown—just grab a pair of binoculars for a safe ground-level inspection. While you’re at it, clear any debris from your roof and gutters near the chimney. Those clogged gutters can direct water right to your masonry, accelerating damage.
As fall approaches, this is your crucial moment to schedule that professional inspection before heating season begins. Test your smoke and carbon monoxide detectors (you’d be surprised how many folks skip this simple life-saving step), and ensure your damper operates smoothly. And please, make sure you’ve got properly seasoned wood ready—green wood creates excessive creosote.
During winter, stay vigilant while using your fireplace. Watch for proper drafting and remove ashes regularly (though leaving about an inch actually helps insulate the firebox for better fires). If you ever hear loud cracking noises or notice unusually dense smoke, these could be signs of a chimney fire—get everyone out immediately and call the fire department.
These DIY steps complement but don’t replace professional services. Think of them as the chimney equivalent of brushing between dental checkups—essential but not the whole solution.
How Often Should My Chimney Be Inspected in MA?
When it comes to chimney repair Andover MA needs, proper inspection timing is everything. Both the National Fire Protection Association and the Chimney Safety Institute of America are crystal clear on this point: every chimney needs an annual inspection, regardless of how often you use it. This isn’t just a recommendation—Massachusetts building codes adopt these standards.
Beyond your yearly checkup, certain events should prompt an additional inspection right away: any chimney fire (even a small one you think you handled), purchasing a new home (don’t trust the previous owner’s maintenance claims), severe weather events (those Nor’easters can be brutal on masonry), changing heating appliances, or whenever you notice operational issues like poor drafting or unusual odors.
Here in Andover, spring or early summer is ideal for your annual inspection. This timing gives you the chance to assess any winter damage and provides plenty of time to complete necessary repairs before the next heating season. As a bonus, you’ll likely find better scheduling availability with contractors during this “off-season” for fireplace use.
“Most of our emergency calls come in October when people light their first fire of the season,” I often tell customers. “By scheduling in May or June, you avoid that rush and have time to budget for any needed repairs.”
What Are the Dangers of Neglecting Repairs?
I wish I could say I’ve never seen the consequences of neglected chimney maintenance, but unfortunately, I’ve witnessed too many preventable disasters in Andover homes.
The fire hazards alone should convince anyone to stay on top of chimney care. Creosote—that black, tarry substance that builds up inside your chimney—is highly flammable. When it ignites, chimney fires can reach temperatures exceeding 2,000°F, hot enough to crack masonry and spread to your home’s structure. NFPA data consistently shows that heating equipment (including chimneys) remains a leading cause of home fire deaths.
The silent danger is carbon monoxide—odorless, colorless, and potentially deadly. A blocked chimney or cracked flue liner can allow this toxic gas to seep into your living spaces. Even low-level exposure causes headaches, dizziness, and confusion that residents often mistake for flu symptoms. At higher concentrations, it can be fatal within minutes.
The structural damage from neglected chimneys extends well beyond the chimney itself. Water infiltration through damaged masonry can rot roof structures, destroy drywall, and create perfect conditions for mold growth. In our harsh New England climate, small cracks quickly become major structural failures as water freezes and expands inside the masonry.
From a purely financial perspective, minor repairs left unaddressed nearly always escalate into major rebuilds. I’ve seen $800 repointing jobs become $8,000 rebuilds in just a couple of years of neglect. Even worse, many insurance policies won’t cover damage resulting from inadequate maintenance, leaving homeowners with significant out-of-pocket expenses.
Are Permits Required for Masonry Chimney Work?
Navigating permit requirements can be confusing, but understanding what’s needed for your chimney repair Andover MA project helps avoid headaches down the road.
In Andover, you’ll generally need building permits for structural chimney repairs, rebuilds, flue liner replacements, and new chimney cap installations that change height or appearance. Any work on chimneys in Andover’s historic districts comes with additional oversight as well.
The good news is that routine maintenance like standard chimney cleaning, minor repointing (less than 25% of the chimney), like-for-like cap replacement, and waterproofing applications typically don’t require permits.
If your home falls within one of Andover’s charming historic districts, be prepared for additional requirements. Architectural review may be necessary even for minor repairs, and material specifications are often strictly regulated. You might need to document existing conditions before work begins and obtain a Certificate of Appropriateness.
The permit process itself is straightforward: submit an application to the Andover Building Department, provide plans and specifications for review, pay the required fees (typically $50-$250 depending on project scope), and schedule inspections at appropriate project milestones.
Any reputable chimney repair Andover MA contractor will handle these permit applications as part of their service. If someone suggests skipping permits to save money, consider it a major red flag about their professionalism.
Get Reliable Chimney Repair Help Today
At Gerrior Masonry & Landscape Construction, we understand that chimney issues can be concerning for Andover homeowners. Our approach to chimney repair Andover MA services is comprehensive, focusing on both immediate repairs and long-term solutions.
What makes our service different is our owner’s direct involvement in every project. When you choose us, you’re getting specialized knowledge of New England’s unique chimney challenges and comprehensive solutions that address root causes, not just symptoms. We use only premium masonry products suitable for our climate and take exceptional care to protect your home during repairs.
“I treat every chimney like it’s protecting my own family,” is our philosophy. This means clear communication about what we find, detailed explanations of your repair options, and thorough documentation with before-and-after photos of all work performed.
Whether you’re experiencing active chimney problems or simply due for preventative maintenance, our team is ready to help ensure your chimney system remains safe, efficient, and structurally sound for years to come. Don’t wait until small problems become big emergencies—reach out today for More info about Chimney Repairs.
Gerrior Masonry & Landscape Construction is based in Woburn, MA, and proudly serves Middlesex and Essex County, Massachusetts.
Conclusion
Maintaining your chimney is not just about aesthetics—it’s about protecting your family and home from serious safety hazards. As we’ve explored throughout this guide, chimney repair Andover MA services are essential for addressing the unique challenges our New England climate presents to masonry structures.
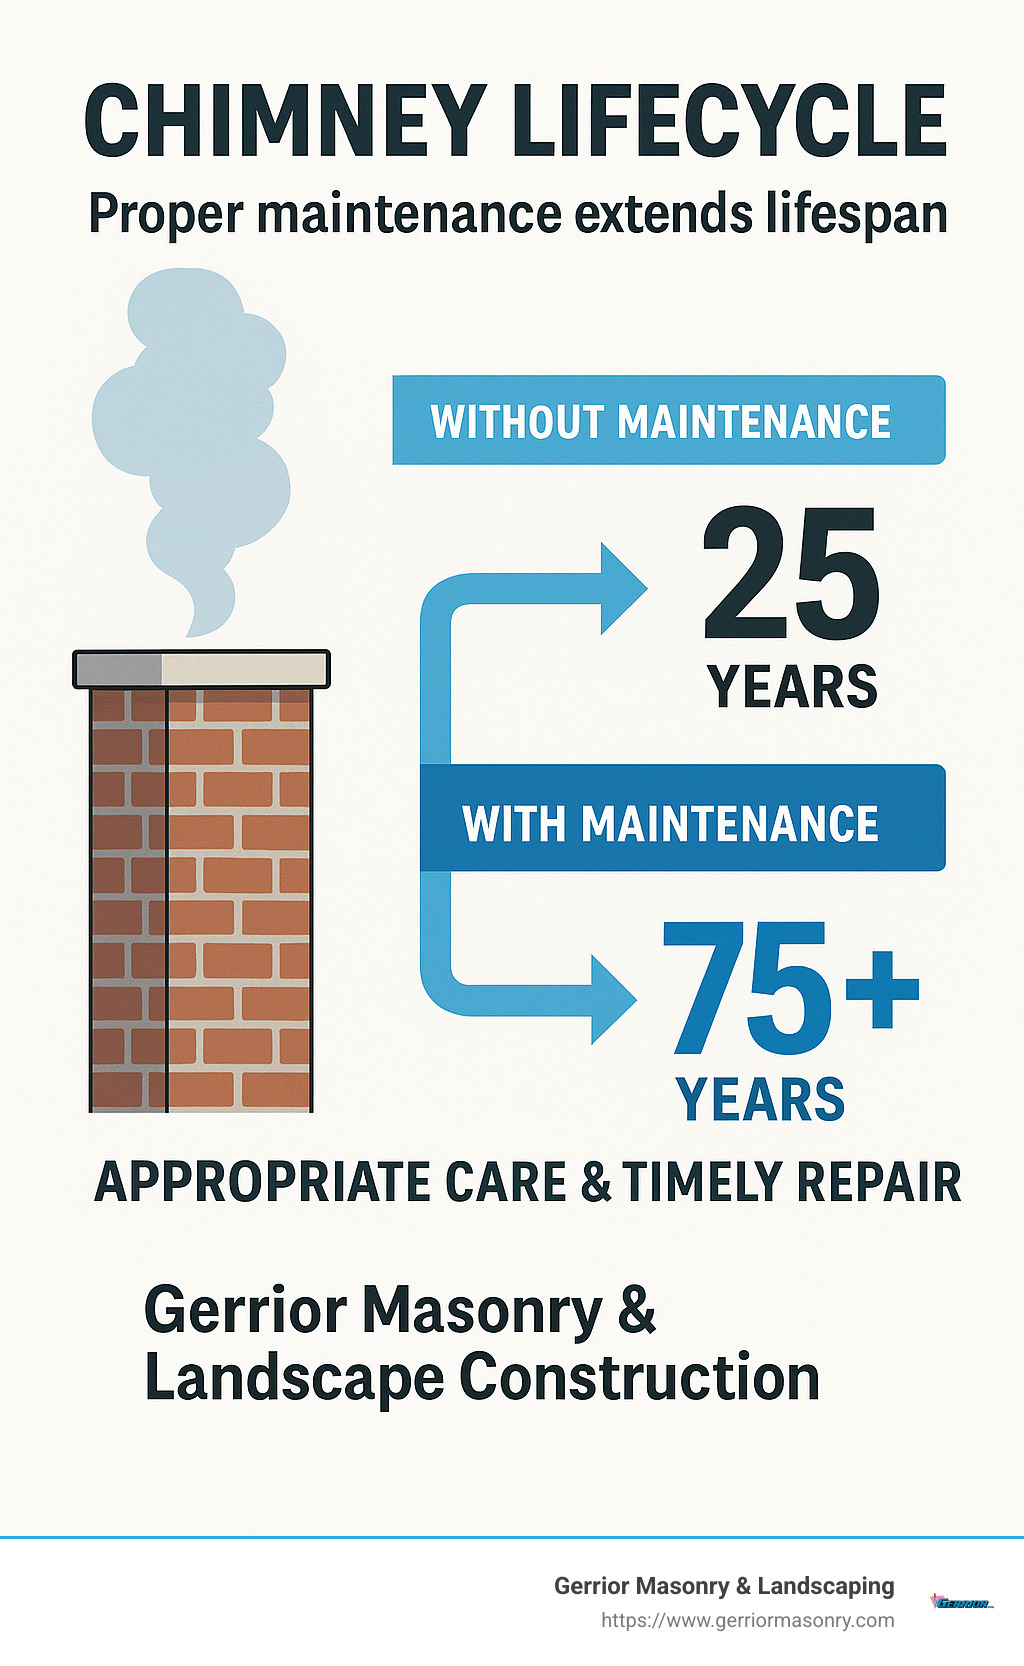
The story of your chimney’s life doesn’t have to be one of steady decline. With proper care, what might be a 25-year lifespan can extend well beyond 75 years. That’s three generations of family gatherings around a safe, warm hearth instead of costly rebuilds and dangerous conditions.
I’ve seen too many Andover homeowners learn the hard way that neglecting chimney maintenance leads to expensive consequences. Annual inspections aren’t just another item on a home maintenance checklist—they’re your first line of defense against serious safety hazards and structural failures.
Those small cracks you might barely notice today? After a few more freeze-thaw cycles, they could allow water to penetrate deep into your masonry. By next winter, what would have been a simple repointing job might become a partial rebuild. This is why early intervention is always the most cost-effective approach to chimney care.
When selecting a professional for your chimney needs, certification matters. CSIA-certified technicians have the training to spot issues that untrained eyes might miss. Local experience is equally important—professionals familiar with Andover’s specific climate challenges understand exactly how our weather patterns affect masonry structures.
Water is your chimney’s greatest enemy. Most catastrophic chimney failures begin with simple water infiltration. A properly constructed crown, quality cap, and appropriate waterproofing create a defense system that protects your entire chimney structure from moisture damage.
Beyond the structural concerns, proper chimney function prevents truly dangerous situations. A well-maintained chimney efficiently vents combustion gases, preventing carbon monoxide from entering your home. It also reduces fire risks by minimizing creosote buildup and maintaining proper clearances to combustible materials.
By following the guidance in this article, you’ll be well-equipped to make informed decisions about your chimney’s care and maintenance. Investing in proper chimney maintenance isn’t just an expense—it’s protection for your home and family, and peace of mind during those cold New England winters.
Gerrior Masonry & Landscape Construction is based in Woburn, MA, and proudly serves Middlesex and Essex County, Massachusetts, including Andover and surrounding communities. With over 30 years of experience in masonry and chimney repair, we’re committed to providing the highest quality service to ensure your chimney remains safe, efficient, and beautiful for decades to come.
Contact us today to schedule your comprehensive chimney inspection and take the first step toward peace of mind.
Protecting Your Home from Water Damage: Understanding Chase Cover Costs
Chimney chase cover replacement cost typically ranges from $300 to $700 for standard sizes with installation, though costs can vary significantly based on materials and dimensions:
Material
Average Cost Range (Including Installation)
Galvanized Steel
$200 – $450
Stainless Steel
$400 – $1,200
Copper
$600 – $3,800
Is your chimney chase cover rusting, leaking, or showing signs of deterioration? That metal cap sitting atop your chimney might seem insignificant, but it plays a crucial role in protecting your home from water damage and costly repairs.
When a chase cover fails, water can seep into your chimney structure, causing wood rot, mold growth, and even compromise your chimney’s structural integrity. This small investment can prevent thousands in future repairs.
I’m Joe Gerrior, owner of Gerrior Masonry & Landscape Construction Corp., and I’ve seen how proper chimney chase cover replacement cost planning can save homeowners from extensive water damage across my 34 years of experience in masonry and chimney repair throughout Massachusetts.
What Is a Chimney Chase Cover and Why Is It Important?
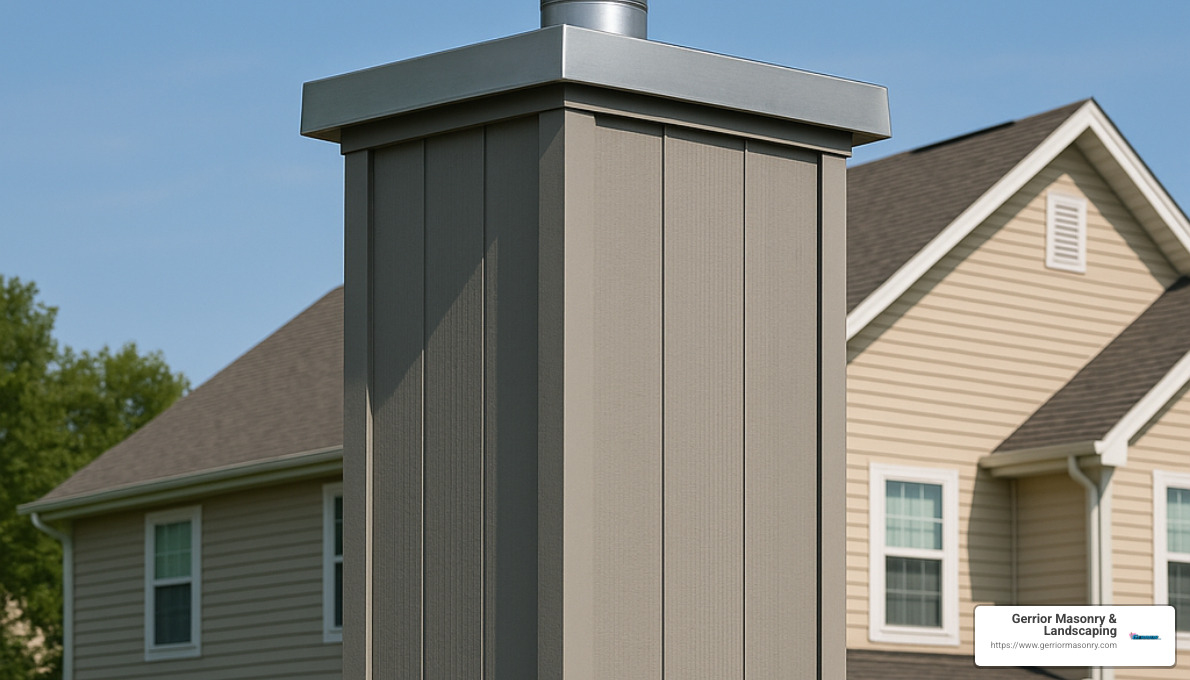
If you have a prefabricated or factory-built fireplace in your home, that box-like structure encasing your flue is called a chimney chase. Unlike traditional brick chimneys with concrete crowns, these modern chimney systems are topped with a metal sheet – your chimney chase cover.
Think of your chase cover as your chimney’s personal umbrella. It’s the first line of defense against Massachusetts’ unpredictable weather, from summer downpours to winter snowstorms.
I’ve repaired countless water-damaged chimneys over my years at Gerrior Masonry, and I can tell you that a functioning chase cover is worth its weight in gold. Here’s why this simple metal cap matters so much:
Water protection is the primary job of your chase cover. When properly installed, it directs rain and melting snow away from your chimney’s interior, preventing moisture from seeping into your home. Without this protection, water damage can quickly spiral into expensive repairs.
Structural preservation becomes a serious concern when water infiltrates your chimney chase. Most prefabricated chimney chases are constructed with wood framing, which can rot when repeatedly exposed to moisture. This compromises the entire structure supporting your chimney system.
Unwanted houseguests like birds, squirrels, and raccoons are always looking for shelter. A solid chase cover creates a barrier that keeps wildlife from turning your chimney into their new apartment complex.
Spark containment is another crucial safety function. Your chase cover works with your chimney cap to keep sparks and embers from escaping and potentially igniting nearby roofing materials or trees.
As one of my colleagues with over 30 years in chimney inspection puts it: “At the top of your chimney, you have a chase cover. The cover, combined with the chimney cap, keeps water out of your fireplace flue. Like a masonry chimney crown, except for a prefab, it’s made of sheet metal.”
The dangers of water infiltration go beyond structural concerns. When water mixes with creosote (that black substance that builds up in your chimney from burning wood), it creates a highly toxic compound. The U.S. Department of Health and Human Services has published serious health warnings about creosote exposure, linking it to respiratory issues and other health problems.
Signs Your Chimney Chase Cover Needs Replacement
After years of battling New England weather, even the best chase covers will eventually show signs of wear. Here’s how to know when it’s time for a chimney chase cover replacement:
Visible rust is often the first warning sign. Look for orange or brown streaks on the cover itself or running down the sides of your chimney. This indicates that your chase cover is actively deteriorating.
Water in your fireplace during or after rain is a clear indicator that your chase cover is no longer doing its job. This isn’t normal and should be addressed immediately.
Ceiling or wall stains near your chimney suggest that water is making its way into your home’s interior. These water marks won’t go away until the source of the leak is fixed.
Crumbling masonry or siding around your chimney can indicate that water is seeping behind these materials, causing them to deteriorate from the inside out.
Warped metal on your chase cover means it’s no longer providing a proper seal. Metal expands and contracts with temperature changes, and over time this can cause permanent deformation.
A dipping or concave cover is especially problematic because instead of shedding water, it’s now collecting it. This standing water accelerates rust and creates constant pressure on your chimney system.
In my experience with Chimney Repairs at Gerrior Masonry, homeowners often wait until they see obvious leaks before addressing chase cover issues. By then, significant damage may have already occurred to the internal structure, leading to more extensive and expensive repairs.
The average galvanized chase cover typically lasts only 7-9 years in our harsh Massachusetts climate. If yours is approaching or past this age, it’s wise to have it inspected even if you don’t see obvious deterioration yet. A small investment in chimney chase cover replacement cost now can save you thousands in water damage repairs later.
When planning for a new chimney chase cover, several key factors will influence what you’ll pay. As a homeowner, understanding these variables helps you budget appropriately and avoid surprises when it’s time to write that check.
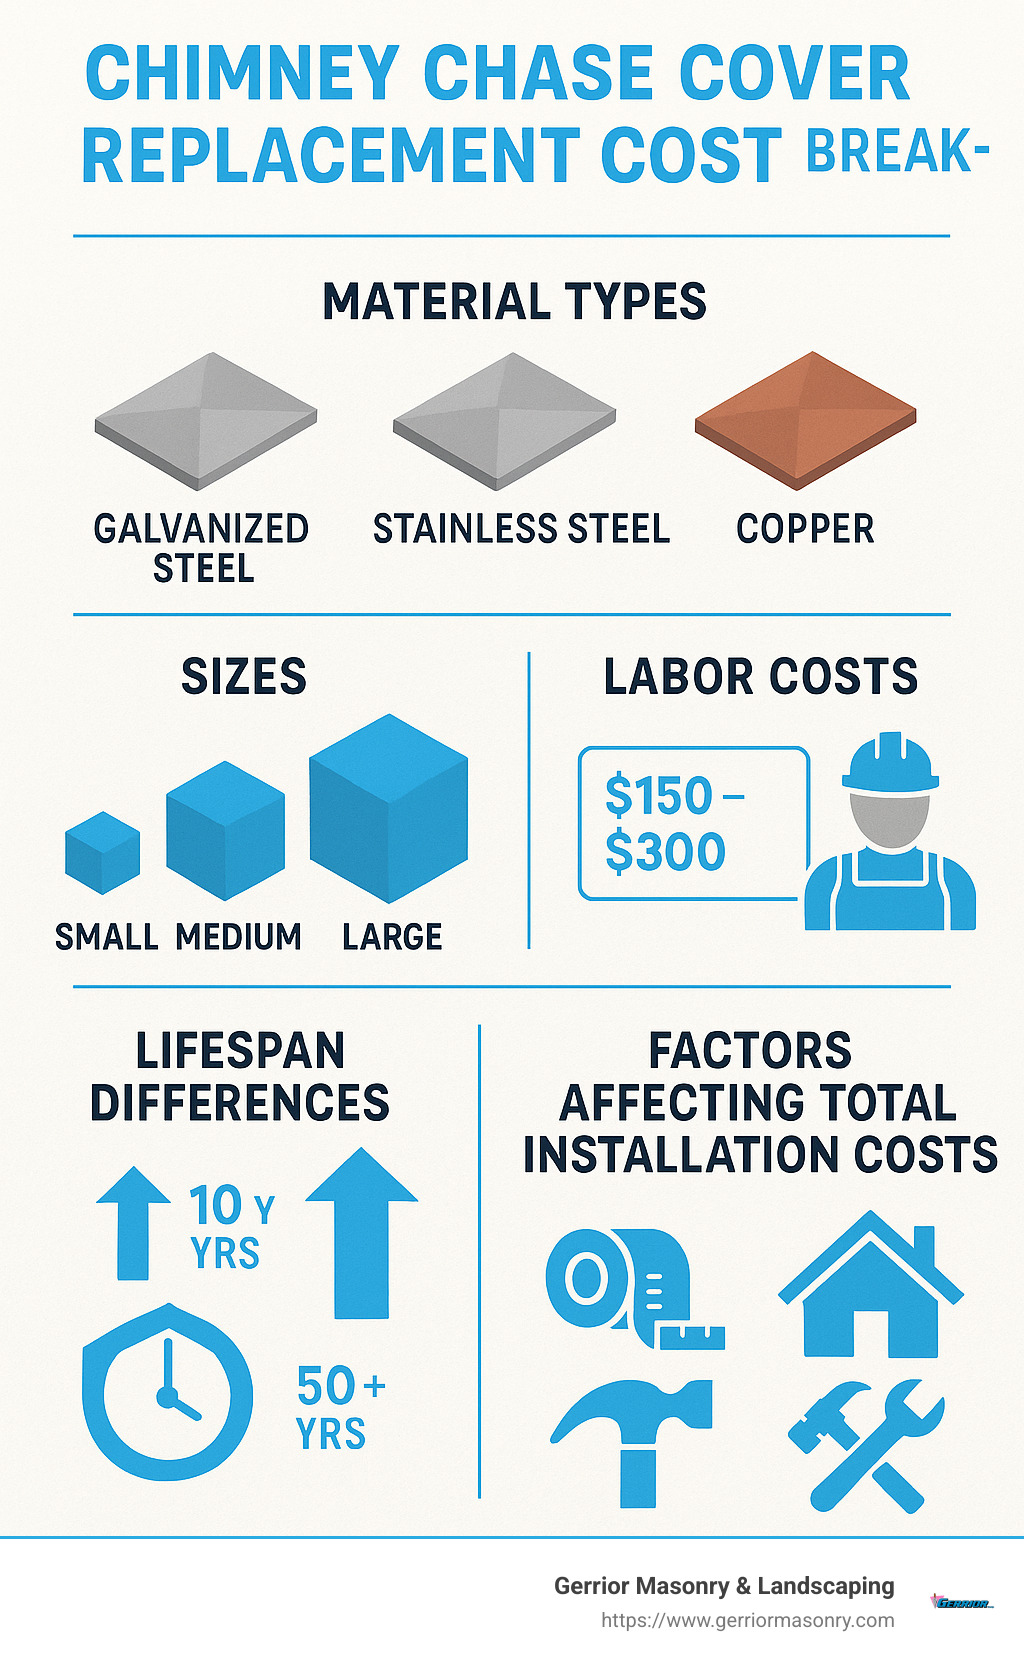
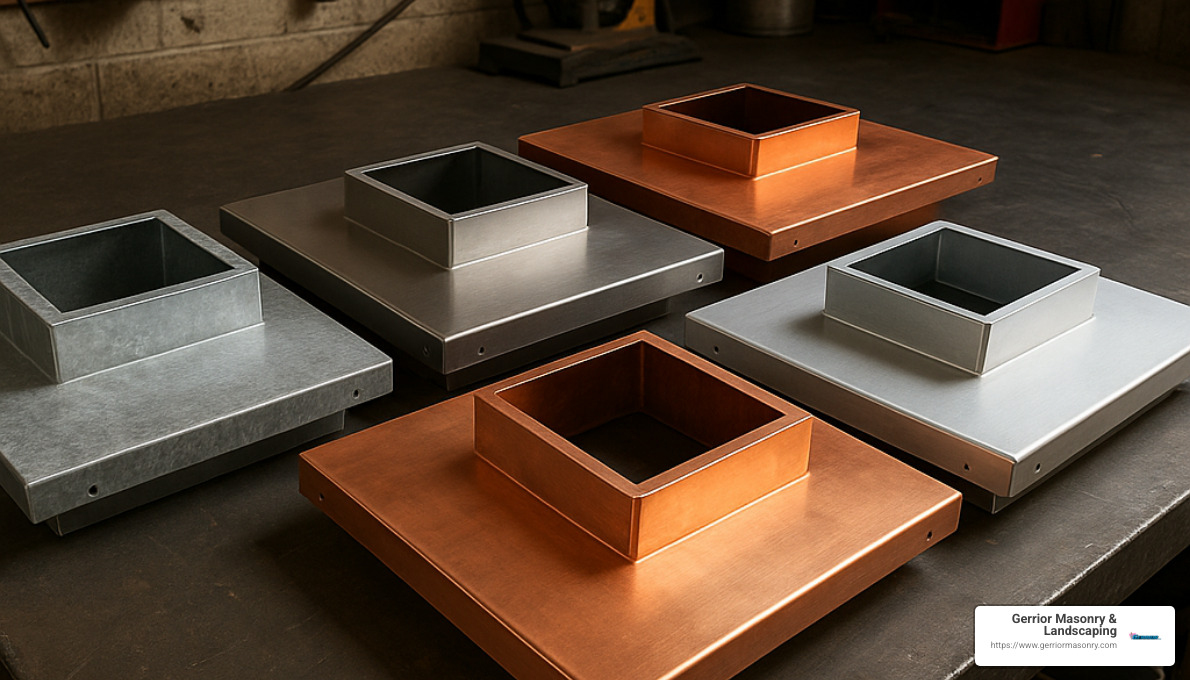
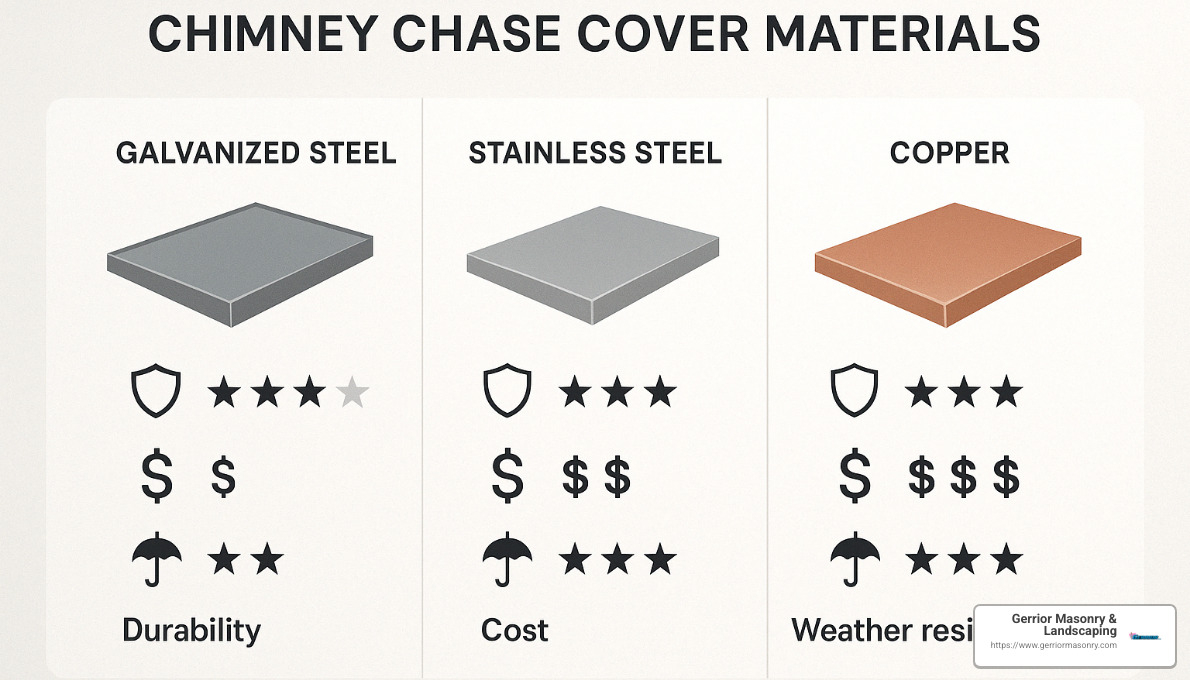
The material you choose makes the biggest impact on your chimney chase cover replacement cost. Think of it as buying a car – you can go economy, mid-range, or luxury, with prices and longevity to match. Galvanized steel offers the most budget-friendly option at around $200-$450 installed. Stainless steel sits comfortably in the middle at $400-$1,200, while copper provides premium protection at $600-$3,800. Some homeowners opt for aluminum ($300-$600), though it’s less common in our New England climate.
Size matters too – and bigger definitely means more expensive. A small 8″ x 8″ galvanized cap might only run $250-$285 installed, while a larger 17″ x 29″ version could jump to $590-$650. Those measurements matter because they determine how much material is needed and how complex the installation will be.
Speaking of complexity, is your chimney chase a simple square or rectangle? Great! You’ll pay standard rates. But if yours has an unusual shape – perhaps with multiple angles or curves – expect to pay 20-50% more for custom fabrication. I’ve seen some truly unique chimney designs in Massachusetts homes, and each one requires special attention.
Your roof itself plays a big role in the final price tag. When I’m climbing up to install a chase cover on a steep roof pitch, that requires extra safety equipment and time. The same goes for especially tall chimneys or those positioned far from roof access points. These factors can add 15-30% to your labor costs.
Average Chimney Chase Cover Replacement Cost Breakdown
Let’s talk dollars and cents. Based on internet data (not actual costs for our Gerrior Masonry services), here’s what you might expect to pay:
Component
Cost Range
Materials (varies by type)
$50 – $800
Labor
$125 – $350
Removal of Old Cover
$50 – $150
Total Average Cost
$200 – $3,800
For most homeowners getting a standard-sized stainless steel cover professionally installed, the sweet spot falls between $400 and $700. Labor typically accounts for about half the total cost, with installation taking anywhere from 30 minutes to 2 hours depending on the complexity.
Don’t forget about removing that old, damaged cover – that’ll add another $50-$150 to your bill. Sometimes those old covers come off easily, but others have rusted in place and require significant effort to remove without damaging the chimney structure.
Timing your replacement can save you money too. Spring and fall represent peak season for chimney work in Massachusetts, which often means higher rates. If you can schedule during summer, you might snag a better deal. Winter installations can be challenging due to our New England weather conditions, but sometimes offer competitive pricing during what’s traditionally a slower season.
Additional Costs That May Impact Your Project
In my 34 years of experience, I’ve rarely seen a chimney chase cover replacement that didn’t involve at least considering some related repairs. When water has been sneaking past your old cover, it often leaves damage in its wake.
Flashing repairs are common companions to chase cover replacements. If the metal flashing around your chimney is damaged, expect to add $200-$500 to your project. Think of flashing as your chimney’s first line of defense against water – it needs to be in good shape for your new cover to do its job properly.
Some chimneys have both a chase and a crown, and that crown might need work too. Crown repairs can range from $300 for minor patches to $3,000 for complete rebuilds. I’ve seen crowns so deteriorated that water was pouring directly into the chimney structure – not a situation you want to ignore!
The most expensive surprise can be structural repairs. If water has been infiltrating your chase for years, the wooden structure inside might be rotted or damaged. These repairs can start at $500 and climb well past $5,000 depending on the extent of damage. This is why I always tell homeowners not to delay chase cover replacement – that $500 cover might save you thousands in structural repairs.
Some Massachusetts towns require permits for chimney work, adding $20-$150 to your project. At Gerrior Masonry’s Chimney Masonry Repair, we always perform a thorough inspection before quoting a job. This helps identify any additional issues that might need addressing and prevents those unwelcome surprises after work has begun.
Chimney Chase Cover Materials: Cost vs. Durability Comparison
When it comes time to replace your chimney chase cover, the material you choose makes all the difference in how long it will last and how much protection it provides. I’ve seen homeowners struggle with this decision for years – balancing budget concerns against long-term value isn’t always straightforward.
Let’s walk through your options together and see what makes the most sense for your home and budget.
If you’re working with a tight budget, galvanized steel offers the most affordable entry point. These covers feature a protective zinc coating over steel that provides a basic level of protection against the elements.
The appeal of galvanized steel is obvious – it’s the least expensive option upfront. Most suppliers keep these in stock, and they’re straightforward for professionals to work with. For homeowners watching their spending, this material offers a functional solution.
The downside? Galvanized steel simply doesn’t last very long. In our New England climate, with harsh winters and damp springs, these covers typically begin showing rust spots within 5-8 years. Once rust takes hold, deterioration accelerates quickly.
You’ll need to stay vigilant with galvanized covers – annual inspections become crucial for catching rust early. Some homeowners try extending their life with rust-inhibiting paint, but this is merely a temporary fix. As one chimney professional told me, “A traditional galvanized chimney chase cover typically functions well for 7-9 years at most.” After that, you’re looking at another replacement.
Stainless Steel Chase Covers: The Popular Middle Ground
Cost Range: $400-$1,200 installed
Most of my customers ultimately choose stainless steel, and for good reason. The chromium in stainless steel forms an invisible protective layer that continuously renews itself when exposed to oxygen, making it remarkably resistant to corrosion.
The beauty of stainless steel is its balance of durability and affordability. While you’ll pay more upfront than galvanized steel, you’re looking at a lifespan of 15-25 years or more – potentially three times longer than the budget option. Many homeowners appreciate that manufacturers often back these covers with 10+ year warranties.
At Gerrior Masonry, we typically recommend 304-grade stainless steel for Massachusetts homes. This higher-grade stainless holds up exceptionally well to our coastal salt air and variable weather conditions. It’s practically maintenance-free once installed, which means no ongoing costs or worries.
The only real drawbacks? The higher initial investment and, for some homeowners, the utilitarian appearance compared to copper’s evolving patina. But for most homes, stainless steel’s clean, neutral finish complements virtually any architectural style.
Copper Chase Covers: Premium Long-Term Investment
Cost Range: $600-$3,800 installed
Nothing says “I’m never dealing with this again” quite like a copper chase cover. While the chimney chase cover replacement cost is highest with copper, it delivers best longevity and develops a character that actually improves with age.
Copper begins with a shiny penny-like appearance that gradually transforms into a stunning blue-green patina over the years. This natural aging process doesn’t damage the metal – in fact, the patina serves as an additional protective layer. Many of my customers specifically request copper for its distinctive look that signals quality craftsmanship.
The lifespan of copper is remarkable – often 30+ years and sometimes outlasting the home itself. I’ve removed copper chase covers from 50-year-old homes that were still functionally sound, just outdated in style. Many manufacturers offer lifetime warranties on copper, reflecting their confidence in the material.
As one industry expert points out, “The ROI period is about 2 years, with increased efficiency of 10-15% and safety for a lifetime.” When you consider that a copper chase cover might be the last one you ever purchase for your home, the premium price becomes easier to justify.
The only real disadvantage beyond the higher upfront cost is that copper requires skilled installation. Its value makes proper handling important, and its thermal properties require specific installation techniques to allow for expansion and contraction.
For homeowners planning to stay in their homes long-term, copper offers the satisfaction of knowing you’ve chosen the most durable, beautiful option available – and one that will likely never need replacement during your ownership.
Gerrior Masonry & Landscape Construction is based in Woburn, MA, and services Middlesex and Essex County, Massachusetts.
DIY vs. Professional Chimney Chase Cover Replacement
When it comes to replacing your chimney chase cover, you might be tempted to climb up on the roof and tackle it yourself. After all, how hard could it be to swap out a metal cap? Before you grab your ladder, let’s weigh the pros and cons of DIY versus hiring professionals for this important home protection project.
When to Consider DIY Installation
If you’re comfortable with heights and have some handyman skills, DIY installation might seem appealing. It makes the most sense when you have a simple, straightforward chase design that won’t require custom fabrication. Having an easily accessible roof with a gentle pitch also makes the job much safer – those steep roofs can be treacherous even for professionals!
You’ll need the proper safety equipment including sturdy ladders, safety harnesses, and appropriate tools for the job. And yes, doing it yourself can save you somewhere between $125-$350 in labor costs, which is nothing to sneeze at.
If you’re leaning toward DIY, accurate measurements are absolutely crucial. Measure the length and width of your chase, adding 1-2 inches for overhang on all sides. Don’t forget to measure any flue pipes (add ½ inch to the outer diameter) and note the height of existing raised edges. Even being off by half an inch can lead to a poorly fitting cover that allows water to seep in.
That said, I’ve seen too many DIY jobs that ended up costing homeowners far more than they saved. One Woburn homeowner tried installing his own galvanized steel cover last year. Six months later, we were replacing not just the cover (which had warped because it wasn’t properly secured), but also repairing water damage to his chase structure. The $175 he saved on installation ended up costing him over $1,200 in repairs.
That DIY installation typically voids manufacturer warranties. Is saving a few hundred dollars worth potentially thousands in repairs down the road?
Benefits of Professional Installation
At Gerrior Masonry, we’ve installed hundreds of chase covers across Middlesex and Essex Counties, and there’s a reason why professional installation remains the recommended approach for most homeowners.
Professional installation includes warranty protection that you simply won’t get with DIY. Many manufacturers only honor their warranties when the product is installed by certified professionals. We ensure proper sizing with perfect fits, appropriate overhangs, and water-shedding features that keep your home dry.
Our team provides expert assessment of your entire chimney system during installation. Just last month, we finded significant wood rot in a customer’s chase structure while replacing their cover – damage they had no idea existed. We were able to address it immediately, preventing what would have become a much costlier repair down the road.
The safety factor alone is worth considering. Chimney work can be dangerous, especially on steep or high roofs. Our technicians are trained, insured, and equipped with proper safety gear. We’ve had customers tell us they started DIY installation only to realize halfway through that they were in over their heads – literally and figuratively!
When we install your chase cover, we handle everything: removal and disposal of the old cover, inspection of the chase structure, custom fabrication if needed, proper sealing and flashing, and complete cleanup. For more complex chimney issues, you can learn more on our Fireplace and Chimney Repair Near Me page.
Your chimney chase cover replacement cost might be higher upfront with professional installation, but the peace of mind and long-term protection for your home make it a wise investment. As we like to tell our customers: “Do it right, or do it twice.”
Frequently Asked Questions About Chimney Chase Cover Replacement
Let’s tackle some of the most common questions homeowners ask me when they’re facing chimney issues. After three decades in the masonry business, I’ve heard them all!
How Often Should a Chimney Chase Cover Be Replaced?
The lifespan of your chimney chase cover largely depends on what it’s made of. Think of it like the roof over your chimney – different materials hold up differently over time.
If you have a galvanized steel cover, you’re looking at replacement every 5-8 years. These budget-friendly options simply don’t stand the test of time, especially in our harsh Massachusetts winters.
Aluminum covers (though less common for chase covers) typically need replacement even sooner – every 3-5 years at most.
Made the investment in stainless steel? You’re in much better shape, with these quality covers lasting 15-25 years or even longer with proper care.
And if you splurged on copper, congratulations! You may never need to replace it again, as copper covers can last 30+ years or even the lifetime of your home.
But here in New England, our weather throws everything at your chimney – freezing temperatures, thawing, snow, rain, and for coastal homes, salt air that accelerates corrosion. That’s why we always recommend annual chimney inspections, regardless of your cover’s age or material. The Chimney Safety Institute of America backs us up on this one – yearly inspections are your best defense against unexpected problems.
What Are the Risks of Delaying Chimney Chase Cover Replacement?
I’ve seen the consequences of postponed chimney maintenance firsthand, and they’re never pretty. When homeowners put off replacing a failing chase cover, they’re inviting serious trouble.
Water damage is the immediate concern. Once that protective cap starts failing, every rainstorm sends moisture directly into your chimney structure. This isn’t just a little dampness – it can lead to thousands in damage to your home’s framework, ceilings, and walls.
The structural deterioration happens surprisingly quickly. Water that penetrates the chase will rot wooden supports and rust metal components, potentially compromising your entire chimney’s stability.
One chimney safety expert I know puts it this way: “The cost to repair a chimney damaged by a cheap chase cover can range from $1,500 up to $10,000. In extreme cases, it could lead to rebuilding a burned-down home.”
There are serious safety hazards too. When water mixes with creosote (that black stuff that builds up from wood fires), it creates a highly corrosive substance that can damage your flue liner. A damaged liner can allow carbon monoxide – that silent killer – to seep into your living space.
And don’t forget about mold growth. Once moisture gets trapped inside your chase, it creates the perfect environment for mold, which poses its own health risks to your family.
As another expert bluntly states: “A cracked flue is dangerous and can leak hazardous gases into the home, causing carbon monoxide poisoning.” That’s simply not worth the risk of delaying a replacement.
Can I Install a Different Material Than My Original Chase Cover?
Absolutely! In fact, upgrading your chase cover material is one of the smartest moves you can make when replacement time comes around.
If your home came with a basic galvanized steel cover that’s now rusting through, upgrading to stainless steel gives you dramatically better protection and longevity. This is probably the most common upgrade we perform at Gerrior Masonry, and the math makes sense – pay a bit more now for something that lasts 3-4 times longer.
For those looking for the ultimate upgrade, copper is compatible with all chimney types. Yes, it carries a premium price tag, but many homeowners find the beautiful patina and lifetime durability worth every penny, especially on higher-end homes.
When considering an upgrade, you’ll want to ensure the new cover is properly sized for your chase. The weight difference between materials is rarely an issue, but the aesthetic impact on your home’s appearance is worth considering – especially with copper, which develops that distinctive greenish patina over time.
Here in Massachusetts, where we face everything from nor’easters to summer humidity, investing in better materials makes particular sense. At Gerrior Masonry, we typically recommend upgrading from galvanized to at least stainless steel. The modest increase in your chimney chase cover replacement cost pays for itself many times over in extended lifespan and peace of mind.
Conclusion: Investing in Your Home’s Protection
When you’re facing a chimney chase cover replacement cost, it might feel like just another expense on your never-ending homeowner to-do list. But I’ve seen how this relatively small investment can prevent catastrophic damage to homes across Massachusetts.
Think about it this way: spending a few hundred dollars now on a quality chase cover could save you thousands in water damage repairs down the road. That’s not just good home maintenance—it’s smart financial planning.
Here in New England, our weather doesn’t exactly go easy on our homes. Those frigid winters with freeze-thaw cycles, heavy snow loads that test every part of your roof system, and for those closer to the coast, that salt air that seems determined to corrode everything it touches—all these factors make having a properly functioning chase cover absolutely essential.
I’ve walked too many homeowners through extensive repair projects that could have been avoided with timely maintenance. By the time you notice water stains on your ceiling, the damage has already begun. Don’t wait for visible leaks before checking your chase cover—by then, you’re already playing catch-up with water damage.
When selecting materials, I always encourage homeowners to think long-term. Yes, galvanized steel comes with a lower price tag upfront, but when you consider that stainless steel might last three times longer with minimal maintenance, the math starts to make sense. And copper? While it represents a premium investment, it might be the last chase cover you’ll ever need to purchase for your home.
Professional installation matters too. A properly sized and correctly installed chase cover ensures water sheds away from your chimney structure as designed. Plus, manufacturer warranties typically require professional installation—protection that’s well worth the installation cost.
Make annual chimney inspections part of your home maintenance routine. Just like you change your smoke detector batteries and clean your gutters, this simple step can catch small issues before they become expensive problems.
At Gerrior Masonry & Landscape Construction, we’ve been protecting homes throughout Middlesex and Essex Counties for over three decades. Our team understands the unique challenges that Massachusetts weather presents, and we’re committed to helping you select the right chase cover solution for your specific situation.
For expert chimney services, including chase cover replacement, visit our Chimney Repair Near Me page to learn more about how we can help protect your home investment for years to come.
Gerrior Masonry & Landscape Construction is based in Woburn, MA, and services Middlesex and Essex County, Massachusetts. With our decades of experience in chimney repair and maintenance, we’re ready to help you protect your home with the right chimney chase cover solution.
Brick Fireplace Repair: Top 3 Essential Steps 2025
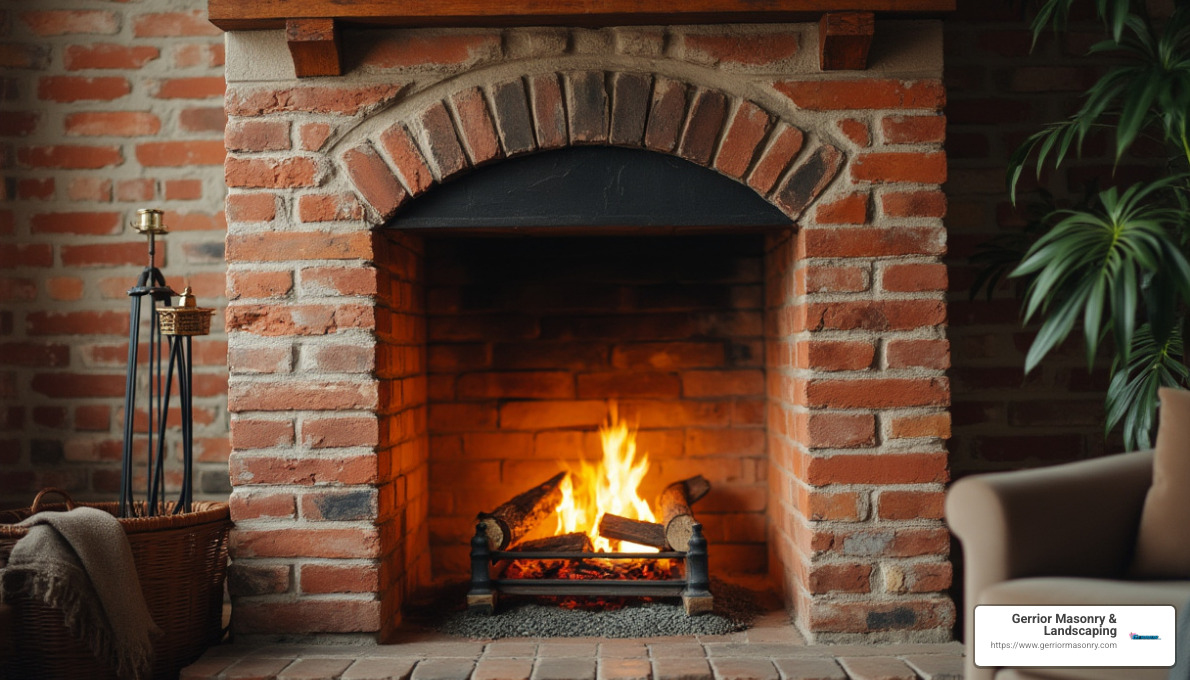
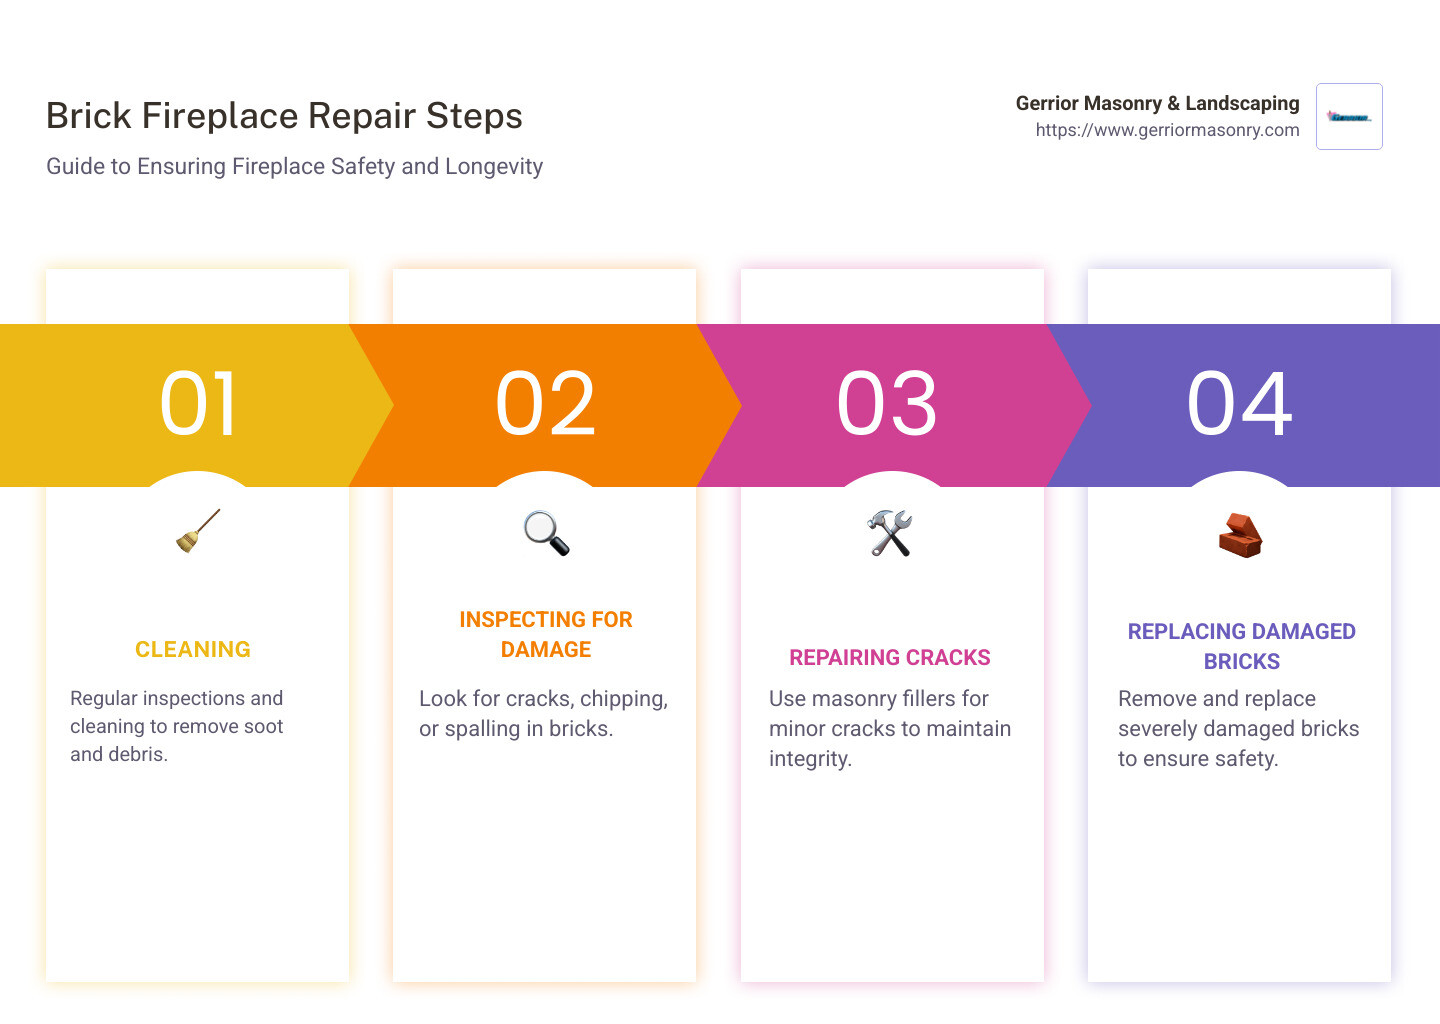
Brick fireplace repair is essential for maintaining the safety, warmth, and beauty of your home. Cracks and damage in the fire bricks can pose serious hazards. Here’s a quick overview:
Maintain: Regular inspections and cleaning are vital to ensure a functioning and safe fireplace.
Safety: Address any damage immediately to prevent fire hazards.
Structural Integrity: Keep your fireplace and chimney secure to protect your home.
Well-maintained fireplaces add both warmth and value to your home.
My name is Joe Gerrior, and I bring over 34 years of experience in masonry and landscaping services. Throughout my career, I’ve guided countless homeowners in the essential process of brick fireplace repair to ensure their homes remain safe and aesthetically pleasing.
Understanding the condition of your fireplace bricks is crucial for maintaining both safety and structural integrity. Identifying the type of damage can help you decide whether to repair or replace the affected bricks.
Types of Brick Damage
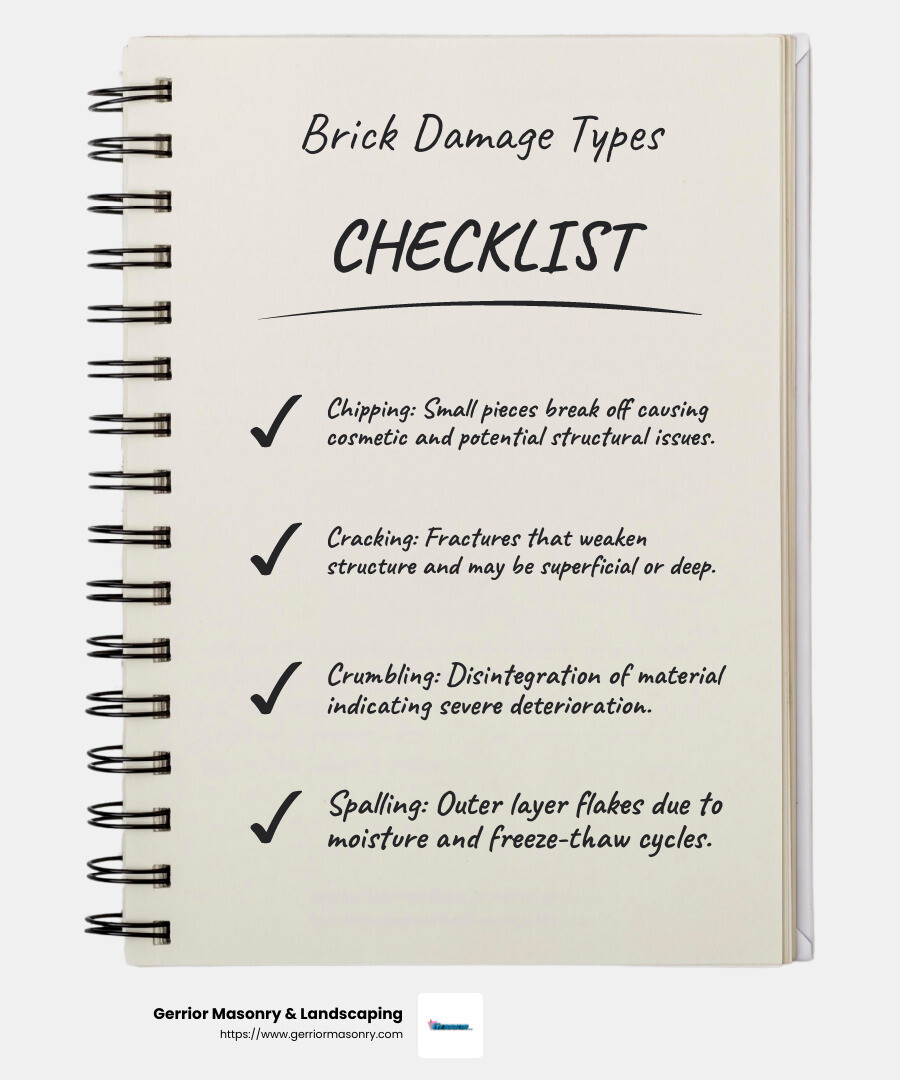
Fireplace bricks can suffer from several types of damage, each with its own implications:
Chipping: Small pieces of brick may break off due to impact or general wear. While often cosmetic, it can lead to further deterioration if ignored.
Cracking: Visible fractures in the bricks can weaken the overall structure. Cracks can be superficial or extend deeper, affecting stability.
Crumbling: This is when the brick material starts to disintegrate. It signals severe deterioration and can compromise the fireplace’s strength.
Spalling: The outer layer of the brick may flake or peel off, often due to moisture penetration and freeze-thaw cycles. This not only affects appearance but also structural soundness.
Determining Repair vs. Replacement
When assessing brick damage, consider the severity and impact on your fireplace’s structural integrity.
Minor Damage: For small chips or superficial cracks, masonry fillers or patching compounds can be effective. These materials are designed to bond well with existing masonry, providing a quick fix.
Severe Damage: If the brick is crumbling, spalling, or the damage compromises the fireplace’s structural integrity, replacement is the best option. A new brick ensures long-term durability and safety.
Regular inspections are key to catching problems early. This proactive approach can save you from more extensive and costly repairs later. Always prioritize safety and consult with a professional if you’re unsure about the extent of the damage.
Tools and Materials Needed for Brick Fireplace Repair
When it comes to brick fireplace repair, having the right tools and materials is essential for a successful project. Whether you’re tackling minor cracks or replacing a damaged brick, being prepared with the right equipment will make the job easier and safer.
Essential Tools
Power Grinder: This tool is crucial for cutting along the joints of a damaged brick. It allows for precise cuts, reducing the risk of damaging surrounding bricks. Always use a dust attachment to minimize dust.
Chisel and Hammer: These are used for removing the mortar from the joints and breaking the damaged brick into smaller pieces for easy removal. A masonry chisel is recommended for detailed work.
Trowel: This is essential for applying mortar during the installation of a new brick. It helps in spreading the mortar evenly and ensuring a strong bond.
HEPA Vacuum: Dust control is vital during brick repair. A HEPA vacuum efficiently captures dust and debris, keeping your workspace clean and reducing airborne particles.
Masonry Brush: Use this for cleaning the area after removing the damaged brick and before applying new mortar. A clean surface ensures better adhesion.
Safety Precautions
Safety should always be a top priority when working on any masonry project. Here are some key precautions to take:
Ventilation: Ensure the work area is well-ventilated. Open windows or use fans to circulate air and reduce dust inhalation.
Protective Gear: Always wear safety goggles, a dust mask, and work gloves. These protect your eyes, lungs, and hands from dust and sharp debris.
Dust Containment: Hang plastic drop cloths to contain dust in the work area. This prevents dust from spreading to other parts of your home.
Dust-Collecting Tools: Use power tools with dust-collection attachments to minimize airborne particles. This not only protects your health but also keeps the workspace cleaner.
By equipping yourself with these tools and adhering to safety measures, you can confidently tackle your brick fireplace repair project. Proper preparation and safety practices lay the foundation for a successful and safe repair process.
Step-by-Step Brick Fireplace Repair
Removing the Damaged Brick
The first step in brick fireplace repair is to carefully remove the damaged brick. This requires precision to avoid harming the surrounding masonry.
Cutting: Use a power grinder to make precise cuts along the inside of the bed joints surrounding the damaged brick. Ensure cuts are just inside the joints to prevent damage to adjacent bricks. Always use a dust attachment to minimize dust.
Chiseling: With a hammer and masonry chisel, remove the mortar from the head joints. Carefully chip away the brick, breaking it into smaller pieces for easier removal. This step requires patience and attention to detail to avoid damaging other bricks.
Dust Collection: Throughout the removal process, use a HEPA vacuum to collect dust and debris. This keeps the work area clean and reduces airborne particles, making it safer to work.
Preparing the Opening
Once the damaged brick is removed, it’s crucial to prepare the opening for the new brick. A clean and well-prepared site ensures effective bonding.
Cleaning: Use a dampened masonry brush to clean out the hole left by the old brick. Remove any loose mortar and debris to create a pristine surface for new mortar. Lightly mist the area with water to prevent the surrounding bricks from rapidly absorbing moisture from the new mortar.
Mortar Mixing: In a 5-gallon bucket, mix Type N mortar with water until it reaches an oatmeal-like consistency—neither too wet nor too dry. Prepare only as much mortar as you can use within about 30 minutes to prevent it from setting prematurely.
Installing the New Brick
With the opening prepared, it’s time to install the new brick. This step requires precision to ensure the new brick sits flush with the surrounding masonry.
Applying Mortar: Use a trowel to apply a layer of mortar to the base of the opening. Spread mortar on the sides and back of the replacement brick, a technique known as back buttering. Ensure all surfaces are well-coated to create a strong bond.
Setting the Brick: Carefully place the new brick into the opening, gently wiggling it to establish good contact with the mortar. Use a level to check that the brick sits flush with the surrounding masonry. Clean off any excess mortar that squeezes out from the joints to maintain a neat appearance.
Filling the Joints: Use a tuck pointer to push mortar deep into the joints surrounding the new brick. Fill the joints completely, ensuring the mortar forms a strong bond. Use a jointing tool that matches the profile of existing joints for a consistent look.
By following these steps, you can effectively repair your brick fireplace, restoring its appearance and structural integrity. Proper technique and attention to detail are key to a successful repair.
Finishing Touches and Curing
Once the new brick is securely in place, the final steps are crucial to ensure the repair blends seamlessly with the existing fireplace and the mortar cures properly.
Cleaning Up
After setting the new brick, wait about 30 minutes for the mortar to begin setting. Then, use a damp sponge to gently clean any mortar smears from the brick face. Be cautious to avoid introducing water into the fresh joints, as this can weaken the setting mortar.
Matching the Appearance
To make the new repair indistinguishable from the existing structure, match the appearance of the new mortar to the old.
Brick Dust: Mix some brick dust into the mortar to help blend the color with surrounding bricks. This simple trick can make a big difference in achieving a uniform look.
Colored Mortar: If the original mortar has a specific color, consider using a colored mortar mix. Apply it with a small brush or trowel for precision, ensuring the color matches as closely as possible.
Texture Matching: While the mortar is still pliable, use a tool to texture the surface to match the adjoining bricks. This attention to detail ensures a seamless repair.
Curing the Mortar
Proper curing is vital for the durability and longevity of the repair. Allow the mortar to cure for at least 24 hours before using the fireplace.
Damp Curing: Keep the area slightly damp during the curing period. This prevents the mortar from drying too quickly, which can cause cracks. Mist the area lightly with water if necessary, but avoid soaking.
Temperature Control: Ensure the area is not exposed to extreme temperatures during curing. Excessive heat or cold can affect the setting process, potentially leading to weakened mortar.
By taking these steps, you ensure that your brick fireplace repair is not only visually appealing but also structurally sound. Proper cleaning, matching, and curing are key to a successful restoration, allowing you to enjoy the warmth and beauty of your fireplace once again.
Frequently Asked Questions about Brick Fireplace Repair
How much does it cost to repair a brick fireplace?
The cost of brick fireplace repair can vary widely based on the extent of the damage and whether you’re opting for a DIY approach or hiring professionals. On average, repairing minor damage, like small cracks or chips, might cost between $200 and $800. For larger repairs, such as replacing bricks or addressing structural issues, costs can range from $1,000 to over $3,000. These are average costs from internet data and not actual costs for Gerrior Masonry services. Always get a detailed quote before starting any repair work.
Can a handyman repair a fireplace?
While a handyman can handle some minor repairs, such as filling small cracks or repointing mortar, more extensive repairs require specialized skills. Masonry experience is crucial for tasks like replacing bricks or addressing significant structural issues. Professionals, like those at Gerrior Masonry & Landscaping, have the expertise and tools needed to ensure the job is done safely and correctly. Hiring a skilled mason can prevent future problems and ensure the fireplace remains safe and functional.
How to fix a brick fireplace?
Fixing a brick fireplace can be a satisfying DIY project if the damage is minimal. Here are some basic steps:
Assess the Damage: Determine if the damage is minor (chipped brick) or major (crumbling or cracked bricks).
Gather Tools and Materials: You’ll need a chisel, hammer, trowel, and mortar mix. Safety gear like goggles and gloves are essential.
Remove Damaged Brick: Carefully cut and chisel out the damaged brick, taking care not to damage surrounding bricks.
Prepare the Opening: Clean the area and mix your mortar according to the instructions.
Install the New Brick: Apply mortar to the opening, set the new brick, and fill the joints with mortar.
Finish and Cure: Clean any excess mortar and let it cure for at least 24 hours, keeping the area damp.
For more complex repairs, consider seeking professional help. Professionals have the skills and experience to handle intricate repairs and ensure the fireplace’s structural integrity.
Conclusion
Gerrior Masonry & Landscaping is your go-to expert for all things masonry, especially when it comes to brick fireplace repair. With over 30 years of experience, our team is dedicated to delivering high-quality results that stand the test of time. Our skilled masons, under the direct oversight of our owner, ensure that every project meets our rigorous standards.
Whether you’re dealing with minor cracks or major structural issues, our expertise in masonry services guarantees that your fireplace will be restored to its former glory. We understand that a well-maintained fireplace is not just about aesthetics; it’s about safety and efficiency, too. That’s why we take each project seriously, using the best materials and techniques to ensure long-lasting results.
When you choose us, you’re not just getting a service provider; you’re partnering with a team that values your home’s integrity as much as you do. We offer a range of services, from patio installations to chimney repairs, all designed to improve the beauty and functionality of your home.
If you’re considering adding a custom outdoor fireplace or fire pit to your home, look no further. Visit our Outdoor Fire Pits page to learn more about how we can help create a cozy and inviting space for you and your loved ones.
Trust Gerrior Masonry & Landscaping for all your masonry needs. We’re here to ensure your home remains a safe, warm, and welcoming place for years to come.
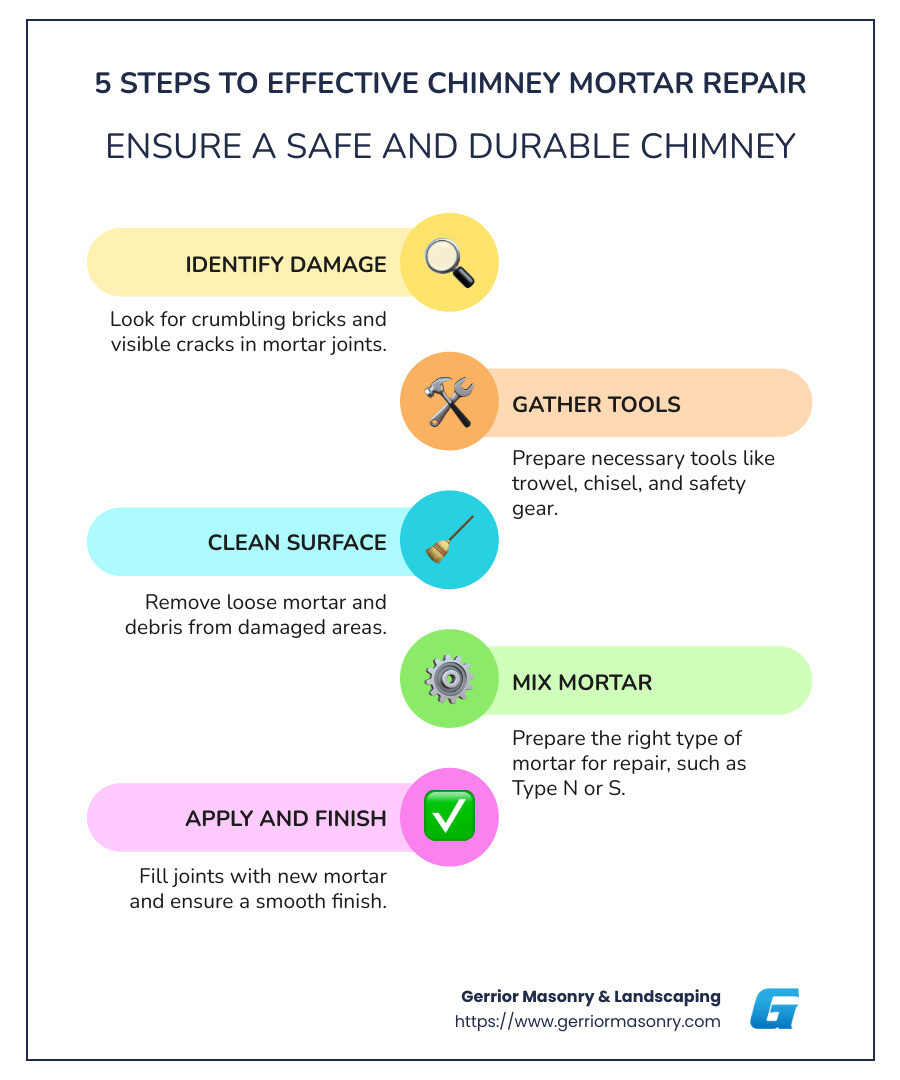
Chimney mortar repair is essential for maintaining both the structural integrity and safety of your home’s chimney. Without proper attention, chimney deterioration can lead to significant issues such as mortar damage, which not only affects the appearance of your chimney but also its functionality. Key factors to watch for include:
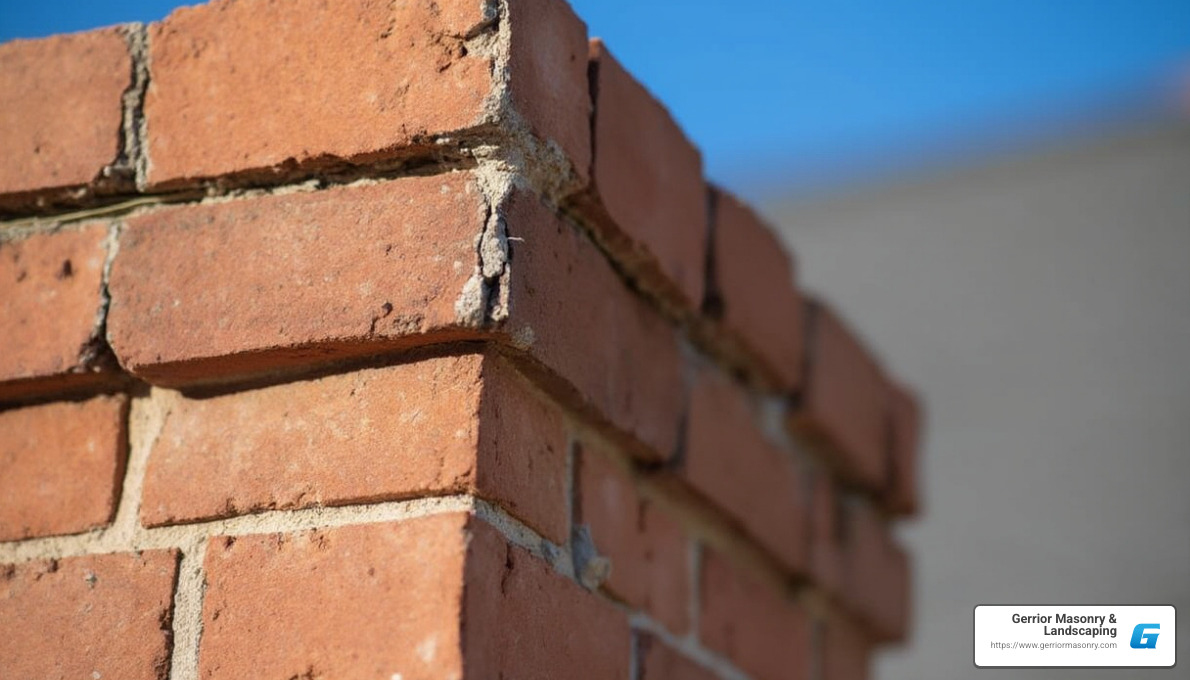
Crumbling or falling bricks
Visible cracks or gaps in mortar joints
Water stains on walls or ceilings near the chimney
Attention to preventative maintenance can save homeowners time and money by avoiding larger repairs down the line. Regular inspections, performed at least once a year, are vital to catching minor issues before they worsen.
I’m Joe Gerrior, and with over 34 years of experience in masonry and landscape construction, I’ve seen the impact of neglecting chimney repairs. The team at Gerrior Masonry & Landscaping is dedicated to providing top-notch chimney mortar repair services across various locations in Massachusetts. We understand the importance of a functioning chimney, both for the safety and value it adds to your home.
Chimney mortar plays a crucial role in keeping your chimney sturdy and safe. But over time, various factors can lead to its deterioration. Understanding these factors can help you maintain your chimney effectively.
Freeze-Thaw Cycles
One of the biggest culprits of chimney mortar deterioration is the freeze-thaw cycle. When water seeps into the mortar and freezes, it expands. This expansion causes the mortar to crack and crumble over time. In Massachusetts, where temperatures fluctuate, this cycle can be particularly damaging during the colder months.
Water Infiltration
Water is another enemy of chimney mortar. It can seep into small cracks and gaps, leading to further deterioration. Over time, this water can cause efflorescence, which appears as white, powdery deposits on the chimney surface. If left unchecked, water infiltration can weaken the mortar and even damage the bricks themselves.
Structural Movement
As homes settle, structural movement can put stress on the chimney. This movement can lead to cracks in the mortar, affecting the chimney’s stability. Vertical cracks often appear due to uneven settling, while horizontal cracks might indicate pressure from within the chimney. Regular inspections can help catch these issues early before they lead to more severe problems.
Age and Weathering
Finally, simple age and exposure to the elements can cause chimney mortar to deteriorate. Over time, even the most well-built chimneys will show signs of wear. Weathering from rain, wind, and sun exposure can erode the mortar, making it less effective at holding the chimney together.
By understanding these factors, you can take proactive steps to maintain your chimney. Regular chimney mortar repair and maintenance can prevent minor issues from turning into major headaches. At Gerrior Masonry & Landscaping, we emphasize the importance of addressing these problems early to ensure the longevity and safety of your chimney.
Stay tuned as we dive into the Chimney Mortar Repair Process in the next section, where we will guide you through the steps to fix these common issues.
Chimney Mortar Repair Process
Repairing chimney mortar is essential to keep your chimney in top shape. Let’s walk through the chimney mortar repair process step-by-step, ensuring you have all the information you need to tackle this task effectively.
Preparing for Repair
Before diving into the repair process, gather the necessary tools and safety equipment. Here’s what you’ll need:
It’s crucial to consider the temperature before starting. Mortar and sealant work best when applied above 50 degrees Fahrenheit. This ensures proper adhesion and curing.
Step-by-Step Repair Guide
Surface Preparation
Start by preparing the surface. Use a hammer and chisel to widen any cracks to about 1/4 inch. This allows the new mortar or sealant to adhere better. Remove any damaged mortar and ensure the edges of the crack form an inverted V shape. Brush away loose debris for a clean surface.
Sealant Application
For minor repairs, a sealant might be the best option. Cut the nozzle of the sealant tube at an angle, matching the crack’s width. Load the tube into a caulk gun and apply a bead deep into the crack. Sealants can stretch up to 700% to accommodate wall movement, making them perfect for small repairs.
Mortar Mixing
For larger repairs, mixing traditional mortar is necessary. Follow the manufacturer’s instructions for mixing ratios. Gradually add water until you achieve a smooth, workable texture. Dampen the area slightly before applying the mortar to improve adhesion. Use a trowel to press the mortar firmly into the joint, ensuring there are no air pockets.
Finishing Touches
Once the mortar or sealant is applied, use your trowel to remove any excess material and match the surrounding texture. If using sealant, allow it to dry for at least two hours. Traditional mortar requires a few days to set, so keep the area damp and shielded from direct sunlight or extreme temperatures.
By following these steps, you can effectively repair your chimney mortar, ensuring your chimney remains safe and efficient. Up next, we’ll explore common chimney problems and solutions to help you maintain your chimney’s integrity.
Common Chimney Problems and Solutions
Chimneys are exposed to various elements and can develop several issues over time. Here, we’ll cover some common problems and their solutions to help you maintain a safe and efficient chimney.
Broken Mortar Joints
Problem: Mortar joints can crack and deteriorate due to weathering, age, or freeze-thaw cycles. This allows water to seep in, leading to further damage.
Solution: Repointing is the go-to fix. Remove the damaged mortar with a grinder, clean out the debris, and replace it with fresh mortar using a pointed trowel. This keeps the structure intact and watertight.
Flashing Damage
Problem: Flashing is the metal layer that seals the space between the chimney and roof. If it’s damaged, water can leak into your home, causing significant damage.
Solution: Remove any damaged flashing. Clean the area thoroughly and install new flashing, ensuring proper overlap. Seal the edges with high-quality caulk to prevent leaks.
Loose Aggregate in Mortar Joints
Problem: Over time, the aggregate in mortar joints can become loose, compromising the chimney’s structural integrity.
Solution: Similar to broken mortar joints, repointing is effective here. Replace the crumbling mortar to ensure a strong and stable chimney structure.
Poor Draft
Problem: A poor draft can occur due to obstructions or improper construction, affecting the chimney’s ability to vent smoke and gases efficiently.
Solution: Inspect the chimney for blockages like nests or debris. Ensure the flue is the correct size for your fireplace. If construction issues are the cause, consulting a professional might be necessary to redesign the chimney for optimal airflow.
By addressing these common issues promptly, you can extend the life of your chimney and prevent more costly repairs down the line. Next, we’ll answer some frequently asked questions about chimney mortar repair.
Frequently Asked Questions about Chimney Mortar Repair
What kind of mortar is best for chimney repair?
When it comes to chimney mortar repair, choosing the right type of mortar is crucial for durability and safety. Type N mortar is commonly used for above-grade, exterior walls and chimneys. It is a medium-strength mortar mix that offers good flexibility, making it ideal for handling weathering and thermal expansion.
On the other hand, Type S mortar is stronger and more suitable for below-grade applications. While it provides higher compressive strength, it’s typically used for structural walls and can be overkill for most chimney repairs unless extra strength is needed.
How do you fix crumbling chimney mortar?
Fixing crumbling mortar is essential to maintain your chimney’s structural integrity. Repointing is the process of removing old, deteriorated mortar and replacing it with new mortar. This involves using tools like a grinder to remove the damaged mortar, cleaning the joints, and then applying fresh mortar with a pointed trowel.
For a more detailed approach, tuckpointing might be used. This technique involves not only repointing the mortar but also creating a clean, finished look by applying a thin line of contrasting mortar to mimic brick joints. It improves both the strength and the appearance of the chimney.
How much does chimney mortar repair cost?
The cost of chimney mortar repair can vary widely based on several factors. Simple repointing jobs might cost a few hundred dollars, while more complex repairs involving extensive mortar replacement or tuckpointing could run into the thousands.
Factors affecting cost include:
Extent of Damage: More damage means more labor and materials.
Project Complexity: Tuckpointing or repairs in hard-to-reach areas can increase costs.
Location: Prices can vary based on local labor rates and material costs.
For accurate estimates, it’s best to consult with a professional. They can assess the condition of your chimney and provide a detailed quote. Investing in proper repairs now can save you from more expensive fixes later.
By understanding these key aspects of chimney mortar repair, you can make informed decisions to maintain your chimney’s safety and efficiency. Next, we’ll wrap up with insights on when to call a professional and the importance of regular inspections.
Conclusion
When it comes to chimney mortar repair, knowing when to call a professional is crucial. While some minor repairs can be handled as DIY projects, there are situations where expert help is essential. If you encounter extensive damage, structural issues, or simply feel unsure about tackling the repair yourself, it’s time to contact professionals like us at Gerrior Masonry & Landscaping.
Why Choose Gerrior Masonry & Landscaping?
Based near Woburn, MA, we have over 30 years of experience in masonry and chimney repairs. Our skilled team, combined with owner oversight on projects, ensures high-quality results that stand the test of time. We serve many locations, including Andover, Arlington, Bedford, and more, providing reliable and efficient service.
The Importance of Regular Inspections
Regular chimney inspections are vital for catching minor issues before they become major problems. Just like routine car maintenance, chimney check-ups prevent costly repairs down the road. Annual inspections by certified professionals can identify hidden cracks, water damage, or deteriorating mortar that aren’t visible to the untrained eye.
Safety and Longevity
Our primary goal is to ensure your chimney’s safety and longevity. A well-maintained chimney not only improves your home’s efficiency but also protects against potential hazards like fires or carbon monoxide leaks. By addressing issues early, you can extend the life of your chimney and enjoy a safe, warm home.
For expert advice and service, reach out to us at Gerrior Masonry & Landscaping. Your home deserves the best care, and we’re here to provide it.
Chimney Replacement: Top 5 Essential Signs in 2025
When facing the prospect of chimney replacement, homeowners often have one crucial question: How do I know when it’s time to replace my chimney? A chimney is a vital part of your home, not just for warmth and comfort but also for safely venting hazardous gases. On average, a chimney can last over 100 years with regular maintenance. However, neglect can accelerate wear and demand a full replacement sooner.
To help you decide if you need a chimney replacement, consider these quick pointers:
Lifespan: Most chimneys can last a century, but this depends on the materials and maintenance.
Signs of Damage: Look for efflorescence, cracked mortar joints, and a cracked crown.
Inspection: Regular inspections are crucial for identifying problems early and avoiding costly repairs.
I’m Joe Gerrior, with a wealth of experience in chimney replacement and related masonry services. Over the last 34 years, I’ve dedicated our family-owned business, Gerrior Masonry & Landscaping, to offering top-notch, reliable services that safeguard your home and improve its beauty.
You might love the cozy charm of a fireplace, but a damaged chimney can be a hidden danger. Here are some signs that it might be time for a chimney replacement.
Efflorescence
Efflorescence appears as a white, powdery substance on your chimney’s exterior. This is a clear signal that water is penetrating your chimney. While it might look like a minor cosmetic issue, it often indicates more severe water damage inside. Water can lead to mold growth and structural damage not just in the chimney, but also in other parts of your home.
Cracked Mortar Joints
Mortar joints are vital for holding your chimney together. If these joints crack or have gaps, they become weak spots where water can easily seep in. In cold weather, this water can freeze and expand, causing even more damage. This can lead to smoke and heat escaping in unwanted places, and in worst cases, a chimney collapse.
Regular inspections by a chimney professional can spot these problems early, even if the cracks are inside the firebox where you can’t see them.
Cracked Crown
The crown is the protective top layer of your chimney, keeping out rain, snow, and critters. A cracked crown can allow water to enter and cause significant damage. Small cracks can sometimes be repaired, but large cracks or crumbling crowns might mean you need a full replacement.
Each of these signs—efflorescence, cracked mortar joints, and a cracked crown—can indicate serious issues that may require a chimney replacement. Ignoring these problems can lead to bigger risks, like structural damage or dangerous gases entering your home. Regular maintenance and inspections can help you catch these issues early, keeping your home safe and secure.
Next, we’ll explore the chimney replacement process, detailing the steps involved in ensuring your chimney is both safe and efficient.
Chimney Replacement Process
Replacing a chimney might sound daunting, but understanding the process can make it much easier. Let’s break it down into three main parts: inspection, partial rebuild, and full rebuild.
Inspection
Before any work begins, a thorough inspection is crucial. A professional will examine your chimney for damage, checking for cracks, water infiltration, and structural integrity. This step helps determine the extent of the damage and whether a partial or full rebuild is necessary. Regular inspections can catch issues early, potentially saving you from more costly repairs down the line.
Partial Rebuild
If the damage is limited, a partial rebuild might be all you need. This involves repairing or replacing sections of the chimney that are damaged, such as the mortar joints or the chimney crown. A partial rebuild can be a cost-effective way to restore your chimney’s functionality and safety without the expense of a complete overhaul.
Partial rebuilds often focus on:
Cracked Mortar Joints: Repointing the mortar to restore strength and prevent water ingress.
Cracked Crown: Repairing or replacing the crown to protect against water damage.
Full Rebuild
In cases of severe damage, a full rebuild might be necessary. This involves dismantling the existing chimney and constructing a new one from the ground up. While more expensive, a full rebuild ensures that your chimney is safe, efficient, and built to last.
A full rebuild includes:
Foundation Work: Ensuring a solid base for the new chimney.
New Materials: Using high-quality bricks or stones and durable mortar.
Modern Safety Features: Incorporating flue liners and caps to improve performance and safety.
Both partial and full rebuilds require skilled masonry work to ensure the chimney not only looks good but also functions properly. Whether you’re dealing with minor repairs or a complete replacement, professional expertise is essential for a successful outcome.
Stay tuned as we dig into the costs associated with chimney replacement, helping you understand what to expect financially.
Costs of Chimney Replacement
When considering chimney replacement, it’s important to understand the costs involved. These costs can vary based on materials, labor, and the extent of the work needed. Let’s break it down.
Material Costs
The materials you choose for your new chimney can significantly impact the overall cost. Here are some common options:
Brick: Known for its classic look and durability, brick is a popular choice. It’s typically more expensive due to its high-quality appearance and longevity.
Stone: Offers a rustic and unique aesthetic. Stone can be more costly than brick due to its weight and the complexity of installation.
Concrete Blocks: A cost-effective alternative, concrete blocks are sturdy and provide good insulation.
Choosing the right material is crucial for both the appearance and durability of your chimney.
Labor Costs
Labor is another major component of chimney replacement costs. Skilled masonry work is essential to ensure your chimney is safe and functional. The complexity of the job, such as whether it’s a partial or full rebuild, will influence labor costs.
Partial Rebuild: Generally less costly, as it involves repairing specific sections.
Full Rebuild: More expensive due to the need for complete dismantling and reconstruction.
Hiring experienced professionals is vital to ensure the job is done correctly and safely.
Average Price Range
The total cost for chimney replacement can vary widely. Here’s a general idea of what you might expect:
Full Chimney Replacement: On average, costs around $9,300. This includes both material and labor expenses for a complete overhaul.
Partial Chimney Rebuild: Typically costs about $2,500. This is a more budget-friendly option if only certain sections need repair.
Chimney Extension: Also averages around $2,500, if you’re looking to increase the height of your chimney.
These figures are averages and can fluctuate based on location, specific materials chosen, and the contractor’s expertise.
Understanding these costs can help you budget effectively for your chimney project. Next, we’ll explore the benefits of replacing your chimney, from improved safety to improved curb appeal.
Benefits of Chimney Replacement
When it comes to chimney replacement, the benefits go beyond just a new look. Let’s explore the key advantages: safety, structural integrity, and aesthetic improvement.
Safety
First and foremost, safety is a major reason to consider replacing your chimney. A damaged chimney can pose serious risks, including:
Carbon Monoxide Leaks: Cracks or gaps can allow harmful gases to seep into your home.
Fire Hazards: Accumulated creosote and soot can ignite, leading to chimney fires.
Replacing your chimney ensures that these risks are minimized, providing peace of mind for you and your family.
Structural Integrity
A new chimney also means improved structural integrity. Over time, weather exposure, age, and water damage can lead to:
Cracked Mortar Joints: These can weaken the chimney, making it unstable.
Efflorescence: White stains that indicate water penetration, which can lead to further damage.
A replacement addresses these issues, ensuring your chimney is strong and stable, and preventing costly future repairs.
Aesthetic Improvement
Finally, don’t underestimate the aesthetic boost a new chimney can bring. Whether you choose brick, stone, or another material, a new chimney can improve your home’s curb appeal. Here’s how:
Modern Look: Update your home’s appearance with a sleek, new design.
Increased Value: A well-maintained chimney can add to your home’s market value, attracting potential buyers.
In summary, a chimney replacement not only ensures safety and structural soundness but also refreshes your home’s exterior look. Next, we’ll address some frequently asked questions about chimney replacement.
Frequently Asked Questions about Chimney Replacement
How much does it cost to replace a chimney top?
Replacing a chimney top, or chimney cap, is a crucial part of maintaining your chimney’s health. The cost can vary depending on the material you choose. On average, you might spend between $300 and $1,200 for a new chimney cap.
Material Options:
Stainless Steel: Durable and rust-resistant, costing around $300 to $600.
Copper: Offers a premium look and lasts long, but it’s pricier at $600 to $1,200.
Aluminum: Lightweight and affordable, typically ranging from $150 to $300.
A well-chosen chimney cap not only protects your chimney from water and debris but also prevents animals from nesting inside.
How often does a chimney need to be replaced?
The lifespan of a chimney depends on its material and maintenance. Generally, chimneys can last several decades if properly cared for.
Brick Chimneys: With regular maintenance, a brick chimney can last 50 to 100 years. However, they require periodic repairs like repointing to ensure longevity.
Metal Chimneys: Made from materials like stainless steel or aluminum, these chimneys typically last 15 to 25 years. They are less durable than brick but easier to install and maintain.
Regular inspections and maintenance can significantly extend the lifespan of any chimney.
What are the risks of not replacing a damaged chimney?
Ignoring a damaged chimney can lead to serious problems, impacting both safety and home integrity.
Carbon Monoxide Leaks: Gaps or cracks in the chimney can allow this dangerous gas to enter your home, posing a health risk.
Creosote Buildup: This tar-like substance can accumulate in chimneys, increasing the risk of a chimney fire if not addressed.
Smoke and Soot Damage: A compromised chimney can cause smoke to back up into your home, leading to soot stains and poor indoor air quality.
Addressing these issues with a timely chimney replacement is essential for maintaining a safe and healthy home environment.
Next, we’ll explore the expert services offered by Gerrior Masonry & Landscaping and their commitment to high-quality results.
Conclusion
At Gerrior Masonry & Landscaping, we are dedicated to providing expert services that ensure your chimney is not just functional but also safe and aesthetically pleasing. With over 30 years of experience, our skilled team, led by owner oversight, guarantees high-quality results for every project.
Why Choose Us?
Expertise in Chimney Replacement: Our team specializes in both partial and full chimney rebuilds. We ensure each project is custom to meet your specific needs, whether you’re dealing with cracked mortar joints or a compromised chimney crown.
High-Quality Materials: We use only the best materials to improve the longevity and safety of your chimney. From durable bricks to premium metal options, we help you choose the right materials for your home.
Comprehensive Services: Beyond chimney replacement, we offer a range of masonry and hardscaping services, including patio installations, walkways, and foundation repairs. Our goal is to improve both the functionality and beauty of your home.
Customer Satisfaction: Our clients’ peace of mind is our top priority. We ensure that every project is completed with meticulous attention to detail, keeping you informed every step of the way.
Investing in a chimney replacement not only improves the safety and structural integrity of your home but also adds to its aesthetic appeal. If you suspect your chimney needs attention, don’t wait—reach out to us for a professional assessment.
Learn more about our services and how we can help with your chimney needs by visiting our Chimney Repair Services. Your home deserves the best care, and we’re here to provide it.
Chimney masonry repair is essential for maintaining the safety and efficiency of your home, especially if you have an older house. For those with masonry fireplaces, common issues like crumbling brick, spalling, or damaged mortar joints can compromise the structure and function of the chimney. Here are quick points to address the need for chimney repairs:
Check for visible cracks or spalling bricks in your chimney structure.
Schedule annual inspections to catch damage early and prevent costly repairs.
Be alert to water damage near your chimney, as this can lead to more severe masonry issues.
Older homes, particularly those over 60 years, often have masonry-based chimneys requiring more frequent attention. Regular maintenance is crucial to prevent fire hazards and ensure your chimney safely vents smoke and gases.
I’m Joe Gerrior, owner of Gerrior Masonry & Landscaping. With over three decades of experience in the industry, I’ve seen the importance of timely chimney masonry repair to maintain a home’s integrity and ensure safety.
Chimney masonry repair is a crucial aspect of maintaining your home’s safety and structural integrity. For many older homes, masonry fireplaces and chimneys are not just aesthetic features but vital components that require regular attention. Here’s what you need to know:
Tuckpointing
Tuckpointing is the process of repairing mortar joints in masonry. Over time, weather and natural wear can cause these joints to deteriorate, leading to gaps that can compromise the chimney’s stability. By removing old, crumbling mortar and replacing it with new mortar, tuckpointing restores the chimney’s strength and prevents water infiltration. This process not only improves the appearance of the chimney but also extends its lifespan.
Mortar Joints
Mortar joints are the spaces between the bricks filled with mortar. These joints are essential for holding the structure together. However, they are also the most vulnerable to damage from moisture, freeze-thaw cycles, and general aging. Regular inspection of mortar joints can help identify areas needing repair before they lead to more significant structural issues. When mortar joints are compromised, the entire chimney’s stability is at risk.
Structural Integrity
The structural integrity of a chimney is paramount. A well-maintained chimney ensures that harmful gases like carbon monoxide are effectively vented out of your home. Compromised structural integrity can lead to leaning chimneys, cracks, or even collapse, posing serious safety hazards. Regular maintenance, including tuckpointing and replacing damaged bricks, helps maintain the chimney’s structural integrity, ensuring it remains safe and functional.
In summary, chimney masonry repair is not just about fixing visible damage. It’s about preserving the structural integrity of your home and ensuring the safety of its occupants. Regular inspections and timely repairs can prevent minor issues from becoming major problems.
Next, we’ll explore common chimney problems and their solutions, helping you understand what to look out for and how to address these issues effectively.
Common Chimney Problems and Solutions
Chimneys, especially in older homes, can face a variety of issues. Knowing what to look for can help you tackle problems before they become serious.
Crumbling Mortar
Crumbling mortar is a common sign of wear and tear in chimneys. Over time, weather conditions and age cause the mortar between bricks to deteriorate. This not only affects the appearance but also weakens the chimney’s structure.
Solution: Tuckpointing is the go-to method for fixing crumbling mortar. This involves removing the damaged mortar and replacing it with fresh mortar. It’s a simple but effective way to restore your chimney’s strength and prevent further damage.
Chimney Flue
The chimney flue is the passage that allows smoke and gases to exit your home. A blocked or damaged flue can lead to dangerous conditions, including carbon monoxide buildup.
Solution: Regular inspections are key. Look for signs of blockages or damage, such as unusual smoke patterns or odors. Professional cleaning and repair can ensure your flue is clear and functioning properly. Chimney liners can also be installed to protect the flue and improve efficiency.
Chimney Caps
Chimney caps are protective covers that sit on top of the chimney. They prevent debris, rain, and animals from entering the chimney. A missing or damaged cap can lead to water damage and blockages.
Solution: Install or replace chimney caps to keep your chimney in good condition. They are a simple and cost-effective way to protect your chimney from external elements. Regular checks will ensure they remain intact and functional.
By addressing these common problems, you can maintain your chimney’s safety and efficiency. Regular maintenance and quick action on repairs will keep your chimney in top shape.
Next, we’ll discuss the importance of regular inspections and how they can help catch problems early.
The Importance of Regular Inspections
Regular inspections are essential for keeping your chimney safe and efficient. Without them, small issues can turn into big problems.
Annual Inspections
Getting your chimney inspected at least once a year is crucial. Many problems, like creosote buildup or minor cracks, are not visible to the untrained eye. An annual inspection helps catch these issues early before they escalate into costly repairs or safety hazards.
Video Cameras
Modern inspections often use video cameras. These tools allow professionals to see deep inside your chimney, reaching areas that are otherwise inaccessible. This technology provides a clear picture of the chimney’s condition, making it easier to spot cracks, blockages, or other hidden problems.
Early Detection
Early detection is key to avoiding major repairs. For example, a small crack can let moisture in, which can freeze and expand, causing more damage. By spotting these issues early, you can address them before they worsen.
Regular inspections save you time, money, and stress in the long run. They ensure your chimney remains safe, efficient, and in good working order. Next, we’ll explore the differences between DIY and professional chimney repair.
DIY vs. Professional Chimney Repair
When it comes to chimney masonry repair, deciding between doing it yourself or hiring a professional is a big choice. Both have their pros and cons, but safety, skill, and cost are key factors to consider.
Safety Considerations
Safety should always come first. Working on a chimney involves heights, heavy materials, and sometimes hazardous conditions. If you’re not used to this kind of work, it can be risky. Falls, injuries, or damage to your home can occur if you’re not careful.
Professional chimney repair experts are trained to handle these risks. They know how to work safely on roofs and with masonry materials. They also have the right tools and equipment, like scaffolding and safety harnesses, to do the job safely.
Qualified Experts
Hiring qualified experts ensures the job is done right. Professionals have the experience to spot issues that might not be obvious. They understand the complexities of chimney systems and can provide high-quality repairs that last.
For example, complex cracks or structural concerns should always be handled by a professional. These issues might indicate deeper problems that require expert assessment and repair. Professionals like those at Gerrior Masonry & Landscaping have the expertise to tackle these challenges safely and efficiently.
Repair Costs
Cost is often a deciding factor. DIY repairs can save money on labor, but they might end up costing more if not done correctly. Mistakes can lead to bigger problems, which can be expensive to fix.
Professional repairs might seem costly upfront, but they often save money in the long run. Experts ensure that repairs meet safety standards and extend the life of your chimney. Plus, many professionals offer free estimates, so you know what to expect before work begins.
In summary, while DIY repairs can be suitable for minor issues, major repairs should be left to professionals. This choice ensures your chimney remains safe and efficient, protecting your home and family. Up next, we’ll answer some common questions about chimney masonry repair.
Frequently Asked Questions about Chimney Masonry Repair
How do you repair a crack in a chimney masonry?
Repairing a crack in chimney masonry often involves using high-heat mortar and a caulk gun. High-heat mortar is essential because it can withstand the intense temperatures that chimneys are exposed to. To repair a crack:
Clean the Area: Remove any loose debris from the crack using a brush.
Prepare the Mortar: Mix the high-heat mortar according to the instructions.
Apply the Mortar: Use a caulk gun to fill the crack with the mortar. Ensure the mortar fills the entire crack.
Smooth the Surface: Use a trowel to smooth the mortar, ensuring a clean finish.
This method helps prevent further water damage and maintains the chimney’s structural integrity.
How much does it cost to repair mortar joints on a chimney?
The cost of repairing mortar joints, a process known as repointing, can vary. Repointing involves removing damaged mortar and replacing it with new mortar. The price depends on factors such as labor costs, the extent of the damage, and the chimney’s height and location. On average, homeowners might expect to pay between $500 and $2,500 for repointing services.
Labor costs can significantly affect the final bill. Hiring skilled professionals ensures the job is done correctly, which can save money in the long run by preventing future issues.
What is the best mortar for chimney repair?
For chimney repair, Type N mortar is often recommended. This type of mortar is known for its strength and flexibility, making it ideal for withstanding the natural expansion and contraction of masonry materials. It offers a good balance between durability and workability, which is crucial for maintaining the chimney’s structure over time.
Type N mortar is versatile and can be used for both above-grade and exterior applications, making it a reliable choice for various masonry repair projects.
Conclusion
At Gerrior Masonry & Landscaping, we understand that your home is more than just a building—it’s a sanctuary. That’s why we are committed to providing top-notch chimney masonry repair services that prioritize the safety and comfort of your home. With over 30 years of experience, our skilled team delivers high-quality results that stand the test of time.
Our expertise in masonry and hardscaping services is backed by our dedication to craftsmanship and customer satisfaction. Every project is overseen by the owner, ensuring meticulous attention to detail and a personal touch. This hands-on approach has earned us the trust of homeowners throughout the Woburn, MA area and beyond.
Why Choose Us?
Skilled Team: Our team consists of seasoned professionals who are passionate about delivering exceptional service.
High-Quality Results: We use the best materials and techniques to ensure your chimney is safe and efficient.
Comprehensive Services: From routine maintenance to urgent repairs, we handle all aspects of chimney care.
Customer Satisfaction: We stand by our work and are always ready to address any concerns you might have.
Investing in regular chimney maintenance and repair can prevent costly issues down the line, ensuring your home remains a safe haven for your family. If you’re in need of expert chimney repair services, look no further than Gerrior Masonry & Landscaping.
For more information on how we can help with your chimney needs, visit our Chimney Repair Services page. Let us bring our expertise to your home and experience the Gerrior difference today!