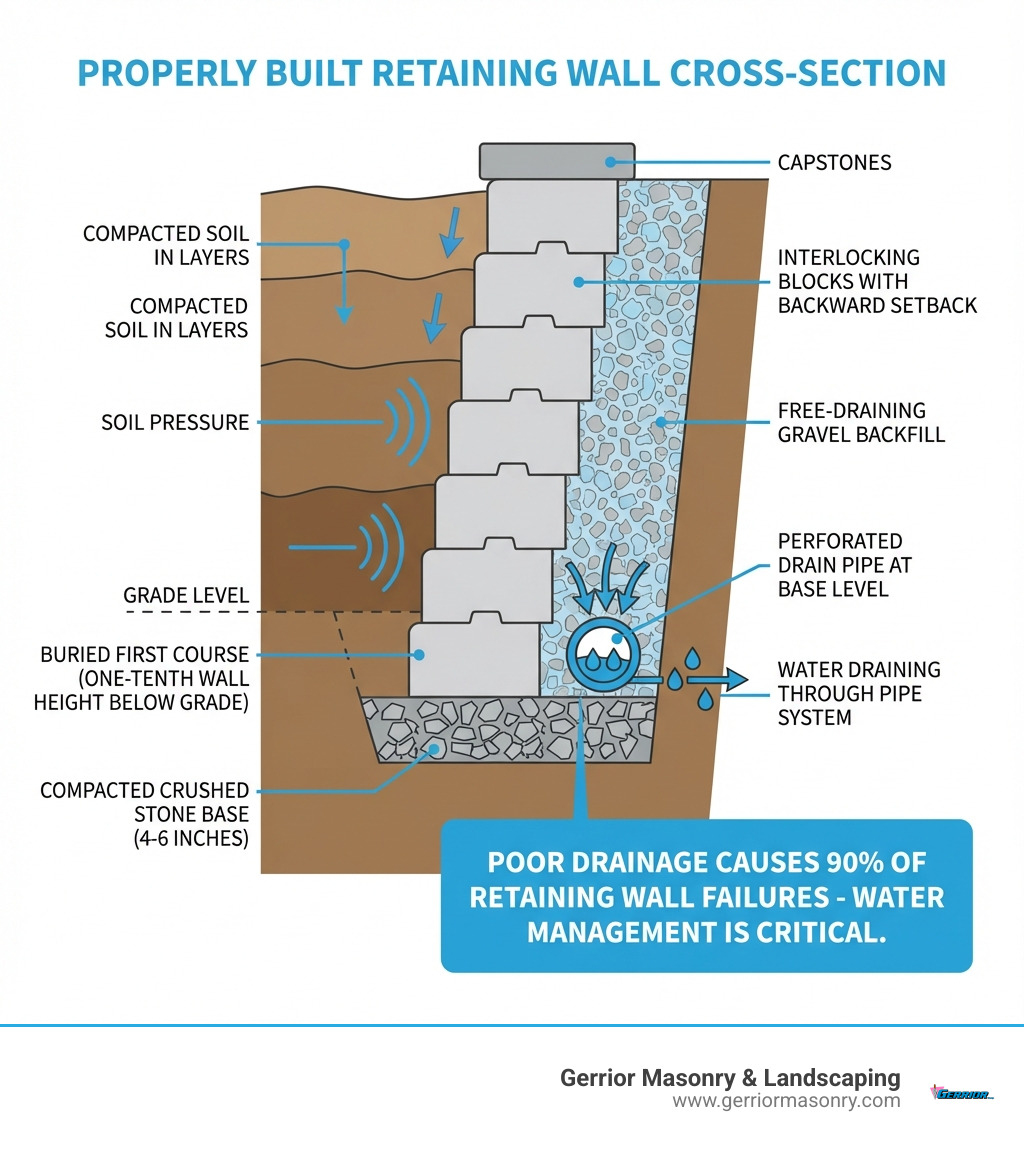
Install drainage – Add perforated pipe and gravel backfill.
Backfill and compact – Fill in layers, compacting thoroughly.
Add capstones – Secure the top course with construction adhesive.
Critical Success Factors:
Drainage is #1 – Poor drainage causes most retaining wall failures.
Compact the base – A solid foundation prevents settling.
Bury the bottom – The first course must be below ground for stability.
Get permits – Walls over 4 feet typically require engineering and permits.
A sloped yard in Massachusetts can feel like wasted space, prone to soil erosion during heavy New England storms and challenging to mow or landscape. A well-built retaining wall is the ultimate solution, transforming that problematic hillside into beautiful, functional, and level terraces perfect for patios, gardens, or play areas. It not only maximizes your usable property but also provides critical structural support and erosion control. While building a low-level retaining wall (under 4 feet) is a manageable DIY project, understanding the forces at play is crucial. The key is knowing how to manage immense soil pressure and why water management is the single most important factor for a long-lasting, successful wall.
I’m Joe Gerrior, owner of Gerrior Masonry & Landscape Construction Corp. With over 34 years of experience serving Massachusetts homeowners, my team and I have built countless retaining walls that combine structural integrity with visual appeal, turning problematic slopes into stunning landscape features.
Before digging, careful planning is crucial for a successful retaining wall project. This phase involves assessing your land, choosing the right materials, and understanding local regulations.
Choosing Your Materials: Pros, Cons, and Costs
The material you choose impacts aesthetics, durability, cost, and installation complexity. Here’s a rundown of common options:
Interlocking Concrete Blocks: A popular choice for DIYers due to their ease of installation and versatility.
Pros: Durable, many styles/colors, easy to install for low walls.
Cons: Can look less natural than stone, prone to efflorescence.
Average Cost: Based on internet data, $25 – $85 per square foot.
Pressure-Treated Timber: Offers a rustic, natural look.
Pros: Cost-effective, easy to work with, natural aesthetic.
Cons: Shorter lifespan (15-20 years), prone to rot and insects, can warp.
Average Cost: Based on internet data, $20 – $80 per square foot.
Natural Stone: For a premium, timeless look, natural stone retaining walls offer unparalleled beauty and longevity. Options like New England fieldstone or classic granite create a structure that is both a functional wall and a stunning landscape feature.
Pros: Extremely durable, lasts a lifetime, beautiful and unique aesthetic that blends seamlessly with the natural environment.
Cons: Most expensive material, requires skilled masonry work to fit and place irregular stones, difficult for DIYers.
Average Cost: Based on internet data, $40 – $280+ per square foot, depending on stone type and complexity.
Poured Concrete: Offers superior strength and durability for demanding situations.
Pros: Very strong, highly durable, can be customized.
Cons: Industrial look unless faced, requires professional pouring, not a DIY project.
Average Cost: Based on internet data, $60 – $210 per square foot.
Here’s a quick comparison of these materials:
Material
Average Cost (per sq. ft.)*
Lifespan
DIY-Friendliness
Aesthetic
Interlocking Concrete Blocks
$25 – $85
Very Long
High
Modern, structured, varied colors/textures
Pressure-Treated Timber
$20 – $80
15-20 years
Medium
Rustic, natural, blends with woodsy settings
Natural Stone
$40 – $280+
Lifetime (with proper install)
Low
Timeless, organic, high-end
Poured Concrete
$60 – $210
Very Long
Low
Industrial (can be faced), strong
*Please note: These are average costs based on internet data and not actual costs for Gerrior Masonry services. Project costs can vary significantly based on design complexity, site accessibility, and specific material choices.
Key Considerations Before You Build Retaining Walls
Before you pick up a shovel, assess your property and understand the rules.
Slope, Layout, and Location
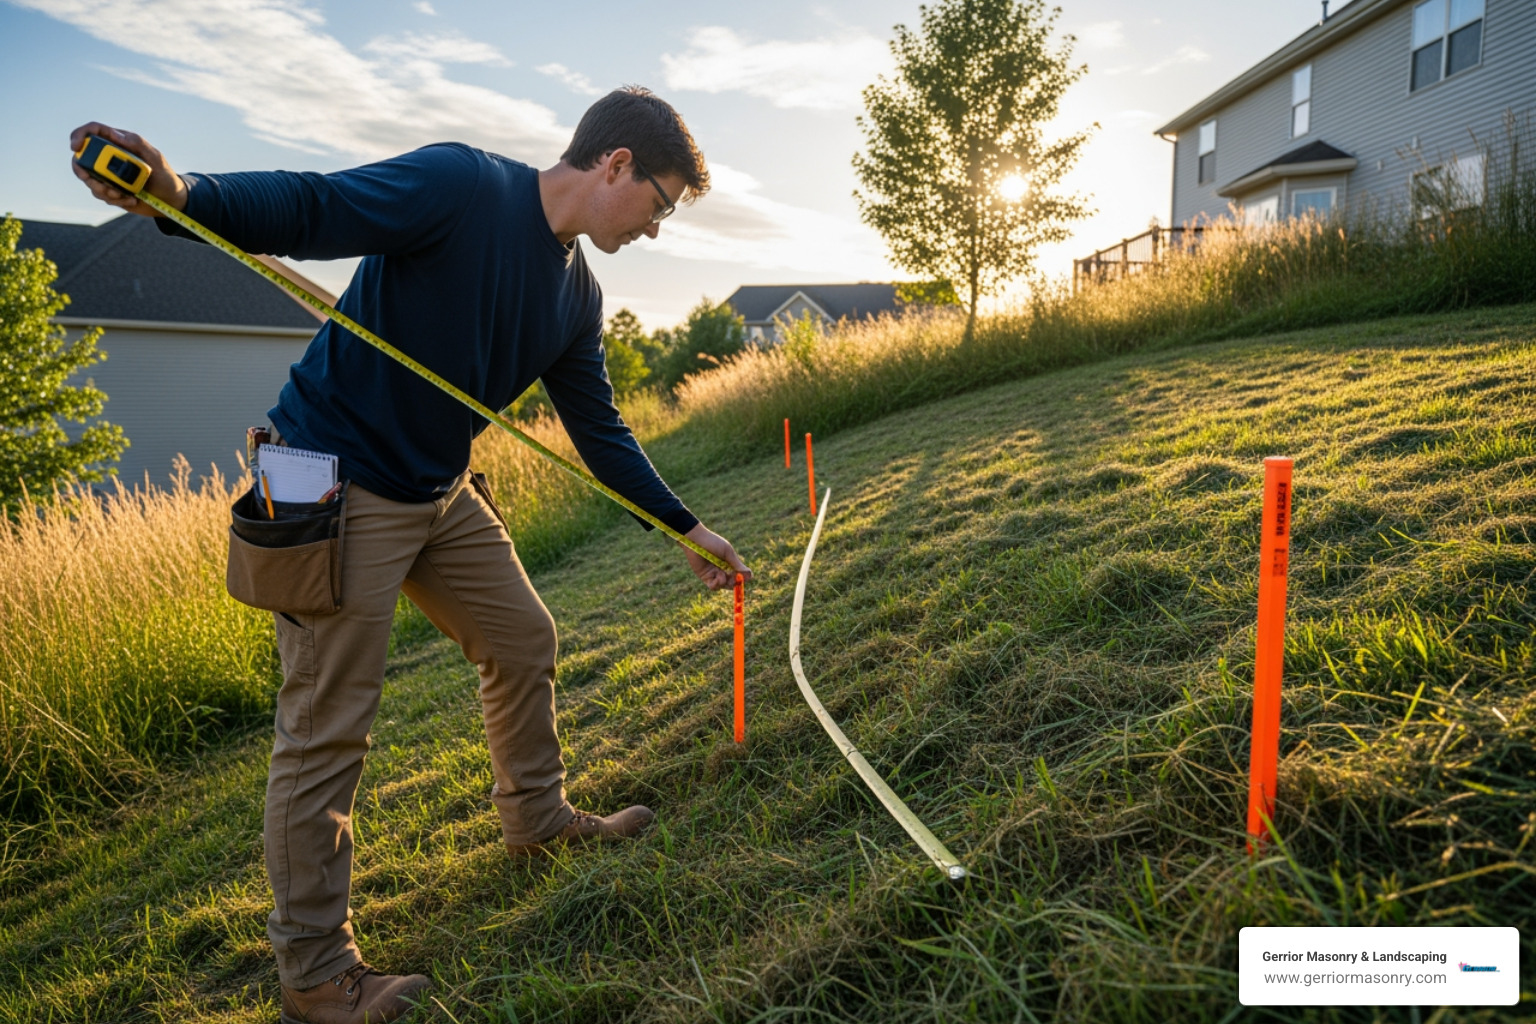
The slope of your land is a critical factor. Steeper slopes exert more pressure, demanding stronger designs. Learn more about how to build a retaining wall on a slope. Plan your layout by placing stakes to mark the front of the wall. Use a string line or garden hose to mark the entire length, ensuring it integrates with your landscape.
Building Codes, Permits, and Frost
In Massachusetts, walls over 4 feet tall or those supporting critical loads (like a driveway or pool) often require professional engineering and permits. Always check with your local municipality, as ignoring regulations can lead to fines or forced removal. You should hire a professional engineer if your wall exceeds 4 feet, supports heavy loads, is on a steep slope, or is part of a tiered system. Also, consider frost heave; your wall’s foundation must extend below the local frost line. You can Find your area’s frost line depth to plan accordingly.
Call Before You Dig
Before any excavation, it is legally required to call 811 (Dig Safe in Massachusetts) a few days in advance. This free service marks the approximate location of underground utility lines on your property, including gas, electric, and communication cables. Digging without this clearance is dangerous and can lead to costly repairs and fines. Plan this into your project timeline.
Gathering Your Tools and Materials
Gather the right tools and materials to make construction smoother. Purchase about 10% more material than your estimates to account for cuts and errors.
Materials: Retaining wall blocks, crushed stone, landscape fabric, perforated drain pipe, construction adhesive, coarse sand, and approved backfill soil.
Safety Gear: Heavy-duty gloves, safety glasses, sturdy work boots, and a respirator mask (when cutting blocks).
The Step-by-Step Construction Guide
With planning complete and materials ready, it’s time to start building. This is where the vision for your new retaining wall takes shape. You can find more detailed instructions on retaining wall installation.
Preparing the Trench and a Stable Base
The foundation is the most critical part of your wall. A solid, level base ensures longevity and stability.
Excavate the Trench: After marking the wall’s location, dig a trench at least twice as wide as your blocks. For walls under 4 ft., dig the trench 4-6 in. deep, plus additional depth to bury the first course.
Bury the First Course: To anchor the wall, bury the first course of blocks. A good rule is to bury one-tenth of the total wall height.
Create a Leveling Pad: Add a minimum of 4 to 6 inches of crushed stone to the trench to create a firm, level base.
Compact the Base: Use a plate compactor to thoroughly compact the crushed stone. A solid base for retaining wall is essential to prevent shifting and failure.
A Step-by-Step Guide to Build Retaining Walls
With the base ready, you can begin laying the blocks. Precision is key for stability and aesthetics.
Lay the First Course: Place the first course of blocks on the compacted base, starting at the lowest point. Use a level to ensure each block is perfectly level. This first course is the most critical.
Stack Subsequent Courses: Stagger the joints of each new course by at least one-quarter of a block’s length for strength. Continuously check for level and alignment.
Use a Setback (Batter): Build the wall with a slight backward lean into the hillside. Each course should be set back slightly from the one below it to help resist soil pressure.
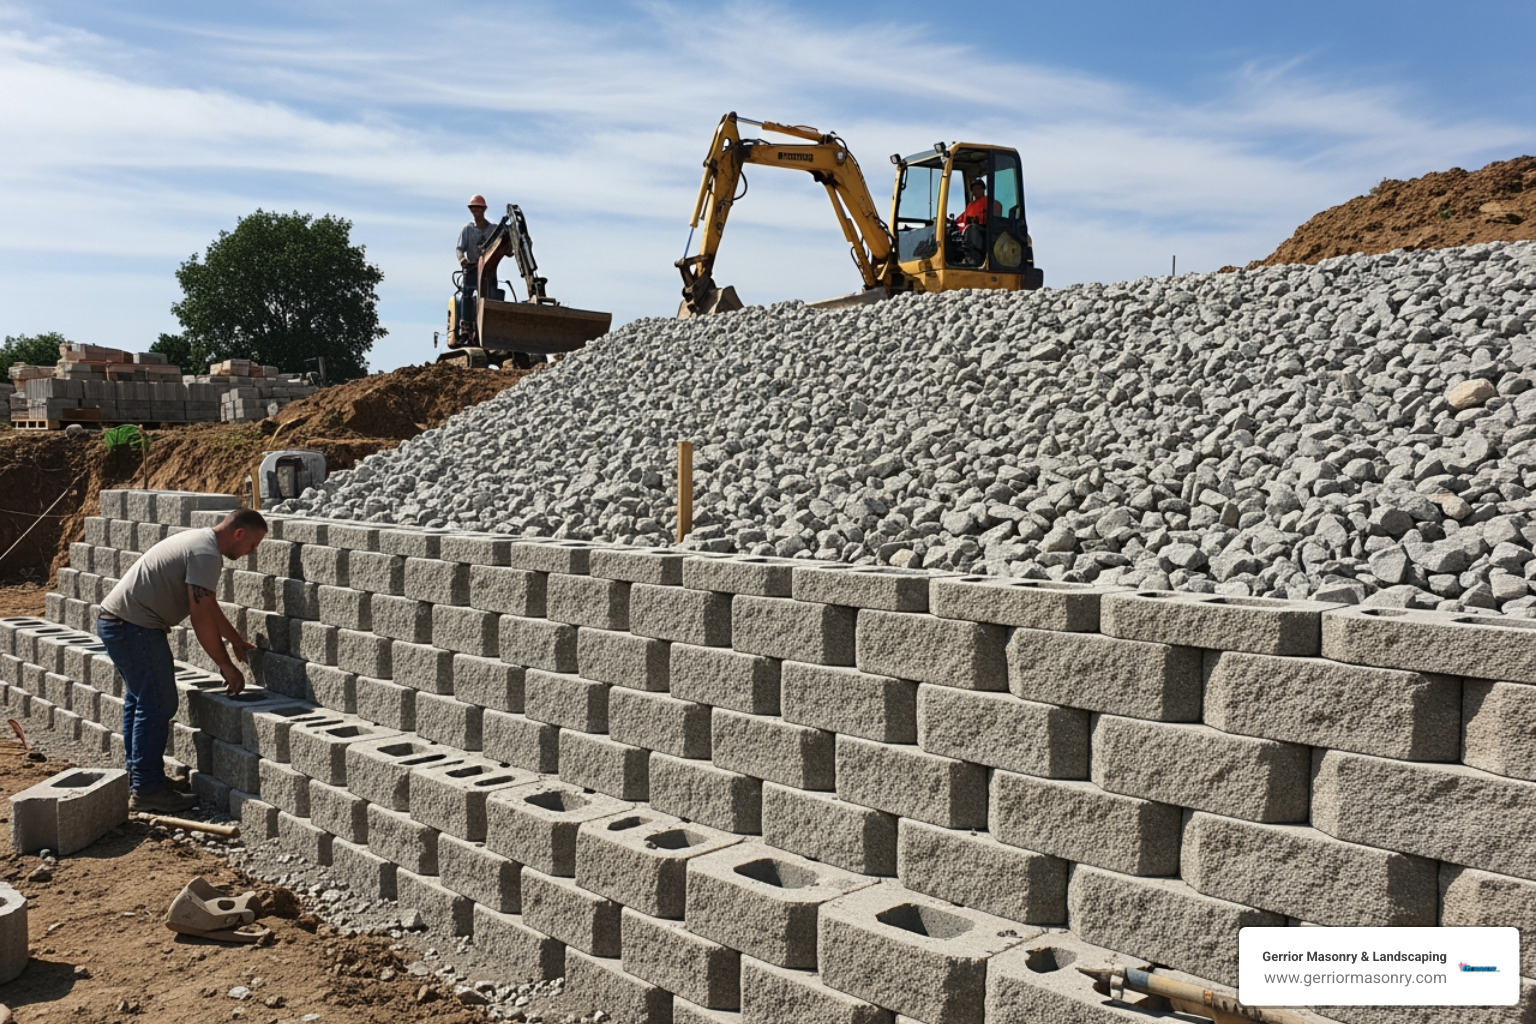
Install Drainage and Backfill: Poor drainage is the #1 cause of wall failure. As you build, install a perforated drain pipe (with holes facing down) behind the first course, sloped to drain water away to a safe location. Backfill at least 12 inches directly behind the blocks with free-draining gravel or crushed stone. This creates a drainage zone. Behind the gravel, add your native soil or approved backfill in 3-4 inch layers (lifts). It’s crucial that this soil is not heavy clay, which retains water. Thoroughly compact each lift with a plate compactor before adding the next.
Finishing Touches for a Lasting Wall
Once all courses are laid and backfilled, add the finishing touches to protect your investment.
Finalize Drainage: Ensure the perforated pipe at the base is completely surrounded by the free-draining gravel. To prevent soil from mixing with and clogging the gravel drainage zone, place a layer of professional-grade landscape fabric over the gravel, separating it from the final topsoil. Finally, grade the ground surface behind the wall to create a gentle slope that directs surface water away from the wall, not towards it.
Installing Capstones: The capstone is the final touch. Secure these top blocks with construction adhesive, creating a slight overhang for a professional look. This provides a clean, finished appearance and protects the wall from weather.
Building a retaining wall is a significant undertaking. While many smaller walls can be a rewarding DIY project, understanding the critical role of proper drainage, a stable base, and meticulous construction is essential. For walls over 4 feet tall, or for complex projects on challenging slopes, we strongly recommend consulting with a professional.
Here at Gerrior Masonry & Landscaping, we have over 30 years of experience helping homeowners in Middlesex and Essex County, Massachusetts, build retaining walls that are not only beautiful but also built to last. Our skilled team and owner oversight on every project ensure high-quality results from foundation to finish.
Why Concrete Patio Construction Matters for Your Home
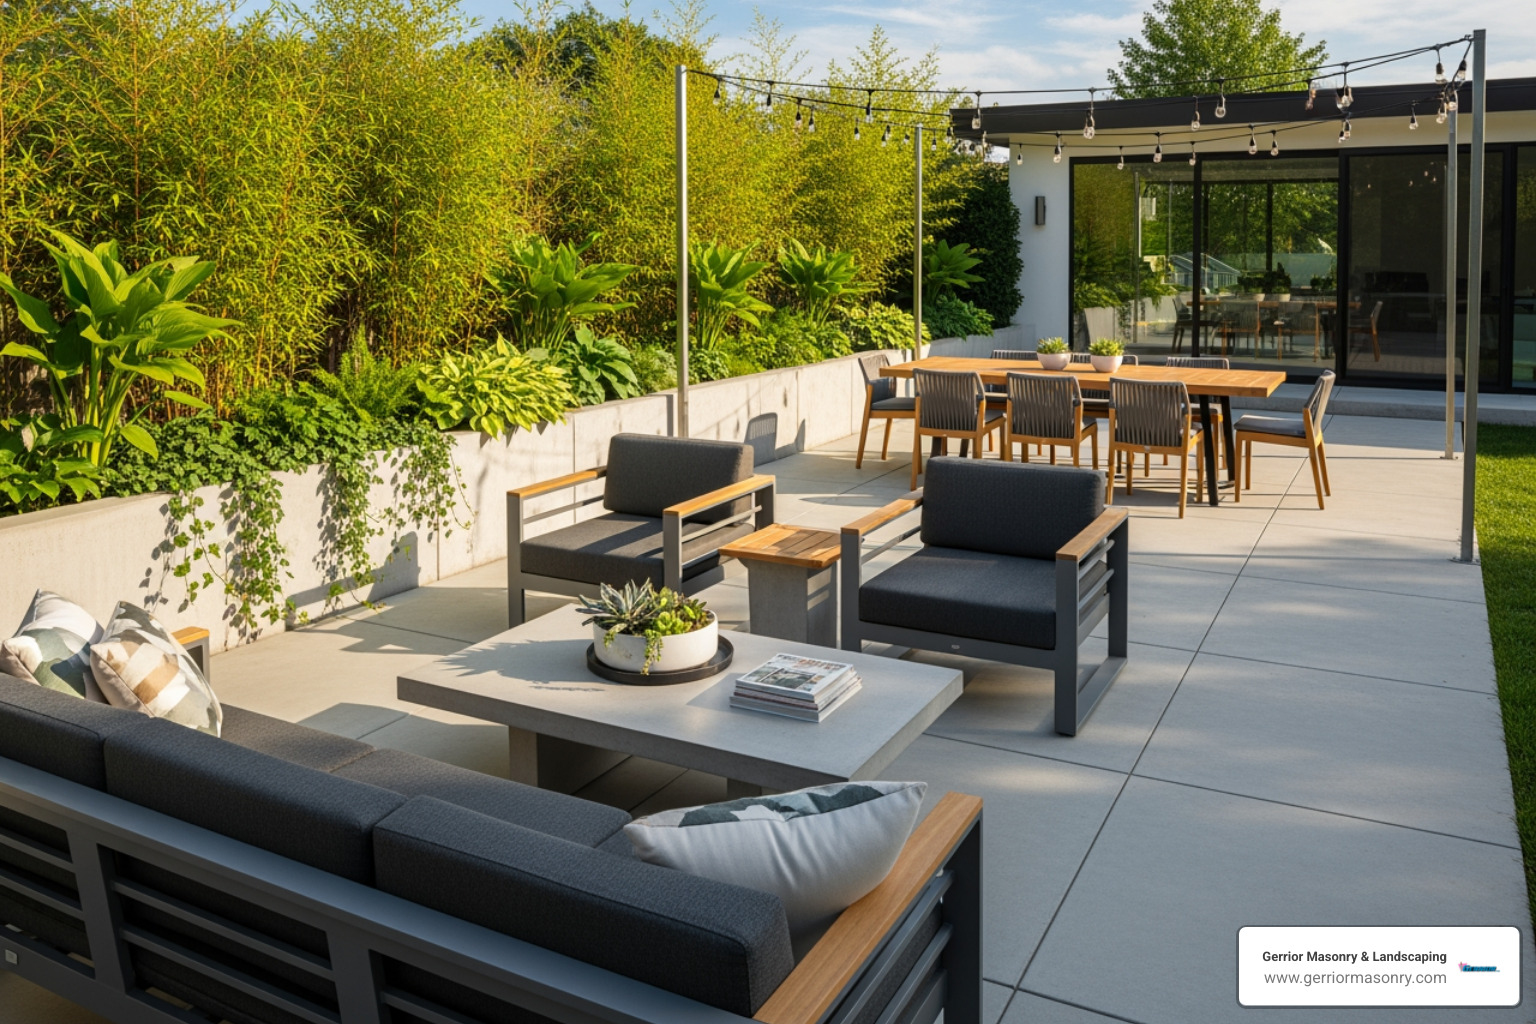
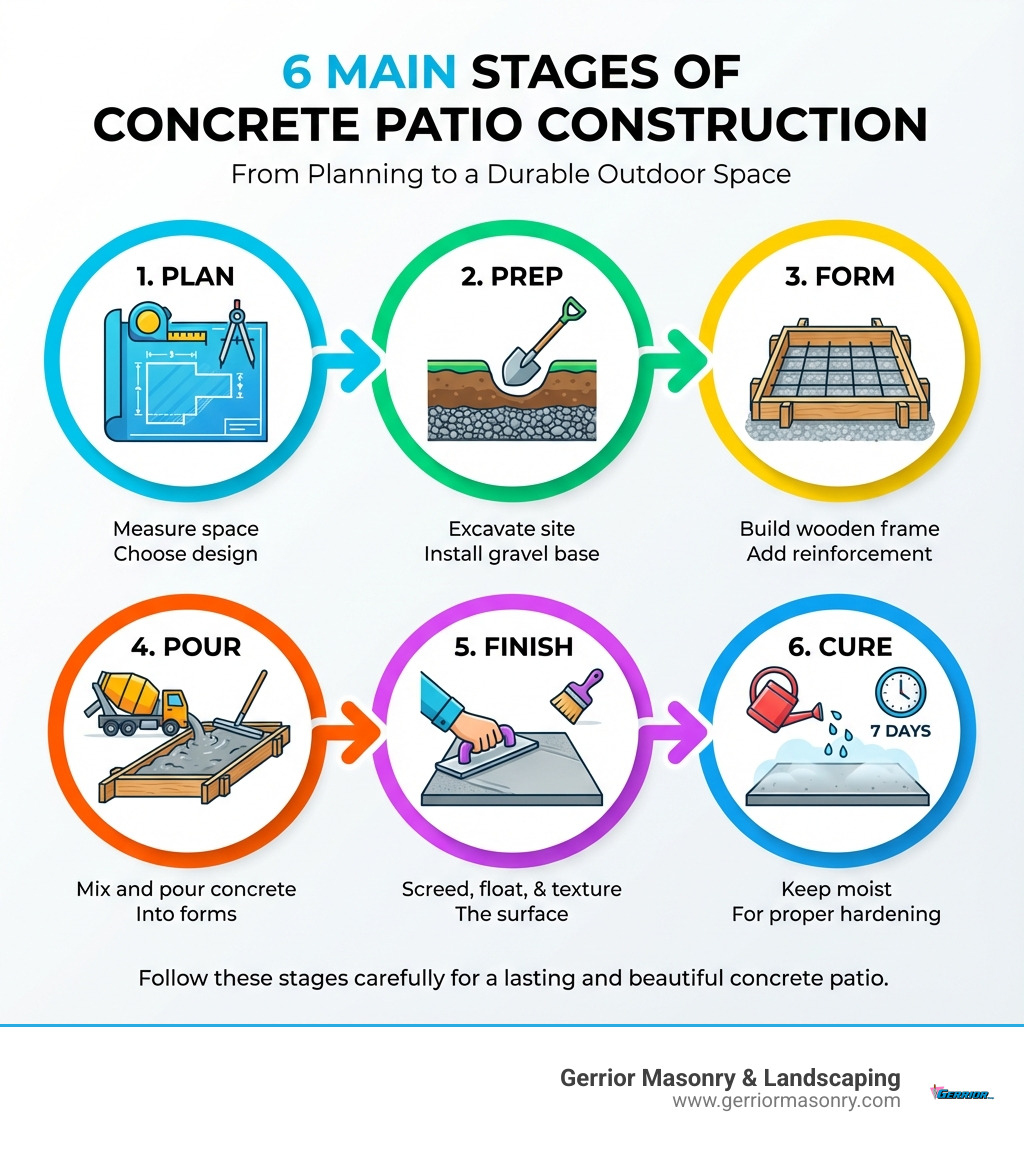
Concrete patio construction can be a rewarding project that transforms your backyard into a functional outdoor living space. A properly built patio involves careful planning, site preparation with a compacted gravel base, building forms, adding reinforcement like rebar, and then pouring, finishing, and curing the concrete. A well-executed project can last over 30 years with minimal maintenance.
Why choose concrete? It’s durable, cost-effective, and offers versatile design options, from basic gray slabs to stamped patterns that mimic stone or brick. While a DIY approach can save 40-50%, professional installation ensures optimal results, especially for complex designs.
I’m Joe Gerrior, owner of Gerrior Masonry & Landscape Construction Corp. With over 34 years of experience in concrete patio construction across Massachusetts, I’ll guide you through the proven techniques to ensure your patio stands the test of time.
Planning and Preparing for Your Concrete Patio Construction
A beautiful outdoor living space begins with meticulous planning. For concrete patio construction, a solid foundation is paramount to achieving a lasting result.
Why Choose a Concrete Patio?
Concrete patios offer a compelling blend of practicality and value. Their primary benefit is unmatched durability; a professionally installed patio can last 30 years or more, easily withstanding the harsh freeze-thaw cycles of a Massachusetts winter and the heat of summer. This longevity translates to exceptionally low maintenance. Unlike pavers with joints where weeds can grow, a solid concrete slab is a fortress against unwanted vegetation and pests.
Maintenance typically involves only occasional cleaning and resealing every 2-3 years to keep it looking new. Financially, concrete is often more cost-effective than natural stone or high-end pavers, providing a premium look without the premium price tag. Beyond the practical, modern concrete offers incredible design versatility. It’s no longer just a gray slab—it can be stamped, stained, or textured to perfectly mimic materials like slate, flagstone, or wood, complementing your home’s unique aesthetic. For more on material selection, see our guide on Choosing the Perfect Flooring Material for Your Outdoor Patio.
Understanding Costs and Design Options for Your Concrete Patio
The cost of your concrete patio construction depends on size, complexity, and finishes.
Cost Factors and Estimates:
Based on internet data, average costs can range from $12 to $20 per square foot for standard finishes. However, highly customized projects with premium stamped or colored finishes can exceed $60 per square foot.
Important Disclaimer:Please note that these cost figures are general estimates based on publicly available internet data and not actual costs for Gerrior Masonry & Landscape Construction services. Prices can vary significantly based on material costs, labor rates, site conditions, and specific design choices. For an accurate estimate for your project, we encourage you to contact us for a personalized consultation.
Decorative Finishes and Design Possibilities:
Today’s concrete offers limitless design options to create a truly custom look:
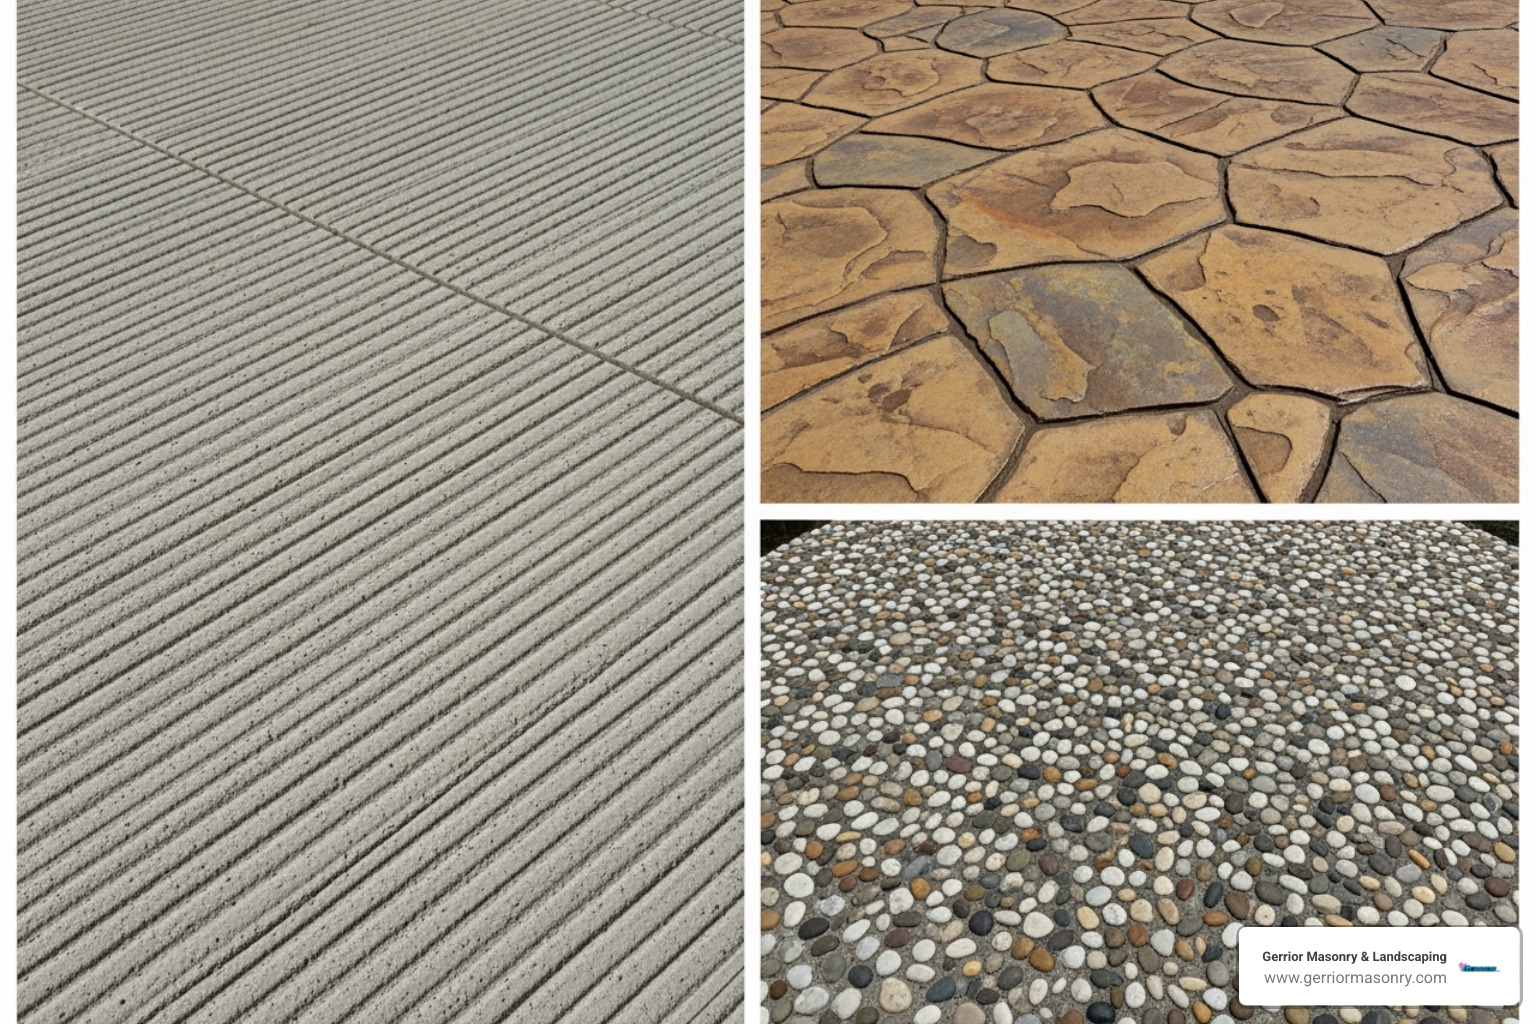
Standard Finishes: A classic non-slip broom finish is safe and attractive, while a smooth troweled finish offers a sleek, modern look for covered areas.
Stamped Concrete: This popular technique uses molds to press realistic textures like Ashlar slate, cobblestone, or wood grain into fresh concrete, offering the beauty of natural materials with superior durability.
Stains and Colors: Color can be mixed in before pouring (integral color) for a deep, consistent hue, or applied topically after curing. Acid stains create rich, marbled tones, while water-based stains offer a wider, more opaque palette of colors.
Exposed Aggregate: This finish reveals the natural stones within the mix by removing the top layer of cement paste, providing a beautiful, durable, and highly slip-resistant surface.
Patio Placement Considerations:
Strategic placement is key to maximizing your patio’s usability. Think about sun exposure—do you want a sunny spot for morning coffee or a shaded area for relief from the hot afternoon sun? Consider prevailing winds and how you might use landscaping or structures to create a comfortable microclimate. Ensure easy access from your house, typically from a kitchen or living area. The transition from your home’s doorway to the patio should be seamless and safe, ideally no more than an 8-inch step down. Also, consider privacy from neighbors and proximity to utilities if you plan to include features like an outdoor kitchen, lighting, or a water feature.
Essential Site Prep for a Durable Concrete Patio Construction
Proper site preparation is the most critical phase for a long-lasting patio.
1. Excavation and Gravel Base:
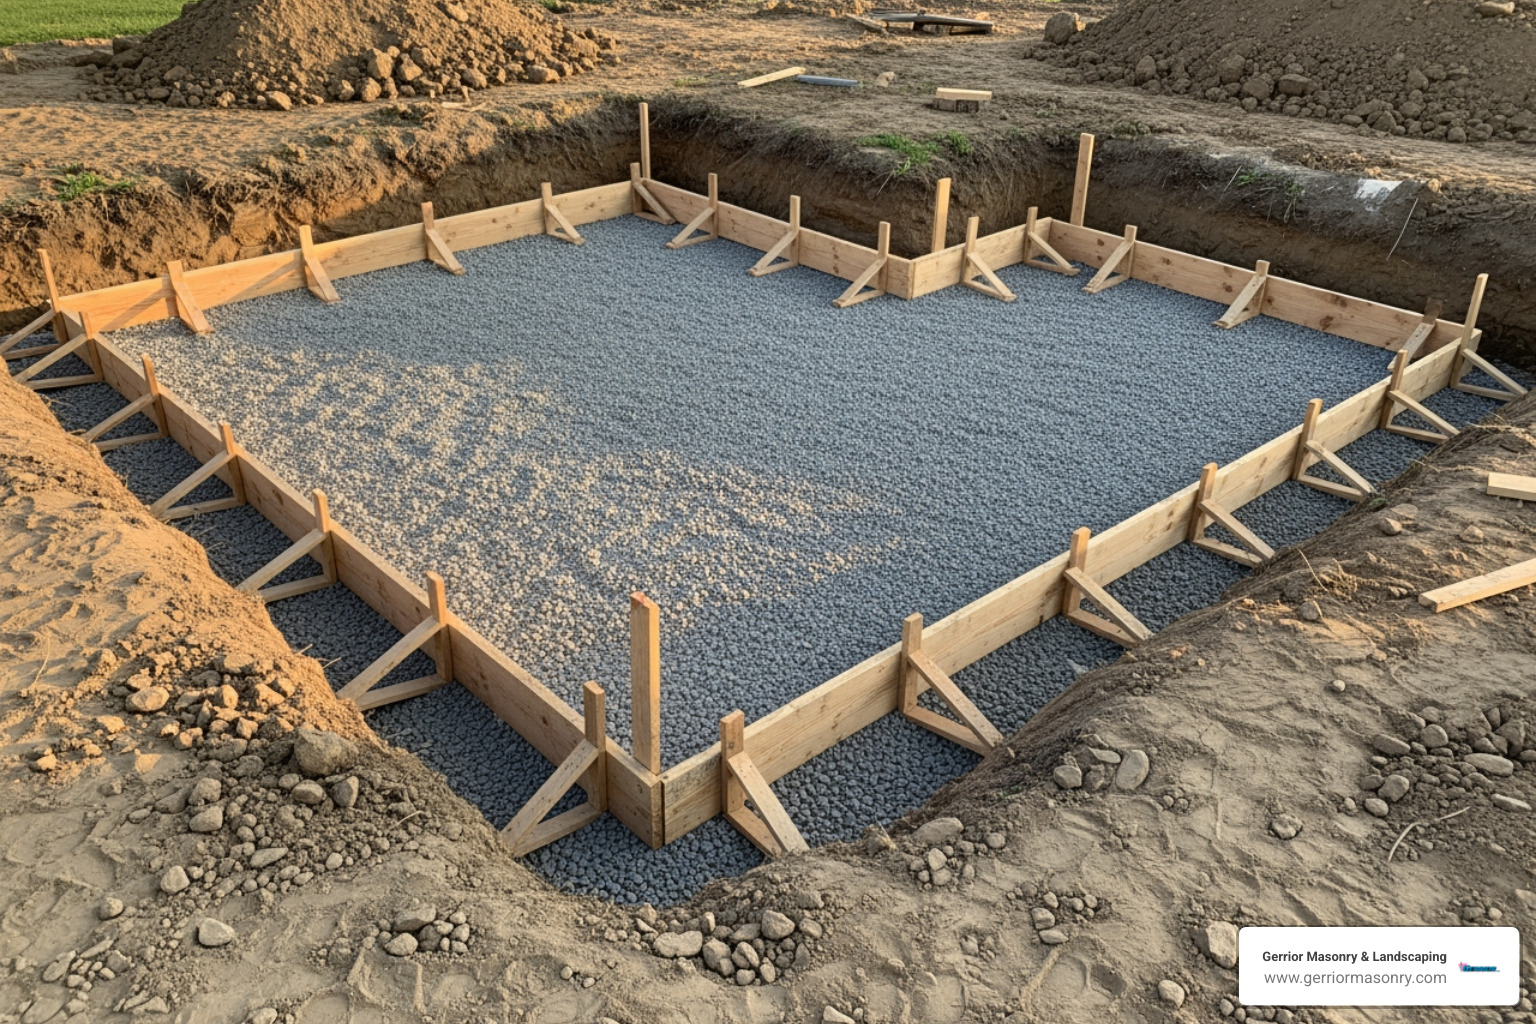
First, mark the patio layout. Excavate the area to a depth of 8-9 inches to accommodate a 4-inch concrete slab and a 4-inch gravel base. In Massachusetts, we may excavate deeper to mitigate frost heave. After clearing the area, we add a 4-6 inch layer of crushed stone, such as CA6 or CA7, compacting it thoroughly.
2. Grading and Forms:
The compacted base must be graded with a slope of 1/8″ per foot away from your house to ensure proper water runoff. This is a key element of proper drainage in hardscaping. Next, build a sturdy formwork using 2×6 lumber, staked securely in place. The tops of the forms will define the final height and slope of your patio.
3. Reinforcement:
To add tensile strength and control cracking, reinforcement is essential. We use a grid of 1/2-inch rebar or welded wire mesh, ensuring it sits in the middle of the slab’s thickness. We also recommend using fibermesh mixed into the concrete for added durability against shrinkage cracks. The minimum patio thickness is 4 inches, but may be increased for heavy loads like an outdoor kitchen.
Building, Finishing, and Maintaining Your Masterpiece
With the site prepared, it’s time to pour and finish your concrete patio, changing raw materials into your envisioned outdoor space.
The Step-by-Step Pouring and Finishing Process
Pouring concrete is a time-sensitive process requiring coordination. For a DIY project, you’ll need helpers and tools like wheelbarrows, shovels, a screed board, and floats. For larger projects, ordering ready-mix concrete is more practical. We recommend a 4,500 psi air-entrained concrete mix with fibermesh. This high-strength mix is designed to withstand Massachusetts’ freeze-thaw cycles, while fibermesh helps prevent shrinkage cracks.
Pour and Screed: Pour the concrete into the forms, spreading it evenly. Immediately use a long, straight 2×4 (a screed board) in a sawing motion across the top of the forms to level the surface and remove excess concrete, establishing the final grade.
Float and Edge: After the initial water (bleed water) disappears from the surface, use a bull float to smooth the slab and push down aggregates. This brings the “cream” to the surface for a finer finish. As it stiffens, use an edger tool along the forms to create clean, rounded edges that are less prone to chipping.
Joints and Texture: To manage the natural shrinkage that causes cracking, we cut control joints into the slab for any area larger than 10×10 feet. These joints are cut to a depth of one-quarter of the slab’s thickness, creating a weakened plane for cracks to follow predictably. Once the concrete is firm, create a safe, non-slip surface. The most common method is a broom finish, achieved by gently dragging a stiff broom across the slab.
Cure the Concrete: Curing is a critical chemical hydration process, not a drying process. To achieve maximum strength, the concrete must be kept continuously moist for at least seven days. This can be done by misting it, covering it with plastic sheeting, or applying a liquid curing compound. After 48 hours, the forms can be carefully removed. For more details, you can review guides on how to build a concrete pad.
Ensuring Longevity: Maintenance and Common Problem Prevention
A well-built concrete patio can last over 30 years with proper care. The most important maintenance task is sealing. After the concrete has fully cured (at least 28 days), apply a high-quality sealer and reapply every 2-3 years to protect against moisture, stains, and UV damage. You can choose between film-forming sealers (like acrylics) for a protective topcoat or penetrating sealers for a more natural look. Regular cleaning is simple: sweep and hose down as needed, using a pH-neutral cleaner for tougher stains. A pressure washer on a low setting can also be used with caution.
While proper concrete patio construction—including a compacted base, reinforcement, and control joints—is the best defense against cracking, small hairline cracks may still appear. Fill these promptly with a flexible concrete crack sealant to prevent water intrusion and further damage. To prevent surface spalling or flaking, never use rock salt or other chloride-based de-icers on your patio, especially during its first winter. Use sand or a concrete-safe de-icer instead. For more seasonal tips, see our guide on Preparing for Spring: Your Guide to a Beautiful Hardscape.
DIY vs. Hiring a Pro: Making the Right Choice
Deciding between a DIY project and hiring a professional involves weighing cost against complexity.
DIY vs. Professional:
A DIY approach can save 40-50% on labor costs. However, it requires significant physical effort, the right tools, and knowledge of proper techniques. Mistakes in mixing, finishing, or curing can lead to a poor-quality result that’s costly to fix.
Hiring a professional ensures expertise, efficiency, and a high-quality finish. An experienced contractor understands local conditions like Massachusetts’ frost heave, uses the right materials and reinforcement, and can execute complex decorative designs flawlessly. Professionals also typically offer a warranty, providing peace of mind. A well-built patio, whether DIY or professionally installed, significantly increases your home’s resale value by adding attractive, functional living space.
Choosing a Contractor:
If you hire a pro, ask key questions:
How do you prepare the site and ensure proper drainage?
What reinforcement and concrete mix do you recommend?
Can I see examples of your stamped or decorative work?
Gerrior Masonry & Landscape Construction is based in Woburn, MA, and proudly serves Middlesex and Essex County, Massachusetts, with expert hardscaping and masonry services.
Why Finding the Right Chimney Pointing Service Matters
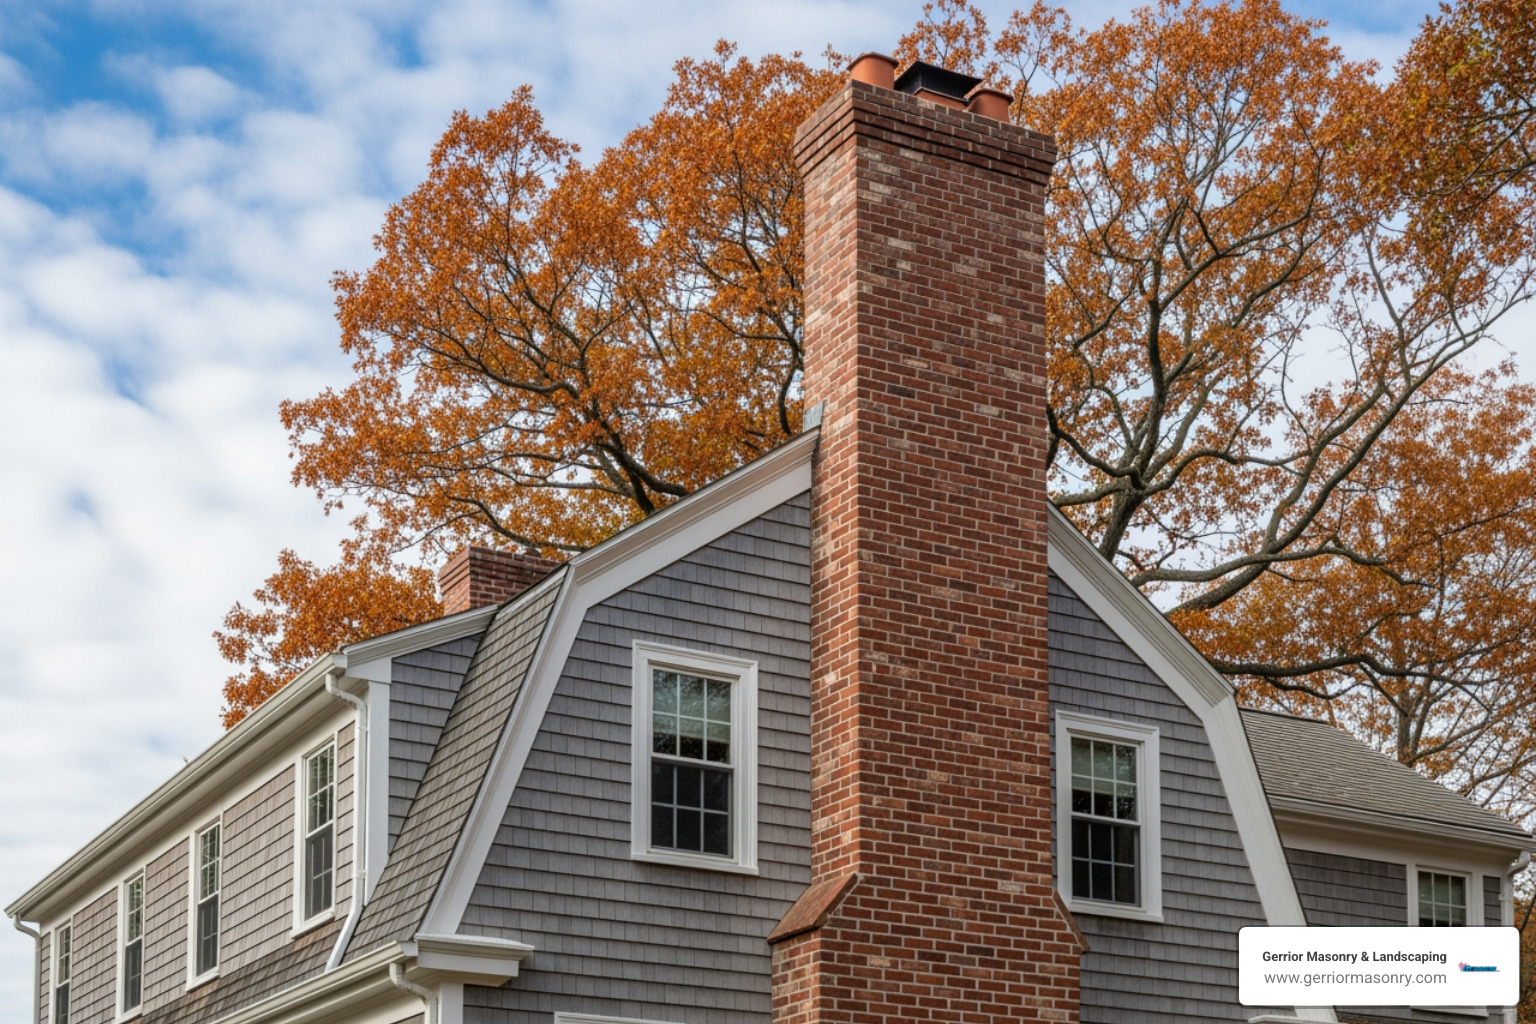
Searching for chimney pointing near me is a critical step in home maintenance. When your chimney’s mortar joints start to deteriorate, you need a qualified local professional quickly—before water damage, structural issues, or safety hazards develop.
What to look for in a local chimney pointing service:
Licensed and insured masonry contractors
Proven experience with chimney repair (20+ years minimum)
Local reputation with positive reviews
Proper materials that match your existing mortar
Warranties on workmanship (90 days to 20 years)
Free estimates with a detailed scope of work
Knowledge of local codes
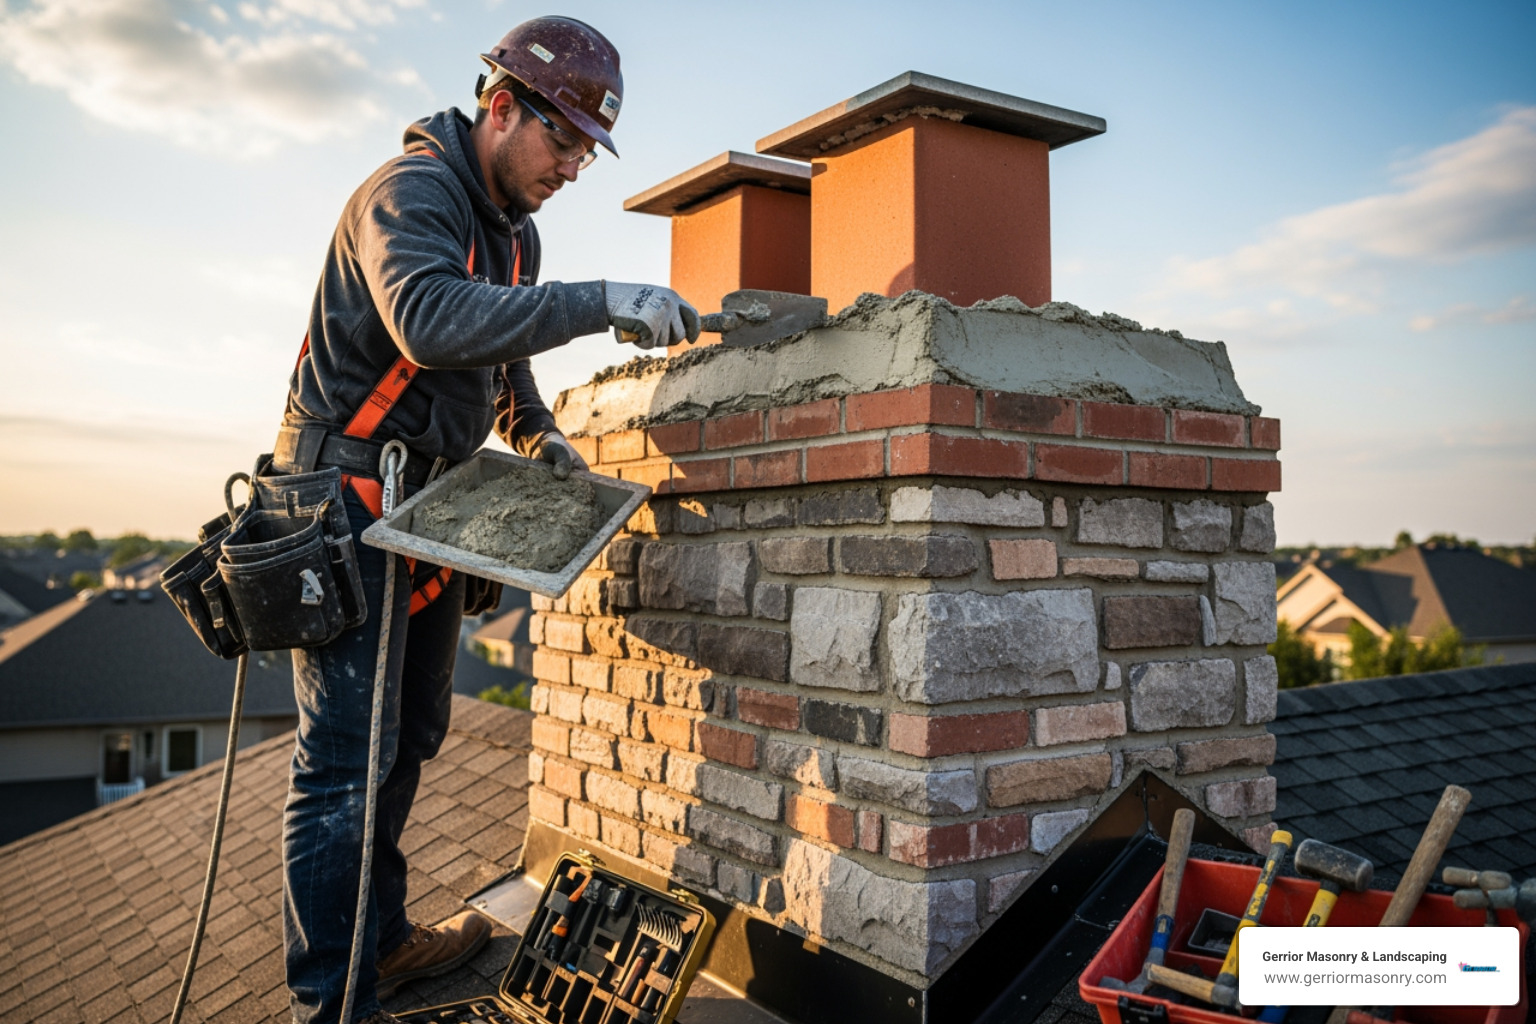
Chimney pointing—also called repointing—involves carefully removing deteriorated mortar and replacing it with fresh mortar. This isn’t just cosmetic. As one industry expert notes, “Fire investigators estimate that 40% of house fires that start from the chimney start in the smoke chamber,” making proper mortar maintenance critical for safety.
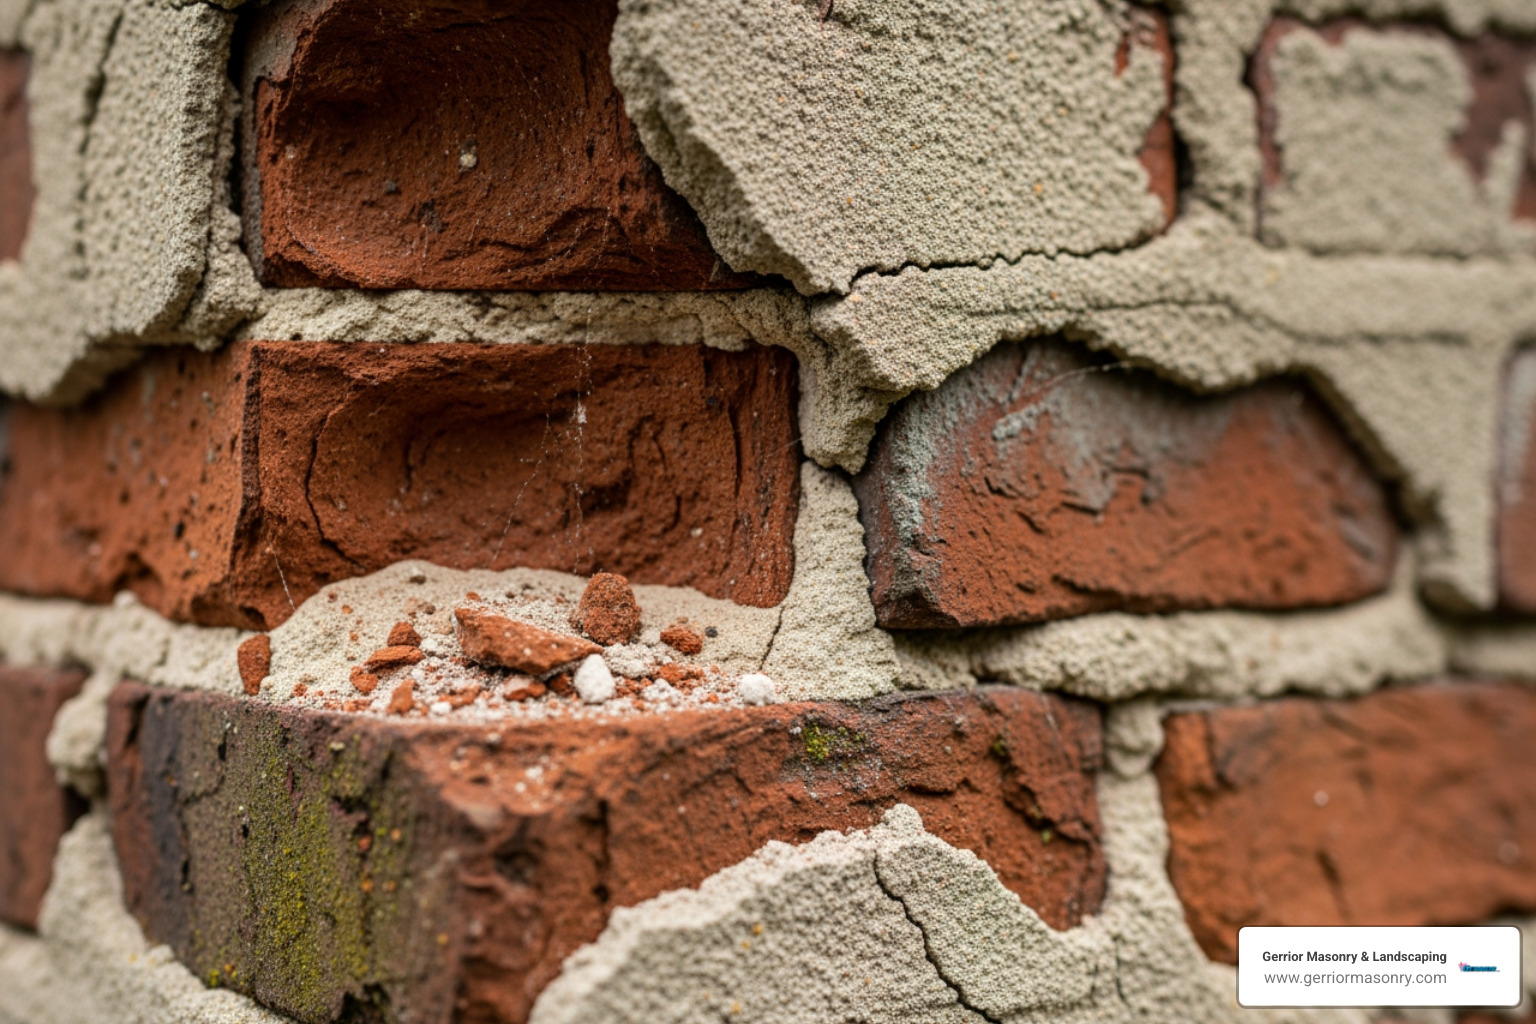
The mortar between your chimney bricks takes a beating from New England weather. While bricks can last over 50 years, mortar joints deteriorate faster from freeze-thaw cycles and rain. When mortar crumbles, water infiltrates the chimney structure, leading to spalling bricks, interior leaks, and potential structural damage.
Why act quickly: Neglected mortar joints can turn a $700-$1,000 repointing job into a $3,000+ partial rebuild if you wait too long.
I’m Joe Gerrior, owner of Gerrior Masonry & Landscape Construction Corp., and I’ve been repairing chimneys in Massachusetts for over 34 years. When homeowners search for chimney pointing near me in the Woburn area, I help them address crumbling mortar before it becomes an expensive structural problem.
We understand that chimney maintenance can seem complex. Here, we’ll break down the most common questions we hear about chimney pointing with clear, expert answers.
What is Chimney Pointing and Why is it Crucial?
Chimney pointing (also called repointing) is the process of replacing the deteriorated mortar joints between your chimney’s bricks. This mortar is the “glue” holding the structure together. Over time, weather exposure, especially New England’s freeze-thaw cycles, causes it to crack and crumble.
This process is crucial because sound mortar joints ensure structural stability, prevent water penetration that leads to spalling bricks and interior leaks, and extend your chimney’s lifespan. Addressing mortar issues with pointing is a proactive measure that prevents a much more expensive chimney rebuild. You can find more information about our comprehensive chimney repairs on our website. For a general overview of how masonry chimneys work and why mortar maintenance matters, you can also review this chimney guide.
What are the Signs That My Chimney Needs Pointing?
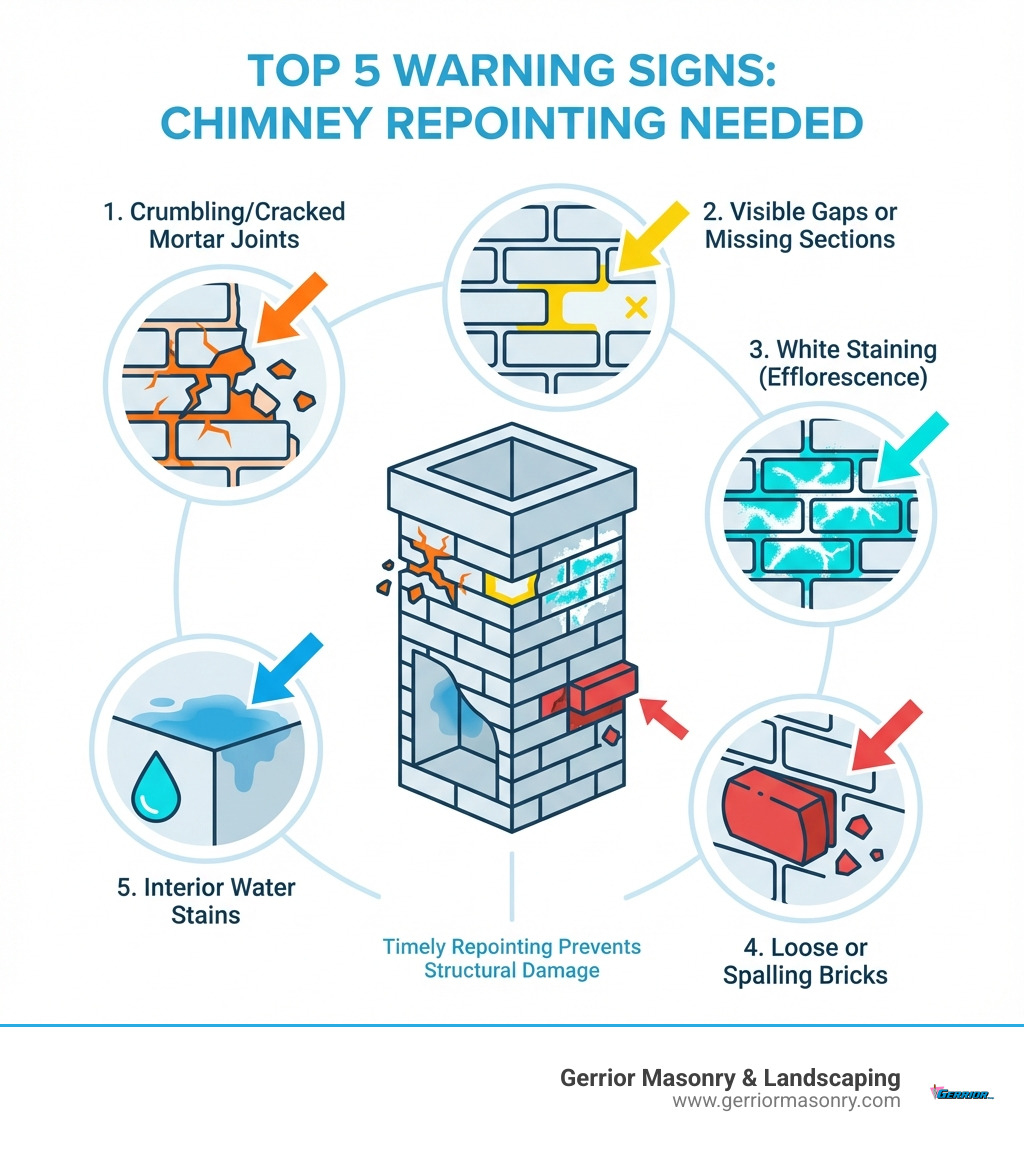
Catching these signs early is key to preventing minor issues from becoming major headaches. Here are the tell-tale signs that your chimney needs pointing:
Crumbling or Cracked Mortar: The most obvious sign. If you can easily scrape out mortar or see noticeable cracks, the joints are failing.
Visible Gaps or Missing Mortar: Sections of mortar that have fallen out leave gaps between bricks, creating direct entry points for water.
Spalling Bricks: When water penetrates mortar joints and freezes, it can cause the faces of the bricks to pop off. This is a serious sign of moisture damage.
Efflorescence (White Stains): Powdery white stains on the chimney’s exterior are a strong signal that water is infiltrating your chimney through failing mortar.
Interior Water Damage: Water stains on your interior walls or ceilings near the chimney often indicate leaks through deteriorated mortar joints.
If you observe any of these signs, it’s crucial to act promptly to avoid more expensive repairs down the road.
How is Chimney Pointing Done?
Professional chimney pointing is a meticulous process designed to restore the integrity and beauty of your chimney. Here’s how we approach it:
Initial Inspection: We conduct a thorough inspection to assess the extent of the damage and determine the best approach.
Removal of Deteriorated Mortar: We carefully grind out the old, crumbling mortar to a consistent depth, creating a stable surface for the new material.
Joint Cleaning: The joints are cleaned of all dust and debris to ensure optimal adhesion for the new mortar.
Mortar Analysis and Matching: We analyze the existing mortar to match its composition, color, and texture. Using a compatible mortar is vital for a durable, seamless repair, especially for older homes that may require a specific lime-based mix.
Applying New Mortar: Our skilled masons carefully apply the new mortar in layers, pressing it firmly to fill all voids and create a watertight seal.
Tooling Joints for a Clean Finish: After application, the mortar is “tooled” to compact it and create a smooth finish that sheds water effectively.
Curing Process: The new mortar needs time to cure properly to achieve maximum strength and durability.
The entire process requires a keen eye and steady hand. For more information on masonry techniques, you might be interested in our work on foundation repointing.
How Much Does Chimney Pointing Cost?
The cost of chimney pointing depends on several factors. Please note that the following are average costs based on internet data and are not actual costs for Gerrior Masonry & Landscaping services. We always provide a detailed, free estimate custom to your specific project.
Minor chimney repairs can range from $150 to $1,000, while more extensive repointing projects may cost between $700 and $3,000 or more. Key factors influencing the price include the chimney’s size, the extent of the damage, accessibility, and any additional repairs needed.
Can I Do Chimney Pointing Myself?
While DIY is tempting for saving money, we strongly advise against it for chimney pointing. It’s a job where incorrect work can lead to greater damage, safety risks, and higher costs in the long run.
Feature
DIY Chimney Pointing
Professional Chimney Pointing
Risks
– Safety Hazards: Working at heights is dangerous.
– Improper Mortar Mix: Using the wrong mortar can cause more damage.
– Poor Durability: Incorrect application can result in new mortar failing quickly.
– Expertise: Skilled masons understand material science and proper techniques.
– Safety: Professionals have the right equipment and training.
– Correct Materials: We accurately identify and use the appropriate mortar for a seamless, long-lasting repair.
– Warranty: Reputable contractors offer warranties on their workmanship.
Cost Savings
Potential short-term savings on labor.
Higher upfront cost, but prevents costly re-dos and major repairs, saving money in the long run.
Result
Often structurally unsound and aesthetically unpleasing.
A structurally sound, durable, and weather-resistant repair.
Choosing a professional ensures the job is done safely with the right materials, providing a durable, warrantied repair and peace of mind. Trust the experts to protect the longevity and safety of your home.
Gerrior Masonry & Landscape Construction is based in Woburn, MA, and services Middlesex and Essex County, Massachusetts.
Finding the Best “Chimney Pointing Near Me” in the Woburn, MA Area
Once you’ve identified the need for chimney pointing, the next step is finding a qualified local professional. A local expert understands the specific challenges posed by New England weather and has a reputation to uphold in the community.
Why Choose a Local Masonry Expert?
When you search for chimney pointing near me, you’re looking for reliability, expertise, and a company that understands the unique demands of our local environment. At Gerrior Masonry & Landscaping, we embody these qualities, offering unparalleled masonry services throughout Middlesex and Essex County, Massachusetts.
Choosing a local masonry expert like us means partnering with a team that deeply understands the specific challenges that homes in the Woburn, MA area face. Our New England climate, with its cycles of freezing and thawing, can be particularly harsh on chimney masonry. We’ve spent over 30 years perfecting our craft in these conditions, ensuring our repairs are not just effective but also built to last.
Gerrior Masonry & Landscaping stands out because:
Decades of Experience: We bring over 30 years of dedicated experience in masonry. Our long-standing presence in the community means we’ve seen and successfully resolved every type of chimney issue.
Owner Oversight on Projects: As the owner, I, Joe Gerrior, personally oversee every project. This hands-on approach guarantees that the highest standards of quality and meticulous care are met.
High-Quality Materials and Techniques: We use only the finest, industry-leading materials, selected for durability and compatibility with your existing masonry. We address the root cause of damage, not just the symptoms.
Local Understanding: Being based in Woburn, MA, we have an intimate understanding of local architectural styles and building codes.
Comprehensive Chimney Services: Beyond pointing, our expertise extends to a full suite of chimney repair services, including chimney crowns, caps, flashing, and full rebuilds. Our goal is to ensure your entire chimney system is safe, functional, and beautiful.
For homeowners in Acton, Andover, Arlington, Bedford, Belmont, Beverly, Billerica, Burlington, Carlisle, Chelmsford, Concord, Danvers, Dracut, Dunstable, Essex, Georgetown, Hamilton, Hudson, Ipswich, Lexington, Lincoln, Lowell, Lynnfield, Malden, Manchester-by-the-Sea, Marblehead, Medford, Melrose, Middleton, Natick, Newton, North Andover, North Reading, Peabody, Reading, Rowley, Salem, Saugus, Stoneham, Sudbury, Swampscott, Tewksbury, Topsfield, Wakefield, Waltham, Watertown, Wayland, Wenham, West Newbury, Westford, Weston, Wilmington, Winchester, and Woburn, MA, Gerrior Masonry & Landscaping is your trusted partner for all your chimney pointing and masonry needs.
When your chimney needs attention, don’t delay. The sooner chimney damage is repaired, the less expensive it will be. Contact us today for a free estimate and let us help you maintain the safety and beauty of your home.
Gerrior Masonry & Landscape Construction is based in Woburn, MA, and services Middlesex and Essex County, Massachusetts.
Finding the Best “Chimney Pointing Near Me” in the Woburn, MA Area
Once you’ve identified the need for chimney pointing, the next step is finding a qualified local professional. A local expert understands the specific challenges posed by New England weather and has a reputation to uphold in the community.
Why Choose a Local Masonry Expert?
When you’re searching for chimney pointing near me, you’re looking for more than just a service; you’re looking for reliability, expertise, and a company that understands the unique demands of our local environment. At Gerrior Masonry & Landscaping, we embody these qualities, offering unparalleled masonry services throughout Middlesex and Essex County, Massachusetts.
Choosing a local masonry expert like us means partnering with a team that deeply understands the specific challenges that homes in the Woburn, MA area face. Our New England climate, with its cycles of freezing and thawing, heavy precipitation, and strong winds, can be particularly harsh on chimney masonry. We’ve spent over 30 years perfecting our craft in these conditions, ensuring our repairs are not just effective but also built to last against the elements.
Gerrior Masonry & Landscaping stands out because:
Decades of Experience: We bring over 30 years of dedicated experience in masonry and hardscaping services. Our long-standing presence in the community means we’ve seen and successfully resolved every type of chimney issue, from minor mortar deterioration to extensive structural damage. This extensive history is a testament to our skill and reliability.
Owner Oversight on Projects: Unlike larger, impersonal companies, I, Joe Gerrior, personally oversee every project. This hands-on approach guarantees that the highest standards of quality are met, and that every detail, from mortar matching to final cleanup, is handled with meticulous care. This commitment to owner oversight ensures that your chimney pointing project benefits from decades of accumulated knowledge and a personal touch.
High-Quality Materials and Techniques: We use only the finest, industry-leading materials, selected for their durability and compatibility with your existing masonry. Our techniques are refined through years of practice, ensuring that the new mortar not only looks seamless but also provides superior protection and structural integrity. We know that visible chimney damage might be indicative of a larger underlying problem, and our thorough approach means we address the root cause, not just the symptoms.
Local Understanding: Being based in Woburn, MA, and serving Middlesex and Essex County, we have an intimate understanding of local architectural styles, historical masonry practices, and specific building codes. This local knowledge allows us to provide custom solutions that respect your home’s character and comply with all regulations.
Comprehensive Chimney Services: Beyond just chimney pointing, our expertise extends to a full suite of chimney repair services, including chimney crown repair, chimney cap installation, flashing repair, flue liner replacement, and full chimney rebuilds. We believe it’s irresponsible to repair one part of a chimney without dealing with the rest, and our goal is to ensure your entire chimney system is safe, functional, and beautiful. You can learn more about our comprehensive chimney repair services on our website.
Customer Satisfaction: Our local reputation is paramount. We strive for complete customer satisfaction, building lasting relationships within our community. When you choose us, you’re choosing a company that values its local ties and works tirelessly to deliver exceptional results.
For homeowners in Acton, Andover, Arlington, Bedford, Belmont, Beverly, Billerica, Burlington, Carlisle, Chelmsford, Concord, Danvers, Dracut, Dunstable, Essex, Georgetown, Hamilton, Hudson, Ipswich, Lexington, Lincoln, Lowell, Lynnfield, Malden, Manchester-by-the-Sea, Marblehead, Medford, Melrose, Middleton, Natick, Newton, North Andover, North Reading, Peabody, Reading, Rowley, Salem, Saugus, Stoneham, Sudbury, Swampscott, Tewksbury, Topsfield, Wakefield, Waltham, Watertown, Wayland, Wenham, West Newbury, Westford, Weston, Wilmington, Winchester, and Woburn, MA, Gerrior Masonry & Landscaping is your trusted partner for all your chimney pointing and masonry needs. We are committed to protecting your home and enhancing its value with our expert craftsmanship.
When your chimney needs attention, don’t delay. The sooner chimney damage is repaired, the less expensive it will be. Contact us today for a free estimate and let us help you maintain the safety and beauty of your home.
Gerrior Masonry & Landscape Construction is based in Woburn, MA, and services Middlesex and Essex County, Massachusetts.
Brick walkway ideas can dramatically transform any outdoor space by adding a touch of elegance and practicality. Here’s a quick peek to inspire you right away:
Herringbone Pattern: Ideal for a dynamic, interlocking look.
Running Bond: Offers a classic and straightforward aesthetic.
Basketweave Pattern: Perfect for a timeless, vintage feel.
Permeable Bricks: Reduce water runoff and are eco-friendly.
Curved Walkways: Add a flowing, natural feel to your garden.
The importance of well-crafted brick walkways cannot be overstated. A meticulously designed brick walkway enhances both the visual appeal and the functionality of your outdoor spaces. Whether navigating to your front door or wandering through a backyard garden, a thoughtfully designed brick path ensures beauty and durability.
I’m Joe Gerrior, owner of Gerrior Masonry & Landscaping. With over 34 years of experience in masonry and landscape design, I specialize in creating visually stunning and sustainable outdoor spaces. In this guide, I’ll share insights and tips on brick walkway ideas that enhance both aesthetic and practicality.
Next, let’s dive into the essential materials and preparation steps for your ideal brick walkway.
Essential Materials and Preparation for Brick Walkways
Creating a beautiful and durable brick walkway starts with choosing the right materials and preparing the base correctly. This ensures stability and longevity. Here’s a step-by-step guide on essential materials and preparation techniques.
Choosing the Right Bricks
Clay Bricks
Clay bricks are a classic choice for walkways. They offer a timeless aesthetic and come in various shades of red and orange. Due to their natural composition, they are highly durable and can withstand harsh weather conditions. Clay bricks also have a rough texture, providing a non-slip surface.
Concrete Pavers
Concrete pavers are versatile and available in a wide range of colors, shapes, and sizes. They are generally more affordable than clay bricks and can mimic the appearance of natural stone. Concrete pavers are also highly durable and can endure extreme weather without cracking.
Preparing the Base
A properly prepared base is crucial for preventing your walkway from settling and becoming uneven. Here’s how to do it:
Gravel Layer
Start with a layer of coarse gravel, ideally #5 (1”) stone gravel. This layer should be about 4-6 inches deep for walkways and 6-8 inches for driveways. The gravel provides excellent drainage and a solid foundation. Make sure to tamp it down thoroughly to compact the stones.
Sand Layer
On top of the gravel, add a finer layer of ⅜” stone or coarse sand. This layer should be about 1-2 inches thick. The sand layer helps to level the surface and allows for minor adjustments when laying the bricks. Tamp this layer as well to ensure it’s packed down firmly.
Weed-Barrier Fabric
Laying down permeable landscape fabric before adding the gravel can help prevent weeds from growing between your bricks. This fabric acts as a barrier while still allowing water to drain through.
Compaction
After smoothing out the subsoil, the next step is compaction. Use a mechanical compactor to compact the subsoil thoroughly. This increases the density of the soil, providing a more stable base and preventing future settling and shifting of the pavers.
Detailed Steps
Excavate the Area: Remove the topsoil and dig down to the required depth based on your gravel and sand layers.
Lay the Weed-Barrier Fabric: Place the fabric to cover the entire excavated area.
Add Gravel Layer: Spread the gravel evenly and compact it.
Add Sand Layer: Spread the sand evenly and compact it.
Level the Surface: Use a level to ensure the surface is even and ready for brick laying.
By following these steps, you’ll create a solid foundation for your brick walkway. This preparation not only supports the installation process but also contributes significantly to the longevity and durability of your walkway.
Next, let’s explore the popular brick walkway patterns you can choose from.
Popular Brick Walkway Patterns
When it comes to designing a brick walkway, the pattern you choose can dramatically impact its overall look and feel. Here are three popular patterns that can enhance the aesthetic appeal and functionality of your walkway: Running Bond, Herringbone, and Basketweave.
Running Bond Pattern
The Running Bond pattern is one of the simplest and most traditional brick patterns. It involves laying bricks in rows, with each brick staggered by half its length from the brick in the row below. This creates a “running” effect that is visually appealing and structurally sound.
Staggered: The staggered layout helps distribute weight evenly, making it a durable option for high-traffic areas.
Traditional: This pattern is timeless and works well with various home styles, from classic to contemporary.
Herringbone Pattern
The Herringbone pattern is known for its strong visual impact and durability. It involves arranging rectangular bricks in a V-shape, which interlocks to resist shifting and can handle heavy loads.
Interlocking: The interlocking nature of the herringbone pattern makes it ideal for areas that experience frequent foot traffic or even light vehicular traffic.
Aesthetic: This pattern can be laid at either 45-degree or 90-degree angles, offering flexibility in design. A 45-degree angle creates a dynamic sense of movement, while a 90-degree angle offers a more traditional look.
Basketweave Pattern
The Basketweave pattern brings a touch of old-world charm with a modern twist. It involves laying pairs of bricks at right angles to each other, creating a block-like effect that resembles a woven basket.
Classic: The standard basketweave pattern alternates horizontal and vertical pairs of bricks, providing a quaint and classic look.
Decorative: An interlocking basketweave adds an extra layer of stability and visual interest, making it perfect for decorative walkways and patios.
By choosing one of these patterns, you can create a brick walkway that not only looks fantastic but also stands the test of time. Each pattern offers unique benefits and can be tailored to suit your home’s style and your personal preferences.
Next, let’s explore some brick walkway ideas for different home styles.
Brick Walkway Ideas for Every Home Style
When it comes to brick walkway ideas, your home’s style should guide your choices. Whether you’re enhancing your front door path, garden walkway, or patio path, the right design can make a significant difference. Let’s dive into some ideas tailored for every home style.
Paths to Front Door
A well-designed brick path to your front door can make a welcoming statement. Here are a few ideas:
Elegant and Straight: A straight path with a herringbone pattern can create a formal and elegant look. This pattern is not only visually appealing but also highly durable.
Curved and Inviting: For a more inviting feel, opt for a curved path. The running bond pattern works well here, following the natural curves and leading guests gracefully to your door.
Traditional Charm: A basketweave pattern offers a classic look that complements traditional homes. This pattern can be framed with a soldier course border for added elegance.
Garden Walkways
Garden walkways can be both functional and aesthetic. They guide you through your garden and add to its beauty.
Curved Garden Paths: Curved paths help create a sense of adventure and discovery. Using a herringbone pattern on a diagonal can add a dynamic feel to the walkway.
Straight Garden Paths: If you prefer a more structured look, straight paths with a running bond pattern can be very effective. This is especially useful in formal garden designs.
Mixed Materials: Combining bricks with other materials like gravel or mulch can add texture and interest. It’s a great way to make your garden walkway stand out.
Patio Paths
Patio paths should be stylish and functional, connecting different outdoor areas seamlessly.
Functional Paths: For high-traffic areas, such as paths leading to an outdoor kitchen or seating area, a herringbone pattern offers durability and slip resistance.
Stylish Paths: To add a touch of style, consider a basketweave pattern. It’s decorative and can break up large patio spaces, making them more visually interesting.
Curved Patio Paths: Curved paths can soften the edges of your patio and create a more organic flow. Use a running bond pattern to follow the curves naturally.
By choosing the right brick walkway ideas for your home’s style, you can enhance both the beauty and functionality of your outdoor spaces. Next, we’ll cover some installation tips and techniques to help you achieve the perfect brick walkway.
Installation Tips and Techniques
Curving Techniques
Creating curves in your brick walkway can add a touch of elegance and make the path more inviting. To achieve smooth curves, follow these tips:
Reducing Gaps: When laying bricks on a curve, gaps can appear between them. To minimize these gaps, use smaller bricks or cut standard bricks to fit the curve snugly. This will make the walkway look seamless.
Miter Corners: For tighter curves, consider mitering the corners of the bricks. This involves cutting the bricks at an angle so they fit together more closely. A saw with a masonry blade will make this task easier.
Securing the Walkway
Securing your walkway ensures it lasts longer and remains safe to walk on. Here are some techniques to help you secure your brick walkway:
Edging Options: Edging keeps the bricks in place and prevents them from shifting over time. Popular options include metal, plastic, or concrete edging. A soldier course (bricks laid lengthwise along the edge) is also a decorative and functional choice.
Mortar vs. Dry Lay:
Mortar: Using mortar to set your bricks creates a more permanent and stable walkway. However, it can be more labor-intensive and costly. Mortared joints prevent weeds but make repairs more difficult.
Dry Lay: This method involves laying bricks on a compacted base without mortar. It’s easier and more cost-effective. If a brick gets dislodged, it’s simple to fix. Using jointing resin compound between the bricks can add stability and reduce weed growth.
Leveling
A level base is crucial for a successful brick walkway. Here’s how to achieve it:
Gravel Layer: Start with a 4-6 inch layer of coarse gravel. This provides a stable foundation and good drainage.
Sand Layer: Add a 1-2 inch layer of sand on top of the gravel. Use a tamper to compact the sand, ensuring a smooth and level surface for the bricks.
Laying Bricks
Once your base is ready, it’s time to lay the bricks:
Start at the Edges: Begin by laying the edging bricks first. This sets the boundary and helps keep the interior bricks in place.
Pattern Consistency: Lay the bricks according to your chosen pattern (running bond, herringbone, etc.). Ensure each brick is level with its neighbors by using a rubber mallet to tap them into place.
Check Alignment: Use a level and string line to keep the walkway straight and even. Adjust bricks as needed to maintain a consistent alignment.
By following these tips and techniques, you can create a beautiful and durable brick walkway that enhances your outdoor space.
Next, we’ll discuss cost considerations and maintenance tips to keep your brick walkway looking great for years to come.
Cost Considerations and Maintenance
Factors Affecting Costs
When planning your brick walkway, several factors will influence the cost:
Size: Larger walkways require more materials and labor, increasing the overall cost.
Brick Type: Clay bricks are typically more expensive than concrete pavers, but they offer a classic look and greater durability.
Pattern Complexity: Intricate patterns like herringbone or basketweave require more time and skill to install, leading to higher labor costs.
Additional Features: Elements like edging, lighting, or embedded designs can add to the cost.
The price range for brick walkways can vary widely. On average, expect to pay between $8 and $20 per square foot, depending on the factors mentioned above.
Maintenance Tips
Maintaining your brick walkway ensures its longevity and keeps it looking its best. Here are some key upkeep tips:
Cleaning: Regularly sweep the walkway to remove debris. For a deeper clean, use a mild detergent and water. Avoid harsh chemicals that can damage the bricks.
Weed Control: Weeds can grow between the bricks if not properly managed. Use a jointing resin compound to fill gaps and create a barrier against weeds. Additionally, spread baking soda, vinegar, or a dish soap solution to prevent weed growth.
Repair: Inspect your walkway periodically for any cracked or loose bricks. Replace damaged bricks promptly to prevent further issues. If you notice settling or uneven areas, re-level the affected sections.
By following these maintenance tips, you can ensure your brick walkway remains a beautiful and functional part of your landscape for years to come.
Next, we’ll explore Gerrior Masonry & Landscaping’s top recommendations for enhancing your outdoor space.
Conclusion
At Gerrior Masonry & Landscaping, we believe that a well-designed brick walkway can transform your outdoor space. Whether you’re looking for a classic path to your front door or a functional garden walkway, our team is here to bring your vision to life.
Enhance Your Outdoor Space
A beautifully crafted brick walkway not only adds curb appeal but also enhances the overall functionality of your landscape. Imagine strolling through a charming garden path or welcoming guests with an elegant entryway. With the right design and materials, your outdoor space can become an extension of your home—a place for relaxation, entertainment, and connection with nature.
Professional Installation
Choosing professionals for your brick walkway installation ensures that every detail is handled with expertise. From preparing the base to laying the bricks and securing the edges, our team at Gerrior Masonry & Landscaping follows best practices to deliver a durable and aesthetically pleasing walkway. We use high-quality materials and proven techniques to ensure longevity and minimal maintenance.
Ready to elevate your outdoor space with a stunning brick walkway? Contact Gerrior Masonry & Landscaping today for a free consultation and let us help you create the perfect hardscape path design for your home.
Why Choosing the Right Masonry Company in Lexington MA Matters
Masonry Company Lexington MA services involve professional stone, brick, and concrete work that improves your property’s beauty and structural integrity. Whether you need a new patio, chimney repair, or a retaining wall, selecting the right contractor is crucial.
Credentials: Licensed, insured, and local references
Materials: Brick, natural stone (bluestone, granite), pavers, concrete
Cost Range: $4,000 to $20,000+ depending on project scope (average costs based on internet data)
Warranties: Guarantees available from established contractors
Lexington’s quintessential New England landscapes feature historic stonework that has stood the test of time. Professional masonry provides lasting structural support, prevents erosion, and increases property value. Quality work blends form and function, defining your home’s character by creating inviting outdoor spaces or restoring historic features.
The right masonry contractor brings decades of expertise, uses materials suited to New England’s weather, and ensures every project is built to last. Many local companies are family-owned businesses that understand Lexington’s unique architectural heritage.
I’m Joe Gerrior, owner of Gerrior Masonry & Landscape Construction Corp. For over 34 years, I’ve provided comprehensive masonry services to Massachusetts homeowners. When searching for a Masonry Company Lexington MA, you need a partner who understands the technical and aesthetic demands of working with stone, brick, and concrete in this historic community.
Note: Gerrior Masonry & Landscape Construction is based in Woburn, MA, and services Middlesex and Essex County, Massachusetts.
What to Expect from a Premier Masonry Company Lexington MA
Partnering with a premier masonry company in Lexington, MA means collaborating with experts who understand the local aesthetic, the New England climate, and the importance of structural integrity. We deliver comprehensive services that transform your vision into a lasting reality.
Comprehensive Masonry Services for Every Need
Our team offers a wide array of masonry services for Lexington homeowners and commercial property managers, from foundational work to decorative outdoor living spaces.
Here’s a list of our popular masonry projects:
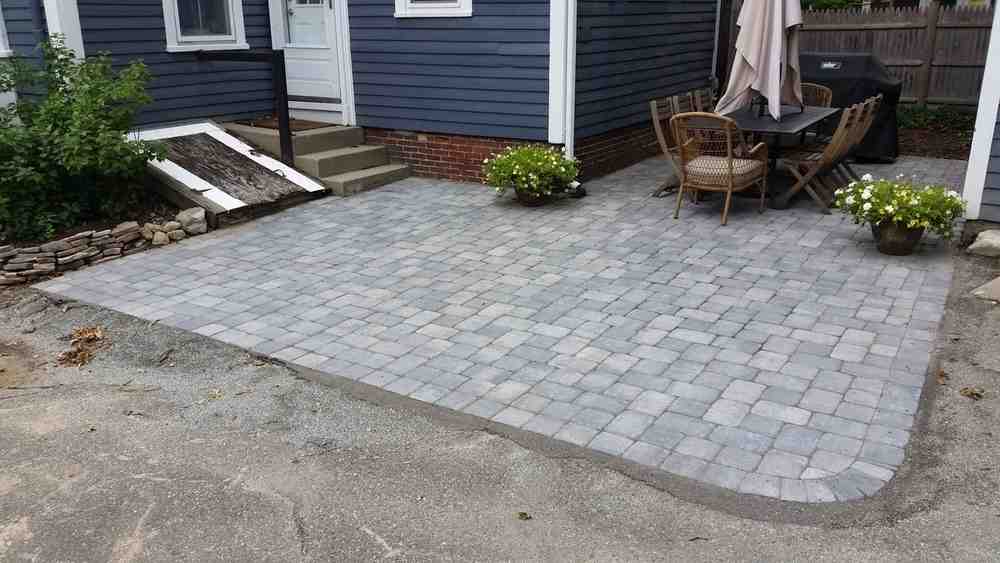
Patios: We create custom patios from durable materials like bluestone, flagstone, and brick to serve as the heart of your outdoor living space. A well-designed patio acts as a seamless transition between your home and garden. We consider factors like sun exposure, drainage, and your intended use to create a space that is both beautiful and practical. Learn more about our patio design and installation services.
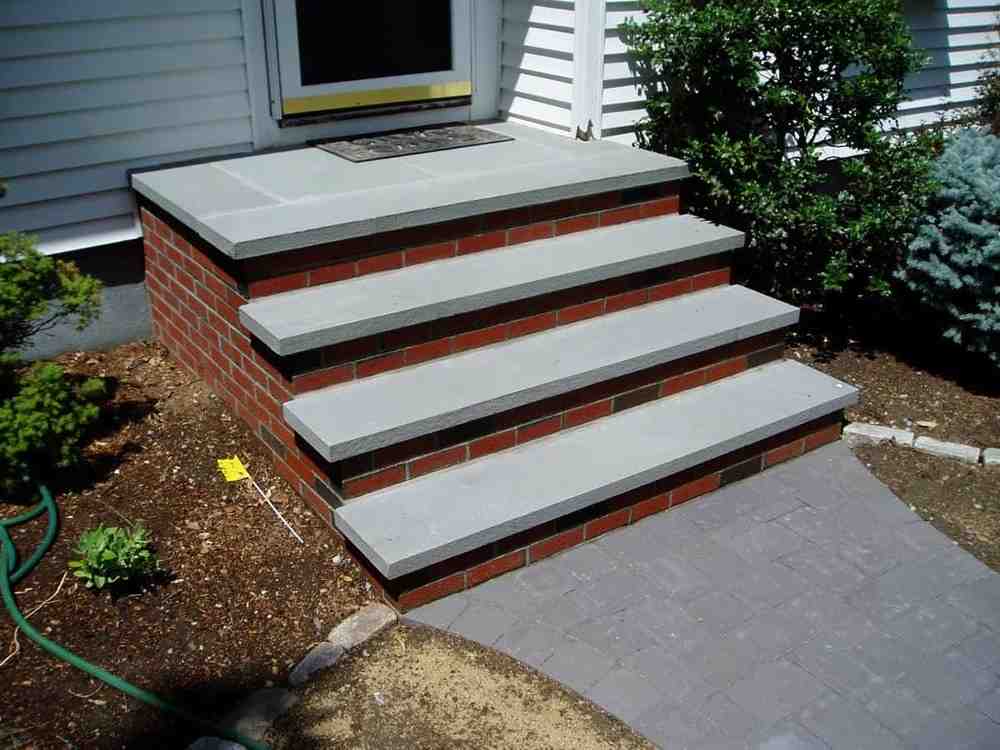
Walkways and Stairs: Our professionally installed stone or brick walkways and stairs improve your home’s entrance and are built to withstand New England weather. Properly graded walkways prevent water pooling and ice buildup, a critical safety feature in Massachusetts winters. We use techniques that ensure long-term stability and prevent shifting, ensuring both beauty and safety.
Retaining Walls: We construct natural stone and concrete retaining walls to manage slopes, prevent soil erosion, and add structure to your landscape. Beyond their structural purpose, retaining walls can create terraced gardens or add vertical interest. We ensure proper footing and drainage systems are installed to guarantee the wall’s longevity, blending form and function.
Chimney Repair: We provide expert chimney repair, from repointing and flashing to crown replacement. A deteriorating chimney can be a fire hazard and a source of water leaks. Our inspections identify issues like cracked flue liners and damaged mortar joints before they become major problems, ensuring your chimney is beautiful, structurally sound, and safe. You can find more information about our chimney repair services.
Foundation Repair and Repointing: We offer comprehensive foundation repair for cracks and stability issues. We address the root cause of foundation issues, whether it’s water damage, soil settlement, or age-related decay. Repointing is also crucial to preserve your building’s structural health and extend the lifespan of brickwork, and our services meticulously match the original mortar to preserve historic integrity.
Bulkhead Replacement: We offer professional bulkhead replacement to ensure your basement remains dry and secure from old or damaged units. A properly installed bulkhead is essential for preventing water intrusion, improving energy efficiency, and protecting your home’s foundation from moisture damage.
Commercial Snow Removal: We provide reliable commercial snow removal services to keep your business accessible and safe during winter. Our prompt and efficient service minimizes disruption to your operations and reduces liability risks associated with snow and ice accumulation. Read more about our commercial snow removal services.
Our team is also skilled in block and stone walls, pool decks, stone veneer, fire pits, stucco, and cement work, all customized to your property’s unique character.
The Hallmarks of a Qualified Masonry Contractor in Lexington, MA
Choosing a masonry contractor is about finding a craftsman who will bring your project to life with precision. Here’s what sets a qualified Masonry Company Lexington MA apart:
Experience is Key: With over 34 years of experience, we have resolved a vast range of masonry challenges. Our expertise ensures projects stand the test of time.
Licensing and Insurance: A professional contractor must be fully licensed and insured. This protects you and your property and is a clear sign of a company’s commitment to safety and professionalism.
Portfolio of Local Work: A strong portfolio of local work demonstrates a contractor’s capability and understanding of local architectural styles. It helps you envision the possibilities for your property.
Positive Client Reviews: Client testimonials offer valuable insights into a company’s reliability, communication, and quality. We are proud of our positive reviews highlighting our attention to detail.
Specialties like Hardscaping Services: Top-tier masonry companies often excel in hardscaping. Our expertise allows us to create cohesive outdoor living spaces that blend seamlessly with your property. Explore our hardscaping services.
Owner Oversight: Owner oversight on every project is paramount to us. This hands-on approach ensures the highest standards of quality and craftsmanship are maintained.
Understanding Masonry Project Costs and Materials
A masonry project is an investment that adds significant value to your property. Understanding costs and materials is key for planning.
Please note: The following are average costs based on internet data and not the actual costs for Gerrior Masonry services. Masonry project costs can range from $4,000 to over $20,000 on average, depending on:
Materials: The type of material chosen significantly impacts the cost.
Project Size: Larger projects require more labor and materials.
Design Complexity: Custom designs or intricate patterns increase the price.
Site Preparation: The amount of preparation, including excavation services, affects the final cost.
Common Materials We Use:
Brick: A timeless, durable choice for classic New England homes, offering excellent weather resistance for facades, chimneys, and walkways.
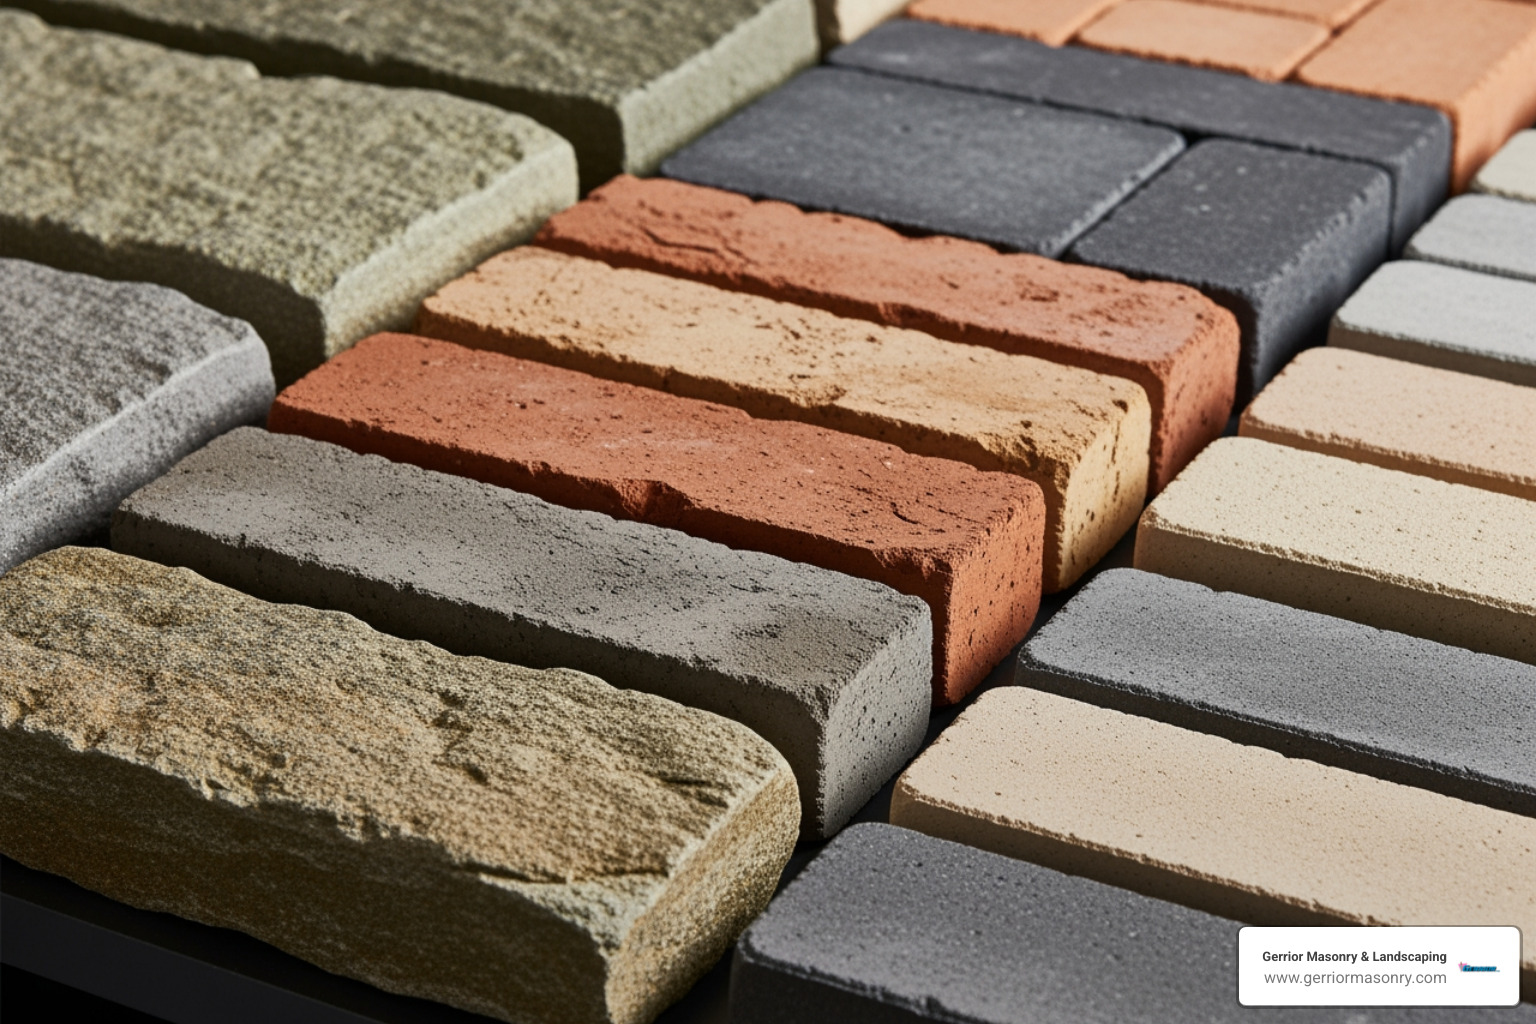
Natural Stone: This includes bluestone, granite, and flagstone, prized for organic beauty and durability, making it ideal for patios, steps, and walls.
Pavers: Pavers from brands like Unilock offer versatility in design and color for patios, driveways, and walkways. Their interlocking system provides flexibility and makes repairs easy.
Concrete: A versatile, cost-effective material for foundations, floors, and walls, providing a strong, stable base.
We select materials and use best practices to ensure our masonry projects withstand the New England climate. For quality materials, we work with reputable suppliers like those at Martignetti Enterprises Inc. – Masonry Products.
The Professional Process: From Concept to Completion
A successful masonry project relies on a clear, professional process from start to finish.
Initial Consultation: We start with a consultation to understand your vision, needs, and goals for the project.
Site Assessment: Our team conducts a site assessment to evaluate existing conditions, identify potential challenges, and establish a realistic timeline.
Custom Design: We collaborate with you on a custom design that complements your home’s architecture and improves your outdoor space.
Detailed Estimate: You’ll receive a detailed written estimate breaking down costs for materials, labor, and timelines.
Project Scheduling: After approval, we handle permits and schedule the work, considering New England weather for optimal material curing.
Site Preparation and Excavation Services: Proper site preparation, including excavation services, is essential to create a stable base.
Construction Phase: Our skilled masons begin construction, maintaining a clean site and providing regular progress updates.
Final Cleanup and Walkthrough: We conduct a thorough cleanup and a final walkthrough with you to ensure your complete satisfaction.
Documentation and Warranty: You receive all project documentation and warranty information, as we stand behind our work.
The Value of Professional Masonry vs. DIY
While DIY can seem appealing, the long-term benefits of hiring a professional Masonry Company Lexington MA far outweigh the initial savings.
Feature
Professional Masonry
DIY Approach
Safety
Trained, insured professionals minimize risks of injury and property damage.
High risk of injury and property damage; no insurance coverage for mistakes.
Cost
Higher initial cost but saves on future repairs; includes warranty.
Appears cheaper but hidden costs (tools, waste, fixing mistakes) add up; no warranty.
Time
Efficiently completed within a set timeframe by an experienced team.
Can take significantly longer due to inexperience and interruptions.
Quality
Superior craftsmanship, structural integrity, and longevity built for New England weather.
Inconsistent results, lacks structural soundness, and can fail prematurely.
Structural Knowledge
Understands soil, drainage, and load-bearing needs for stability.
Limited knowledge can lead to instability, cracking, or even collapse.
Property Value
High-quality work significantly increases curb appeal and market value.
Poorly executed projects can detract from curb appeal and decrease property value.
Choosing a professional means investing in expertise, efficiency, and enduring quality that maximizes your property’s value.
Your Guide to Finding the Best Masonry Company Lexington MA
Finding the right Masonry Company Lexington MA is crucial. Here’s how to steer your search:
Verify Credentials: Ensure any contractor is fully licensed and insured. Ask for proof to protect yourself and ensure they meet industry standards.
Ask for Local References and Portfolio: A reputable company will gladly provide references and a portfolio. Reviewing past projects demonstrates their experience and quality.
Review Contracts Carefully: A detailed contract should outline the scope of work, materials, timeline, payment schedule, and warranties to avoid misunderstandings.
Inquire About Warranties: A reliable contractor will offer warranties or guarantees on their work. Inquire about what they cover for long-term peace of mind.
Aligning with Lexington’s Aesthetic: Choose a contractor who understands Lexington’s historic aesthetic. They should be able to blend modern methods with classic styles to complement the community’s character, as detailed by the historic character of Lexington, MA.
By following these guidelines, you can select a skilled, reliable masonry company that respects the unique character of Lexington, MA.
Partner with Lexington’s Trusted Masonry Experts
Quality masonry is an investment in your property’s beauty, durability, and value. From a stable foundation to a charming new patio, choosing the right Masonry Company Lexington MA is paramount. You need a partner who combines decades of experience with a deep understanding of local needs and a commitment to craftsmanship.
Gerrior Masonry & Landscape Construction brings over 34 years of experience to every project. Our skilled team and owner oversight ensure every detail is handled with precision, resulting in high-quality outcomes that withstand New England weather. We are dedicated to changing your property with solutions that are both beautiful and structurally sound.
If you’re ready to improve your Lexington property with expert masonry services, we invite you to connect with us. We are based in Woburn, MA, and proudly serve communities throughout Middlesex and Essex County, Massachusetts, including Lexington.
Why Driveway Apron Pavers Transform Your Home’s First Impression
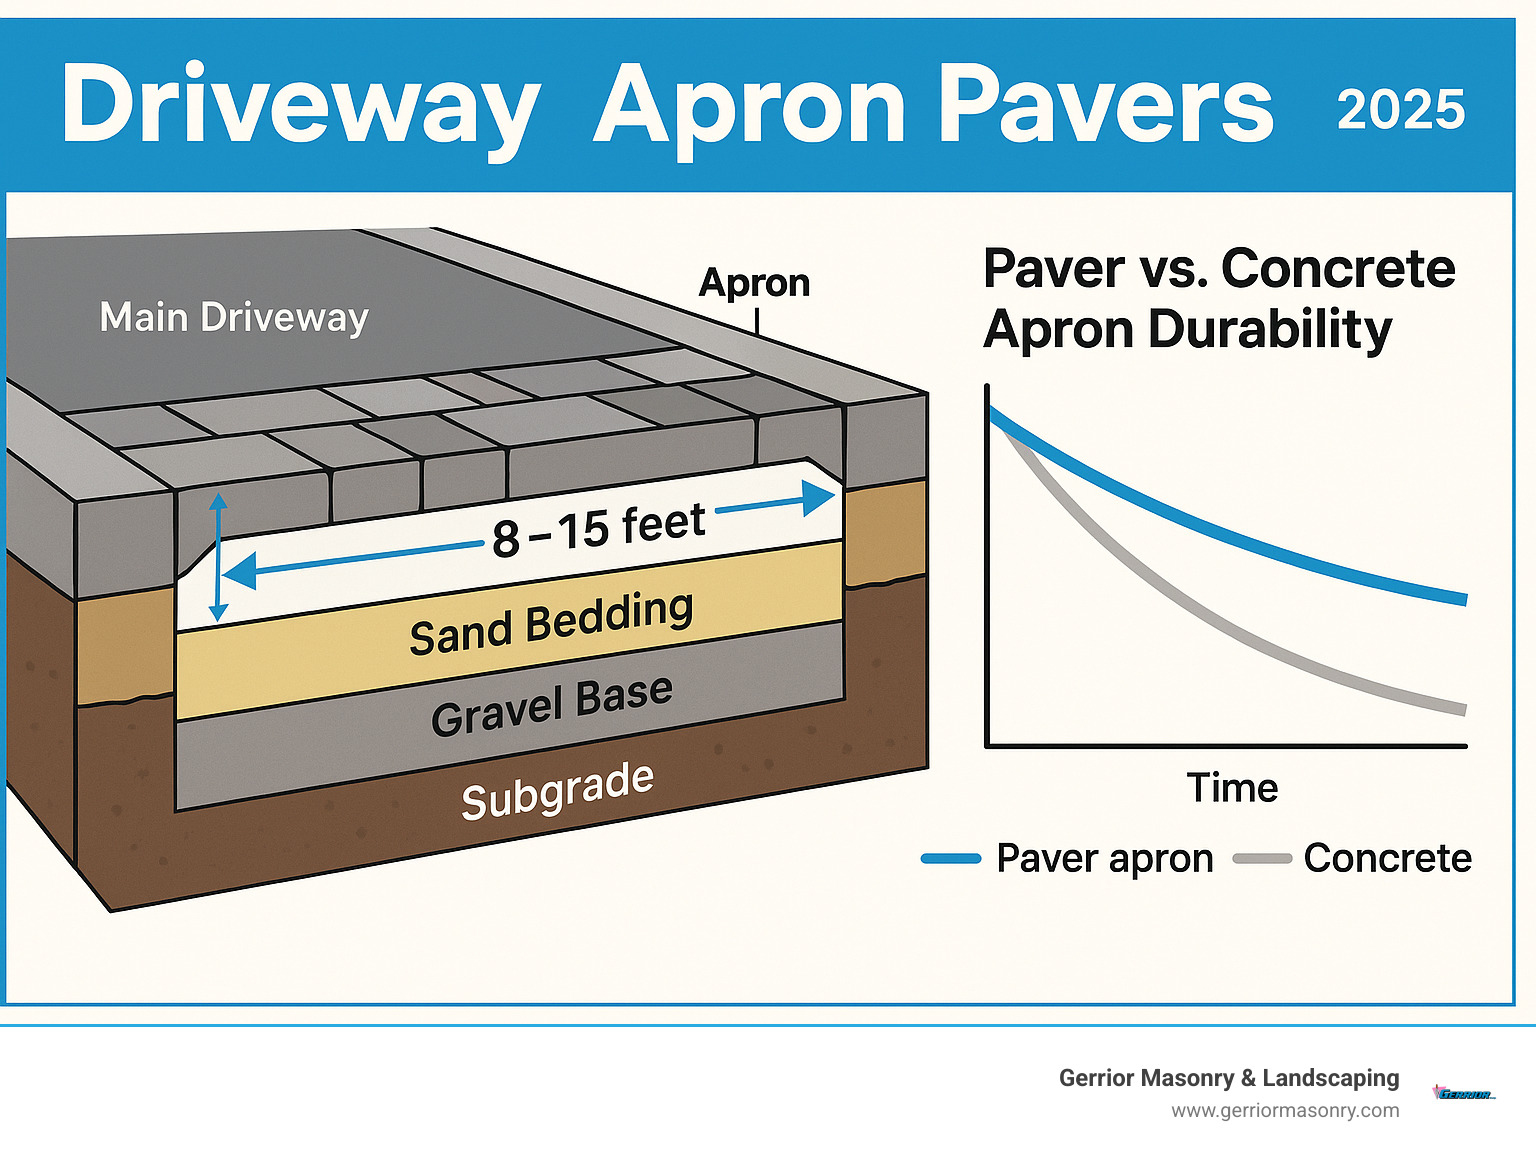
Driveway apron pavers create the perfect transition between your private driveway and the public street. This often-overlooked area, typically extending 8 to 15 feet from the curb, serves as your property’s welcome mat and can dramatically improve your home’s curb appeal.
Quick Answer: What You Need to Know About Driveway Apron Pavers
Location: The section where your driveway meets the street
Function: Provides smooth vehicle transition and protects main driveway
Materials: Concrete pavers, brick, or stone offer superior durability
Cost: $5-$15 per square foot (ranges based on internet data, not actual Gerrior pricing)
Benefits: Improved aesthetics, easy repairs, and long-lasting performance
Your driveway apron takes the most abuse from heavy delivery trucks, snowplows, and daily traffic. Traditional concrete often cracks and settles in this high-stress zone. Paver aprons solve these problems while adding visual interest that makes your home stand out.
Many homeowners focus on their main driveway but ignore the apron, which is a missed opportunity. A well-designed paver apron can increase property value and create an impressive first impression.
This guide walks you through planning, designing, and installing a block paver driveway apron. You’ll learn about material options, installation steps, and maintenance.
I’m Joe Gerrior, owner of Gerrior Masonry & Landscape Construction Corp. With over 34 years of experience installing driveway apron pavers throughout Massachusetts, my team has helped hundreds of homeowners transform their entrances with durable, attractive paver solutions.
Understanding and Installing Driveway Apron Pavers
Getting to know driveway apron pavers starts with understanding what makes this small area of your property so important. Once you see how much impact it has on your home’s appearance and functionality, you’ll wonder why you waited so long to upgrade it.
What is a Driveway Apron and Why Upgrade?
Think of your driveway apron as the hardest-working part of your entire driveway. This transitional zone where your driveway meets the street takes a beating from delivery trucks, snowplows, and daily traffic. It’s your driveway’s bodyguard—absorbing punishment so your main driveway stays protected.
The apron does more than just look pretty. It creates a smooth transition for vehicles, supports heavy loads that would damage regular pavement, and helps manage stormwater runoff.
But traditional materials often lead to frustration. We see the same problems over and over with concrete and asphalt aprons:
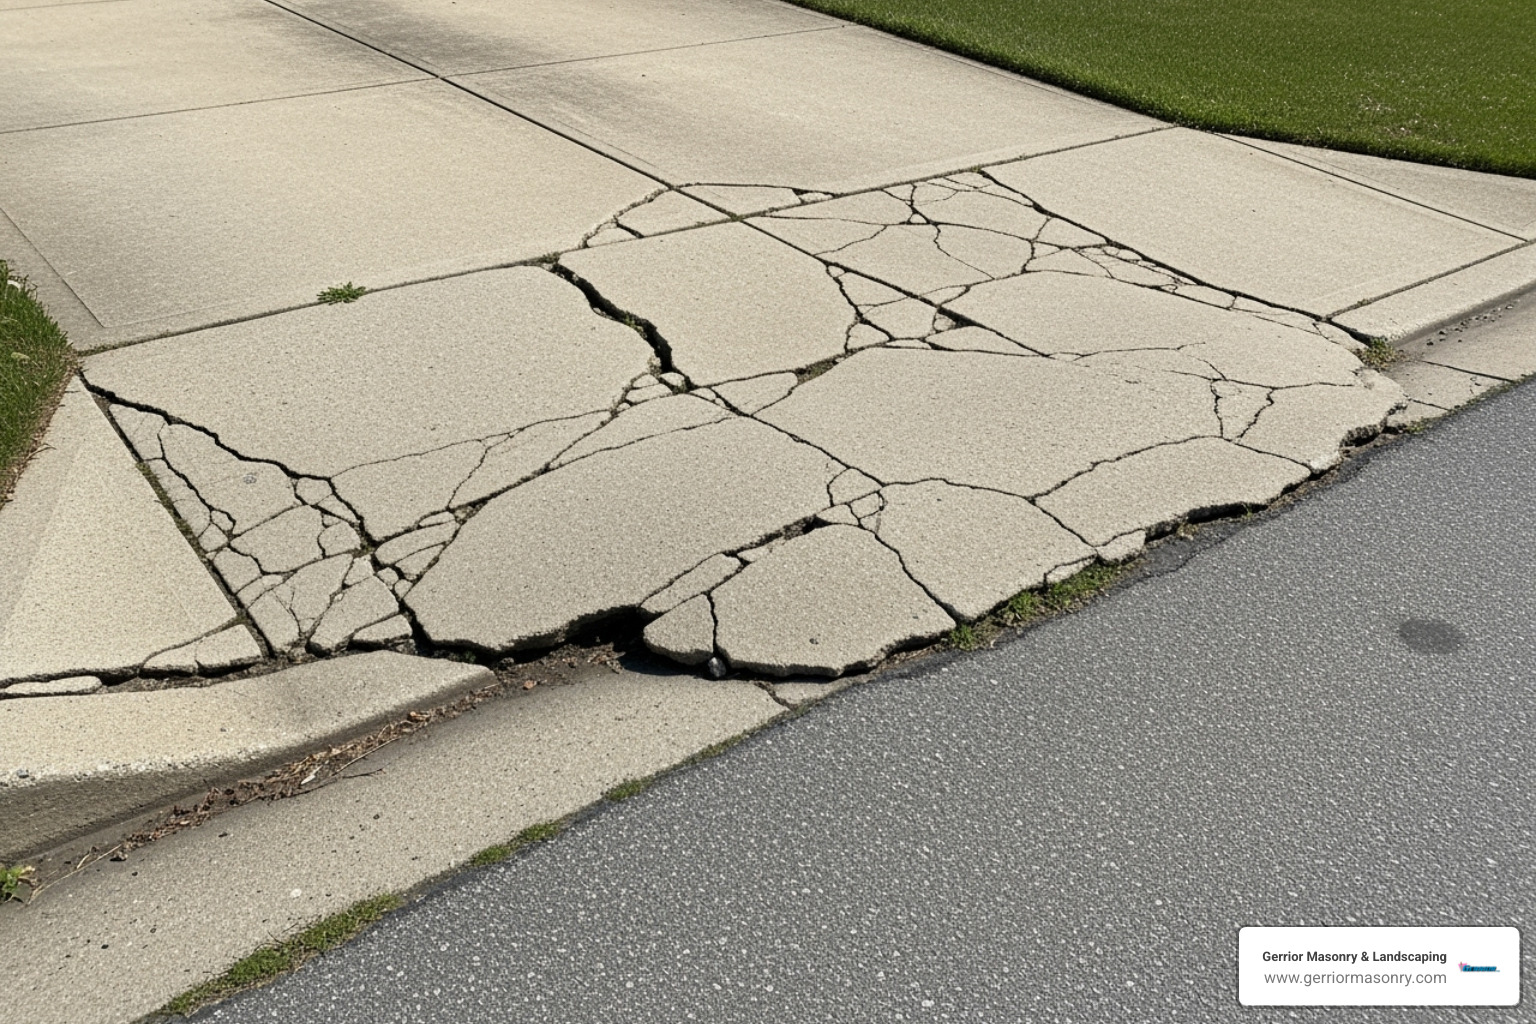
Cracking happens when the freeze-thaw cycle does its work. Water seeps into tiny cracks, freezes, expands, and creates bigger cracks.
Spalling—when the surface flakes and pits—usually shows up thanks to road salt and harsh weather.
Settlement and sinking occur when the base wasn’t properly prepared, creating an uneven and dangerous surface.
Erosion around the edges happens when water doesn’t drain properly, washing away soil.
These aren’t just cosmetic issues; they’re expensive problems waiting to happen. A cracked, sunken apron doesn’t scream “welcome.” The good news? Driveway apron pavers solve all these problems while making your entrance look amazing, giving you a beautiful, durable surface that improves your property value.
Why Choose Paver Aprons Over Outdated Materials?
Let’s be honest about something – not all paving materials are created equal. While your neighbor might be patching their concrete apron for the third time this decade, you could be enjoying a maintenance-free driveway apron paver system that looks better every year.
Here’s how the materials stack up when you look at the big picture:
All pricing mentioned is based on internet data and not actual Gerrior Masonry & Landscaping service costs. The high end of the cost range is at least 3x the average to reflect the wide variability in project specifics and material choices.
What makes driveway apron pavers the smart choice comes down to four key advantages that our clients love:
Superior aesthetics and design versatility means you’re not stuck with boring gray concrete or basic black asphalt. We can create intricate herringbone patterns, add contrasting borders, or match your home’s architectural style perfectly. Whether you want classic cobblestone charm or modern large-format elegance, pavers deliver options that make your neighbors jealous.
Best durability comes from engineering. These aren’t your basic patio pavers – they’re manufactured specifically to handle heavy vehicle loads. Quality driveway apron pavers can be two to three times stronger than traditional concrete, and when installed over a properly compacted base, they’ll outlast and outperform other materials for decades.
Easy repairability is where pavers really shine. When a single paver gets damaged (which rarely happens), we can pop it out and replace just that one piece. Compare that to concrete, where fixing a crack means cutting out and patching a large, obvious section that never quite matches the original.
Long-term value and low maintenance make the initial investment worthwhile. While pavers might cost more upfront than basic concrete, their longevity and minimal maintenance requirements often make them more cost-effective over their lifetime. Plus, they boost your property value and give you that “wow factor” every time you come home.
Design and Planning for Your Paver Apron
This is where the fun begins – turning your vision into reality. Designing your driveway apron pavers is like choosing the perfect frame for a beautiful picture. Get it right, and everything looks intentional and neat.
Paver color and texture set the entire mood for your entrance. Do you want warm earth tones that complement your home’s natural materials, or bold contrasts that make a statement? Smooth finishes give a modern, clean look, while textured surfaces add character and provide better traction in wet conditions.
Shape and pattern choices can completely transform the feel of your space. Herringbone patterns are incredibly popular because they lock pavers together beautifully and handle heavy traffic like champs. Basketweave patterns offer a more relaxed, traditional feel, while running bond creates clean, contemporary lines. For wider driveways, we can even incorporate circular accents or custom designs that become true conversation pieces.
Creating borders and accents adds that professional finishing touch. A contrasting border using different colored pavers or a “soldier course” (pavers lined up like soldiers in formation) defines the space and adds visual depth. Belgian blocks make stunning edging that can extend along your entire driveway for a cohesive, upscale look.
Matching your home’s architecture ensures everything works together harmoniously. A rustic New England farmhouse calls for different paver choices than a sleek contemporary home. We help you find that sweet spot where your apron complements rather than competes with your home’s existing style.
Beyond the visual elements, smart planning involves understanding the practical requirements. Local building codes and permit requirements vary by municipality, and since aprons often extend into public right-of-way areas, checking with your town’s building department is essential before starting any work.
Municipal thickness rules typically require aprons to be thicker than regular driveways – often 6 inches instead of 4 – because they handle heavier loads from delivery trucks and emergency vehicles. This extra thickness, combined with proper base preparation, ensures your driveway apron pavers will handle whatever gets thrown at them.
Slope and drainage requirements ensure water flows away from your home toward the street gutters, preventing pooling and foundation issues. Getting this right during the design phase saves headaches later.
The Installation Process for Driveway Apron Pavers
Installing driveway apron pavers might look straightforward, but there’s serious science behind creating a system that will last for decades. The difference between a professional installation and a DIY attempt often comes down to the unseen foundation work.
Excavation and removal starts the process by marking boundaries and removing existing materials. Old concrete or asphalt needs proper disposal at specialized facilities.
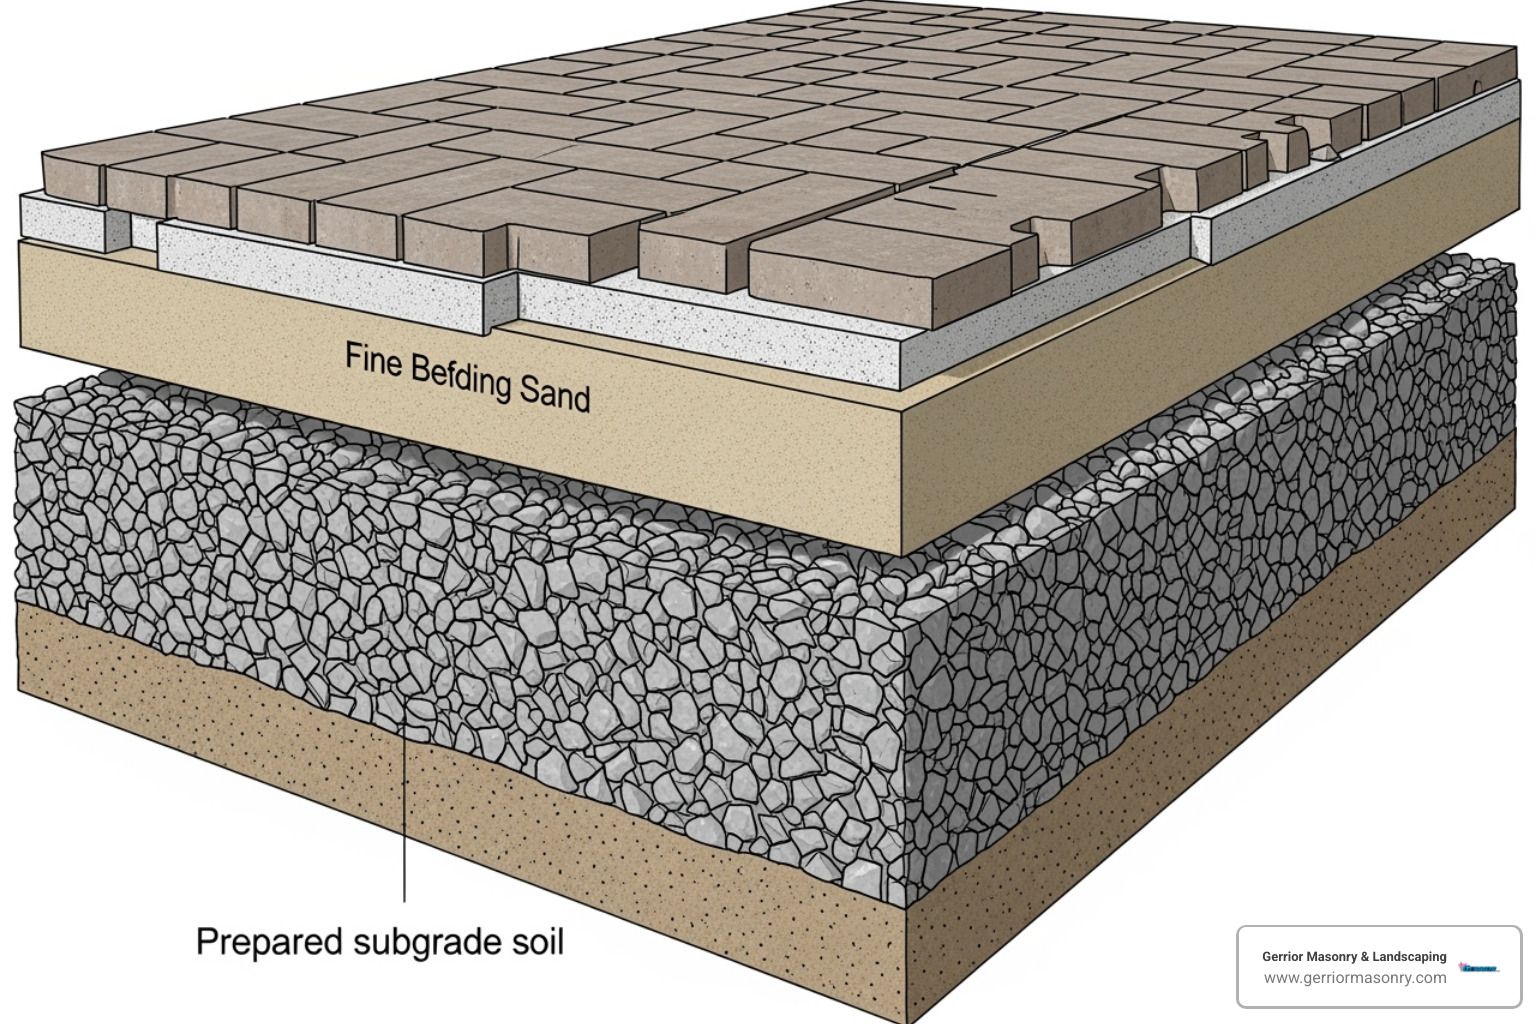
Base material preparation is where the magic happens. We excavate deep enough for an 8 to 10-inch layer of compacted crushed stone aggregate. This robust foundation is critical for supporting heavy vehicles and preventing settlement.
Compaction eliminates voids in the base material using professional plate compacters. Each layer gets thoroughly compacted to prevent future problems.
Sand bedding layer provides the perfect surface. We spread a ¾-inch layer of leveling sand evenly over the compacted base.
Laying pavers requires skill. Each paver is carefully placed, maintaining straight lines and consistent spacing for a strong interlock.
Edge restraints prevent your paver system from spreading apart. These rigid barriers lock everything in place permanently.
Compacting pavers happens once all pieces are laid. We use a plate compactor with protective padding to settle the pavers firmly into the sand.
Jointing sand application completes the system. Polymeric sand is swept into the joints and hardens when wet to lock everything together and prevent weeds.
For more detailed information about our complete hardscaping installation processes, visit our hardscaping services page.
Maintenance and Sustainability of Driveway Apron Pavers
One of the best parts about choosing driveway apron pavers is how little maintenance they actually require. While your neighbors are dealing with crack repairs and resurfacing projects, you’ll be enjoying a beautiful entrance that takes care of itself.
Routine maintenance couldn’t be simpler. Regular sweeping keeps debris and leaves from accumulating, while an occasional rinse with your garden hose removes surface dirt and grime. Stain removal for tougher spots like oil or grease just requires specific paver cleaners – tackle stains quickly and they come right out.
Weed prevention happens automatically thanks to polymeric sand in the joints, though you might occasionally need to pull a stubborn weed or two. Snow removal works best with plastic or rubber-edged shovels to avoid scratches. If you need de-icing agents, choose concrete-friendly options like calcium magnesium acetate instead of harsh rock salt.
Long-term care involves re-sanding joints every few years as some sand naturally washes away over time. Sealing pavers every 3-5 years with quality sealer improves color, protects against stains, and makes cleaning even easier – especially valuable in our harsh Massachusetts winters.
The environmental benefits of driveway apron pavers make them an even smarter choice. Permeable pavers with wider joints allow rainwater to filter directly through the surface into the ground below, dramatically reducing stormwater runoff that contributes to urban flooding and waterway pollution.
Reduced runoff and puddles mean no more hazardous ice patches or standing water on your apron surface. Groundwater recharge happens naturally as water percolates through the system, replenishing local water supplies that benefit entire ecosystems.
Natural water filtration occurs as stormwater passes through the base layers, removing pollutants before reaching groundwater. Some municipalities even offer tax incentives for installing permeable surfaces because of their positive impact on local stormwater infrastructure.
By choosing driveway apron pavers, you’re making a responsible environmental choice while creating a stunning entrance that improves your property value. For more information about integrating drainage solutions into hardscaping projects, check out our drainage systems and dry wells services.
Your Driveway Apron Project with Professional Guidance
As we’ve covered, driveway apron pavers are a smart investment. They offer superior durability against heavy traffic and weather, endless aesthetic possibilities, and low maintenance compared to traditional materials. A simple paver replacement beats patching concrete any day. A well-designed paver apron transforms your home’s first impression and can increase its value.
While a DIY installation is tempting, the long-term success of a paver apron depends heavily on the foundation. Proper base preparation, excavation depth, compaction, and drainage are critical, especially with New England’s freeze-thaw cycles. A shortcut in the foundation can lead to settling or shifting pavers down the road.
This is where professional experience makes a difference. With 34 years of experience, we understand the local soil conditions, weather challenges, and municipal codes across Massachusetts. We provide owner oversight on every project, ensuring your driveway apron pavers get the attention to detail they deserve.
Ready to create a beautiful, durable entrance that welcomes you home? We can help you design and install the perfect paver apron for your property. Contact us for your hardscaping project to schedule a consultation.
Gerrior Masonry & Landscape Construction is based in Woburn, MA, and proudly serves the surrounding communities throughout Middlesex and Essex County, Massachusetts.