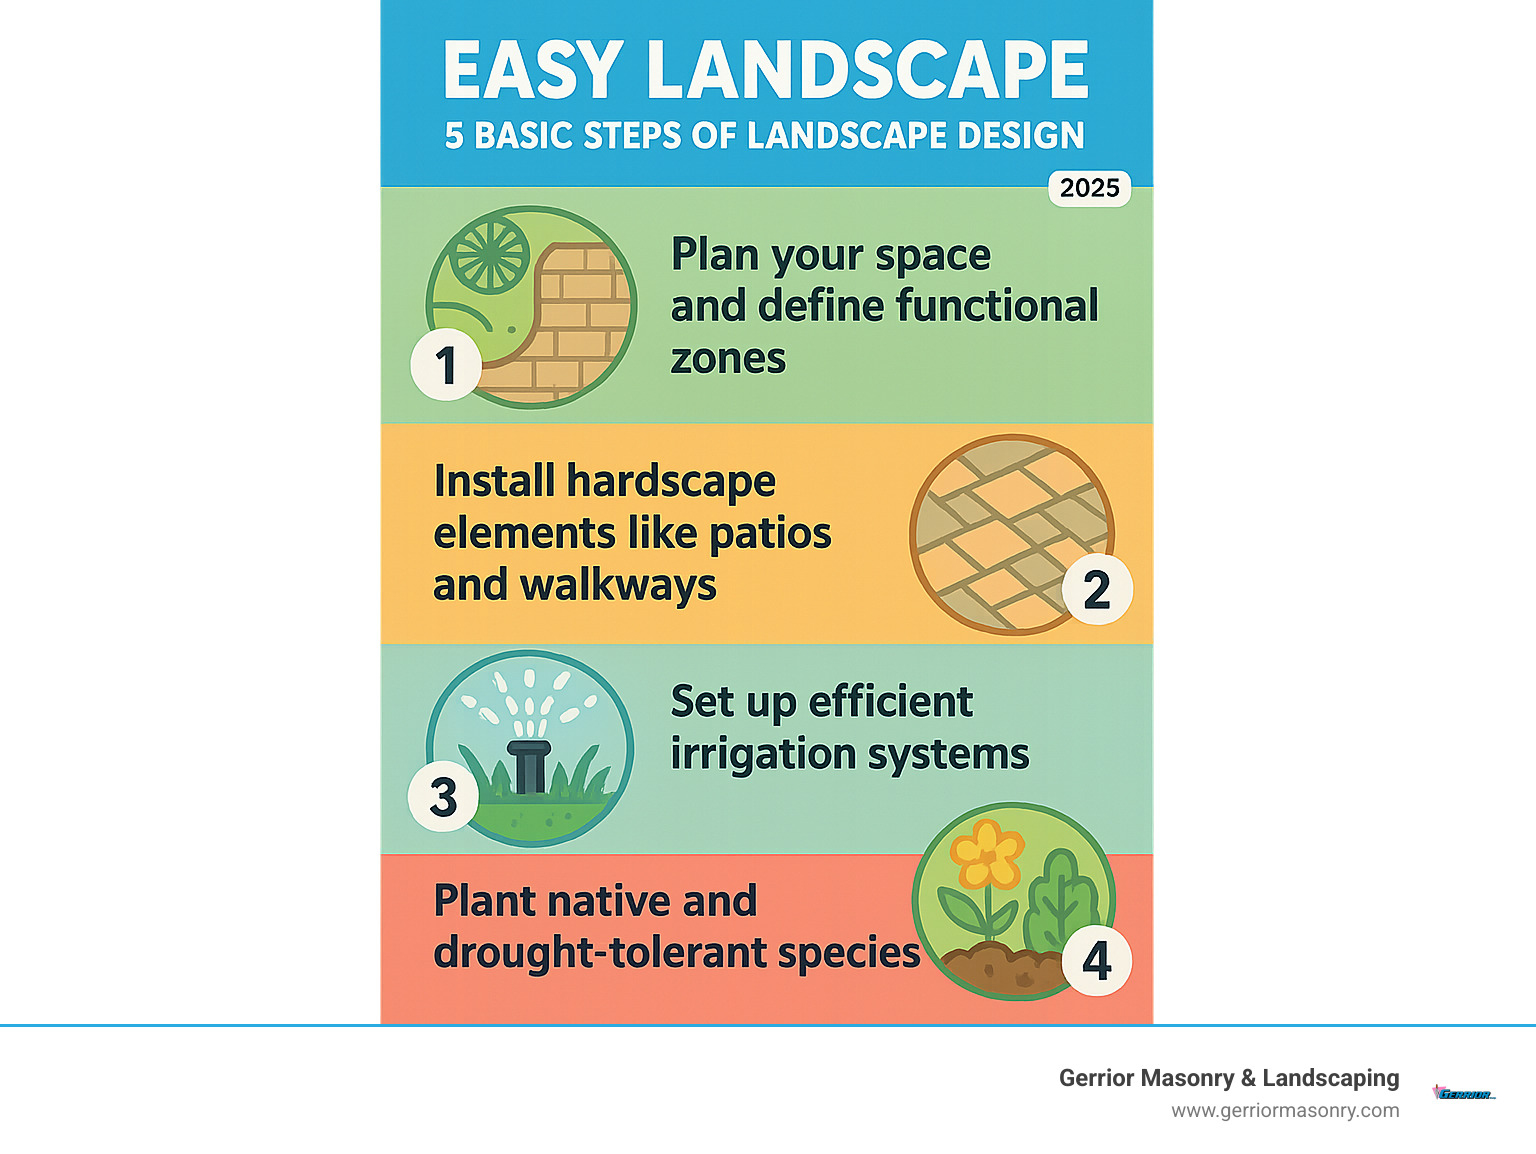
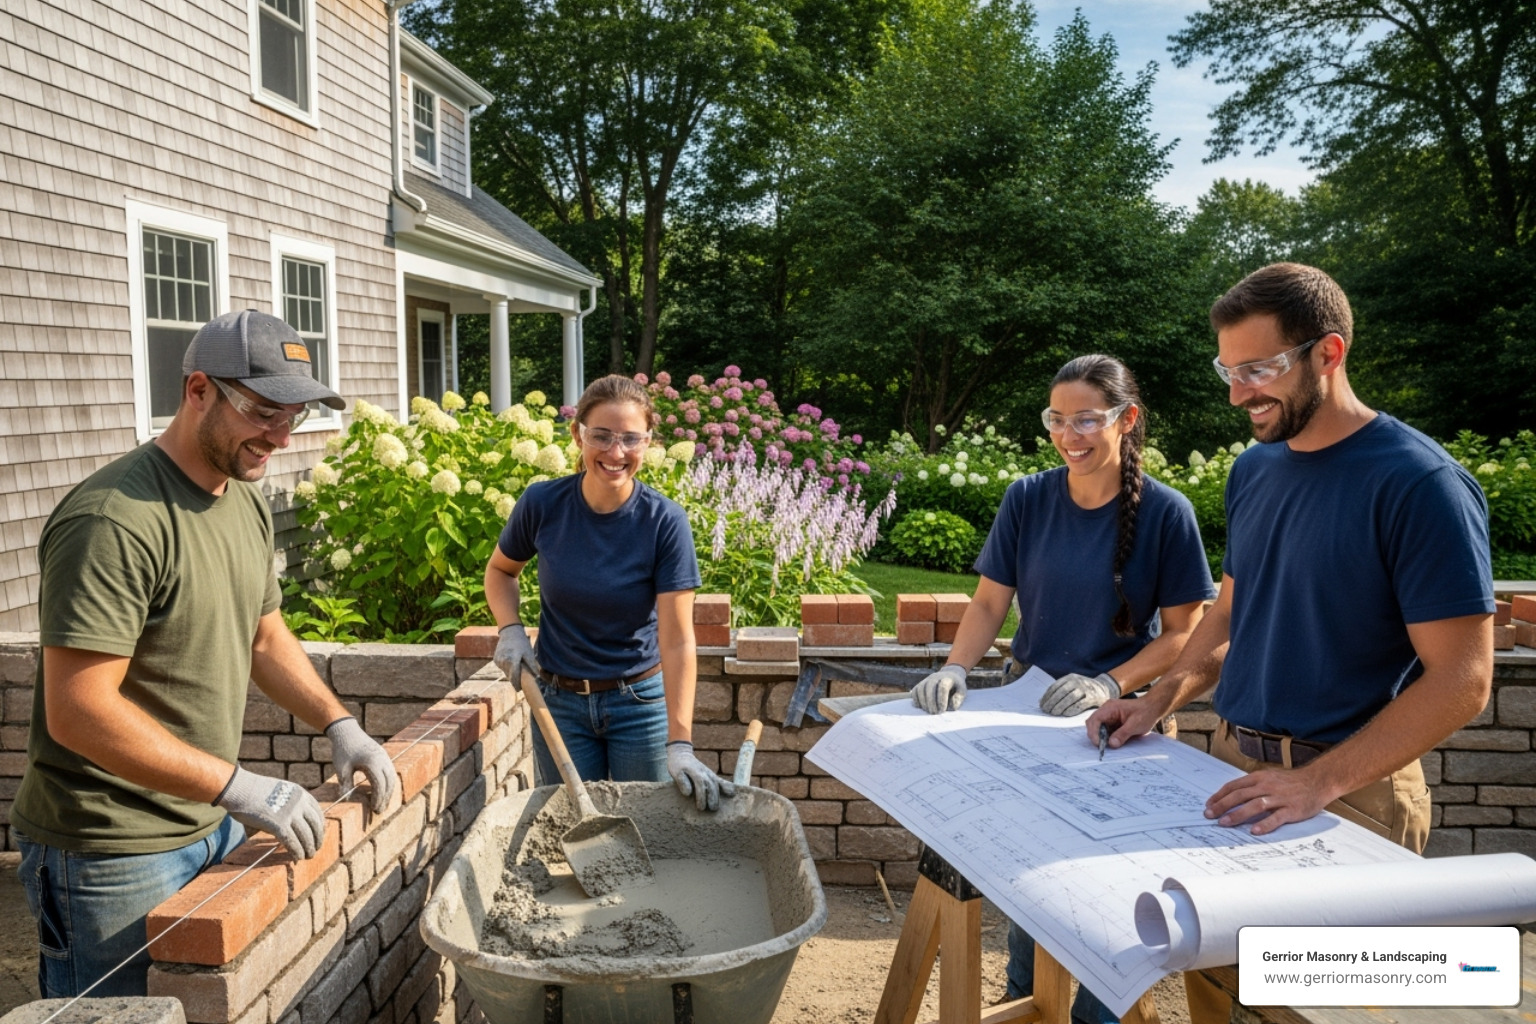
Preparing Your Canvas: The Fundamentals of Easy Landscape Design
Creating an easy landscape doesn’t require a green thumb or years of gardening experience. With smart planning and simple techniques, your yard can become a beautiful, low-maintenance outdoor space that improves your home’s value and your quality of life.
Key Elements for Easy Landscape Success:
Native plants that thrive without constant care
Hardscaping to reduce lawn maintenance areas
Mulch and ground cover for weed suppression
Perennial plants that return year after year
Strategic design using repetition and negative space
The goal of simple landscape design is to create a stunning outdoor area that requires minimal upkeep. By choosing drought-tolerant plants and focusing on a clear purpose, you can design a relaxing sanctuary that isn’t another chore on your to-do list. A well-designed landscape works with nature, not against it, by selecting materials and plants that suit your lifestyle and local climate.
At Gerrior Masonry & Landscape Construction, we’ve spent over 34 years helping Massachusetts homeowners create easy landscape solutions that blend beauty with practicality. Our approach combines artistic vision with low-maintenance techniques to turn your outdoor space into a masterpiece you can actually enjoy.
The process is straightforward, much like an artist approaching a canvas. We start with a vision, establish the foundational elements, and then add the details that bring it to life. This ensures every component serves the goal of simplicity and low maintenance.
An easy landscape is about changing your yard into a functional and beautiful space while reducing the burden of maintenance. Smart upfront choices can significantly decrease gardening time and reduce water usage by up to 50% in some regions, saving both resources and money.
Your Palette for an Easy Landscape: Plants, Hardscapes, and Ground Cover
To create a beautiful and simple outdoor space, you need the right palette of elements. The secret to an easy landscape is choosing plants, hardscaping, and ground cover that work together naturally, requiring minimal fuss while delivering maximum impact.
Selecting the Right Plants for Effortless Beauty
The right plants can make your garden practically take care of itself, while the wrong ones can lead to endless chores.
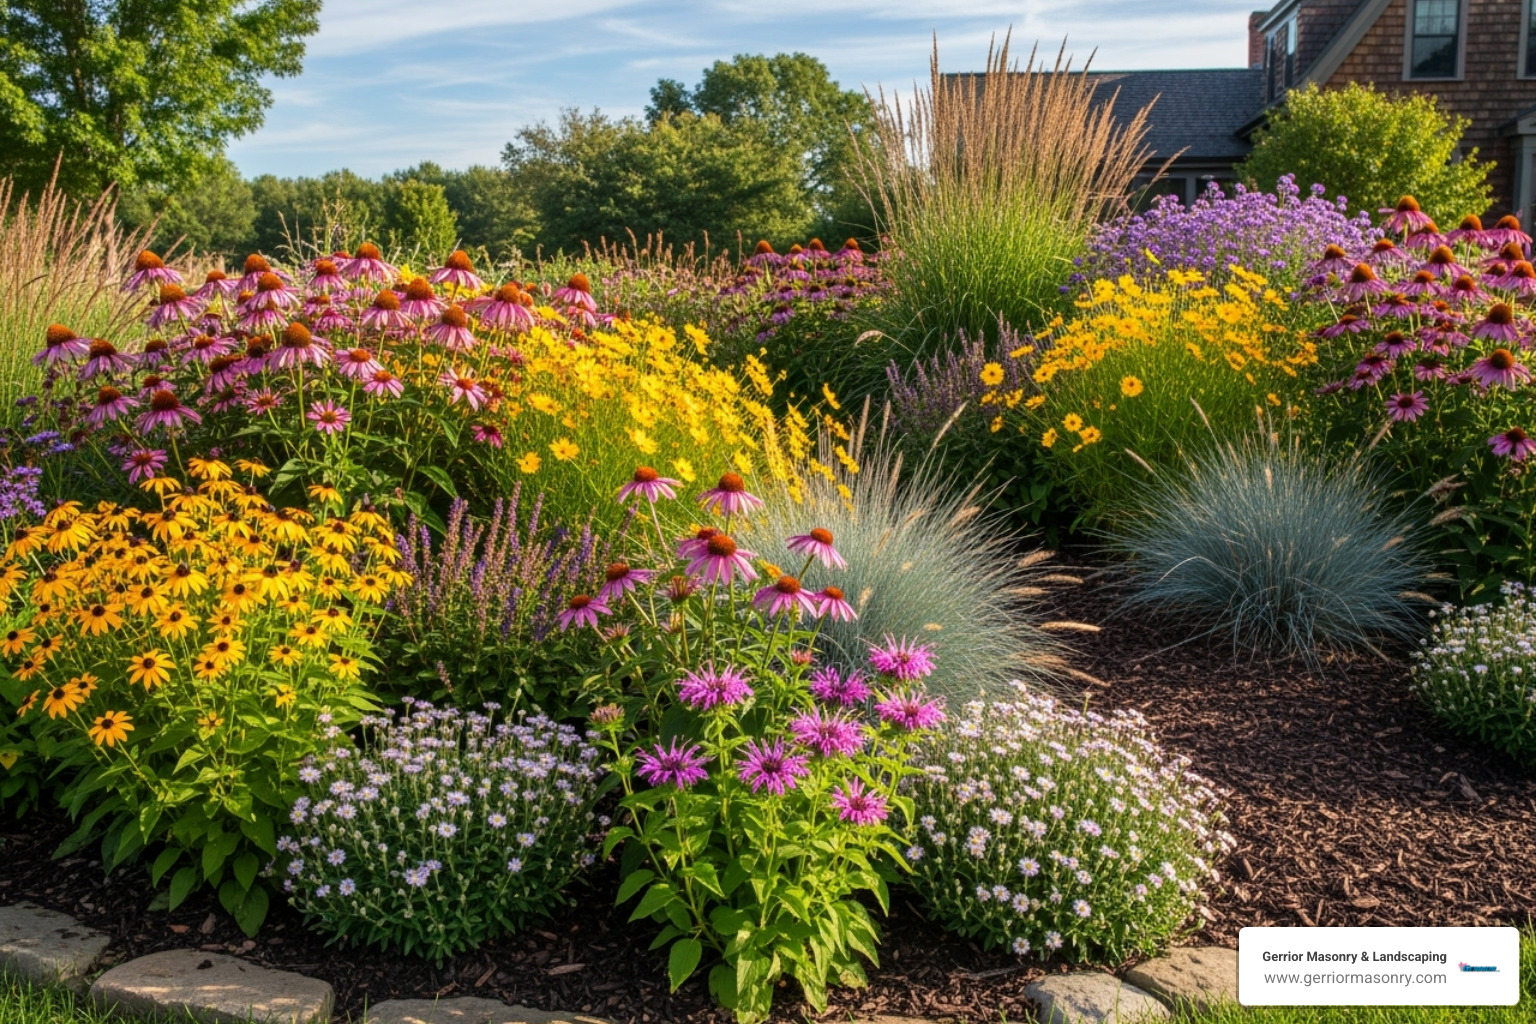
Native Plants: These are your best friends for low-maintenance gardening. Adapted to Massachusetts’ climate, they thrive with little intervention and can cut water usage by up to 50% once established.
Drought-tolerant plants: These are designed by nature to thrive with scarce water. Ornamental grasses, succulents, and hardy perennials like black-eyed Susan or coneflower add beauty and texture without demanding constant watering.
Perennials: Unlike annuals, perennials return year after year. Plant them once for seasons of enjoyment. Many are naturally drought-tolerant and require little care.
Container Gardening: This offers flexibility and control. You can manage soil and water for each plant, move them for optimal sunlight, and easily change your look. It’s also a great way to contain weeds.
Evergreens: These plants provide year-round color and structure, keeping your landscape looking intentional even in winter.
Building the Bones with Low-Maintenance Hardscaping
If plants are the color, hardscaping is the structure. Once installed, it requires virtually no maintenance.
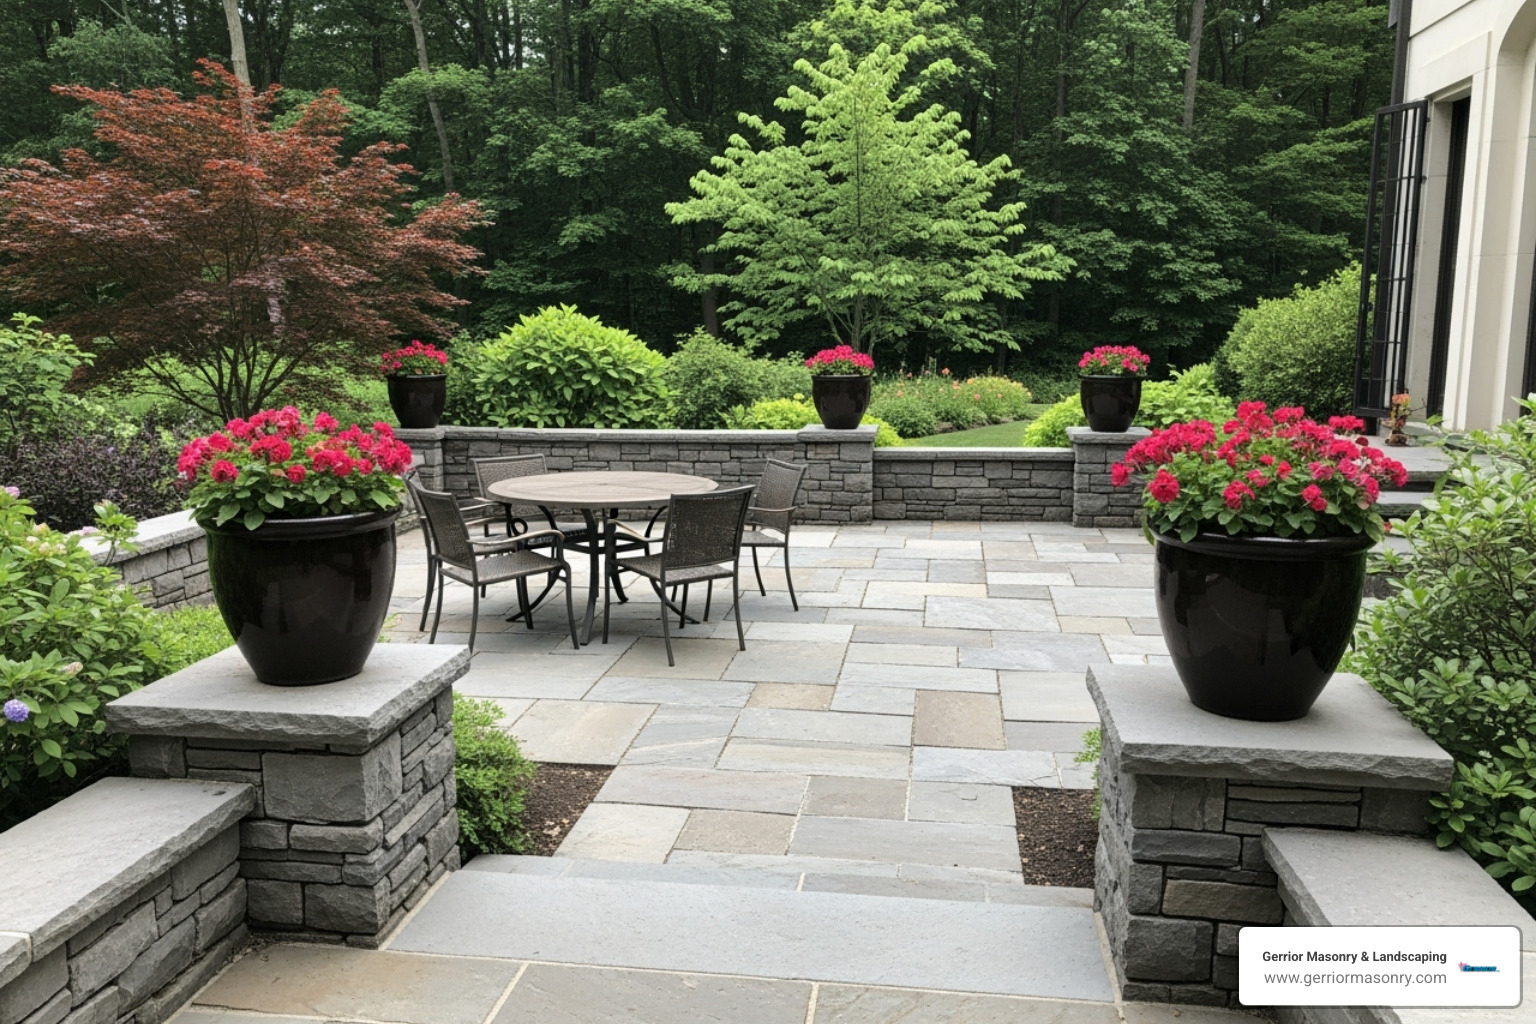
Patios and walkways create functional outdoor living areas, replacing high-maintenance lawns with surfaces that only need an occasional sweep. Natural stone, pavers, or concrete offer durable and beautiful options.
Retaining walls are both practical and aesthetic. They manage slopes, prevent erosion, and create defined, easy-to-maintain planting beds. Quality materials like natural stone or concrete blocks ensure they are permanent, valuable features.
The key benefit of hardscaping is reducing lawn area. Every square foot of patio or walkway is space you don’t have to mow, water, or fertilize, dramatically cutting down your yard work.
Mulch and ground cover are the unsung heroes of an easy landscape. They suppress weeds and retain moisture, so you can spend less time on maintenance.
Mulch acts as a protective blanket for your garden. A 2-4 inch layer prevents weeds, helps soil retain moisture, and improves soil health as it decomposes. In windy areas, river rocks are a great alternative.
Ground covers are a smart way to replace grass in difficult areas. Creeping thyme, clover, and gravel paths are excellent low-maintenance options. For zero-maintenance areas, river rocks or decorative stone provide a permanent, attractive solution.
By combining the right plants, hardscaping, and ground cover, you can create an easy landscape that is both beautiful and low-maintenance, giving you an outdoor space to enjoy, not just maintain.
Mastering the Brushstrokes: Design, Maintenance, and Budgeting
Just as an artist uses composition and technique, we apply design principles to ensure your easy landscape is both beautiful and sustainable. This involves understanding the artistic side of landscaping, practical lighting, and smart maintenance and budgeting.
Applying Artistic Principles to Your Easy Landscape
An easy landscape is not just about less work; it’s about creating a harmonious space. We use artistic principles to make your yard visually appealing and serene.
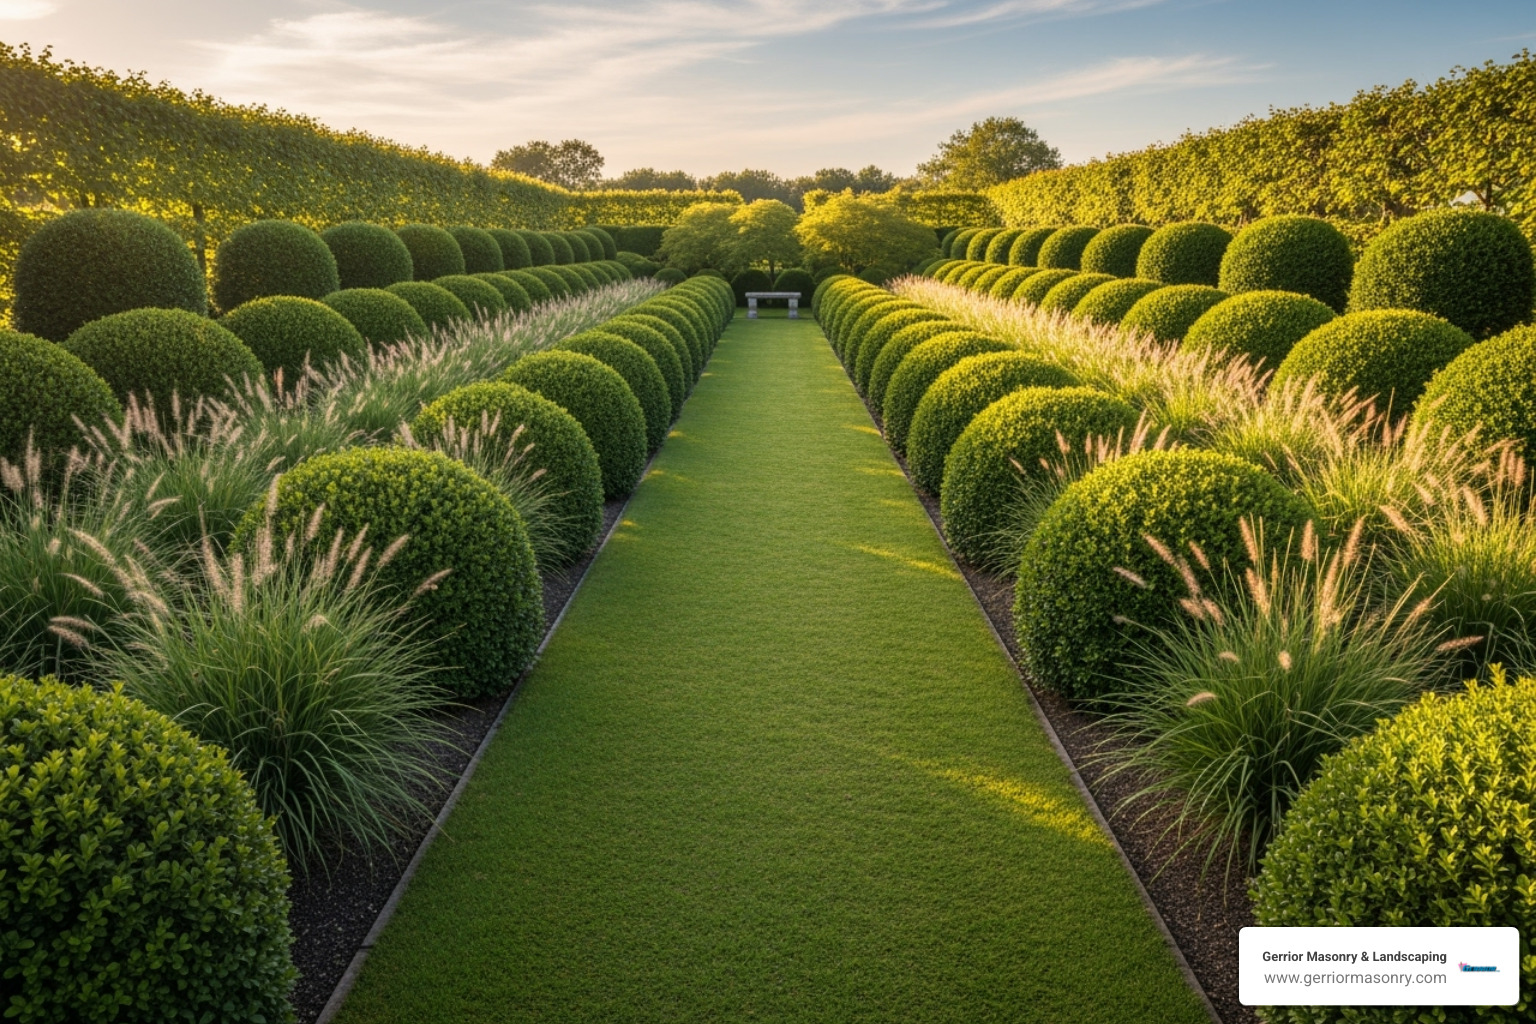
Repetition and Rhythm: Repeating elements like a specific plant or material creates unity and a calming, cohesive look. This helps the eye flow smoothly across the landscape, making the design feel intentional.
Negative Space: This refers to the open, uncluttered areas like a patio or a simple lawn. It prevents visual clutter, making the landscape feel more spacious and peaceful. Less is often more.
Focal Points: A single element, like a striking tree, a sculpture, or a seating area, can draw the eye and add interest without complexity. A few well-chosen focal points are more effective than many competing elements.
Simplicity: The key is to distill your outdoor space to its essence. A limited color palette, such as varying shades of green, can add depth without feeling busy, creating a landscape that is both natural and beautiful.
Illuminating Your Masterpiece with Outdoor Lighting
Strategic lighting can dramatically improve your landscape’s appeal and functionality after dark, adding beauty and practicality with minimal effort.
Outdoor lighting serves several purposes:
Functional: Pathway and step lights ensure safety and extend the usability of your outdoor areas into the evening.
Aesthetic: Uplighting a tree or downlighting a garden bed can create a magical, moonlit effect, highlighting your landscape’s best features.
Safety and Security: Well-placed lighting can deter intruders and illuminate dark corners.
For an easy landscape, we recommend automatic lighting systems with timers or sensors. Solar-powered lights are a great low-maintenance option, requiring no wiring. For more powerful and consistent light, low-voltage systems are durable and low-maintenance once installed. Thoughtful lighting ensures your easy landscape is stunning and inviting, day or night. More info about outdoor living spaces can inspire how lighting integrates with your design.
Protecting Your Investment: An Easy Landscape Maintenance and Budgeting Guide
An easy landscape is about long-term sustainability with minimal fuss. This means avoiding common mistakes, having a simple maintenance plan, and making smart budget choices.
Common mistakes include overcrowding plants, which leads to a high-maintenance mess, and ignoring your site’s conditions (like sunlight and soil). Choosing the right plant for the right place is fundamental to low-maintenance success.
Our maintenance approach is simple: do less, but do it right.
Watering: Drought-tolerant plants and mulch reduce watering needs. A drip irrigation system can further increase efficiency.
Weeding: Mulch handles most of the work. The few weeds that appear are easy to remove.
Pruning: Low-maintenance plants require only occasional trimming.
Hardscape Care: Patios and walkways need just a sweep or a seasonal power wash.
When considering budget, DIY projects can be very cost-effective. For instance, using native plants and low-cost perennials is a great way to landscape your backyard without spending a lot of money. However, for complex projects or if you lack the time and expertise, hiring a professional can be more beneficial in the long run, particularly regarding plant health and maturity. While DIY offers significant savings, professional installation ensures proper soil amendment, root system protection, and overall quality that can save you money on future problems.
Budget-Friendly Approaches:
DIY where possible: Tackle smaller projects like planting new garden beds or applying mulch yourself.
Choose wisely: Opt for native plants and perennials, which are often more affordable and require less long-term care than exotic annuals.
Repurpose materials: Look for reclaimed pavers or stones for pathways if budget is a concern.
Phased approach: Don’t feel pressured to complete everything at once. Break your project into smaller, manageable phases over time.
We understand that creating an easy landscape is an investment. While the average cost of professional landscaping can range from $4,000 to $10,000 or more, depending on the scope of the project and the materials chosen, DIY projects can save homeowners up to 50% compared to hiring professionals. These are average costs based on internet data and not actual costs for Gerrior Masonry services. We always provide detailed quotes custom to your specific project.
Whether you’re looking to transform your entire property or simply improve a small corner, an easy landscape is within reach. It’s about making smart, sustainable choices that benefit both your lifestyle and your wallet.
At Gerrior Masonry & Landscape Construction, we have over 30 years of experience in creating beautiful, functional, and low-maintenance outdoor spaces for homeowners across Massachusetts. Our skilled team and owner oversight on every project ensure high-quality results. We specialize in masonry and hardscaping services, including patio installation, walkways, walls, and more, all designed to make your outdoor living easier and more enjoyable.
To discuss your easy landscape project and get a personalized quote, please contact us for your landscape design project. Gerrior Masonry & Landscape Construction is based in Woburn, MA, and services Middlesex and Essex County, Massachusetts.
Why Proper Fireplace Mortar Repair Matters for Your Home’s Safety
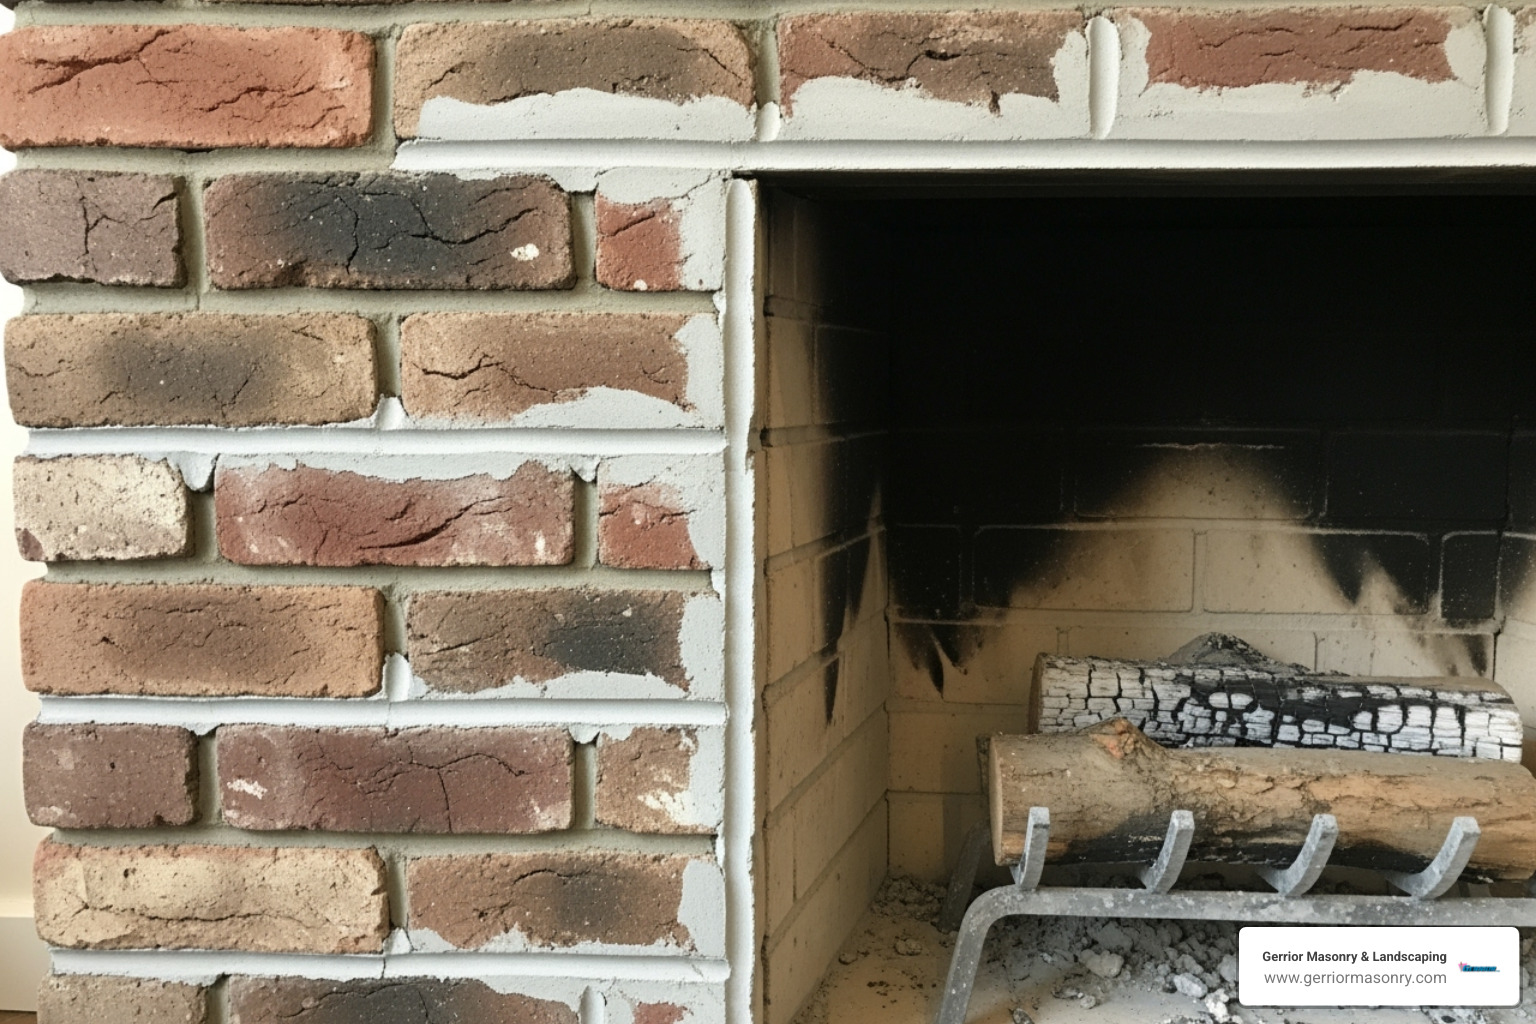
Knowing how to repair fireplace mortar is crucial for any homeowner, as damaged joints can lead to serious safety hazards. Small cracks might seem minor, but they can allow dangerous gases to escape and compromise your fireplace’s structural integrity.
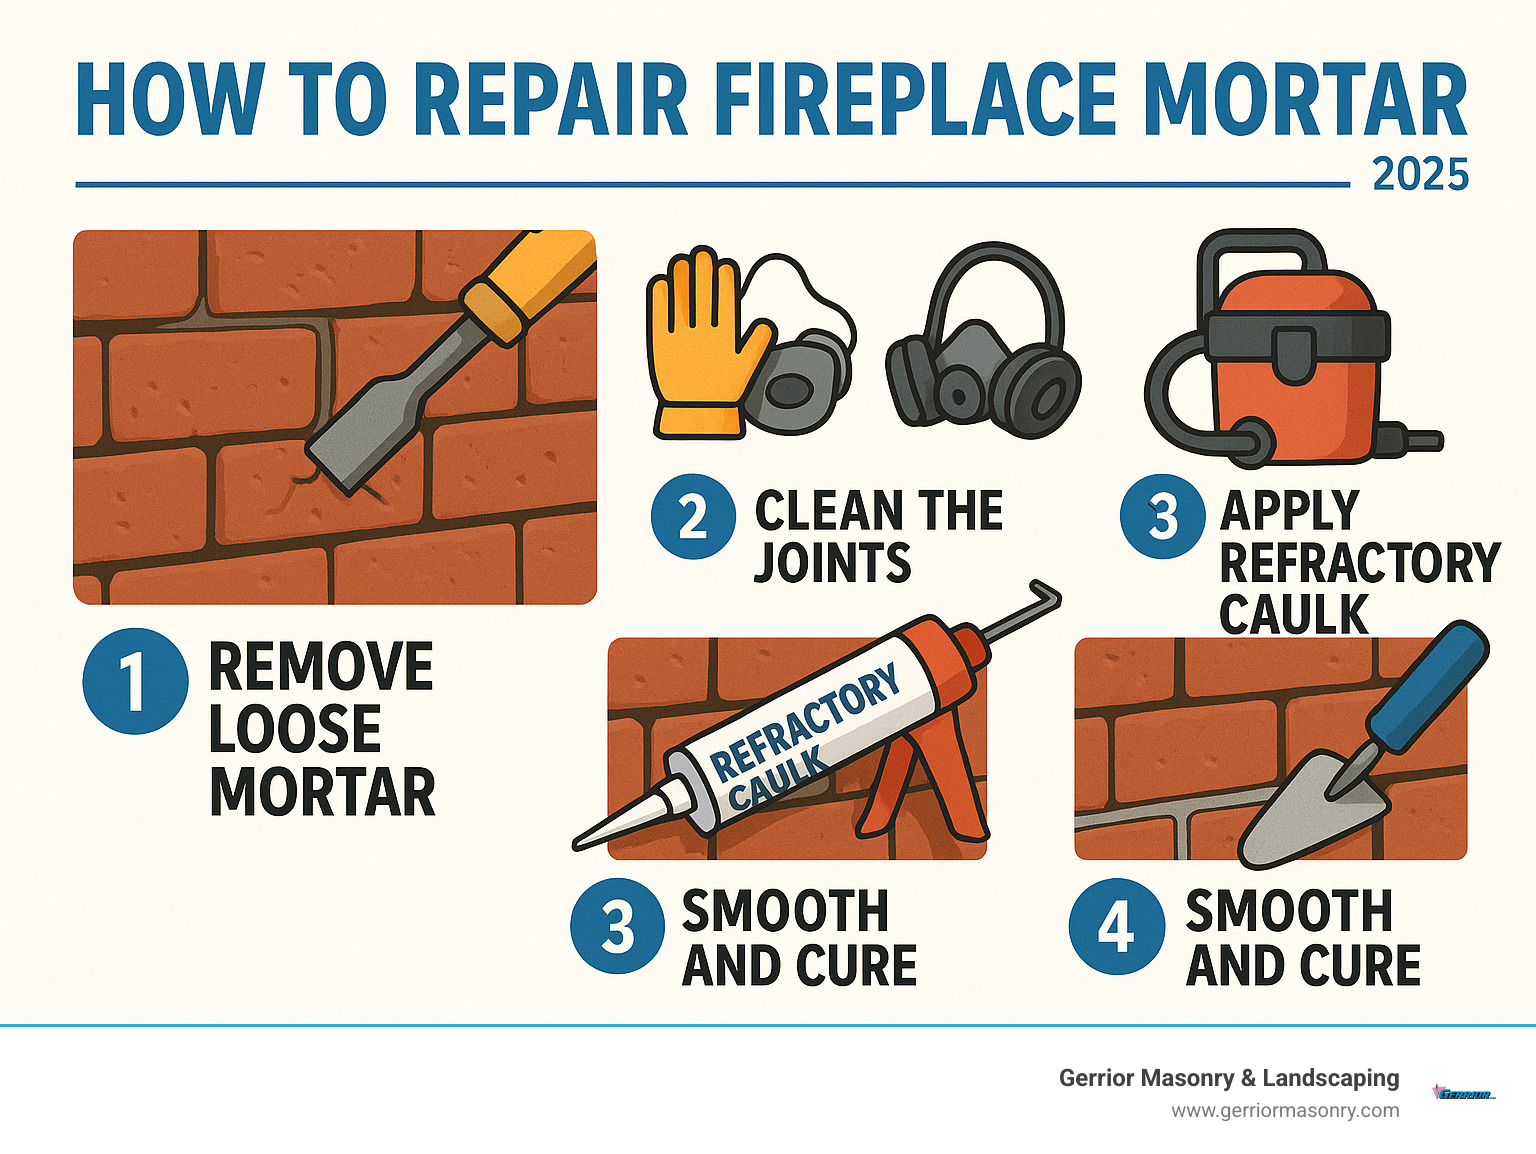
Here’s the quick process for minor repairs:
Quick Answer:
Remove loose mortar – Use a chisel to scrape out crumbling material.
Clean the joints – Vacuum all debris and dust from the gaps.
Apply refractory caulk – Fill joints with high-temperature caulk.
Smooth and cure – Tool the joints and allow proper heat curing.
Fireplace mortar is not like regular mortar. It’s a special refractory mortar designed to withstand extreme temperatures and constant expansion and contraction. Regular mortar would quickly fail, making specialized materials essential for a safe, lasting repair.
I’m Joe Gerrior, owner of Gerrior Masonry & Landscape Construction Corp. With over 34 years of experience in Massachusetts, I’ve seen how important proper mortar repair is. While some minor fixes are suitable for DIY, knowing when to call a professional is key to your home’s safety.
Relevant articles related to how to repair fireplace mortar:
Your Complete Guide on How to Repair Fireplace Mortar
Ready to tackle that crumbling mortar in your fireplace? This guide will walk you through everything you need to know about how to repair fireplace mortar, from understanding the materials to knowing when to call in the pros.
First, Understand Why Fireplace Mortar is Different
The mortar in your firebox is called refractory mortar, and it’s fundamentally different from standard construction mortar. Its key feature is the ability to withstand extreme temperatures—some types up to 2,000 degrees Fahrenheit. This is possible due to ingredients like silica and magnesium silicate, which allow the mortar to expand and contract along with the firebricks during heating and cooling cycles. This process is known as thermal expansion.
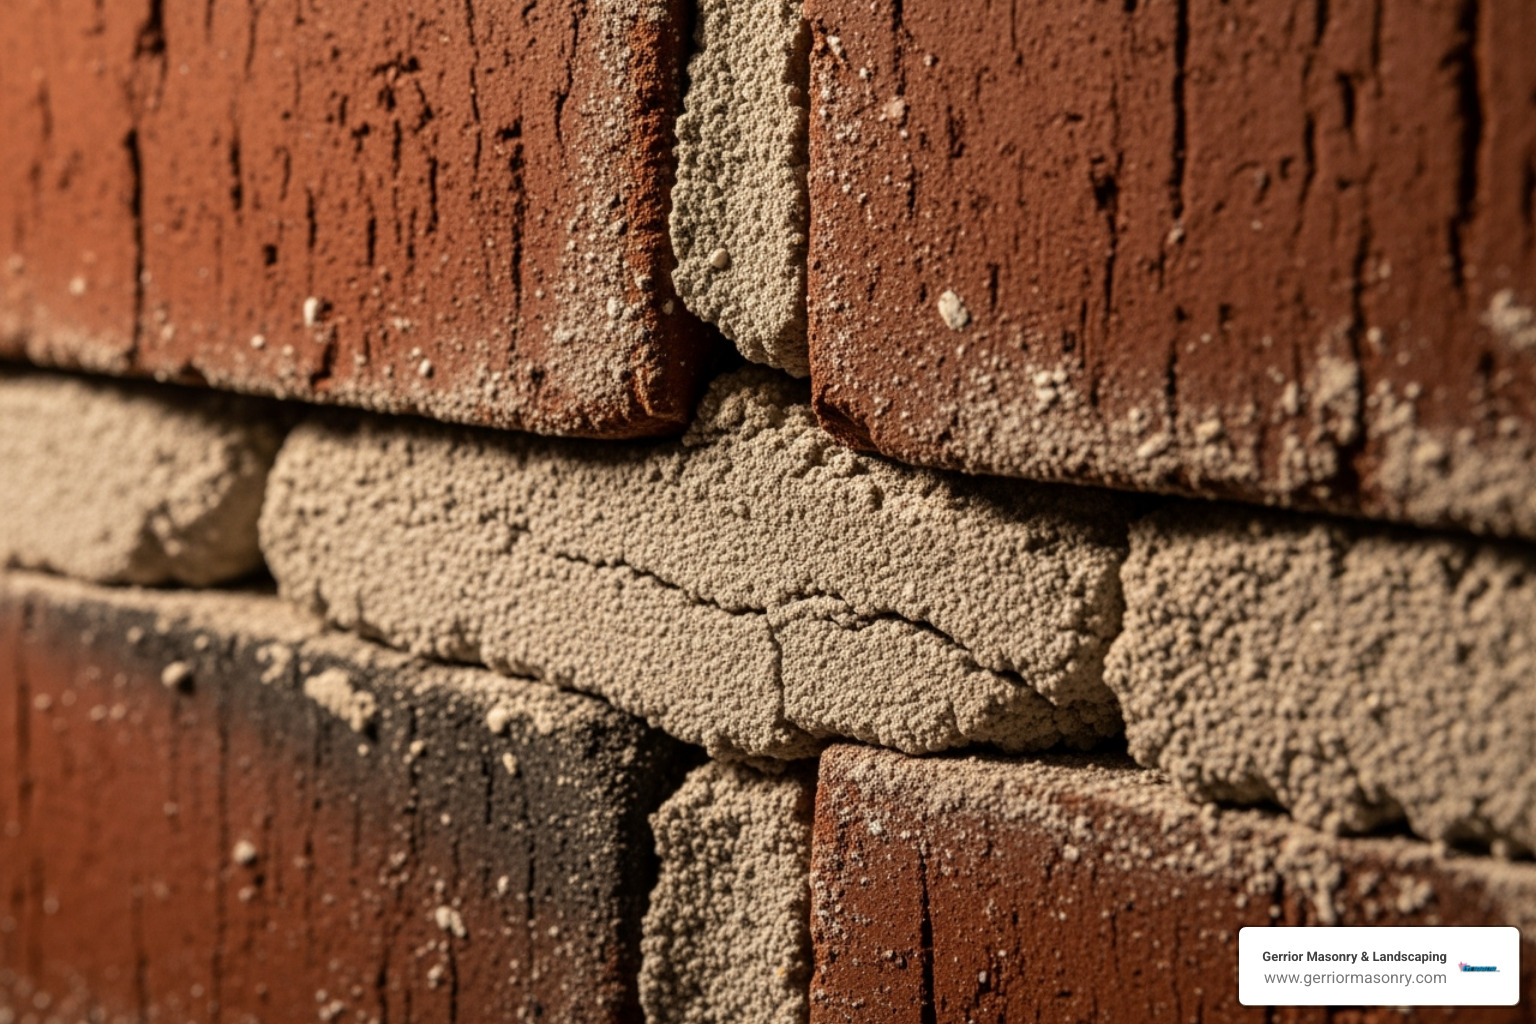
Regular mortar would crack and crumble under this stress, creating serious dangers of damaged mortar. Gaps can allow hot gases, smoke, and embers to escape into your walls, posing a fire hazard. They can also lead to carbon monoxide leaks and compromise the structural integrity of your fireplace.
Signs of Damage and When to Repair Fireplace Mortar
Inspect your firebox regularly for these common signs of mortar damage:
Cracks: Hairline fractures that can grow over time.
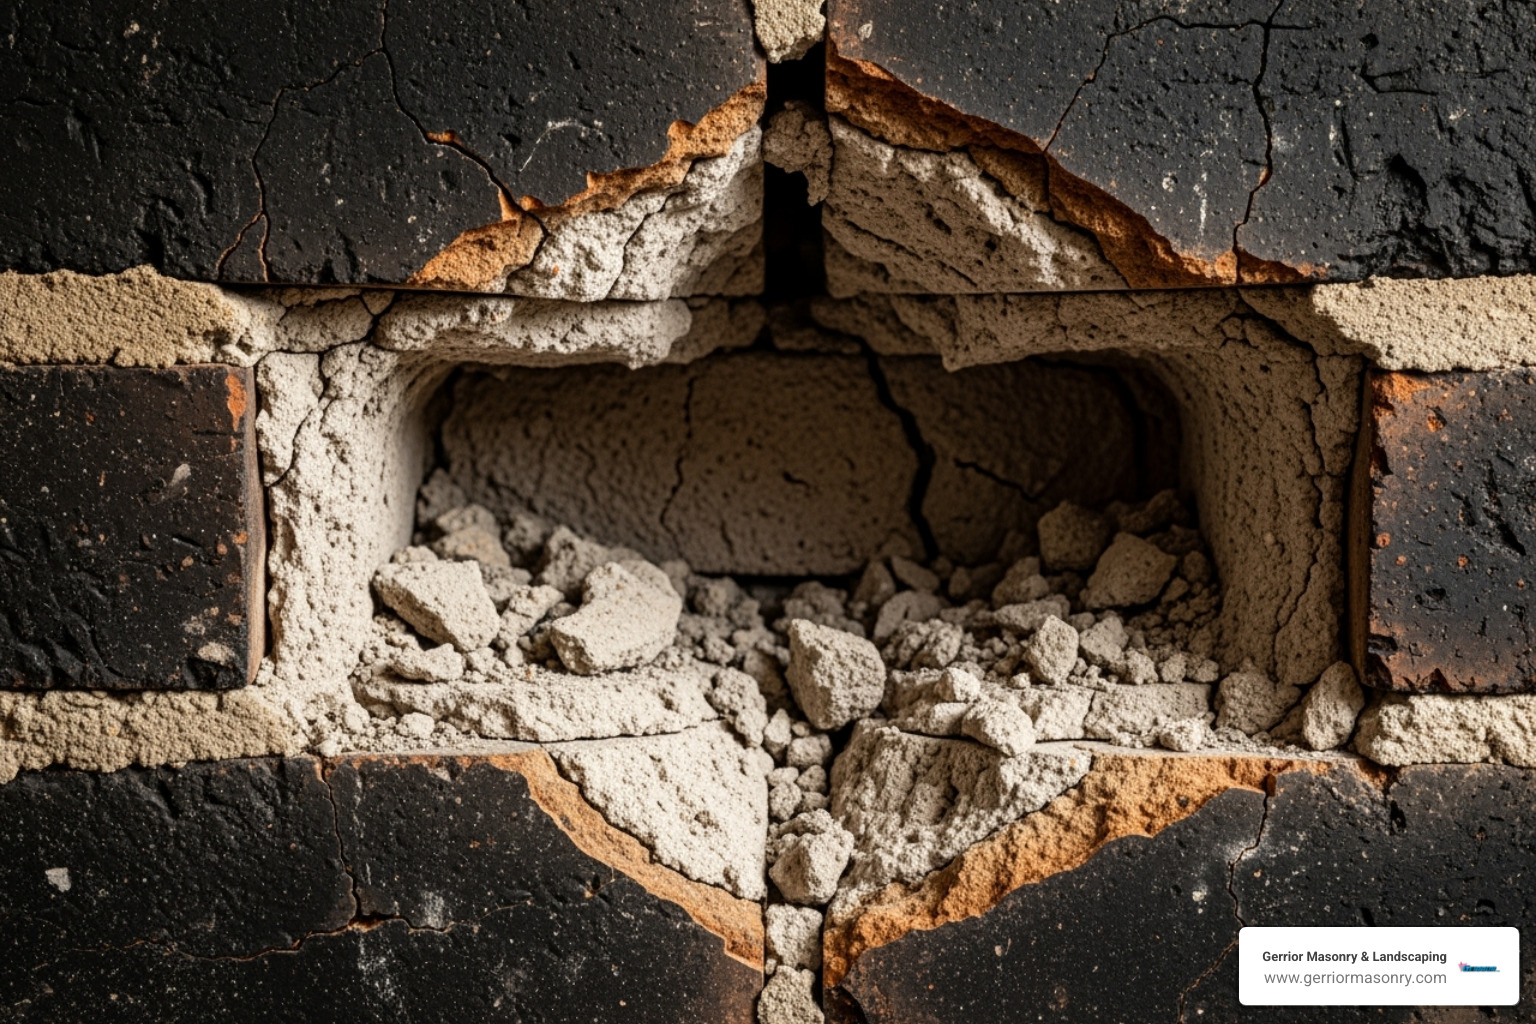
Gaps: Missing chunks of mortar between firebricks.
Crumbling: Mortar that is powdery, sandy, or breaks away easily.
Spalling Bricks: Flaking on the face of the bricks, often indicating moisture issues.
Soot Stains: Dark stains on the exterior of your fireplace or chimney, signaling smoke leaks.
Common Causes of Damage:
Heat Damage: The constant cycle of heating and cooling stresses the mortar.
Moisture Issues: Water from a damaged cap or flashing can freeze and thaw, breaking mortar apart.
Age: Mortar naturally deteriorates over 20-30 years.
If you notice any of these signs, especially if gaps are wider than 1/8 inch or mortar has deteriorated more than 1/4 inch deep, it’s time for a repair. Ignoring the problem can lead to fire risks, carbon monoxide poisoning, and structural failure.
If you suspect wider masonry issues, our foundation repair services might provide useful insights.
Gathering Your Tools and Materials for the Job
Having the right tools and materials makes the job safer and easier. Here’s what you’ll need:
Safety Gear: Safety glasses, work gloves, and a dust mask or respirator are essential.
Cleaning Tools: A fireplace brush, dustpan, shop vacuum, and a wire brush.
Mortar Removal Tools: A putty knife, linoleum knife, or a grout removal tool.
Repair Materials: A tube of refractory caulk, which is specifically designed for high-heat applications. Do not use regular caulk, as it will fail under high temperatures.
Application Tools: A caulking gun, a small nylon paintbrush (for moistening joints), and paper towels or a damp sponge for cleanup.
For larger jobs, a tuck-pointing trowel may be needed for applying traditional refractory mortar. Always ensure the fireplace is completely cool before beginning any work.
Explore our comprehensive masonry services for more extensive projects.
Step-by-Step: How to Repair Fireplace Mortar
This process is for minor repairs using refractory caulk.
Prepare the Firebox: Remove the fire grate and sweep out all ash and debris. Use a shop vacuum for a thorough cleaning.
Remove Loose Mortar: Using a putty knife or grout removal tool, scrape out damaged mortar to a depth of about 2 to 2.5 times the joint’s width, or until you hit solid material.
Clean the Joints: Vacuum all dust and debris from the cleaned-out joints. Use a wire brush to remove any stubborn grime.
Moisten the Joints: Lightly dampen the joints with a wet paintbrush. This prevents the surrounding masonry from drawing moisture out of the new caulk too quickly, ensuring a stronger bond.
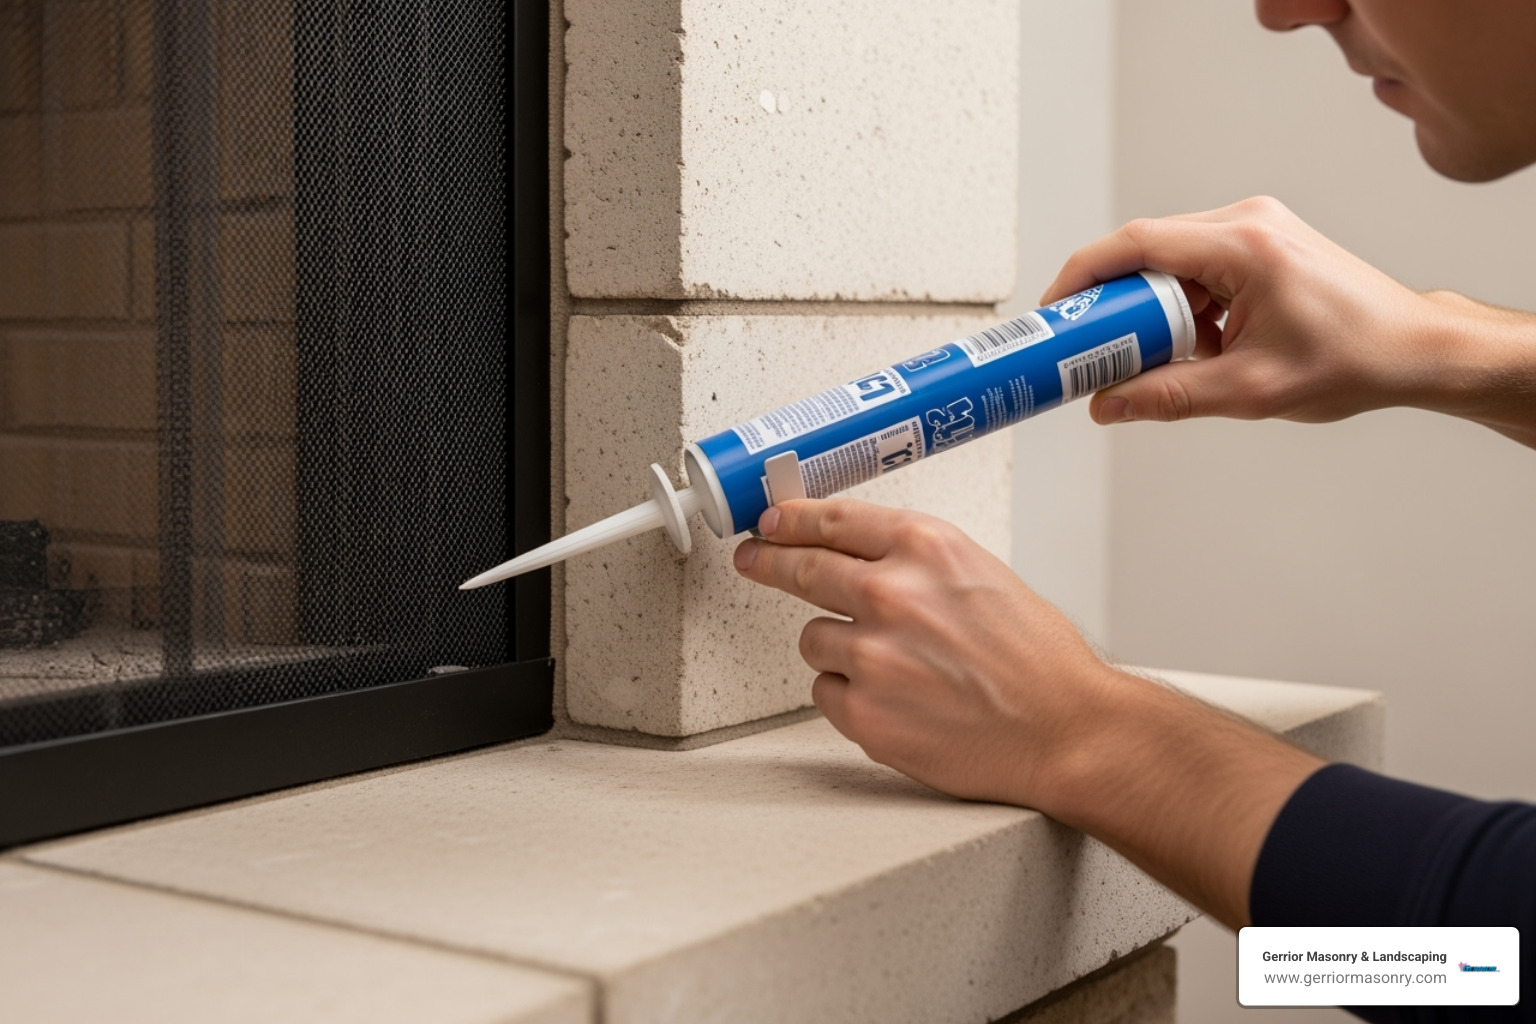
Apply Refractory Caulk: Cut the caulk tube’s tip at an angle. Using a caulking gun, apply a steady bead of caulk deep into the joints, starting with the vertical ones. Ensure there are no air pockets.
Smooth the Joints: Immediately after applying, use a gloved finger or a small tool to press the caulk firmly into the joint and create a smooth, concave finish. Wipe away excess caulk with a damp paper towel.
Proper curing is essential for the refractory caulk to gain its heat-resistant properties.
Air Dry: Allow the caulk to air dry for at least 24 hours.
Heat Cure: The first fire after the repair is part of the curing process. Start with a small fire and gradually increase the heat, maintaining a modest fire for about an hour. This heat curing activates the heat-resistant compounds in the caulk.
Appearance: The new caulk will likely be lighter than the old, soot-stained mortar. It will darken over time with use, blending in naturally.
The repair will reach its maximum strength after several heating and cooling cycles.
DIY vs. Professional Repair: Knowing Your Limits
Knowing when to tackle a repair yourself versus calling a professional is key to your safety.
When to DIY:
You’re dealing with hairline cracks (up to 1/8 inch wide).
There are small, isolated gaps where mortar has crumbled.
The repair can be handled with refractory caulk.
DIY material costs typically range from $15-$45. Please note: These are average costs based on internet data and not actual costs for Gerrior Masonry services.
When to Call a Professional:
You see extensive damage, with large crumbling sections or gaps wider than 1/4 inch.
Firebricks are loose or spalling (flaking).
There are signs of structural issues, like bulging walls or large cracks in the fireplace structure itself.
The job requires tuckpointing or repointing—the complete removal and replacement of mortar.
Professionals have the specialized tools and expertise to diagnose underlying issues (like water damage) and ensure a structurally sound repair that complies with building codes. Professional repairs can range from a few hundred dollars for minor repointing to several thousand for a complete firebox rebuild, depending on the extent of the damage.
If you’re ever in doubt, call a professional. For related masonry work, learn about our repointing a foundation services.
Trust the Experts for a Safe and Lasting Fireplace
This guide provides the steps for how to repair fireplace mortar for minor issues, helping you maintain your fireplace’s safety and beauty. The key is using the right materials, like refractory caulk, and knowing when a problem is too big for a DIY fix.
Safety comes first. While refractory caulk is excellent for small cracks, it cannot fix underlying structural problems. If you see extensive damage, loose or spalling bricks, or signs of water infiltration, it’s time to call a professional. Attempting to patch major issues can lead to greater risks and more expensive repairs down the line.
At Gerrior Masonry & Landscaping, we have over 30 years of experience helping Massachusetts homeowners with complex fireplace and masonry repairs. Our skilled team, with owner oversight on every project, ensures a high-quality, lasting solution that protects your home and family.
If you’re facing fireplace mortar issues that go beyond a simple DIY repair, we’re here to help. Contact us for your fireplace mortar repair needs and let our experts restore the heart of your home.
Gerrior Masonry & Landscape Construction is based in Woburn, MA, and proudly services Middlesex and Essex County, Massachusetts.
A wood burning fireplace transforms any home into a cozy retreat. The authentic crackling sounds, radiant warmth, and mesmerizing flames create an ambiance that gas or electric alternatives simply cannot match.
Quick Guide to Wood Burning Fireplaces:
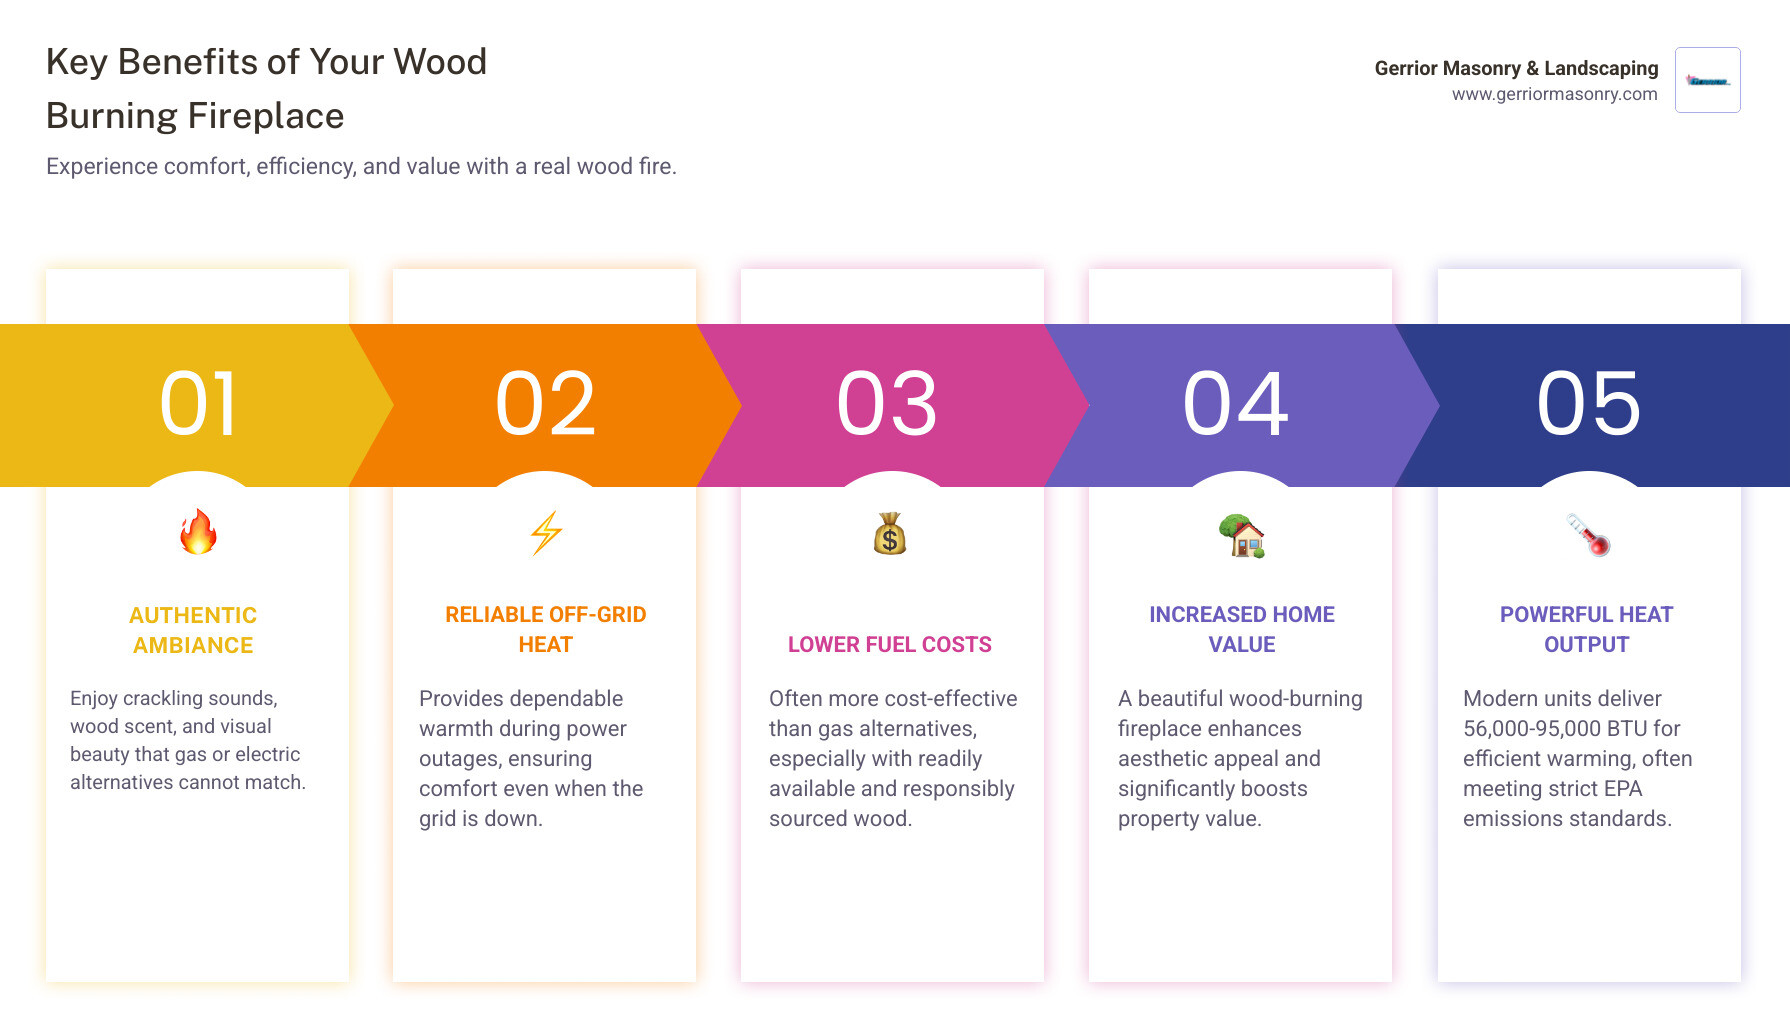
Heat Output: Modern units range from 56,000 to 95,000 BTU/h
Efficiency: EPA-certified models burn with less than 2.5g/hr emissions
Types: Traditional masonry, fireplace inserts, zero-clearance units
Cost: Often lower fuel costs than gas alternatives
Benefits: Works during power outages, increases property value, provides authentic sensory experience
Beyond ambiance, wood burning fireplaces offer reliable warmth during power outages and can even be used for cooking. Modern high-efficiency units are environmentally responsible and cost-effective, exceeding government requirements for emissions. While older units could emit 60-100 grams of particles per hour, today’s EPA-approved models stay under the 2.5-gram limit.
I’m Joe Gerrior, owner of Gerrior Masonry & Landscape Construction. Over my 34 years in the masonry business, I’ve helped countless Massachusetts homeowners design and install beautiful, safe wood burning fireplace systems. From custom hearths to chimney repairs, proper installation and maintenance are crucial for safety and enjoyment.
Your Complete Guide to Choosing a Wood Burning Fireplace
Shopping for a wood burning fireplace doesn’t have to be overwhelming. The best choice fits your lifestyle, budget, and home. Consider your primary goal: a stunning centerpiece, maximum heat output, or a reliable heat source during power outages. Let’s walk through the main options.
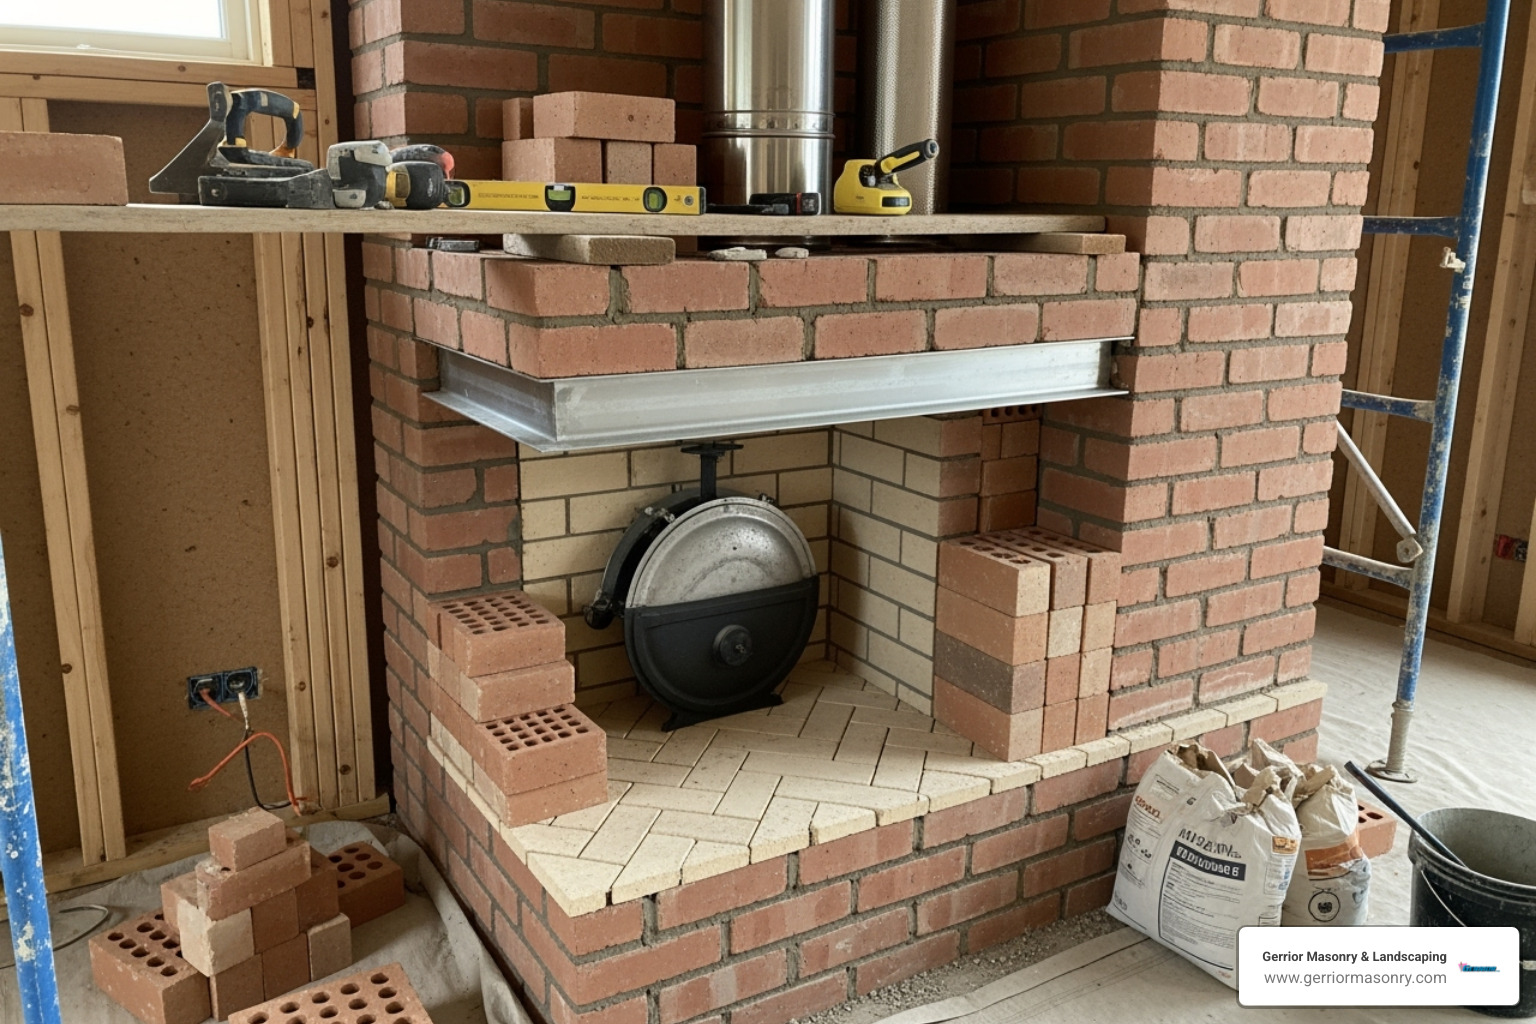
Traditional masonry fireplaces are built on-site from brick and stone, becoming unique architectural features. Their charm is best, though heat output varies by design.
Fireplace inserts are steel or cast iron units that fit into existing masonry fireplaces, changing them into efficient heaters. Glass doors and blower fans keep and circulate heat in the room.
Freestanding wood stoves offer flexibility and high heating efficiency. They sit on custom masonry hearths we design to complement your space, providing a cozy, cabin-like feel.
Heat output, measured in BTUs, typically ranges from 56,000 to 95,000 BTU per hour, capable of heating 1,000 to 2,800 square feet. Modern EPA-certified models are highly efficient, releasing less than 2.5 grams of particles per hour—a vast improvement over the 60-100 grams from older units. Advanced systems use catalytic combustion or non-catalytic designs to achieve longer, more complete burns, maximizing heat and minimizing emissions.
Types of Wood Fireplaces and Key Features
When shopping for a wood burning fireplace, look for these key features:
High-efficiency models: EPA-certified units extract maximum heat from every log while burning cleanly, meaning you’ll use less wood and create less ash.
Heat output ratings: We help you match the right output (56,000 to 95,000 BTU) to your specific space and heating goals.
Long burn times: Quality units can burn for 8-12 hours, letting you load up before bed and wake up to glowing coals.
Expansive viewing areas: Large glass doors or open designs let you see the mesmerizing flames from anywhere in the room.
Custom masonry aesthetics: Whether you want rustic fieldstone or contemporary stone veneer, we create the perfect frame for your fire. Our masonry services cover everything from design to installation.
Wood Burning Fireplaces vs. Other Heating Options: A Quick Overview
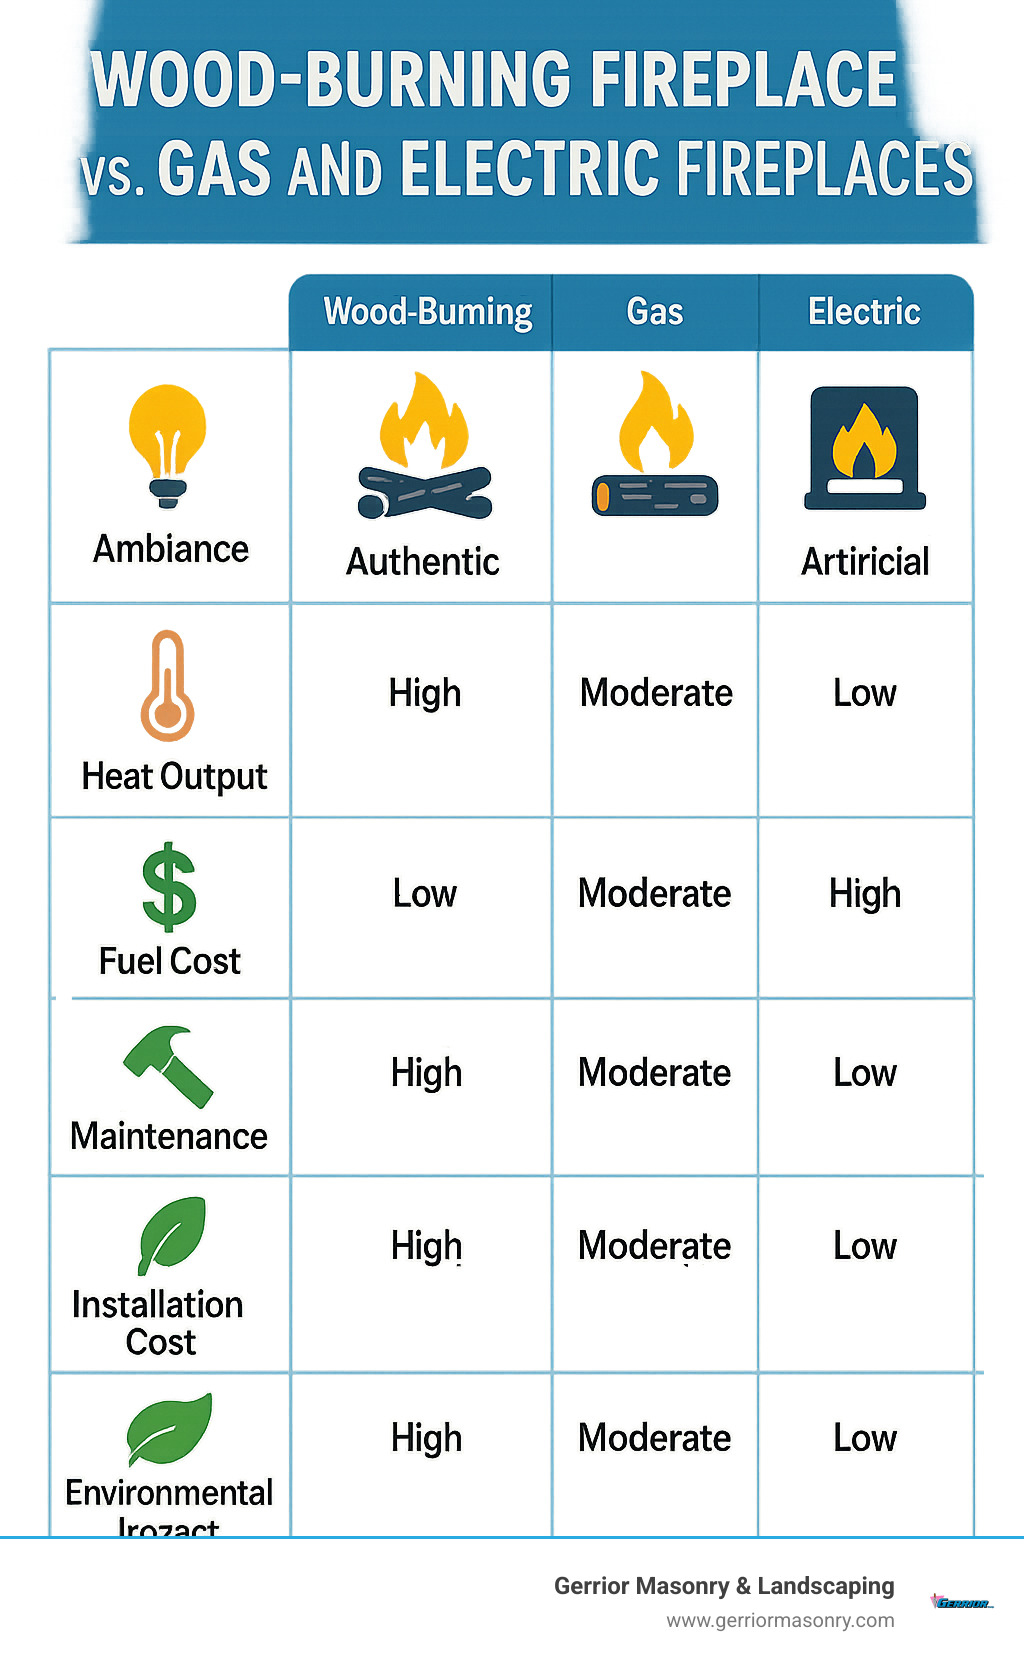
Here’s how wood burning fireplaces stack up against alternatives:
Ambiance: Wood’s authentic crackle, scent, and flame are best by gas or electric options.
Heat output: Modern wood fireplaces produce significant heat, comparable to gas and superior to electric for large spaces.
Fuel costs: Wood is often cheaper, especially with a local supply.
Maintenance: Wood requires the most upkeep (ash removal, chimney cleaning). Gas needs less, and electric is minimal.
Installation costs: Wood can have a higher upfront cost, especially for custom masonry.
Understanding the Costs and Lifespan of a Wood Burning Fireplace
Investing in a wood burning fireplace involves understanding both upfront costs and long-term value. The figures shared here are average costs based on internet research, not actual Gerrior Masonry pricing; we provide custom quotes for each project.
Installation Costs: These vary widely. Inserts or zero-clearance units typically run $2,000 to $15,000. Traditional masonry fireplaces range from $8,000 to $25,000 or more. Freestanding wood stoves usually cost $3,000 to $12,000, including the hearth and chimney work.
Firewood Costs: A cord of seasoned hardwood typically runs $200 to $600, making wood heating economical for many.
Lifespan: Traditional masonry fireplaces can last for generations with proper care. Prefabricated units and stoves typically last 10 to 25 years.
Return on Investment: A well-designed wood burning fireplace increases your home’s value. The cozy ambiance and reliable off-grid heat are features buyers seek, and long-term fuel savings can be substantial. Just as proper foundation repair strengthens your home, a professionally installed fireplace improves its livability and market appeal.
Gerrior Masonry & Landscape Construction is based in Woburn, MA, and proudly services Middlesex and Essex County, Massachusetts.
Ensuring Safe Installation and Lasting Enjoyment
Proper professional installation transforms your dream fireplace into decades of safe enjoyment. A wood burning fireplace is a complex system, and cutting corners is dangerous. There’s a science to ensuring correct airflow, proper clearances, and adherence to building codes. Our skilled masons understand chimney construction, flue sizing, and hearth regulations to ensure your fireplace operates safely and efficiently.
Regular maintenance, including annual inspections and cleaning, is just as crucial. It prevents dangerous conditions like chimney fires and saves you money in the long run.
Environmental Impact and Modern Efficiency
While older fireplaces created significant air quality issues, modern wood burning fireplaces are a different story. Pre-1990 appliances could emit 60-100 grams of fine particles per hour. In contrast, today’s EPA-certified models emit less than 2.5 grams per hour—a 95% improvement. Choosing an EPA-certified model is not only better for the environment but may also be required by local regulations. Furthermore, burning sustainably harvested wood is considered carbon-neutral, as it releases carbon that was part of the natural cycle. You can find compliant models in the U.S. Environmental Protection Agency (EPA) certified heater database.
Essential Safety and Operation Tips
Operating your wood burning fireplace safely is simple with a few key practices.
Use Seasoned Hardwood: Only burn wood that has been dried for 6-12 months (below 20% moisture). It burns hotter, cleaner, and creates less creosote.
Avoid Prohibited Materials: Never burn treated wood, painted wood, construction scraps, or wet ‘green’ wood. This creates a smoky mess and dangerous creosote.
Build Fires Correctly: Use the ‘top-down’ method (large logs on bottom, kindling on top) for a cleaner, more efficient burn.
Operate the Damper Properly: Open the damper fully when starting a fire. Adjust it slightly once the fire is established, but never close it completely while coals are hot.
Dispose of Ashes Safely: Let ashes cool for at least 24-48 hours. Use a metal container with a tight lid and store it outside, away from anything combustible.
Install Safety Devices: Every home with a fireplace needs working smoke and carbon monoxide detectors. Test them monthly. Keep a fire extinguisher nearby.
The Importance of Professional Fireplace Installation and Maintenance
Proper installation requires deep knowledge of chimney requirements, flue liners, and clearance regulations. A correctly sized chimney and a sound flue liner are essential for safety. The biggest danger is creosote buildup, a flammable substance that causes chimney fires.
Annual chimney sweeping is non-negotiable and often required by insurance and fire codes. Professional masonry inspections can spot cracks, deteriorating mortar, or structural issues before they become disasters.
With over 30 years of experience and owner oversight on every project, our skilled masons ensure your fireplace is beautiful, safe, and built to last. For expert fireplace and chimney repairs, trust the professionals who’ve been doing this right for decades.
Gerrior Masonry & Landscape Construction is based in Woburn, MA, and proudly services Middlesex and Essex County, Massachusetts.
Fixing pooling water in your yard is crucial for protecting your home and outdoor space. If you have standing water after rain, here are the main solutions:
Quick Fixes:
Aerate compacted soil and add compost
Clean gutters and extend downspouts 4+ feet from house
Fill low spots with topsoil and re-seed
Landscaping Solutions:
Install rain gardens with water-loving plants
Create French drains with perforated pipe and gravel
Build dry wells for underground water collection
Professional Help Needed When:
Water pools near your foundation
Large swampy areas persist
Basement shows signs of dampness
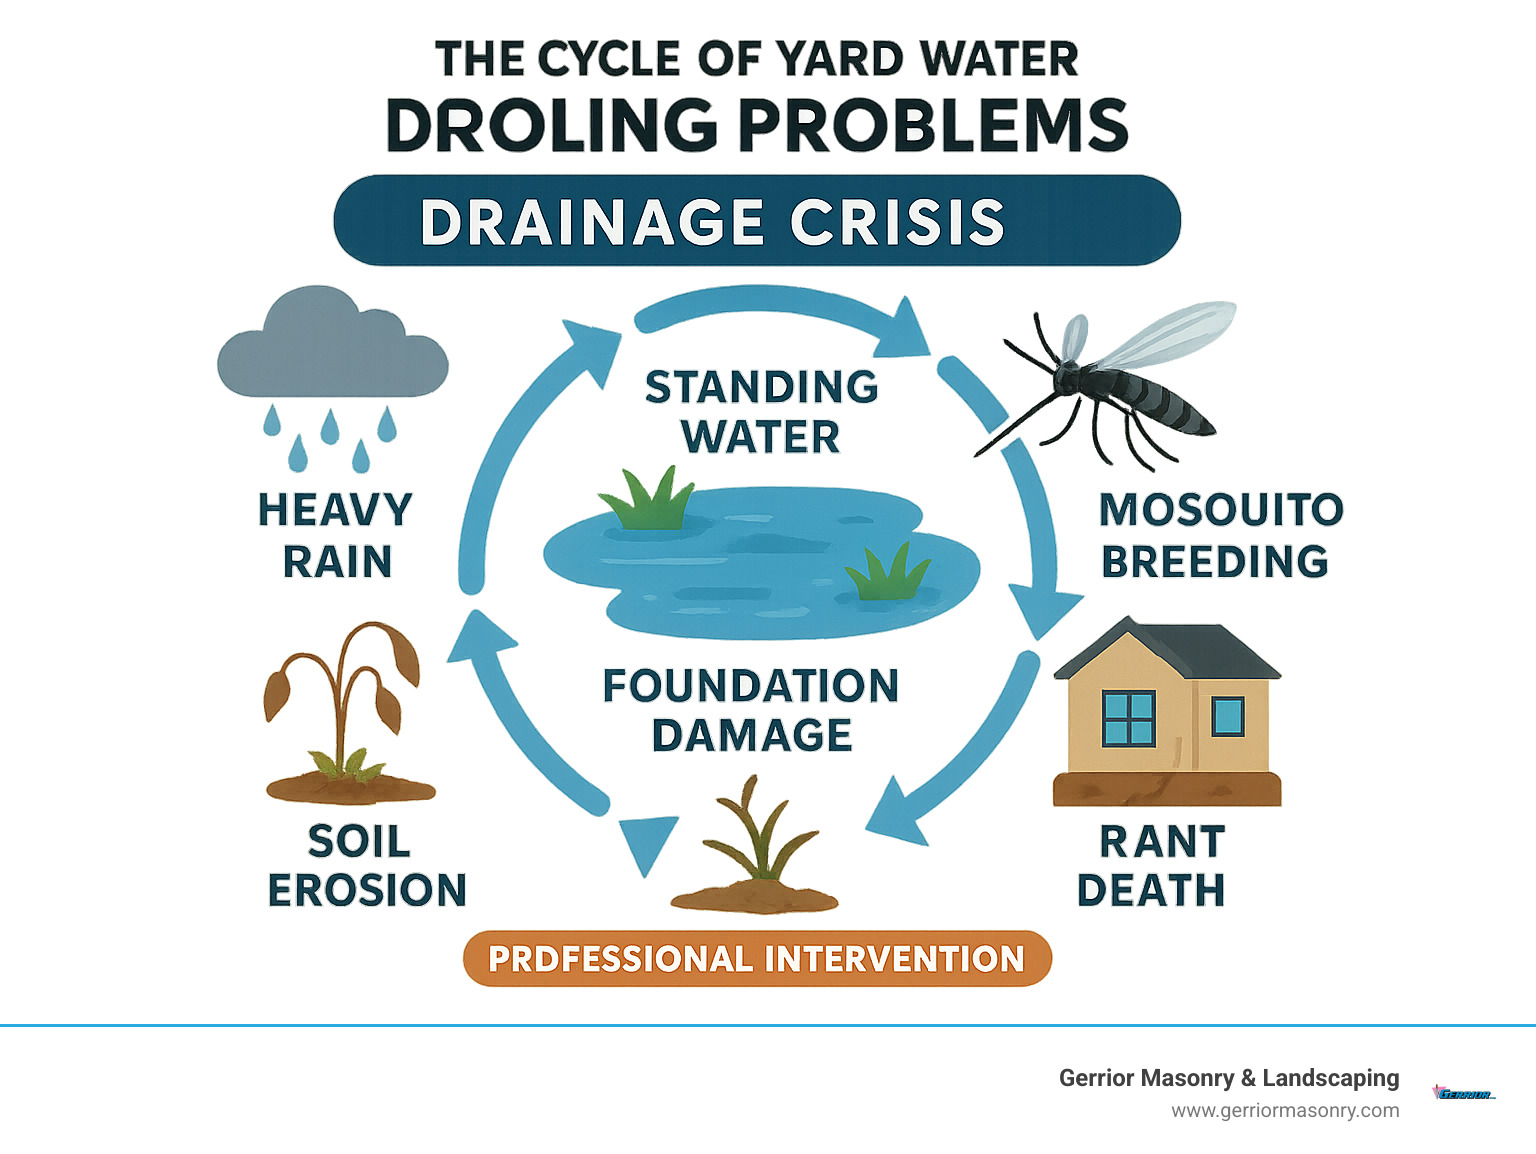
Standing water isn’t just unsightly—it creates serious problems. It becomes a breeding ground for mosquitoes carrying diseases like Zika and West Nile, threatens your home’s foundation, causes plant root rot, and creates slip hazards.
Beyond health and safety, pooling water damages property value. Clay soil, poor grading, and clogged drainage systems all contribute to soggy conditions that persist for days after rain.
I’m Joe Gerrior, owner of Gerrior Masonry & Landscape Construction Corp. For over 34 years, my team and I have been fixing pooling water in yard situations throughout Massachusetts, solving everything from simple gutter issues to complex French drain installations that protect homes from foundation damage.
Key terms for fixing pooling water in yard:
Residential drainage solutions
drainage around foundation
drainage system around the house
Your Action Plan for Fixing Pooling Water in Your Yard
The good news is that fixing pooling water in your yard is doable once you find the cause. Think of it like being a detective—we need to find the culprit to solve the case.
With over 30 years of experience helping Massachusetts homeowners, I’ve found most drainage problems have a few common causes. Let’s walk through identifying and tackling the issue in your yard.
Step 1: Identify the Root Cause
Your yard’s drainage problem has a cause. Sometimes it’s an obvious low spot where puddles form; other times, water appears mysteriously after a storm.
Soil problems are often the hidden villains. Compacted soil acts like concrete, preventing water penetration. It can be caused by heavy construction equipment or years of foot traffic. I’ve seen new homes flood because crews compressed the soil.
Clay soil also presents challenges. Its tiny particles pack together, creating a dense barrier that water struggles to penetrate.
Even trickier is hardpan, a rock-hard layer of compressed soil. Water hits this underground wall and backs up. Thatch buildup can also block water, often combined with other issues.
Grading problems are easier to spot. After a rainstorm, walk your yard and note where water collects. These low spots act like bathtubs. More concerning is a negative slope—when your yard slopes toward your house, sending water straight to your foundation.
Don’t overlook water runoff issues from your roof and hardscaping. Clogged gutters and short downspouts dump massive amounts of water next to your foundation. Large impermeable patios and driveways shed water instead of absorbing it, overwhelming nearby soil.
Sometimes the problem runs deeper. A high water table means groundwater sits close to the surface, saturating the soil. Broken water lines can also create mysterious soggy spots that persist even in dry weather.
Step 2: DIY Fixes for Minor Water Pooling in Your Yard
Once you’ve identified the cause, many minor pooling problems can be tackled with a weekend DIY effort, often preventing bigger issues later.
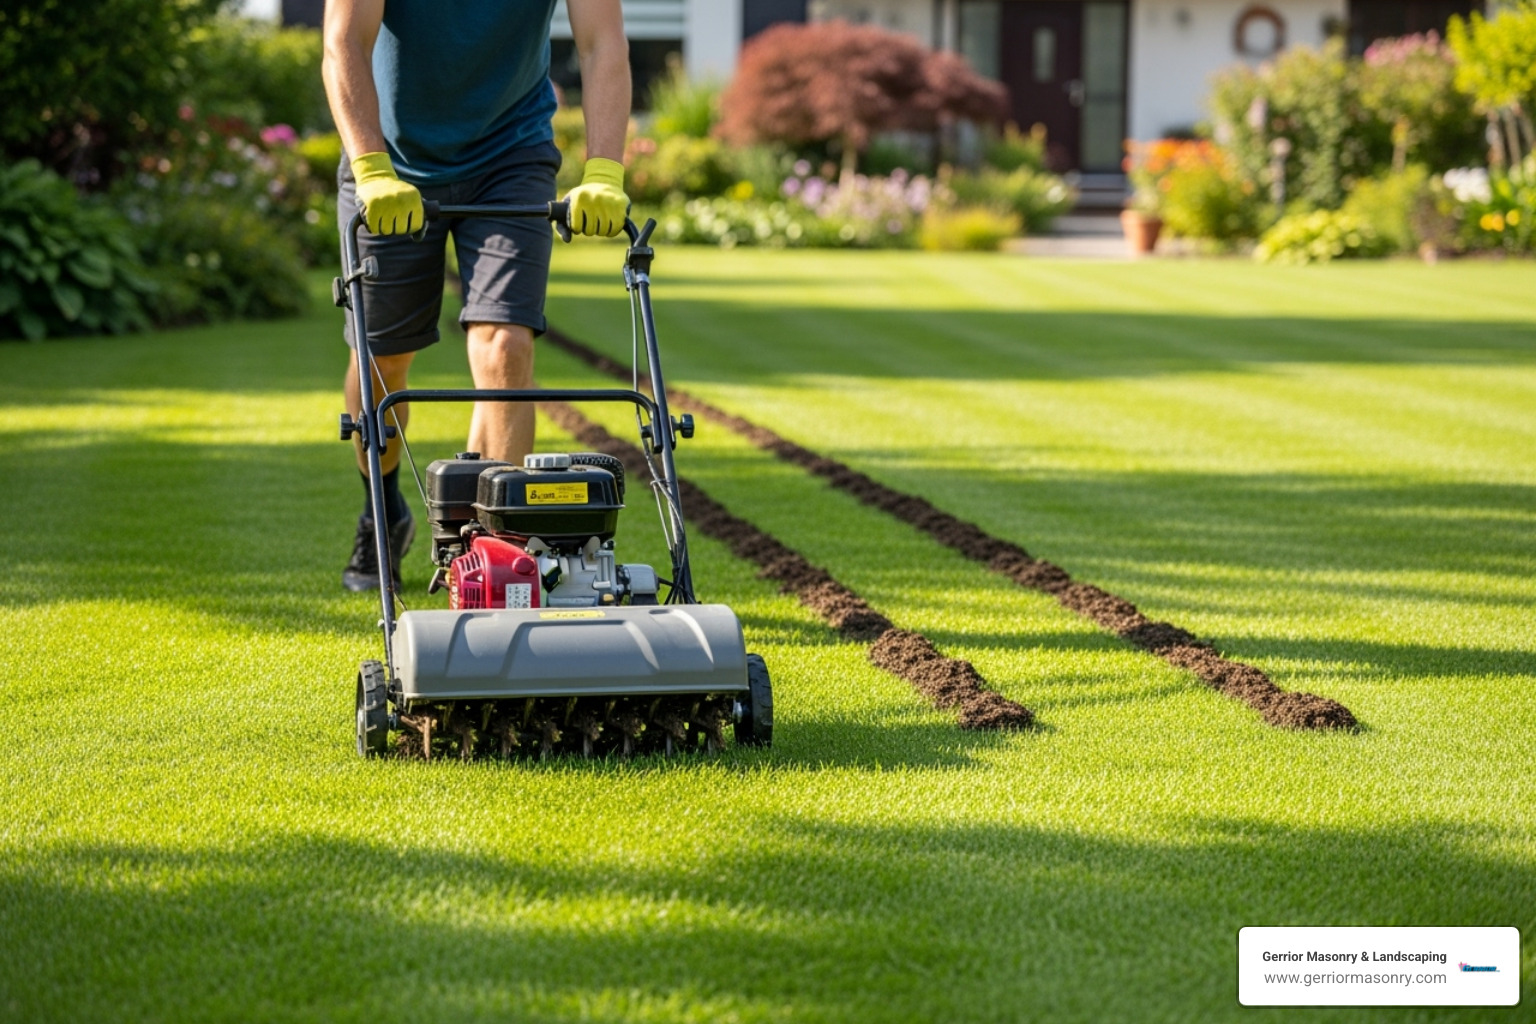
Improving soil health is an effective first step. Core aeration helps compacted soil by allowing water, air, and nutrients to penetrate. You can rent an aerator or hire a lawn service; I recommend annual aeration for clay soil.
After aeration, top dressing with compost adds organic matter. Compost helps soil absorb and hold water while improving drainage. For small low spots, mixing compost with topsoil creates an excellent fill.
Managing roof runoff provides immediate relief. Clean your gutters twice yearly to prevent hundreds of gallons from dumping next to your foundation.
Extending your downspouts at least four feet from your house prevents this concentrated water dump. Simple extensions are inexpensive and can solve many pooling problems.
Optimizing your watering schedule can also help. Overwatering contributes to drainage issues. Try the sprinkler’s water output test; most lawns only need about an inch of water weekly. Deep, infrequent watering encourages stronger roots that help with drainage.
If you’re feeling overwhelmed, our Landscaping for Drainage services can help you implement these solutions effectively.
Step 3: Use Landscaping to Manage Excess Water
Sometimes the best solution is working with the water. Strategic landscaping can transform a soggy area into a beautiful, functional feature that manages excess water.
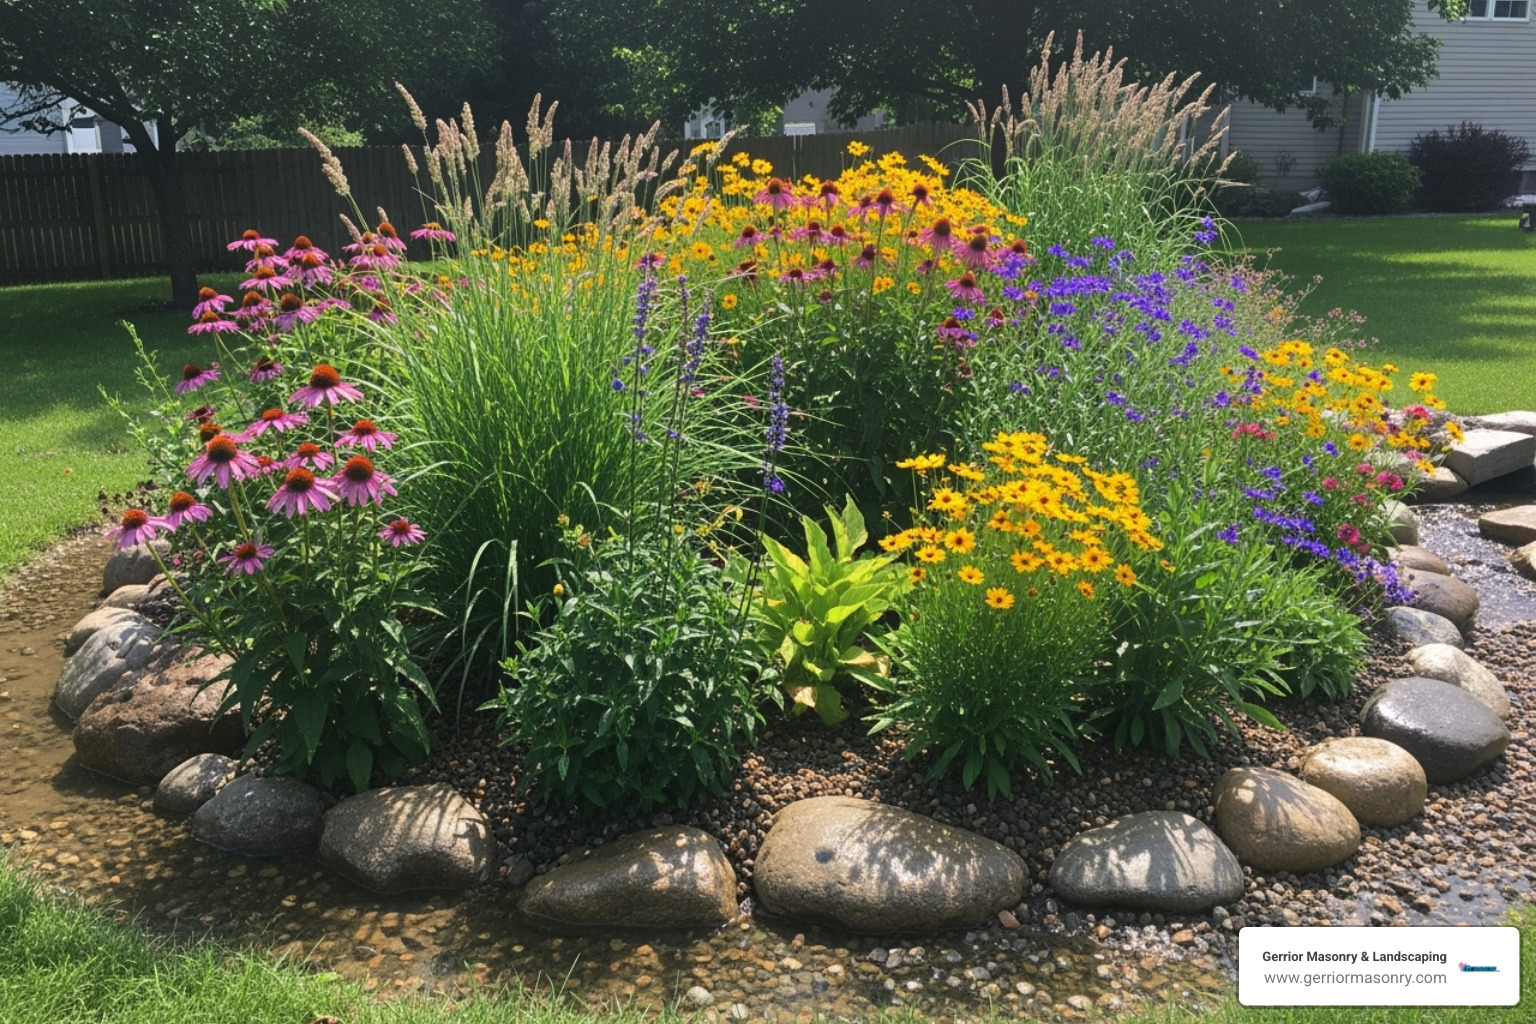
Installing a rain garden turns a drainage problem into an attractive feature. These shallow depressions collect runoff from your roof and driveway, allowing it to slowly soak into the ground. How to build a rain garden can be a rewarding DIY project. Bio-swales work on the same principle but are designed as natural drainage channels.
Choosing water-tolerant plants for wet areas makes more sense than replanting grass that keeps dying. Daylilies, primrose, and violets add beautiful color to damp spots. These plants are tolerant of wet sites and will thrive where lawn grass struggles.
Installing permeable hardscapes addresses the root cause of runoff from solid surfaces. Permeable pavement options like porous pavers and gravel walkways allow water to soak through. These materials can look as attractive as traditional hardscaping while solving water problems.
For complex hardscaping solutions that integrate drainage with beautiful outdoor living spaces, see how our hardscaping services can transform problematic areas into functional, attractive features.
When Professional Drainage Solutions Are Necessary
Some yard water problems are too big for a DIY approach. Trying to fix major drainage issues yourself can make things worse. Knowing when to call a professional saves you from costly mistakes and protects your foundation.
Warning Signs That You Need an Expert
After 30 years of fixing pooling water in yard problems, I know the red flags that mean it’s time to call for help.
Water pooling near your foundation is the biggest warning sign. Water against your foundation risks cracks, basement flooding, and costly structural damage. This isn’t a future problem—it’s happening with every rain.
Basement dampness or flooding indicates your exterior drainage has failed. A musty smell, damp walls, or water in your basement means water is getting where it shouldn’t. We offer more info about basement waterproofing for these issues.
Persistent puddles and large swampy areas that last for days after rain show your soil can’t handle the water load. I’ve walked yards that are still soggy a week after rain—that’s not normal and won’t fix itself.
Significant soil erosion creates channels and gullies that worsen with every storm. Erosion accelerates quickly, undermining hardscaping, plants, and even structures.
Suspected broken pipes can be tricky. Unexplained soggy spots or a spike in your water bill could mean a broken underground pipe that needs professional diagnosis.
An Overview of Advanced Drainage Systems
When DIY solutions fail, we use proven drainage systems to handle serious water volumes and redirect them permanently.
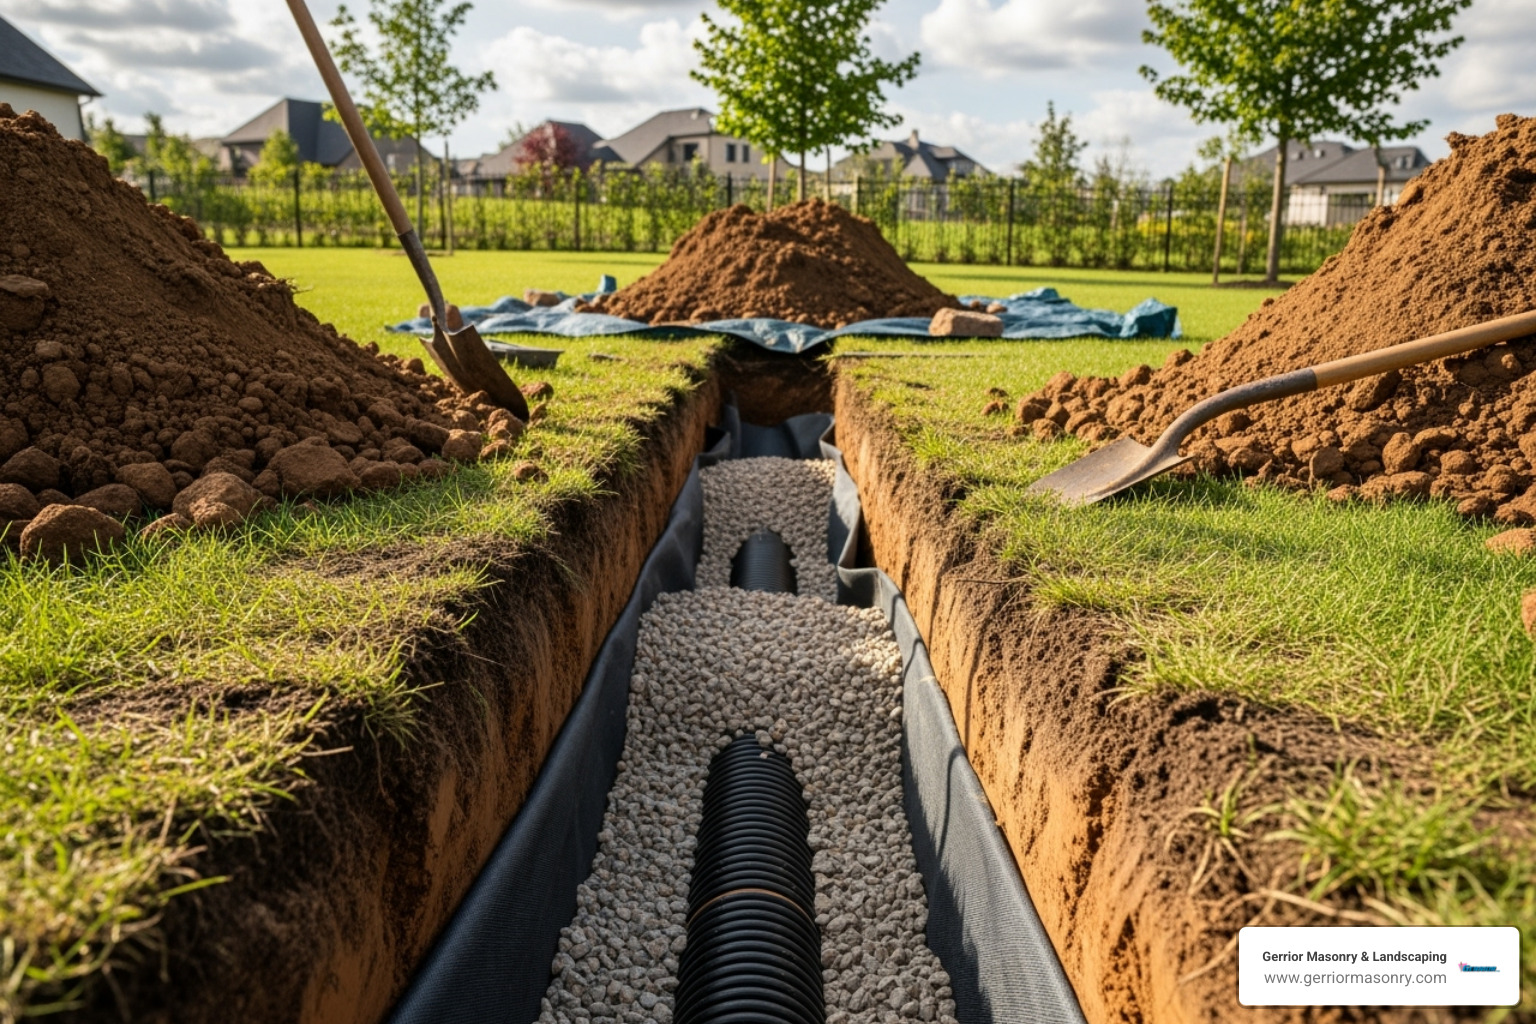
French drains are the workhorses of drainage. It’s an underground highway for water. We dig a sloped trench, line it with fabric, fill it with gravel, and install a perforated pipe. This system collects and carries water away from problem areas to a safe discharge point, intercepting water before it becomes a problem. Learn more in our French Drains Explained guide.
Dry wells act like underground reservoirs. It gives water a place to go instead of flooding your yard. We build them as gravel-filled pits or install chambers to hold runoff from downspouts or French drains until the ground can absorb it.
Cost considerations are important. Based on industry averages (not our pricing), French drain installations can run $2,800 to $6,500, with complex projects costing more. Dry well costs generally range from $1,165 to $4,420. These are average costs based on internet data and not actual costs for Gerrior Masonry services; we provide custom quotes.
The Ultimate Solution: Professional Help for Fixing Pooling Water in Your Yard
For persistent drainage problems, professional help is the most effective, permanent solution. We bring specialized equipment, decades of experience, and a deep understanding of how water moves through Massachusetts landscapes.
Yard regrading addresses improper slope. Your yard should direct water away from your house. According to Turf Magazine, proper grading means at least a 2% slope away from your foundation (a 6-inch drop over 10 feet). This sometimes requires swale construction to guide water flow naturally.
For major regrading, costs typically range from $0.08 to $2.00 per square foot, though complex jobs can reach $6.00+ per square foot. Again, these are average costs based on internet data and not actual costs for Gerrior Masonry services.
Why choose Gerrior Masonry & Landscaping? After 30+ years of fixing pooling water in yard issues in Massachusetts, we understand our region’s unique soil and weather. Our commitment to quality sets us apart—I personally oversee every project from assessment to final grading.
Our team knows effective drainage is about more than moving water—it’s about protecting your foundation, preserving your landscape, and giving you a yard you can enjoy. We solve the underlying problem, not just the symptom, so you won’t face the same soggy mess again.
Whether you need a French drain or complete yard regrading, we have the experience to reclaim your yard and protect your home’s value. Contact us for a custom drainage solution for your property and budget.
Gerrior Masonry & Landscape Construction Corp. is based in Woburn, MA, and we proudly serve homeowners throughout Middlesex and Essex County, Massachusetts. For more on our drainage solutions, visit our drainage systems and dry wells page.
Conclusion
Your soggy yard doesn’t have to stay that way. Fixing pooling water in your yard is about more than eliminating puddles—it’s about protecting your foundation, getting rid of mosquito breeding grounds, and reclaiming your outdoor space.
This guide provided a complete action plan, from identifying compacted soil or poor grading to implementing solutions like French drains and rain gardens. The key is a correct diagnosis and choosing the right approach for your situation.
Many homeowners can tackle minor pooling with DIY fixes like aeration, cleaning gutters, and extending downspouts. But for persistent puddles, water near your foundation, or large swampy areas, it’s time to call the professionals.
At Gerrior Masonry & Landscape Construction Corp., we’ve spent over 30 years helping Massachusetts homeowners transform soggy yards into beautiful, functional spaces. Whether you need yard regrading, a full drainage system, or other water management features, our expertise ensures the job is done right.
Don’t let standing water damage your property value or limit your yard’s use. The problem can get worse—and more expensive to fix—the longer you wait.
Ready to say goodbye to puddles for good? Contact us for a custom drainage solution for your property’s unique challenges. For more details on our professional drainage solutions, visit our drainage systems page.
Gerrior Masonry & Landscape Construction Corp. is based in Woburn, MA, and proudly services Middlesex County and Essex County, Massachusetts.
Why Quality Masonry Matters for Your Stoneham Home
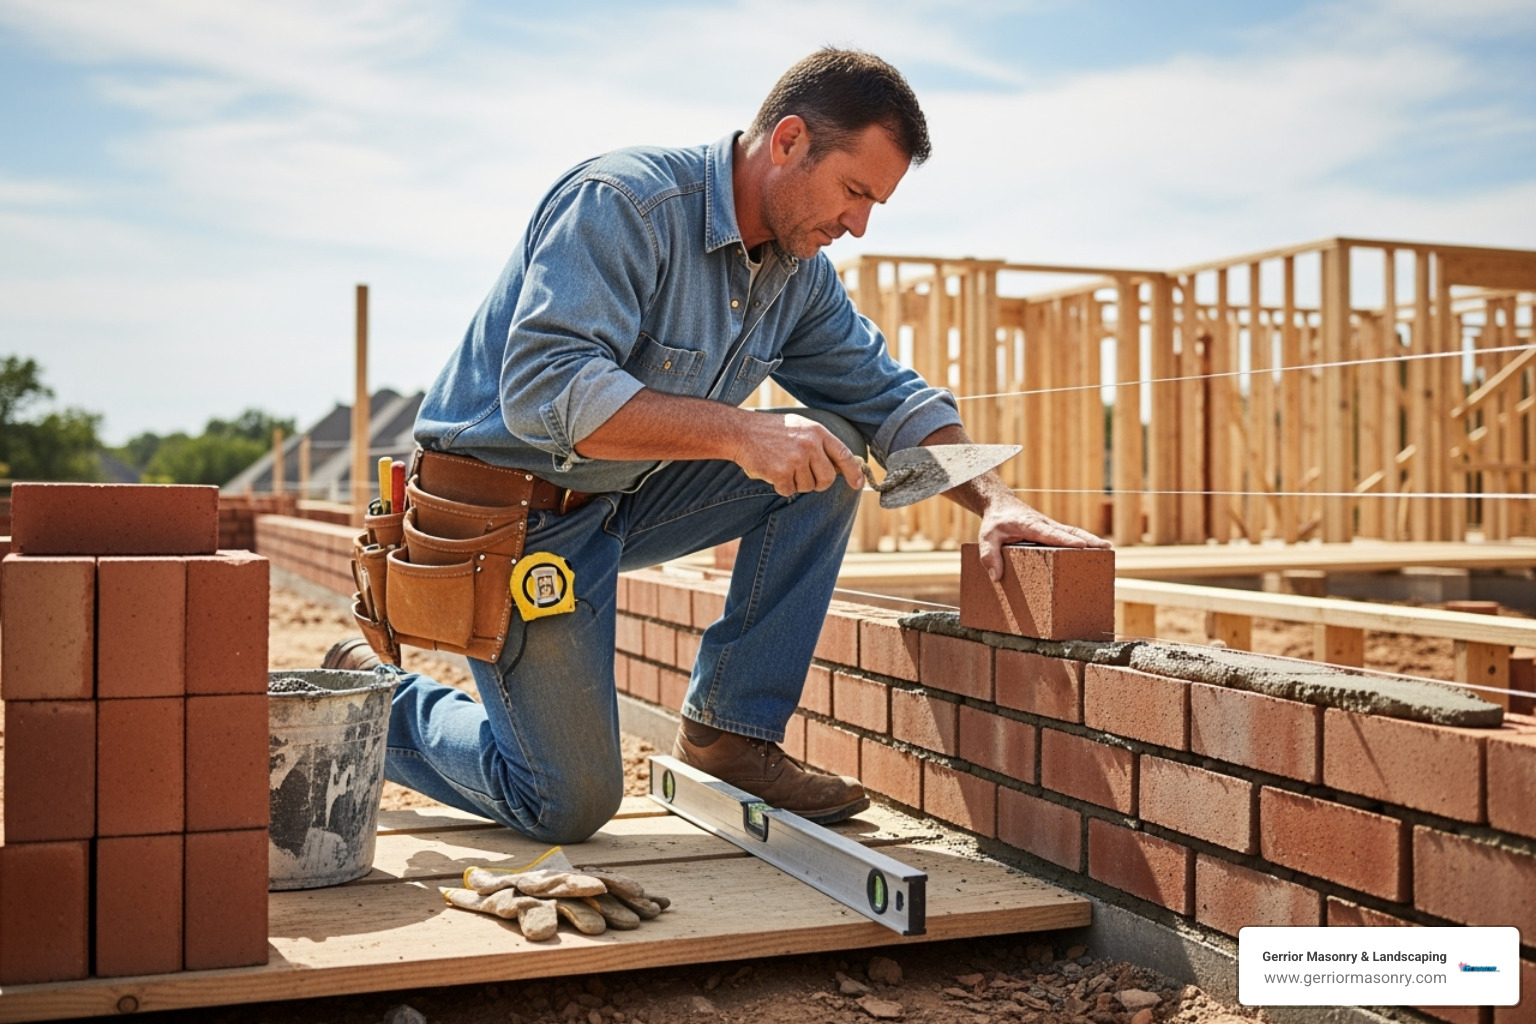
Finding a reliable masonry contractor Stoneham can transform your property with durable stonework, beautiful patios, and expert foundation repairs that withstand New England’s challenging climate.
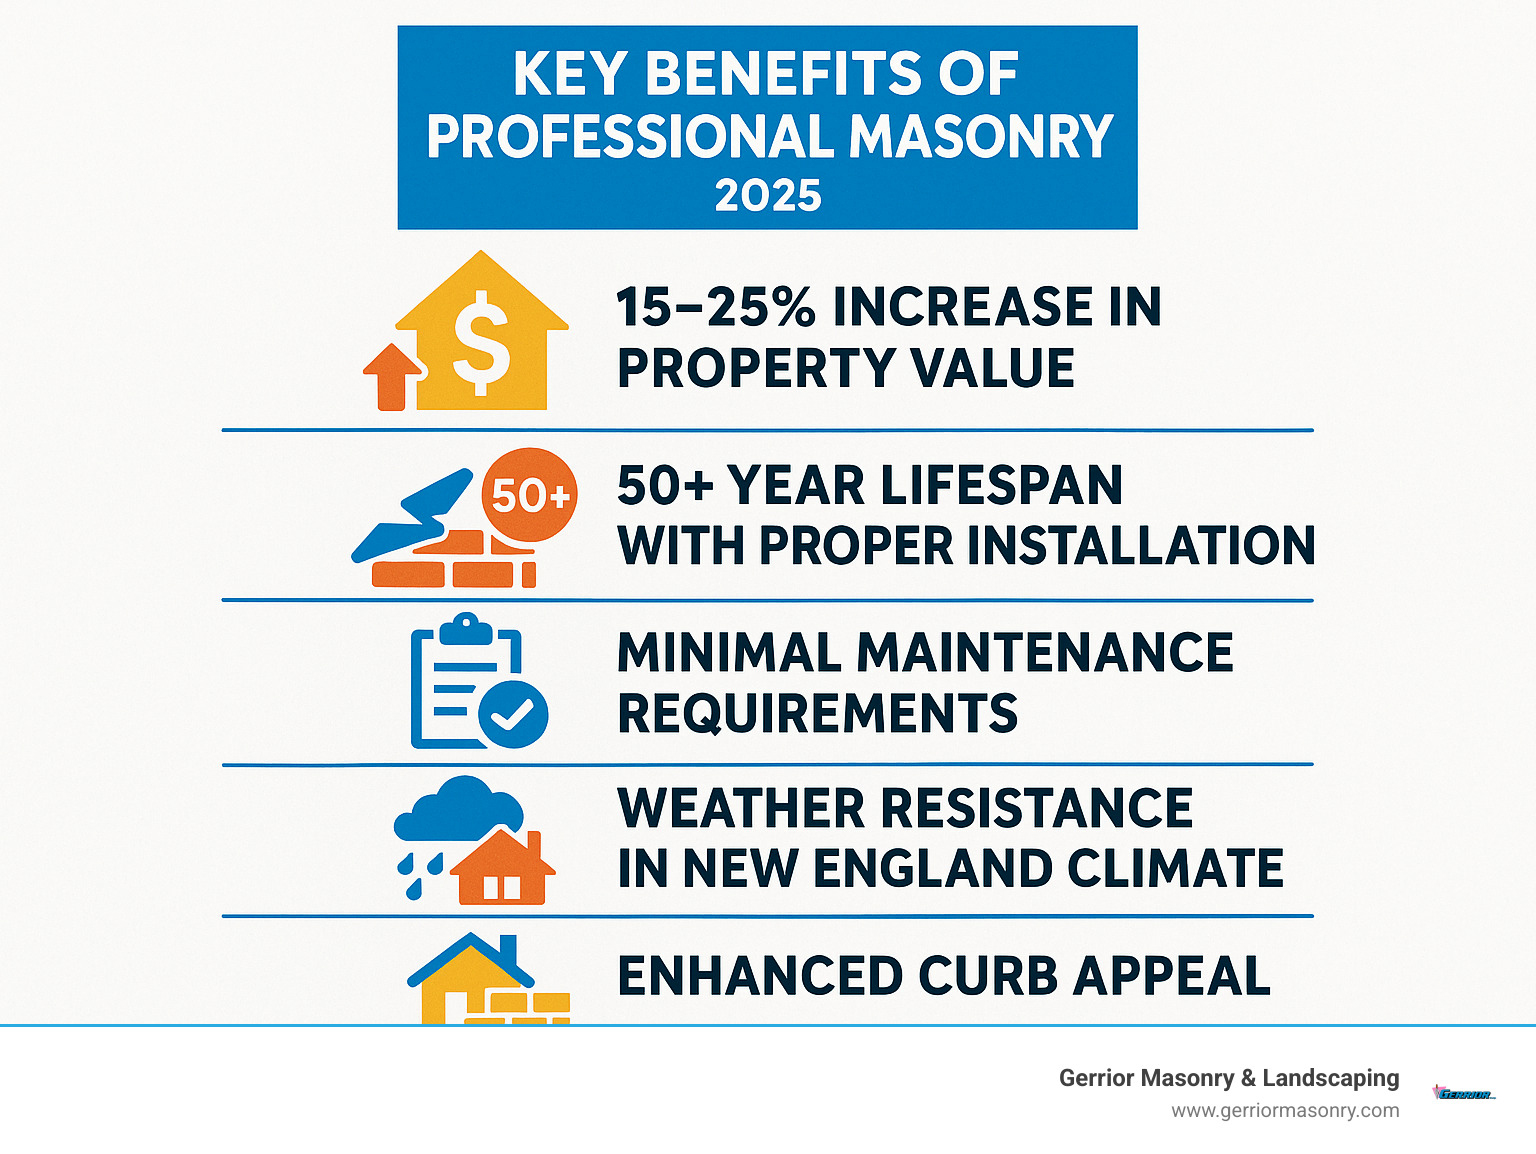
Quality masonry does more than just look good—it protects your home’s structural integrity and boosts property value. In Stoneham’s freeze-thaw climate, professional craftsmanship makes the difference between repairs that last for decades and those that fail within a few winters. Whether you need foundation repointing, a new stone patio, or chimney repairs, the right contractor brings both technical expertise and local knowledge.
I’m Joe Gerrior, owner of Gerrior Masonry & Landscape Construction Corp., and I’ve been serving Massachusetts homeowners for over 34 years. As an experienced masonry contractor Stoneham area residents trust, I understand what it takes to deliver lasting results in our challenging climate.
A Homeowner’s Guide to Hiring a Masonry Contractor in Stoneham
Planning a masonry project is a smart investment in your home’s appearance and value. But choosing the right masonry contractor Stoneham requires knowing what to look for. With over 30 years in this business, I’ve learned that informed homeowners get the best results. Let me walk you through the essentials.
Common Masonry Projects and Services
Understanding the range of available services helps you plan your project.
Patios and pool decks: Extend your living space with a beautifully crafted stone or paver patio. We help you select from materials like elegant bluestone or versatile pavers. Our patio design & installation services create extraordinary outdoor living areas.
Walkways and stairs: Crucial for safety and curb appeal, our durable paths and steps in brick, stone, or concrete complement your home and withstand New England weather. We ensure safe, non-slip surfaces and proper dimensions. Learn more about our walkways and stairs expertise.
Retaining walls: These structures solve practical problems like slopes and erosion while adding visual interest. Professional construction is essential to handle soil and water pressure, which is why we focus on proper drainage and structural footings.
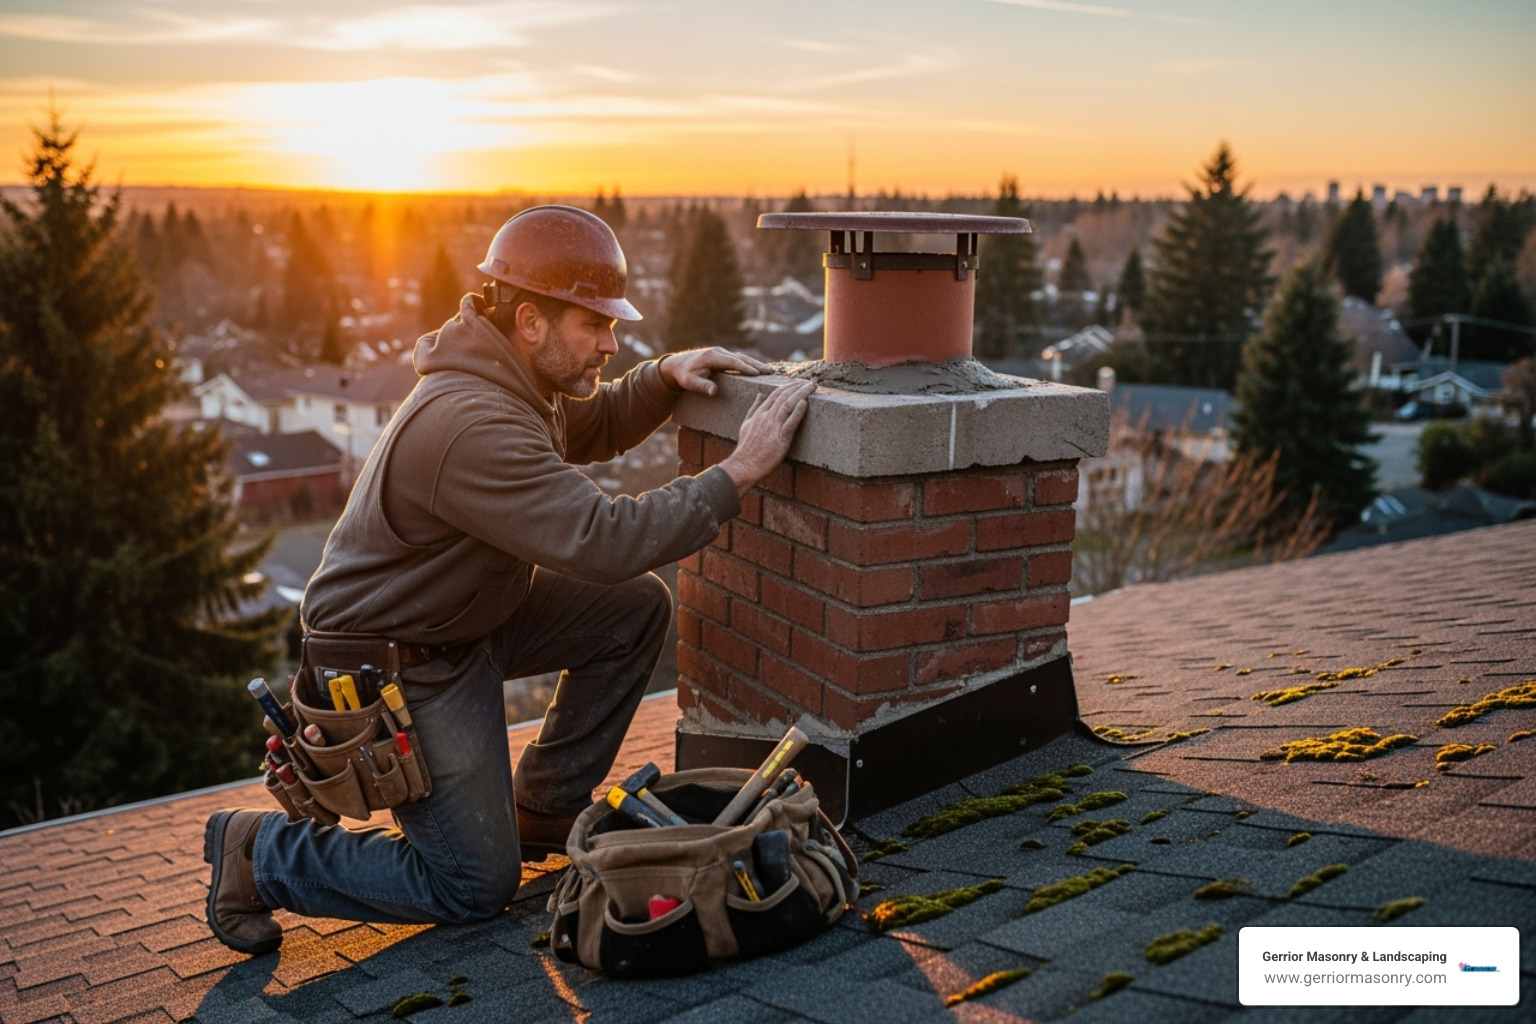
Chimney repair: From minor tuckpointing to complete rebuilds, chimney work requires specialized knowledge of masonry and fire safety codes. We fix spalling bricks and failing flashing to prevent leaks. Our chimney repair services keep your family safe.
Foundation and basement repair: This work is critical for your home’s structural integrity. We offer repointing, waterproofing, and crack repair to stop water intrusion and stabilize your home. Our foundation repointing services are vital for older Stoneham homes.
Outdoor fireplaces and fire pits: Create a magical gathering space with a safe, beautiful outdoor heating solution. We build custom features that become the centerpiece of your backyard. See what’s possible with our outdoor fire pits.
We also handle bulkhead replacements, driveways, and crucial drainage solutions. Proper drainage protects your investment; our drainage systems & dry wells direct water away from your foundation and hardscaping. We also offer excavation services for complete site preparation, ensuring better project coordination.
Essential Qualifications: Experience, Licensing, and Insurance
When vetting a masonry contractor Stoneham, certain qualifications are non-negotiable.
Experience: Masonry takes years to master. Our 30+ years of experience at Gerrior Masonry & Landscaping means we can handle any challenge and deliver lasting results, especially with local climate considerations.
Licensing and Insurance: Your contractor must have general liability insurance and workers’ compensation. This protects your property from damage and you from liability if a worker is injured. Ask to see current certificates—legitimate professionals will happily provide them.
A strong portfolio: Look for high-quality work on projects similar to yours. A good portfolio shows attention to detail in the finished product. We’re proud to show our portfolio as a demonstration of our commitment to excellence.
Customer references and reviews: These provide insight into communication, timeliness, and problem-solving. Ask references how the contractor handled the project from start to finish. Happy customers are eager to share their experiences.
Owner oversight: I personally oversee every project to ensure our high standards are met, a level of involvement not always found with larger companies.
The Project Process: From Consultation to Completion
Understanding our process helps ensure your project goes smoothly.
Initial consultation: We discuss your goals, budget, and timeline to ensure we’re a good fit. We’ll listen to your ideas and offer professional guidance.
Site assessment: We inspect your property, take measurements, and identify potential challenges like drainage issues or difficult access.
Design and material selection: We help you choose materials that suit your home’s style and our local climate, explaining the benefits of each.
Detailed proposal and contract: We provide a transparent contract detailing the project scope, timeline, and cost, so you know exactly what to expect.
Site preparation: Proper prep is key to longevity. Our excavation services ensure a solid, compacted base to prevent future issues.
Construction: Our skilled craftsmen execute the project with precision, keeping the site clean and you informed throughout the process.
Final walkthrough: We consider the job done only when you are completely satisfied and your property is left pristine. We’ll also provide tips for long-term care.
Understanding Estimates from a Masonry Contractor Stoneham
Evaluating proposals is easier when you know what to look for.
Written, itemized estimates: Never accept a verbal quote. A proper estimate details the scope, materials, labor, and other costs. This transparency prevents surprises. We provide free, detailed estimates.
Pricing factors: Project complexity and materials directly impact cost. Site access, the level of detail, and the specific materials chosen all play a role. A simple walkway is far less than an elaborate multi-level patio.
Average cost disclaimer: Any prices you see online are average costs based on internet data and not actual costs for Gerrior Masonry services. Masonry costs vary dramatically based on complexity, materials, and site conditions. A simple repair might cost a few hundred dollars, while comprehensive hardscaping projects can range from $5,000 to $50,000 or more.
Payment schedules: Payments should be tied to project milestones. Be wary of contractors demanding large upfront payments. Our no hidden fees policy means the price we quote is the price you pay.
The cheapest estimate isn’t always the best value. A low bid may mean corners are being cut on materials or base preparation, leading to costly failures later on. Quality materials and skilled craftsmanship are worth the investment.
Navigating Stoneham’s Unique Masonry Challenges
New England presents specific challenges, highlighting the need for an experienced local contractor.
Freeze-thaw cycles: Our climate’s temperature swings are destructive. Water seeps into cracks, freezes, and expands, causing damage. We use materials and techniques, like proper base preparation and sealants, designed to withstand these forces.
Water management: Heavy rain and snowmelt require proper drainage solutions to protect foundations and hardscaping. This is not an optional add-on; it’s essential for longevity. Our drainage systems & dry wells services are a key part of a durable project.
Historical home preservation: Restoring original stonework or brickwork requires special expertise and the ability to match existing materials, including the specific type of mortar, which we source from specialty suppliers.
Local building codes: We understand Stoneham’s codes and permits, ensuring your project is compliant and avoiding delays.
Why Hiring a Local Stoneham Masonry Contractor is a Smart Move
Choosing a local contractor offers significant advantages.
Local knowledge: We know Stoneham’s building codes, permitting processes, and climate challenges. This familiarity with local conditions, from soil types to suppliers, ensures a smooth project.
Supplier relationships: Our established relationships with local suppliers mean better pricing and reliable material delivery, keeping your project on schedule.
Community reputation: Our success depends on satisfied customers in our community. As your neighbors, our reputation is on the line, motivating us to exceed expectations.
Faster response times: Being local allows us to respond quickly, especially for emergency repairs like a leaking chimney or foundation issue.
Customer satisfaction: We are committed to our neighbors. We don’t just work in Stoneham; we live here and care about the community and the quality of our work within it.
Your Next Steps for a Successful Masonry Project
Now it’s time to put this knowledge to work for your home. The foundation of any successful masonry project is quality craftsmanship, especially in Stoneham’s demanding freeze-thaw climate. Investing in professional work protects your home’s structural integrity and boosts its value for decades.
When vetting contractors, prioritize extensive experience, proper licensing and insurance, a strong portfolio, and positive customer references. A transparent contractor will provide a detailed, itemized estimate and guide you through every step. Experience is crucial in this field; it’s an art and a science learned over years, and that accumulated wisdom shows in the final results.
At Gerrior Masonry & Landscaping, we bring over 30 years of hard-earned experience to every project. Our owner oversight approach means Joe Gerrior personally ensures each job meets our exacting standards. We don’t just build patios and repair foundations—we craft lasting solutions that improve your home and daily life. High-quality results are a product of skilled craftsmen, durable materials, and meticulous attention to detail.
Ready to transform your Stoneham property? We invite you to get a professional estimate for your project. Whether you need a stunning new patio, critical foundation repairs, or a beautiful outdoor fireplace, we’re here to bring your vision to life.
Gerrior Masonry & Landscape Construction is based in Woburn, MA, and proudly services Middlesex and Essex County, Massachusetts.
A lawn dry well is an underground drainage system that collects excess water from your property and slowly releases it into the surrounding soil. It’s a permanent solution to eliminate standing water and protect your landscape from flooding damage.
Quick Answer for Lawn Dry Well Installation:
What it is: An underground, gravel-filled pit or perforated container that stores and disperses stormwater.
Best for: Downspout drainage, low spots, and other concentrated water problems.
Installation depth: Typically 4+ feet deep, depending on soil percolation.
Cost range: $300-$2,000+ depending on size and complexity (average costs based on internet data).
Standing water in your yard can damage your foundation, kill grass, and create mosquito breeding grounds. Heavy rainfall and poor soil drainage, especially the clay soil common in Massachusetts, turn beautiful lawns into swampy messes. A properly installed dry well offers a permanent solution that works with nature’s own drainage system.
For over 34 years, Gerrior Masonry & Landscape Construction Corp. has installed countless lawn dry well systems to solve these persistent drainage problems for Massachusetts homeowners, changing waterlogged properties into functional, healthy landscapes.
What is a Dry Well?
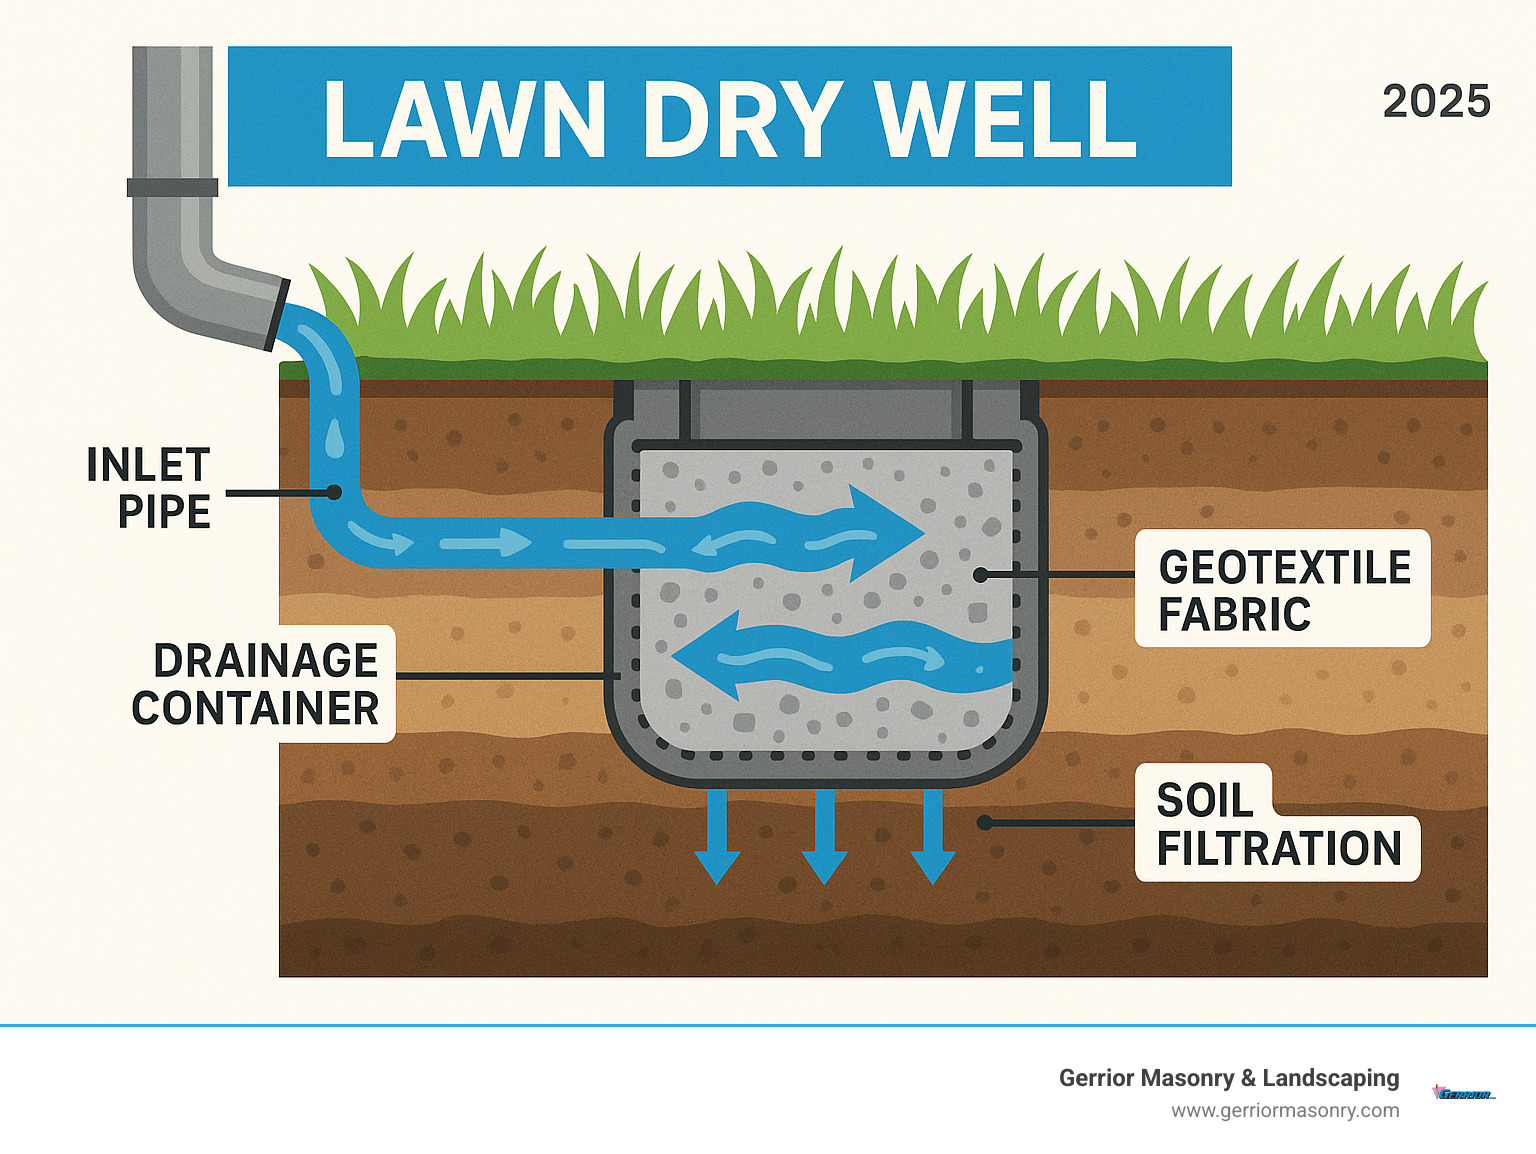
A dry well (also known as a soak pit) is an underground structure designed to manage stormwater runoff. It acts as a hidden reservoir, collecting excess water from downspouts or low spots on your lawn. Instead of pooling on the surface, water flows into the dry well and gradually seeps into the surrounding subsoil. This mimics nature’s filtration process, keeping your lawn dry and reducing the load on municipal storm drains. Once installed, a dry well is covered with soil and grass, making it completely invisible.
Why Proper Drainage is Crucial for Your Property
Effective drainage is a critical component of property maintenance. Here’s why it’s indispensable:
Prevents Foundation Damage: Standing water creates pressure on basement walls, leading to cracks and leaks. Proper drainage is key to preventing expensive structural repairs. Learn more about More info about foundation repair.
Protects Landscaping: Waterlogged soil deprives plant roots of oxygen, causing root rot and killing your lawn and garden.
Avoids Soil Erosion: Uncontrolled runoff washes away valuable topsoil. Dry wells contain this flow, preserving your landscape’s integrity.
Improves Lawn Health: A soggy lawn is prone to fungal diseases and pests like mosquitoes. Good drainage promotes a lush, healthy lawn.
Increases Property Usability: Proper drainage transforms wet, muddy areas into functional spaces for recreation, gardening, or entertaining.
Everything You Need to Know About a Lawn Dry Well
This section covers the practical details of choosing, planning, and installing the right lawn dry well for your property.
Dry Well vs. French Drain: Which is Right for You?
Homeowners often ask whether they need a dry well or a French drain. The answer depends on your specific water problem. A dry well is a standalone pit that collects and disperses water in one spot, while a French drain is a sloped trench that redirects water along a path.
Feature
Dry Well
French Drain
Purpose
Collects and disperses concentrated water into the ground
Collects and redirects water away along a path
Best For
Downspouts, isolated soggy spots, low areas
Foundation perimeters, long stretches of saturated ground
Water Flow
Vertical infiltration
Horizontal diversion
Soil Type
Requires good soil percolation
Can work in less permeable soils by moving water away
Installation
Typically a single, deeper pit
Long, shallower trench with perforated pipe
Visibility
Can be completely hidden
May have visible gravel trench or catch basins
Maintenance
Minimal, primarily preventing clogs
Requires periodic cleaning of pipes/catch basins
A dry well is ideal for a specific point source of water, like a downspout or a low spot in the yard. A French drain is better for intercepting water spread over a larger area, like along a foundation. In Massachusetts, where clay soil is common, a French drain can be used to channel water to a dry well located in an area with better soil absorption. For more details, see our guide on drainage systems.
Planning Your Lawn Dry Well Installation
Proper planning is the key to a long-lasting dry well. Here are the critical steps:
Sizing: The dry well must be large enough to handle the water volume from the intended drainage area (e.g., a roof section or patio). A common rule of thumb is to size it to hold at least one inch of rainfall from that area.
Location: Place the dry well at least 10 feet from your home’s foundation to prevent water damage and at least 3 feet from property lines.
Percolation Test: This is a non-negotiable step. Dig a test hole (approx. 8 inches wide, 4 feet deep) and time how long it takes for a set amount of water to drop one inch. Fast drainage (under 3 minutes per inch) is excellent; slow drainage may mean a dry well isn’t suitable or needs a modified design.
Soil Type: Sandy soils drain quickly, while heavy clay soils drain slowly. Clay may require a deeper dry well to reach more permeable soil layers. Learn more about soil health and aeration.
Permits and Safety: Check with your local building department for any regulations. Crucially, always call 811 before you dig to locate underground utility lines. It’s free, required by law, and prevents dangerous accidents. For a DIY guide, This Old House offers helpful tips on how to install a dry well.
Step-by-Step Installation Guide
Installing a lawn dry well involves careful work, but follows a clear process.
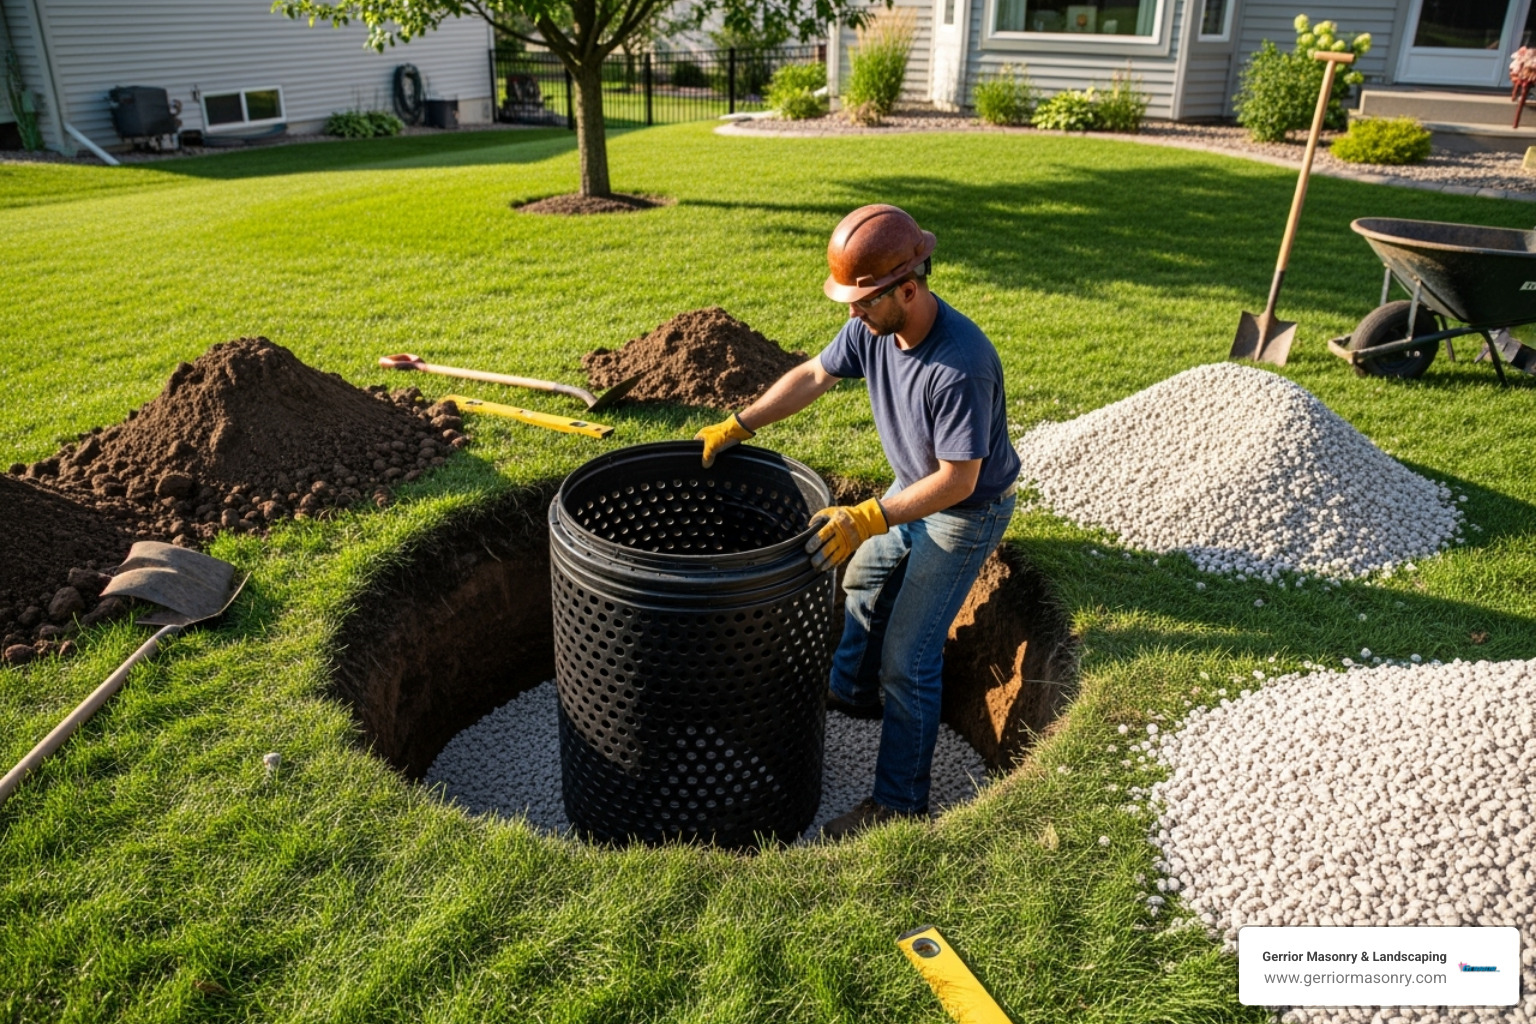
Excavation: Dig a pit to the required dimensions (typically 4x4x4 feet) and a trench from the water source to the pit, ensuring a downward slope for gravity flow. This is heavy labor; professional excavation services can handle it efficiently.
Gather Materials: You’ll need a perforated container or washed ¾-inch stone, non-woven geotextile fabric, a 4-inch PVC inlet pipe, and additional gravel.
Line the Pit: Line the entire pit with geotextile fabric, leaving enough excess to fold over the top. This is critical to prevent soil from clogging the system.
Install the System: Place a 6-inch layer of gravel at the bottom, then set your perforated container or begin filling with gravel. Connect the inlet pipe securely.
Backfill: Fill the area around and above the container with washed gravel, leaving about 8-12 inches at the top.
Cover and Finish: Fold the excess geotextile fabric over the top of the gravel, then cover with topsoil and seed or sod to blend it into your lawn.
Understanding the Costs and Maintenance of a Lawn Dry Well
A lawn dry well is a valuable investment. Here’s what to expect for costs and upkeep.
Installation Costs: Costs vary by size and complexity. A DIY project might run $300-$800 for materials. Professional installation typically ranges from $1,500 to $8,000 or more for complex jobs. These are average costs based on internet data and not actual quotes from Gerrior Masonry & Landscaping.
Potential Problems: The most common issue is clogging from silt and debris, which is prevented by using quality geotextile fabric. Poor soil percolation can also lead to failure if the site wasn’t tested properly.
Maintenance Needs: A well-built dry well is virtually maintenance-free. The best preventative step is to install gutter guards if the dry well is connected to downspouts to keep leaves and debris out. Periodically check the area for slow drainage after heavy rain. If your system uses a sump pump, it will require regular testing and winterization.
Reclaim Your Yard with a Professional Drainage Solution
A lawn dry well is one of the most effective, low-maintenance solutions for managing standing water from downspouts or persistent low spots. A properly installed system works silently underground, using gravity to transform a waterlogged yard into a functional, beautiful space while protecting your property.
Key Benefits Summarized
Installing a lawn dry well offers significant advantages beyond just eliminating puddles:
Eco-Friendly Stormwater Management: Reduces runoff into municipal storm systems and helps prevent local flooding by dispersing water naturally into the ground.
Groundwater Recharge: Replenishes local groundwater aquifers, a vital benefit for the environment.
Soil Erosion Prevention: Captures and controls runoff before it can wash away valuable topsoil and plantings.
Foundation Protection: Directs water away from your home’s foundation, preventing costly hydrostatic pressure damage, cracks, and leaks.
A Healthier, Usable Lawn: Eliminates soggy spots, creating ideal conditions for robust grass growth and making your entire yard enjoyable. This is a key part of our comprehensive landscaping services.
When to Call the Experts
While a dry well seems simple, professional expertise is crucial for a successful, long-lasting solution, especially in certain situations:
Complex Drainage Issues: If you have widespread water problems, multiple runoff sources, or persistent flooding, a professional assessment is needed to design a comprehensive solution.
Heavy Clay Soil: The poor drainage of clay soil, common in Massachusetts, often requires modified designs or alternative approaches that an expert can identify.
High Water Table: Installing a dry well in an area with a high water table is ineffective without specialized solutions.
Proper Sizing and Location: Experience is key to correctly sizing a system for your needs and placing it for maximum effectiveness while adhering to safety setbacks from foundations and property lines.
For a professional assessment and installation of your drainage system, contact the experts at Gerrior Masonry & Landscaping. We are based in Woburn, MA, and proudly serve the communities of Middlesex and Essex County, Massachusetts. With over 30 years of experience, we have the expertise to solve your drainage problems and protect your property investment.