
Why Flagstone Patio Construction Is Worth Doing Right
Flagstone patio construction is one of the most rewarding hardscaping projects a homeowner can take on — but only if the foundation is built correctly. For homeowners in Massachusetts, a well-constructed patio provides a durable outdoor living space that withstands the local climate while adding significant aesthetic value to the property.
Here’s a quick overview of how it works:
- Plan and mark your patio area with stakes and string
- Call 811 to have underground utilities marked before digging
- Excavate 6–9 inches deep depending on stone thickness and climate
- Compact a gravel base (4–6 inches) in 2-inch layers
- Add a bedding layer of sand or decomposed granite (1–2 inches)
- Lay the flagstone pieces, leveling each one individually
- Fill joints with polymeric sand, stone dust, or decomposed granite
- Install edging to lock the perimeter in place
Flagstone is a flat, naturally occurring sedimentary rock that splits into smooth slabs. It’s quarried — not manufactured — which gives each patio a one-of-a-kind look. It also handles the intense Massachusetts freeze-thaw cycles well when installed correctly, which matters a lot for local longevity. Because the stone is natural, it maintains its color and integrity far longer than many synthetic alternatives.
A dry-laid flagstone patio for a typical 120-square-foot space costs roughly $1,800–$2,200 in DIY materials. Professional installation in Massachusetts ranges from $2,500 to $15,000 or more depending on stone choice and site complexity. These are average costs based on internet data, not a quote from Gerrior Masonry.
I’m Joe Gerrior, owner of Gerrior Masonry & Landscape Construction Corp., with over 34 years of experience in masonry and hardscaping — including flagstone patio construction — serving residential and commercial clients across Massachusetts. In this guide, I’ll walk you through everything you need to build a flagstone patio that lasts for decades.
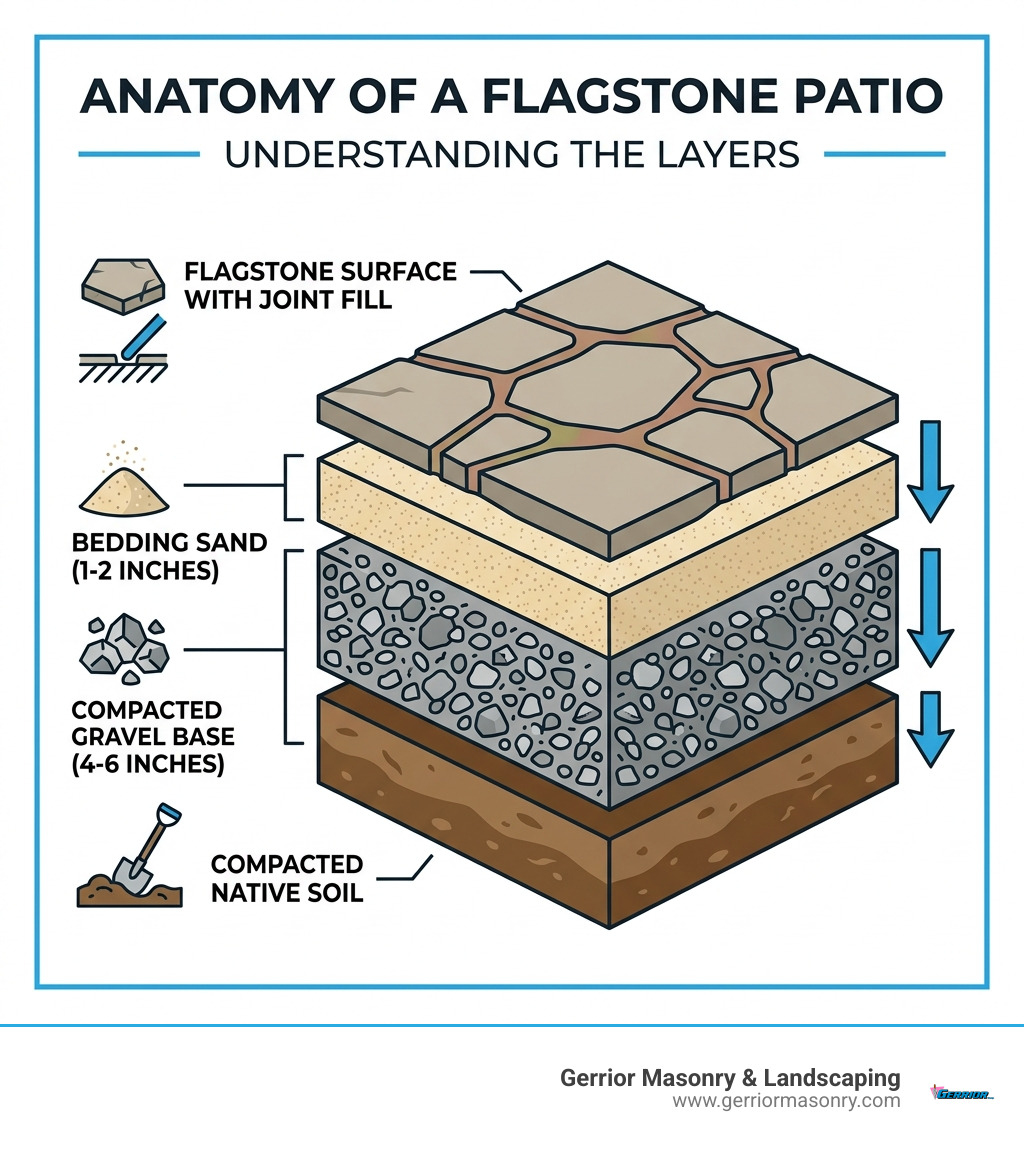
Common flagstone patio construction vocab:
Essential Planning for Flagstone Patio Construction
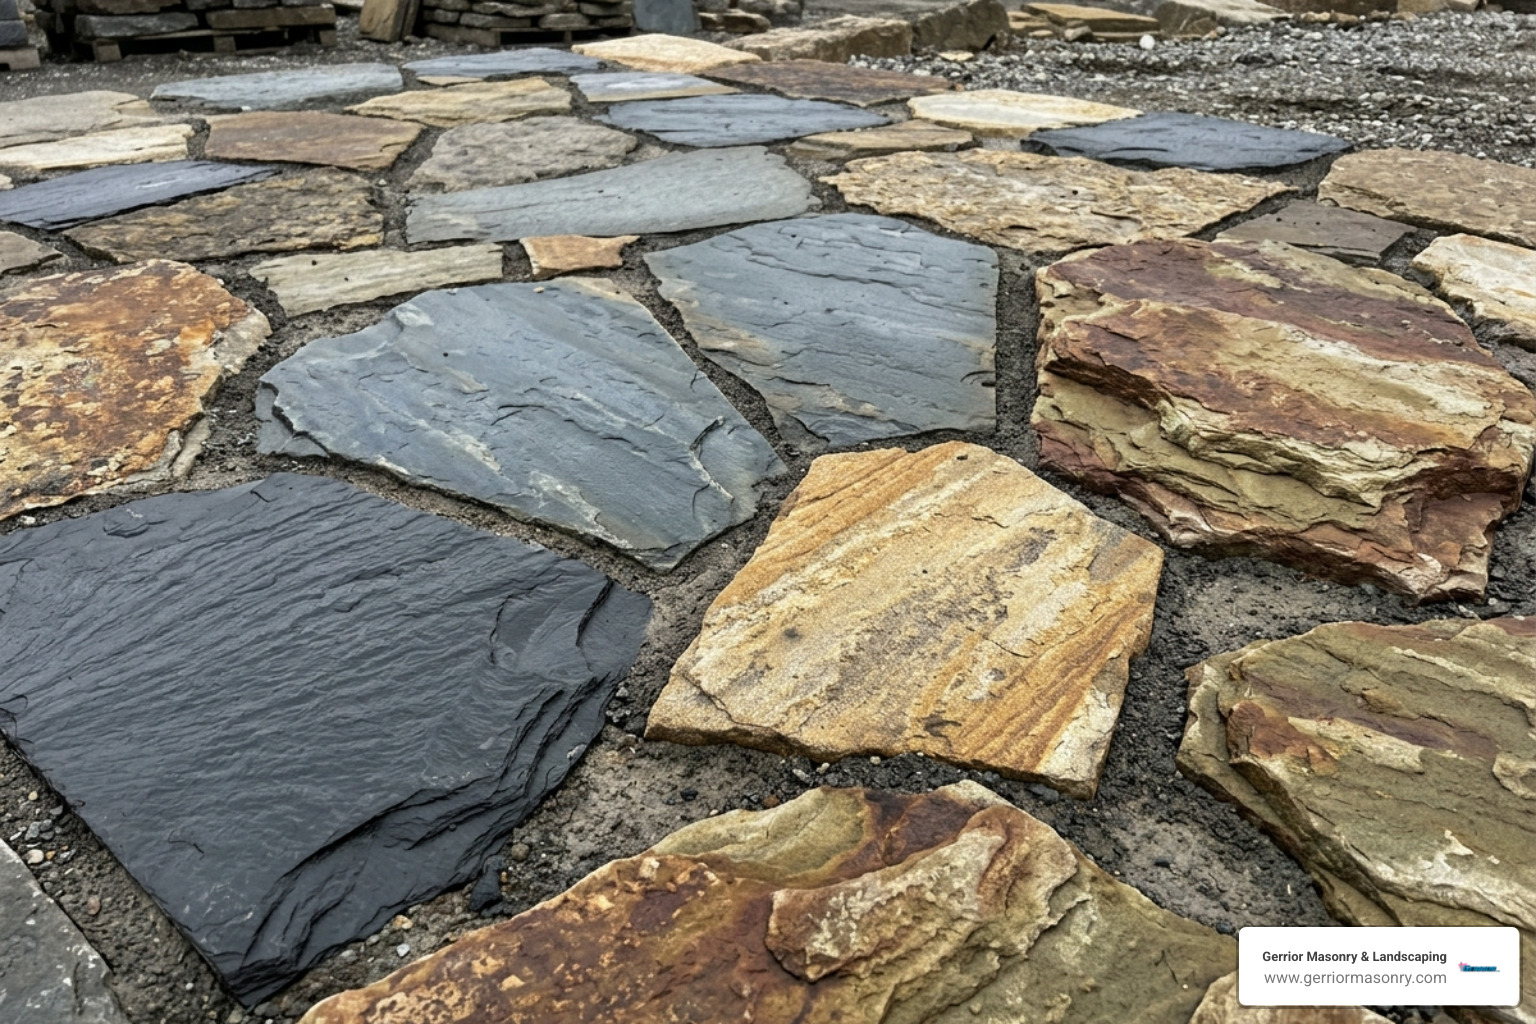
Before you pick up a shovel in Woburn or Winchester, you need a solid plan. Successful flagstone patio construction starts with selecting the right materials and understanding the local environment. In Massachusetts, we deal with significant temperature swings, meaning your stone choice needs to be as tough as a local winter. Proper planning ensures that your investment remains level and beautiful despite the shifting ground common in our region.
Selecting Stone Types and Essential Tools
Choosing your stone is the fun part, but it’s also the most critical for durability. Flagstone is a generic term for several types of flat stone:
- Bluestone: A dense, blue-gray sandstone that is a staple for Massachusetts hardscaping. It’s incredibly popular in towns like Lexington and Concord because it’s durable and offers a classic look.
- Sandstone: Known for warm tans and reds. It’s porous but stays relatively cool underfoot during our humid July afternoons.
- Slate: Offers a beautiful, layered texture. However, it can be prone to “spalling” (layers peeling off) if it’s not high quality.
- Limestone: Elegant and light-colored, but can be slippery when wet.
When selecting your stone, thickness is your best friend. We recommend stones that are at least 1.5 to 2 inches thick. Anything thinner is likely to crack under foot traffic or shift during the first deep freeze of the year. For more help on material selection, check out our guide on choosing the perfect flooring material for your outdoor patio.
You can find further scientific research on stone durability to see how different minerals hold up over time.
Essential Tool List:
- Safety Gear: Work gloves, safety glasses, and hearing protection (especially if you’re using a plate compactor).
- Layout Tools: Stakes, mason’s string, and marking paint.
- Excavation Tools: Shovel, pickaxe, and a wheelbarrow.
- Compaction Equipment: A hand tamper for small areas, but we strongly suggest renting a gas-powered plate compactor for anything over 50 square feet.
- Setting Tools: A 4-foot level, a rubber mallet, and a stone chisel for shaping pieces.
Excavation and Base Preparation Requirements
If there is one thing we’ve learned in 30 years of masonry, it’s this: your patio is only as good as what’s underneath it. Skipping base preparation is the #1 reason for patio failure in Middlesex County.
First, call 811. Whether you’re in Arlington or Andover, you must have your underground utilities marked. You don’t want to strike a gas line while looking for a place to put your grill.
The Excavation Process:
- Mark the Area: Use spray paint to outline the footprint.
- Determine the Depth: You need to dig deep enough to accommodate 4–6 inches of compacted gravel, 1–2 inches of bedding sand, and the thickness of the stone itself. Usually, this means excavating 6–9 inches deep.
- Establish the Slope: To prevent water from flooding your basement in Medford or Malden, the patio must slope away from your house. Aim for a 2% slope, which is roughly a 1/4-inch drop for every foot of distance.
- Compact the Subgrade: Before adding gravel, use your plate compactor on the raw soil.
For a deeper dive into what makes a stable foundation, read our article on the base for flagstone walkway construction.
Dry-Laid vs. Mortared Flagstone Patio Construction
There are two main ways to build your patio: dry-set or mortared.
- Dry-Laid (Dry-Set): This is the most DIY-friendly method. The stones are set on a bed of gravel and sand. It’s permeable, meaning water can filter through the joints into the ground. It’s also flexible; if a stone shifts due to frost, you can easily lift it, add a bit of sand, and reset it.
- Mortared: This involves laying flagstone over a reinforced concrete slab and filling the joints with wet mortar. While it looks formal and high-end, it’s much harder for a DIYer. If the slab isn’t perfect, the mortar will crack when the ground moves.
| Feature | Dry-Laid Method | Mortared Method |
|---|---|---|
| DIY Difficulty | Intermediate | Advanced |
| Drainage | Permeable (Good) | Impermeable (Requires Drain) |
| Maintenance | Occasional weeding/refilling | Repairing cracked grout |
| Foundation | Gravel/Sand Base | Poured Concrete Slab |
If you are considering the mortared route, you might want to learn about concrete patio construction to understand the foundation requirements.
Step-by-Step Installation and Maintenance
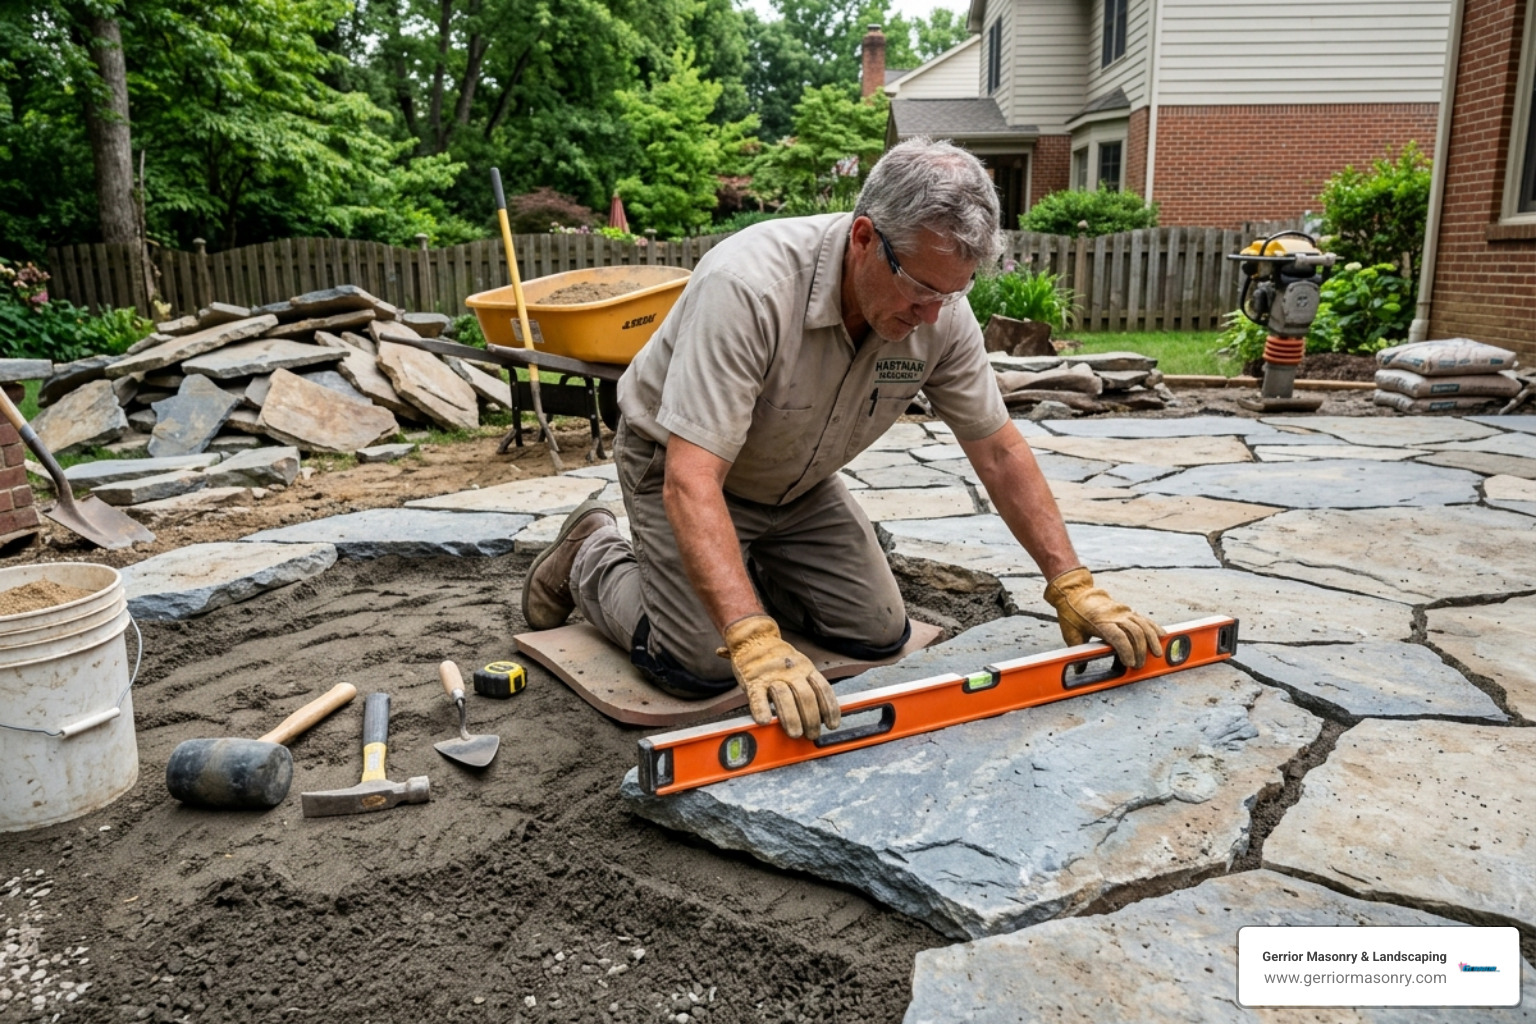
Once your base is compacted and your sand is screeded level (following your slope!), it’s time to play the world’s heaviest game of Tetris.
Laying the Stone and Joint Finishing
Start laying stones at the most visible corner or along a straight edge (like the house foundation).
- The Fit: Place your largest stones first. Try to keep the gaps between stones (the joints) consistent, ideally between 3/8 of an inch and 1.5 inches. If a stone doesn’t fit, you can use a hammer and chisel to knock off “ears” or sharp points.
- Leveling: This is the tedious part. Every single stone needs to be checked with a level. If a stone is too low, lift it and add a handful of sand. If it’s too high, whack it with a rubber mallet. It should feel rock-solid when you step on it.
- Joint Filling: Once the stones are set, you need to fill the gaps.
- Polymeric Sand: This is our favorite for DIYers in towns like Burlington and Billerica. It’s sand mixed with additives that harden when wet. It resists weeds and ants.
- Stone Dust: A more natural, rustic look, but it will require more weeding over time.
- Edging: Install metal or plastic landscape edging around the perimeter. Secure it with 10-inch spikes to prevent the stones from “creeping” outward over time.
For smaller projects or paths, you might find our guide on installing flagstone stepping stones helpful.
Avoiding Common Mistakes in Flagstone Patio Construction
Even with the best intentions, things can go wrong. Here are the pitfalls we see most often in Massachusetts:
- Poor Compaction: If you only use a hand tamper on the gravel, your patio will sink. Rent the plate compactor. It’s worth the $100.
- Inadequate Drainage: If you don’t maintain that 1/4-inch-per-foot slope, you’ll end up with an ice rink in the winter. For serious water issues, you may need to look into drainage systems and dry wells.
- Small Stones at the Edges: Small pieces shift easily. Use your largest, heaviest stones for the perimeter.
- Ignoring the “811” rule: Nothing ruins a weekend like a broken water main.
Check out this scientific research on patio drainage to understand the physics of water runoff.
Cost Estimates and Professional Services in Massachusetts
Let’s talk numbers. Building a patio is an investment in your home’s value.
- DIY Costs: If you do the labor yourself, expect to pay between $10 and $12 per square foot for natural flagstone. For a standard 120-square-foot patio, your material total (including gravel, sand, and stone) will likely fall between $1,800 and $2,200.
- Professional Costs: Hiring a pro ensures the job is done right the first time. In the Massachusetts area, professional flagstone patio construction generally ranges from $2,500 to $15,000. The higher end of that range accounts for large-scale projects, complex patterns, or sites that require significant excavation and retaining walls.
At Gerrior Masonry & Landscaping, we’ve spent three decades perfecting the art of the stone patio. Whether you’re in Newton, Natick, or North Reading, we bring owner-supervised quality to every backyard. If the DIY route feels a bit too heavy (literally), we are here to help with our patio installations services.
Frequently Asked Questions
Can I install flagstone over an existing concrete slab? Yes, you can! If the slab is in good condition and has a proper slope, you can mortar the stones directly to the concrete. This is a great way to “face-lift” an old, ugly concrete patio in places like Lynnfield or Salem.
How long does a flagstone patio last? A properly installed dry-laid patio can last 30 to 50 years. Because it’s natural stone, it won’t fade in the sun like concrete pavers might.
How do I maintain it? Sweep it regularly to keep organic debris out of the joints. If you used polymeric sand, you might need to top it off every 3–5 years. If stones become uneven due to extreme frost, simply lift them and relevel the sand underneath.
How much stone should I order? Always order 10–15% more than your square footage calculation. This accounts for breakage and the pieces you’ll inevitably have to cut to fit the “puzzle.”
Summary of DIY Steps
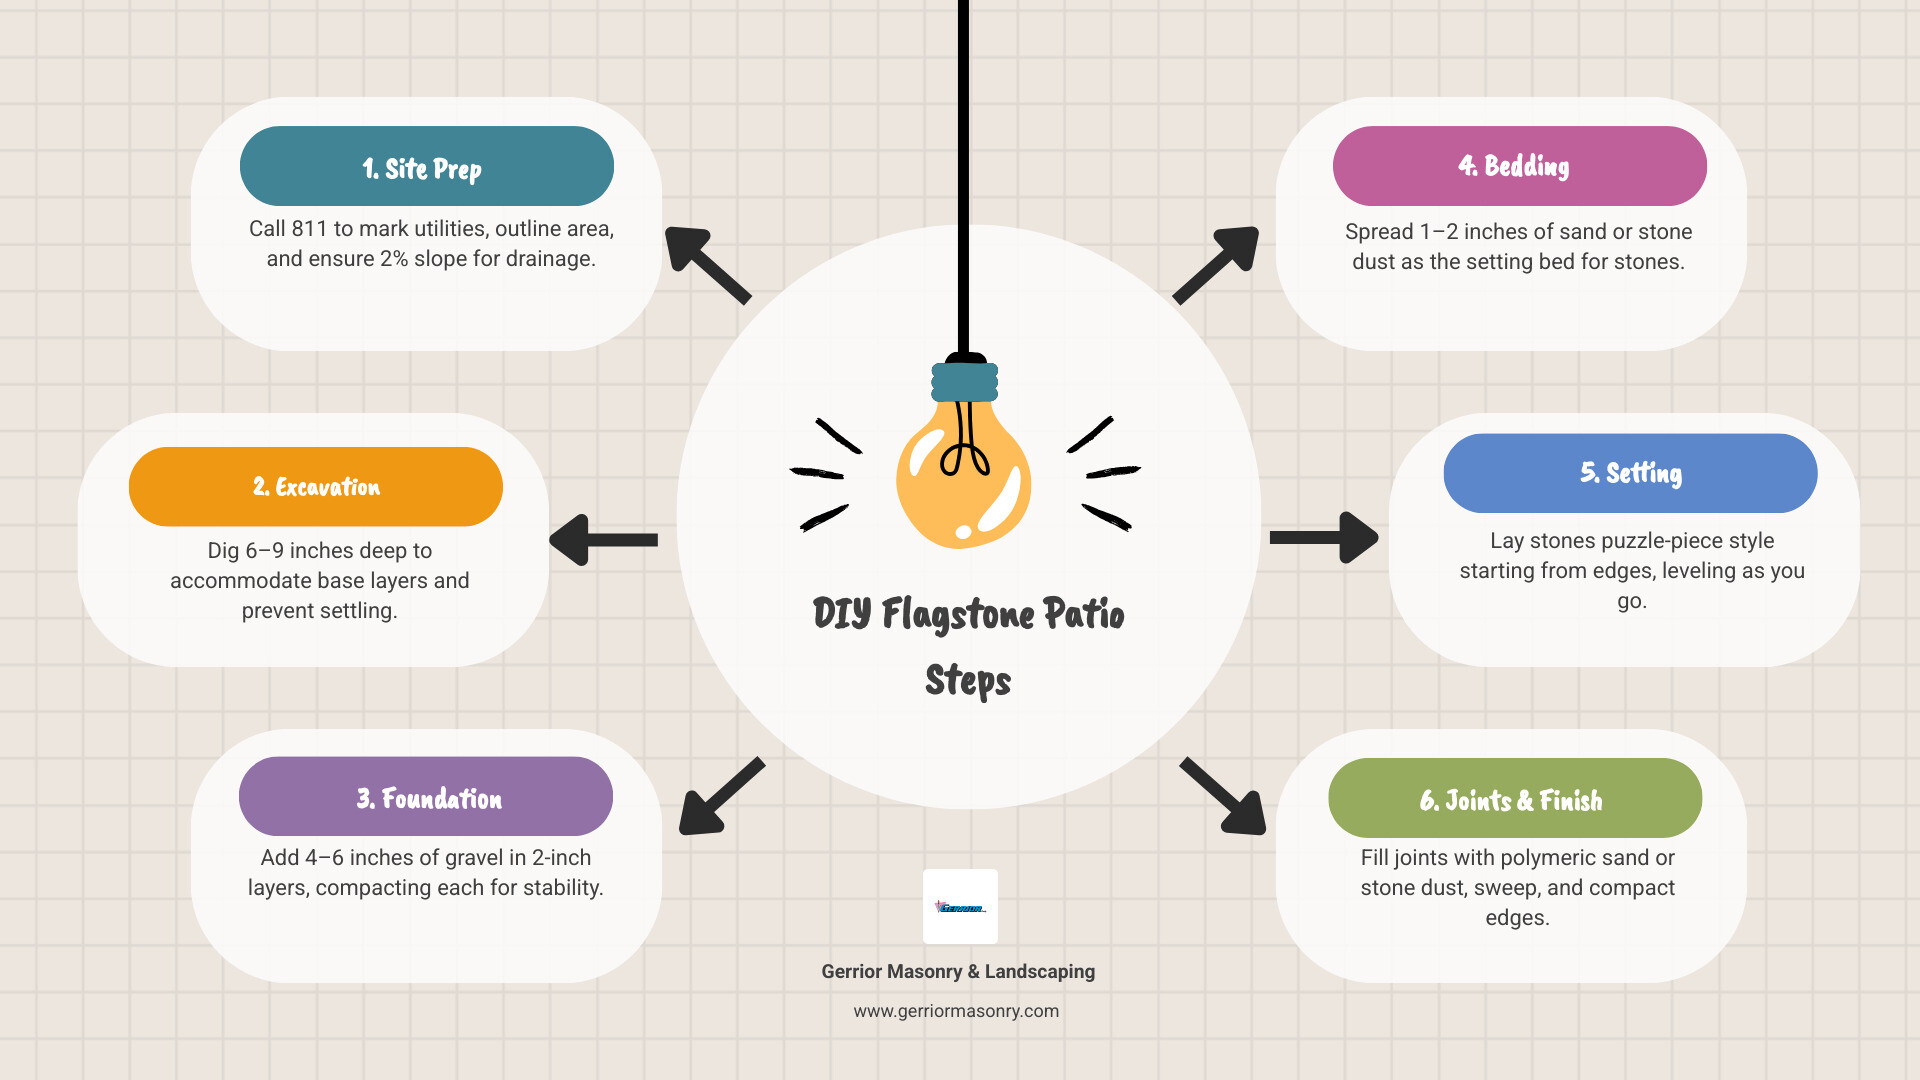
- Site Prep: Call 811, mark the area, and ensure a 2% slope.
- Excavation: Dig 6–9 inches deep.
- Foundation: Add 4–6 inches of gravel, compacting every 2 inches.
- Bedding: Add 1–2 inches of sand or stone dust.
- Setting: Lay stones, starting from the edge.
- Finishing: Level each stone, install edging, and fill joints.
Building a patio is hard work, but there is nothing quite like sitting on a stone surface you built yourself while the sun sets over the Massachusetts hills. Whether you are in Woburn, Arlington, or Beverly, we hope this guide helps you create the outdoor space of your dreams.
Gerrior Masonry & Landscape Construction is based in Woburn, MA, and services Middlesex and Essex County, Massachusetts. Average costs for Massachusetts based on internet data range from $855 to $6,600 for DIY projects, while professional installations typically range from $2,500 to $15,000 or more depending on stone choice and site complexity.
Ready to transform your backyard? If you’d rather spend your weekend relaxing than hauling tons of stone, give us a call. From stone patio contractors near me searches to full landscape design projects, Gerrior Masonry & Landscaping has the experience to get it done right.
We serve: Acton, Amesbury, Andover, Arlington, Ayer, Bedford, Belmont, Beverly, Billerica, Boxford, Burlington, Carlisle, Chelmsford, Concord, Danvers, Dracut, Dunstable, Essex, Georgetown, Hamilton, Hudson, Ipswich, Lexington, Lincoln, Lowell, Lynnfield, Malden, Manchester-by-the-Sea, Marblehead, Medford, Melrose, Middleton, Natick, Newton, North Andover, North Reading, Peabody, Reading, Rowley, Salem, Saugus, Stoneham, Sudbury, Swampscott, Tewksbury, Topsfield, Wakefield, Waltham, Watertown, Wayland, Wenham, West Newbury, Westford, Weston, Wilmington, Winchester, and Woburn.
