
Stone garden wall construction: 3 Solid Steps
Why Stone Garden Walls Transform Your Landscape
Stone garden wall construction offers a timeless way to improve your property’s beauty and functionality. From creating defined planting areas to retaining soil on a slope, a well-built stone wall adds architectural interest and lasting value.
Key steps for successful stone garden wall construction:
- Choose your wall type – dry-stacked, mortared, or interlocking blocks
- Plan and measure – determine height, length, and material needs
- Excavate properly – dig trench 4-6 inches deep, twice the stone width
- Build solid foundation – compact gravel base with landscape fabric
- Install drainage – prevent water pressure with perforated pipe and gravel
- Layer stones carefully – stagger joints, maintain slight backward lean
- Finish with capstones – secure top course for professional appearance
An aged fieldstone wall is a symbol of the New England lifestyle. These structures can last indefinitely when built properly, making them a smart investment.
Cost considerations: Building a freestanding stone wall typically costs around $800 per 10 feet, though prices can range from $500 to $2,500+ depending on materials and complexity. The project generally takes about 7 days with two people working together.
I’m Joe Gerrior, owner of Gerrior Masonry & Landscape Construction Corp. For over 34 years, my team and I have helped Massachusetts homeowners create beautiful, durable outdoor spaces. Our expertise in *stone garden wall construction ensures every project meets the highest standards of craftsmanship and longevity.*
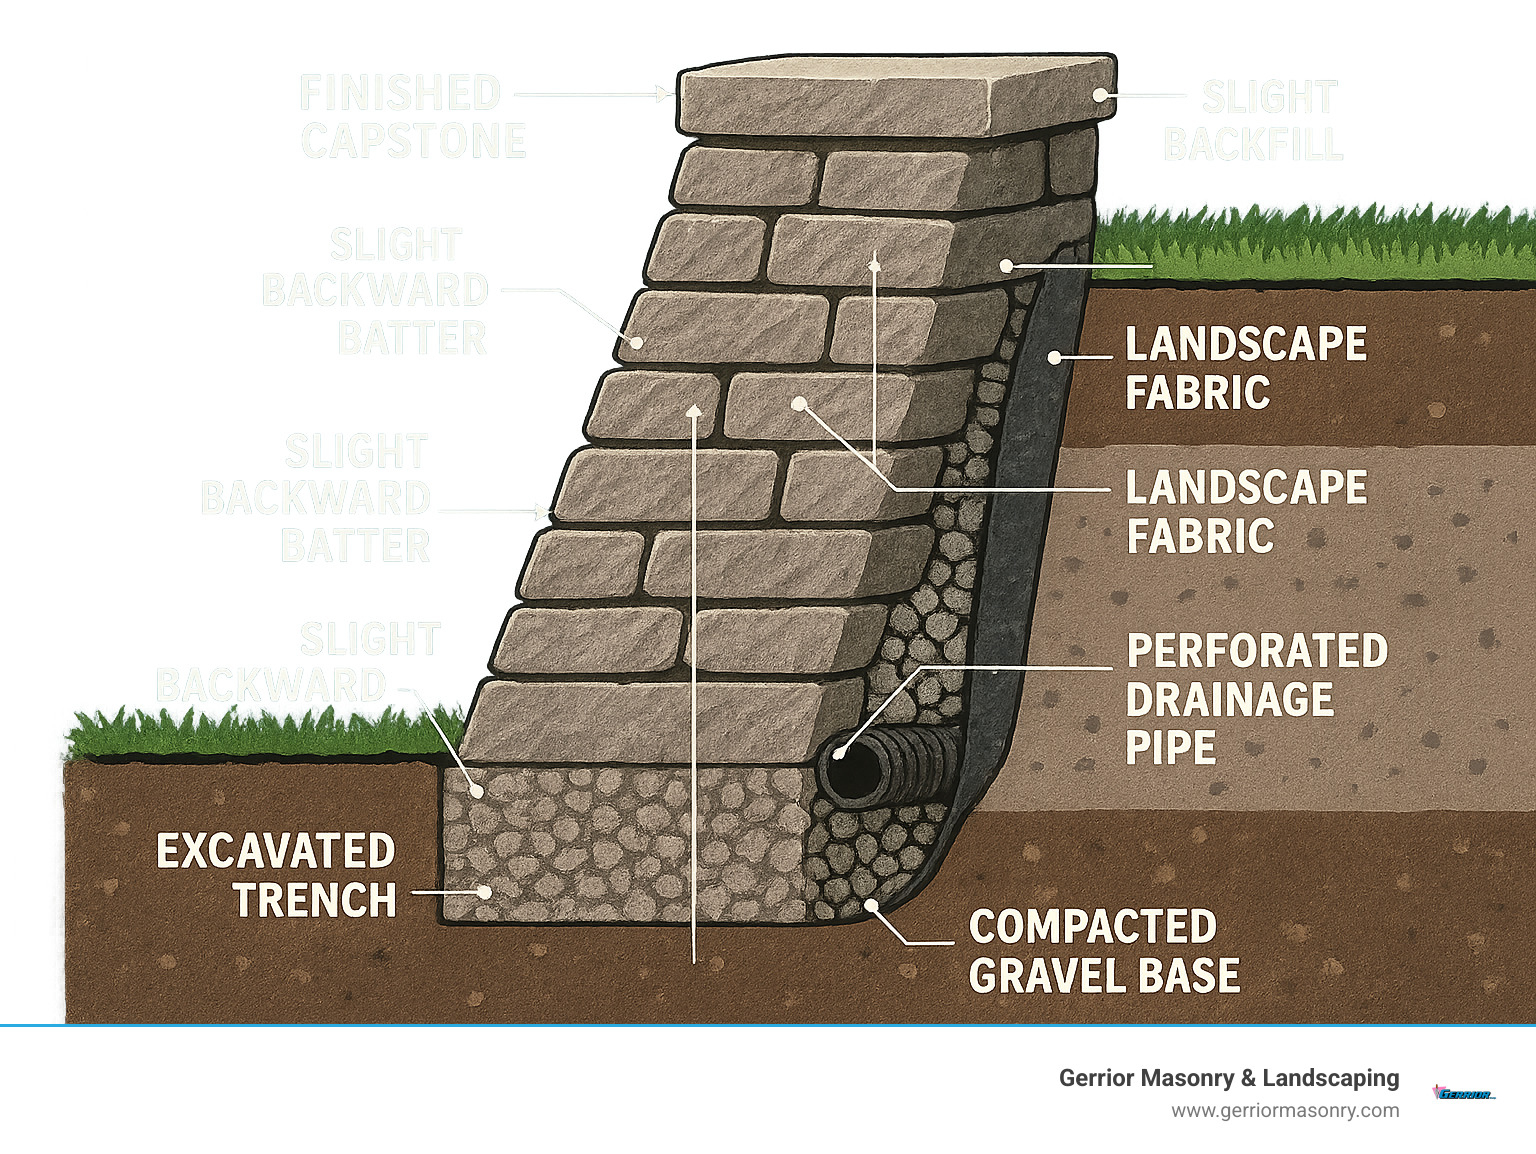
Stone garden wall construction terms at a glance:
Choosing Your Style: Types of Stone Garden Walls
When planning your stone garden wall construction, the first decision is choosing the right style. This involves considering both aesthetics and function. Are you creating a decorative border or a sturdy retaining wall to manage a slope? Each purpose requires a different approach. In New England, local fieldstone can make any wall look like it’s always been part of the landscape.
The key difference is between freestanding walls and retaining walls. A freestanding wall stands on its own, like a garden border. A retaining wall holds back soil to prevent erosion, requiring more robust construction and careful planning.
For more guidance on your options, check out our hardscaping services.
Here’s how the three main types of stone walls stack up:
| Wall Type | Cost (Relative) | Skill Level | Durability | Ideal Use |
|---|---|---|---|---|
| Dry-Stacked Stone | Medium | Moderate to High | High | Decorative borders, low retaining walls |
| Mortared Stone | High | High | Very High | Taller retaining walls, formal structures |
| Interlocking Block | Medium | Low to Moderate | High | Straight or curved retaining walls, planters |
Dry-Stacked Stone Walls
For a rustic, natural look that defines classic New England, dry-stacked stone walls are a great choice. They are built without mortar, relying on carefully fitted stones, gravity, and craftsmanship. Building a dry-stacked wall is like solving a giant, three-dimensional puzzle. Its biggest advantage is natural drainage. Water flows through the gaps, which is crucial for preventing damage from freeze-thaw cycles in Massachusetts. The main limitation is height; keep dry-stacked walls to a 3-4 feet maximum. For most garden applications, this provides plenty of height for beautiful, lasting boundaries.
Want to see more options? Visit our landscape walls page for inspiration.
Mortared Stone Walls
When you need serious strength or a formal, polished appearance, mortared stone walls are the solution. Mortar binds the stones into a solid unit that can handle heavy loads and taller heights, making them suitable for seating or holding back significant soil. The trade-off is that they require real masonry skills and more complex construction. You’ll need to mix mortar properly and place stones with precision. In our climate, a concrete footing below the frost line is non-negotiable. The extra effort results in a wall that’s both beautiful and incredibly durable.
Check out our masonry services to see what’s possible with professional mortared construction.
Interlocking Block & Veneer Walls
For homeowners wanting consistent results without advanced masonry skills, interlocking block systems are a modern solution. These engineered blocks are designed to fit together perfectly, making stone garden wall construction more predictable. The blocks stack easily with built-in alignment systems, which most DIYers find less intimidating than natural stone. Height limits are typically 24-36 inches before engineering and reinforcement are needed. You can also get the best of both worlds with stone veneer options. Stone veneer provides the gorgeous look of real fieldstone over the reliable structure of manufactured blocks, combining modern reliability with timeless beauty.
Planning and Preparation: Your Blueprint for Success
Before we even pick up a shovel, thoughtful planning makes the difference between a stone garden wall construction project that brings joy for decades and one that becomes a costly headache. Think of this phase as laying the groundwork for success—literally and figuratively.
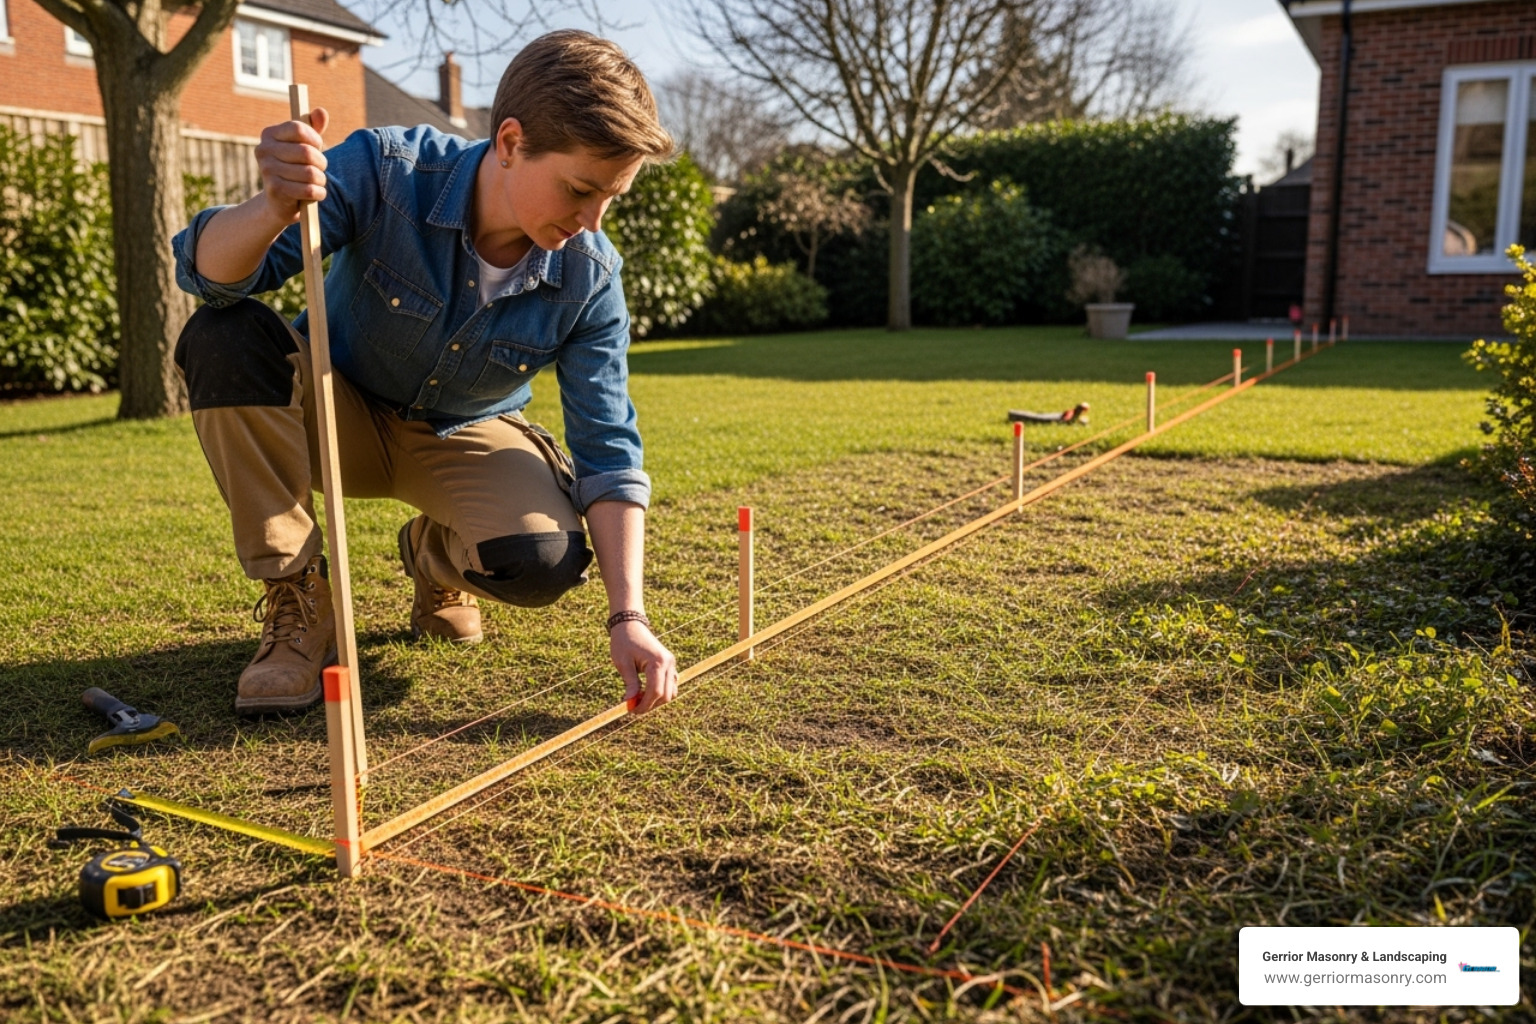
Site selection and measurement come first. Walk your property with a measuring tape and really look at how water flows during heavy rains. That low spot where puddles form? That’s where proper drainage becomes crucial. Take time to measure the exact length and height you need, accounting for any slopes or curves in your landscape.
Here’s something many homeowners overlook: checking local regulations and building permits. In Massachusetts communities we serve, retaining walls over 30-36 inches typically require permits. I’ve seen too many beautiful walls that had to be torn down because someone skipped this step. A quick call to your local building department can save you thousands in rework costs.
The permit process isn’t just red tape—it’s about safety. Taller walls create significant structural loads, and building codes ensure your wall won’t fail during our famous New England freeze-thaw cycles.
Estimating Your Materials
Getting your material calculations right prevents those frustrating mid-project trips to the supply yard. Nothing kills momentum like running out of stone when you’re in the zone!
Stone quantity depends on your wall type and dimensions. For natural fieldstone, plan on about one ton for every 7.5 face-feet of freestanding wall (with typical 24-inch width) or every 10 face-feet of retaining wall (18-inch width). These numbers might seem abstract, but your stone supplier can help translate your measurements into actual tonnage.
Paver base calculation is straightforward: allow approximately 0.4 cubic feet of crushed stone per square foot of wall face area. This granular foundation is what keeps your wall stable through decades of weather.
For retaining walls, gravel backfill becomes critical—budget about 0.35 cubic feet per square foot of wall face area. This isn’t optional; it’s what prevents water from building up behind your wall and pushing it over.
Don’t forget the supporting players: landscape fabric to separate soil from gravel, mortar mix for mortared walls (typically building sand, cement, and lime), and construction adhesive for securing capstones. Always order 10-20% extra materials—trust me, you’ll need them for adjustments and the inevitable “oops” moments.
Essential Tools for the Job
The right tools transform stone garden wall construction from backbreaking labor into satisfying craftsmanship. You don’t need a contractor’s full arsenal, but certain tools are non-negotiable.
Start with shovels—both a spade for digging and a flat-nose for moving materials. A sturdy wheelbarrow becomes your best friend when moving tons of stone and gravel. Your back will thank you.
Hand tampers are crucial for compacting your base materials. Skipping this step is like building a house on quicksand. For larger projects, renting a plate compactor saves time and ensures better results.
Levels keep everything straight and true. You’ll want a torpedo level for individual stones, a 4-foot level for longer sections, and a line level to maintain consistent course heights. Stakes and mason line help mark your layout and keep courses straight.
Safety gear isn’t optional: work gloves, safety glasses, and knee pads for comfort during long work sessions. When cutting stone, add a respirator and hearing protection. A rubber mallet gently sets stones without damage, while a mini sledgehammer and mason’s chisel help shape natural stone to fit perfectly.
Quality tools make the work easier and safer, but they don’t replace careful technique and patience.
The Critical Steps for Stone Garden Wall Construction
Now comes the exciting part—actually building your wall! The first few steps in stone garden wall construction are absolutely crucial. Think of it this way: everything that comes after depends on getting these fundamentals right. A solid foundation and proper drainage aren’t just nice-to-haves; they’re what separate a wall that lasts decades from one that starts leaning after the first hard winter.
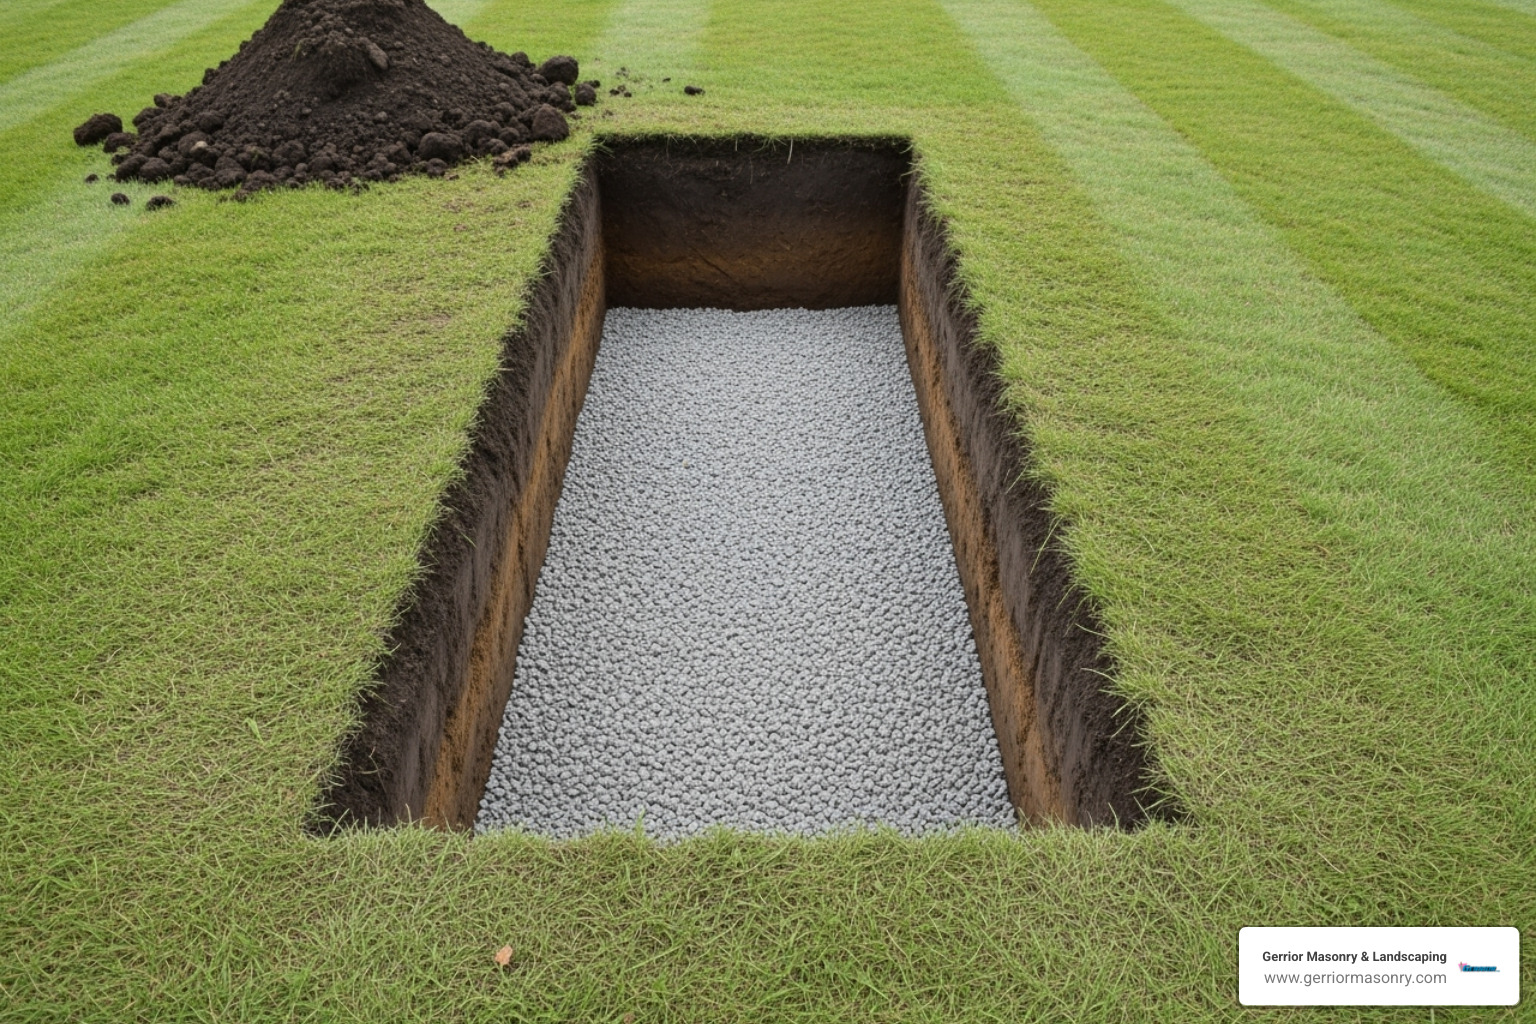
Step 1: Excavating the Trench and Foundation
The foundation work is where we separate the weekend warriors from the serious builders. It’s not glamorous, but it’s absolutely essential for successful stone garden wall construction.
Start by marking your wall’s exact path using stakes and mason line. This keeps everything straight and prevents that sinking feeling when you realize your wall is wandering off course halfway through the project.
When digging your trench, aim for a footing depth of 4 to 6 inches. Here’s the critical part many DIYers miss: the footing width should be twice the width of your stones—typically around 12 inches wide. This wider base spreads the wall’s weight over more ground, preventing settling that could crack or tilt your beautiful wall.
If you’re building on sloped ground, you’ll need to “step” your trench to maintain level sections. It’s extra work, but keeping that base level is non-negotiable. Any wobbles here will haunt you as the wall gets taller.
For complex foundation challenges, you might want to learn about proper foundation work from professionals who handle these issues daily.
Step 2: Building a Solid Base
Once your trench is dug, it’s time to create the actual foundation your stones will rest on. This is where patience pays off—rushing through base preparation is like building a house on quicksand.
First, lay down landscape fabric across the entire trench bottom. This permeable barrier keeps your gravel base from mixing with the soil below, which would compromise both drainage and stability. Overlap the fabric seams by at least 12 inches to prevent any gaps.
Next comes the crushed stone base. Add your ¾-inch stone in thin layers—no more than 2 inches at a time. After each layer, compact it thoroughly with a hand tamper. For larger walls, a mechanical compactor is worth renting; your back will thank you, and the results will be much better.
The compacting step is where many DIY projects go wrong. Skipping this creates a soft, unstable base that will settle over time. Keep adding and compacting layers until your base sits about 8 inches below the final grade, ready for your first course of stones.
Step 3: Incorporating Proper Drainage
Here’s where we talk about the silent killer of stone walls: water. Without proper drainage, even the most beautifully built wall can fail within a few seasons. Water trapped behind a wall creates hydrostatic pressure—imagine the wall trying to hold back not just soil, but soil saturated with water. In our Massachusetts climate, freeze-thaw cycles make this even more destructive.
The solution is a comprehensive drainage system that we build as we go. Behind the wall, we continuously backfill with crushed gravel rather than soil. This creates a permeable zone where water can collect without building pressure.
At the base level, install a perforated drain pipe (often called a French drain) behind your first course of stones. This pipe collects water filtering through the gravel and carries it safely away from the wall. The pipe should “daylight” at both ends—meaning it extends beyond the wall where water can exit naturally.
For mortared walls, consider adding weep holes—small gaps or pipes at the base that allow trapped water to escape through the wall face. It’s like giving your wall a way to breathe.
The drainage work might seem invisible once the wall is finished, but it’s what keeps your stone garden wall construction project standing strong for generations. For complex drainage situations, our expert drainage solutions can handle even the most challenging water management needs.
Laying the Stones: Techniques for a Durable Wall
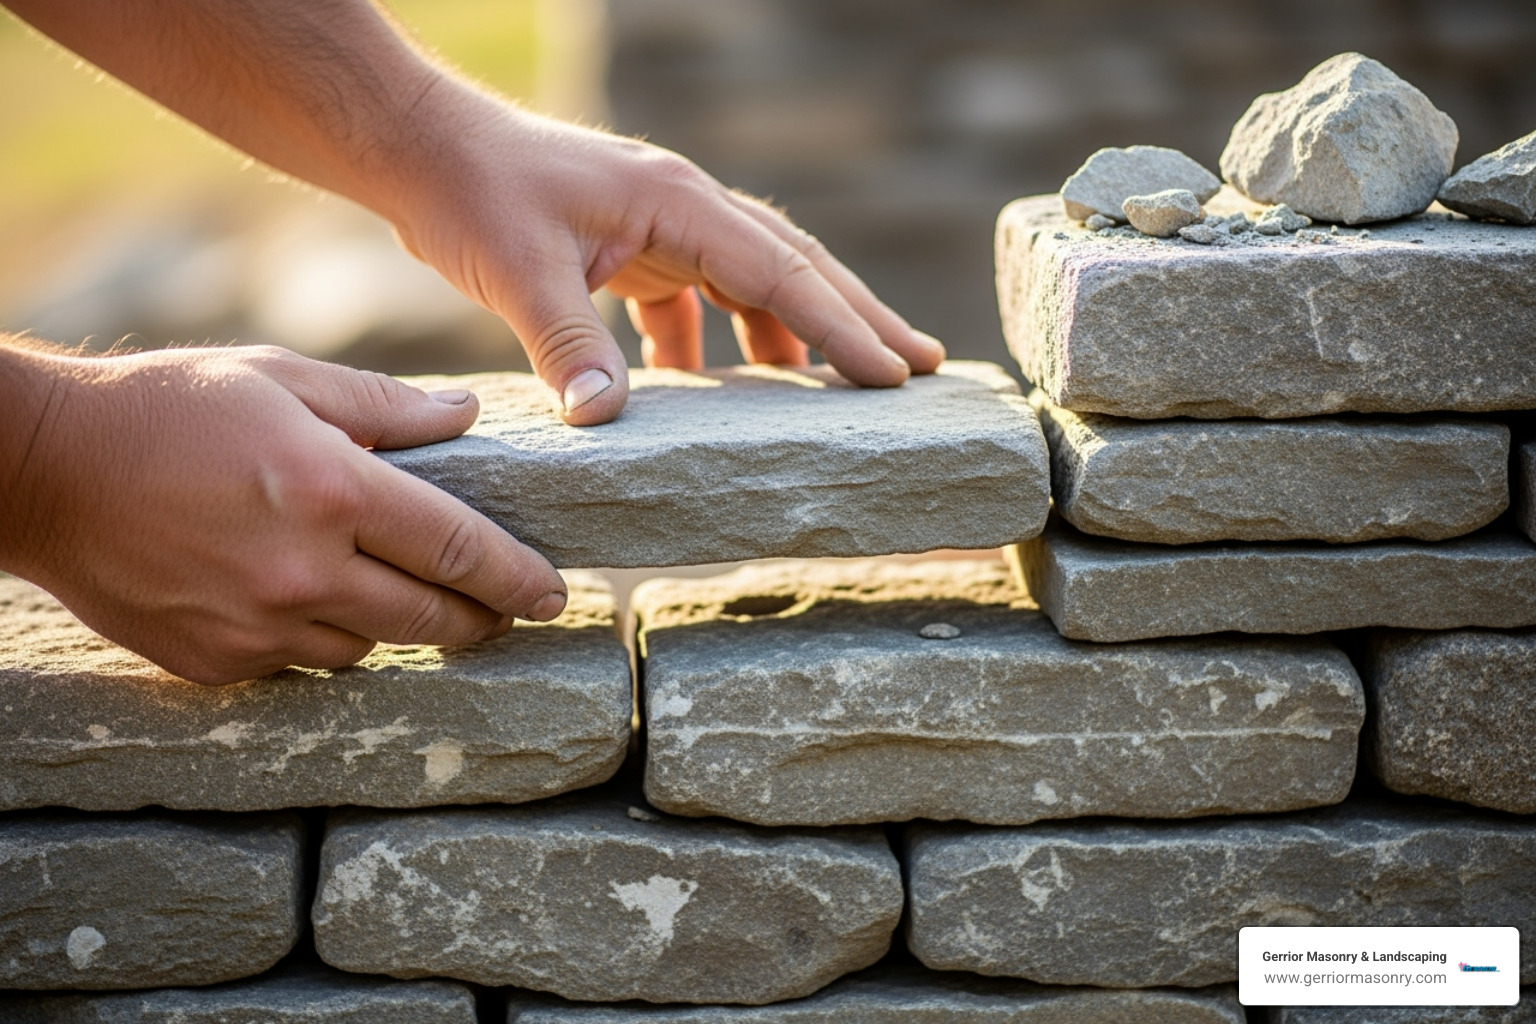
Laying the stones is the most rewarding part of stone garden wall construction. This is where craftsmanship and careful planning create something beautiful and lasting. The techniques used here determine whether your wall stands for decades or fails within a few seasons.
Key Techniques for Dry-Stacked Stone Garden Wall Construction
Building a dry-stacked wall without mortar might seem challenging, but it’s actually quite forgiving once you understand the fundamentals. The secret lies in letting gravity and careful stone placement do the work for you.
Start with your base stones—always choose the largest, flattest stones for your foundation course. These workhorses will support everything above them, so don’t skimp here. Bury this first course partially into your compacted base, typically about 2 inches deep for every foot of total wall height. This gives you that rock-solid foundation that won’t shift over time.
The one-over-two principle is your best friend in stone garden wall construction. Each stone should bridge the gap between two stones below it, like a bridge spanning a river. This distributes weight evenly and locks your wall together naturally. When you get this right, individual stones can’t shift because their neighbors are holding them in place.
Staggering your joints prevents those troublesome vertical seams that can weaken a wall. Offset each vertical joint by at least 4 inches from the joints above and below. It’s similar to how bricks are laid, and there’s a good reason builders have used this technique for centuries.
Don’t worry if a stone wobbles slightly—that’s where shims come in handy. Tuck small, flat stone pieces underneath until each stone sits firmly. Every stone should feel “pinched” into place and stay put through gravity alone.
For retaining walls, build in a slight backward lean or batter toward the soil you’re holding back. This helps your wall resist pressure from behind. A good rule of thumb is 1 to 2 inches of lean for every 12 inches of wall height. The This Old House guide to stone walls offers excellent visual examples of proper batter technique.
As you build higher, set each row back slightly—about ¼ inch—from the row below. This creates a gentle taper that adds to your wall’s stability and gives it that classic, time-tested appearance.
Considerations for Mortared Stone Garden Wall Construction
Mortared stone garden wall construction requires different skills but offers superior strength for taller walls or formal landscapes. The key is working with mortar at the right consistency and timing.
Mixing your mortar properly makes all the difference. Combine building sand and cement, often adding hydrated lime for better workability. The mix should hold its shape without being soupy—think of thick frosting consistency.
Apply mortar beds evenly, about ½ inch thick, on your foundation or previous stone course. Set each stone firmly into this bed, tapping gently with a rubber mallet to ensure good contact and level placement. The visible edges of your face stones should rest on other stones, not floating on mortar, for that clean, professional look.
Fill your joints as you go, packing mortar into vertical spaces between stones. Once the mortar begins to stiffen but before it hardens completely, tool the joints with a brick jointer. This creates a slightly concave shape that sheds water and gives your wall that finished appearance.
Clean excess mortar from stone faces immediately—dried mortar stains are nearly impossible to remove later. A damp sponge works wonders for keeping your stones looking their best.
Finishing Your Wall with Capstones
The capstones are like putting a perfect bow on a beautifully wrapped present. They protect your wall from water damage while giving it that polished, professional appearance that makes neighbors stop and admire your work.
Select your flattest, most attractive stones for this final course. These stones need to create a level surface while shedding water away from the wall’s core. For dry-stacked walls, choose larger, heavier stones that will sit securely through their own weight.
Secure capstones properly depending on your wall type. For mortared walls, apply a fresh mortar bed and set each stone carefully, checking for level and alignment. Block walls often benefit from construction adhesive to ensure capstones stay put through freeze-thaw cycles.
The finished result should feel substantial and look intentional. Whether you choose large, flat stone slabs or the traditional “cock and hen” style with alternating large and small upright stones, your capstones add both protection and that final touch that transforms a pile of rocks into a true garden feature.
Frequently Asked Questions about Building a Stone Wall
We get a lot of questions about stone garden wall construction, and honestly, we love talking about it! After 30+ years in the business, we’ve heard just about every concern homeowners have. Let me share the answers to the questions that come up most often.
How much does it cost to build a stone garden wall?
This is always the first question, and I completely understand why. The cost of stone garden wall construction really depends on what you’re looking to build and how you want to build it.
Material costs make up a big chunk of your budget. Natural fieldstone typically costs more than manufactured blocks, but it gives you that authentic New England look that’s hard to beat. The wall type matters too—dry-stacked walls use more material since they need to be thicker, while mortared walls require additional supplies like cement and sand.
Site complexity can really affect your budget. If we need to move materials uphill, work around existing landscaping, or deal with rocky soil, that adds time and effort to the project.
Please note that prices are based on national averages and do not reflect actual costs for Gerrior Masonry & Landscaping services.
For a simple DIY approach, a 10-foot freestanding wall typically ranges from $800 to over $2,500, depending on your stone choice and site conditions. Small retaining walls for flower beds might run $500 to $2,000 for materials. However, professional installation of more complex walls—especially mortared or taller retaining walls—can reach $4,900 or significantly more, depending on the project’s scope.
The investment is worth it when you consider that a properly built stone wall can last indefinitely and adds real value to your property.
How high can I build a stone garden wall?
Height limitations are all about safety and structural integrity. Different wall types have different capabilities, and local building codes play a big role here too.
Dry-stacked walls work beautifully but have natural limits. We generally recommend keeping them to 3 to 4 feet maximum. Beyond that height, the physics just don’t work in your favor without mortar to hold things together.
Interlocking block walls can typically go up to 24 to 36 inches before you need engineering help like geogrid reinforcement. These systems are designed with specific height limits in mind.
Mortared stone walls can go higher, but here’s where local regulations really matter. Most communities require permits for walls over 30 to 36 inches in height. Here in Woburn and throughout Middlesex and Essex County, we always check with local building departments before starting any significant wall project.
The permit process isn’t just red tape—it ensures your wall is designed to handle the loads safely and won’t become a liability down the road.
How do I prevent my retaining wall from failing?
This is the most important question you can ask. I’ve seen too many walls fail because someone skipped the fundamentals, and it’s heartbreaking—not to mention expensive to fix.
Foundation work is absolutely critical. Your footing needs to be deep enough to get below the frost line (crucial here in Massachusetts) and wide enough to distribute the wall’s weight properly. We typically make it at least twice the wall’s width. If this foundation isn’t perfectly level and thoroughly compacted, everything above it suffers.
Drainage is where most walls fail. Water is incredibly powerful, especially when it freezes and expands. That’s why we always install a compacted gravel base, use permeable backfill behind the wall, and include a perforated drain pipe at the base to collect and redirect water away from the structure.
For mortared walls, weep holes give trapped water another way out. And that slight backward lean (batter) we build into retaining walls? That helps the wall work with gravity instead of fighting against it.
The truth is, complex drainage situations and taller retaining walls really benefit from professional expertise. We’ve seen what works and what doesn’t over three decades of building walls throughout Massachusetts.
Conclusion: Enjoy Your Handiwork for Years to Come
There’s something deeply satisfying about stepping back and admiring a completed stone garden wall construction project. The durability alone makes it worthwhile—a properly built stone wall can last for generations, becoming a permanent feature that defines your landscape for decades to come. Beyond longevity, these walls bring natural beauty that only improves with age, as moss and weathering give them character you simply can’t get from other materials.
The increased property value is another welcome bonus. A well-crafted stone wall signals quality and permanence to potential buyers, often becoming a selling point that sets your home apart from others in the neighborhood. But perhaps most rewarding is the project satisfaction—knowing you’ve created something both beautiful and functional with your own hands.
Stone garden wall construction can absolutely be a fulfilling DIY project, especially for smaller decorative walls or garden borders under three feet tall. The sense of accomplishment when you place that final capstone is hard to beat. However, it’s important to be honest about when professional expertise becomes necessary.
Complex or tall retaining walls require significant engineering knowledge and masonry skills to ensure they’re safe and built to last. In areas like Massachusetts, where freeze-thaw cycles can wreak havoc on improperly built walls, the stakes are even higher. A failed retaining wall isn’t just an eyesore—it can be dangerous and expensive to repair.
For a flawless, professional result that you’ll enjoy for years to come, consider consulting with experienced professionals. At Gerrior Masonry & Landscaping, we bring over 30 years of experience and owner oversight to every project, ensuring the highest quality craftsmanship. We understand the unique challenges of New England’s climate and soil conditions, and we know how to build walls that will stand strong through countless seasons.
Whether you’re dreaming of a rustic dry-stacked boundary wall or a formal mortared retaining structure, we’re here to help you achieve the rock-solid garden wall of your dreams. Based in Woburn, MA, we proudly serve communities throughout Middlesex and Essex County, Massachusetts.
Contact us for a professional garden wall installation.
