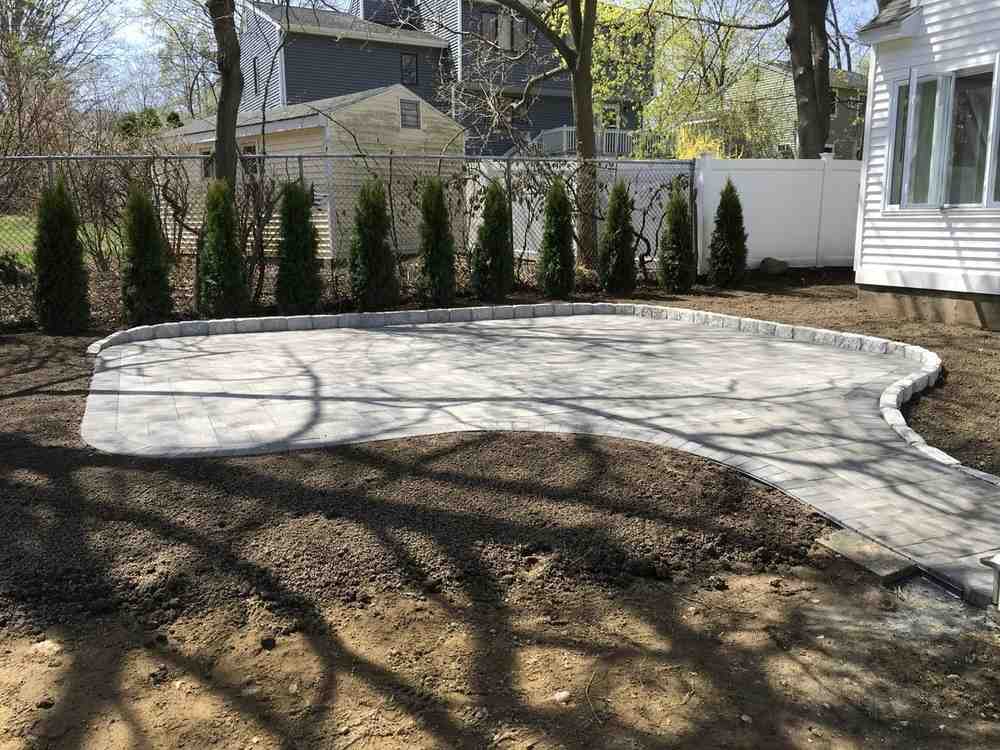
Why Installing a Paver Patio Is One of the Best DIY Projects You Can Take On
Installing a paver patio is a rewarding weekend project that can transform your backyard into a functional outdoor living space — and it’s more achievable than most homeowners think.
Here’s the quick overview of how to install a paver patio:
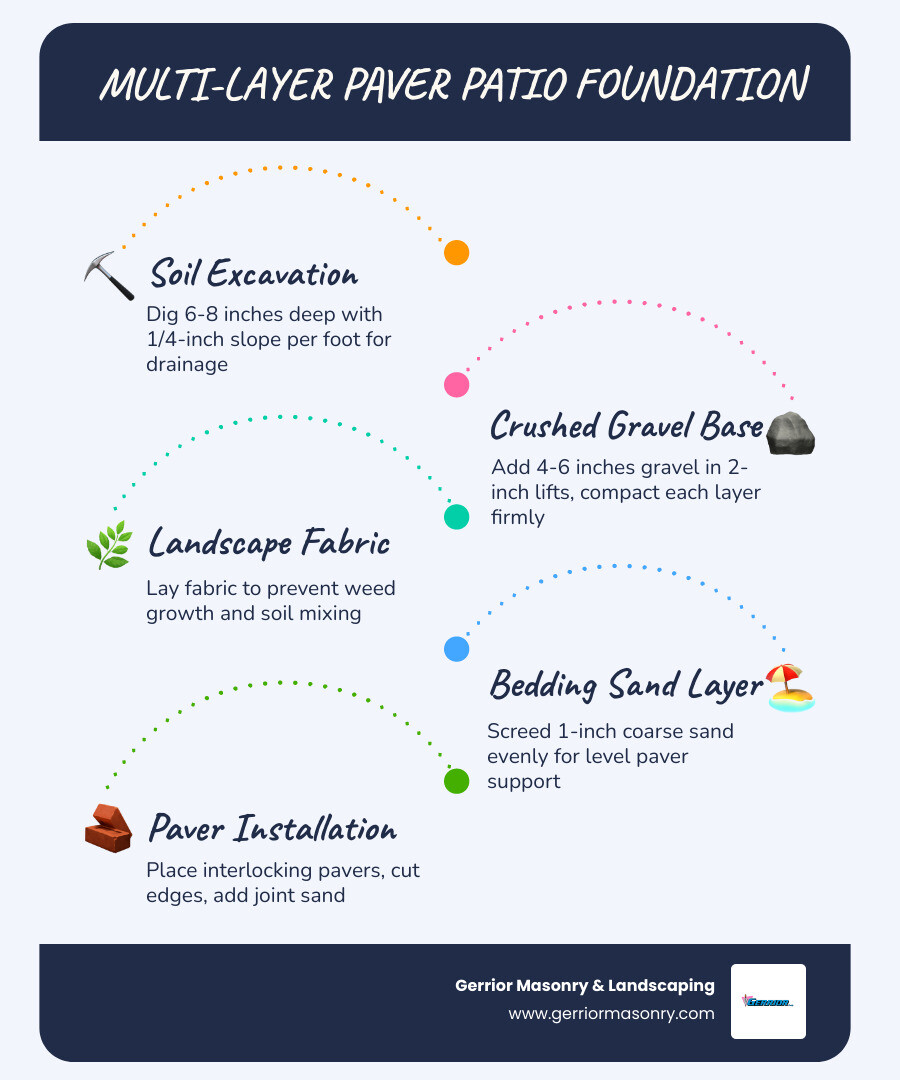
- Plan and measure your patio area, then mark it with stakes and string
- Excavate 6-8 inches of soil to make room for base layers
- Lay landscape fabric, then compact 4-6 inches of crushed gravel in 2-inch lifts
- Screed a 1-inch layer of coarse bedding sand until level
- Lay pavers in your chosen pattern, starting from a straight edge
- Cut pavers to fit edges using a masonry saw
- Install edge restraints to prevent shifting over time
- Sweep polymeric sand into joints, compact, and mist to set
A properly built paver patio can last 30 years or more with minimal upkeep. DIY material costs typically run $500-$1,500 for a 10×10 foot patio — a fraction of professional installation prices.
The key to success? It all comes down to what’s underneath the pavers. A solid, well-compacted base is what separates a patio that lasts decades from one that shifts and sinks after the first New England winter.
I’m Joe Gerrior, owner of Gerrior Masonry & Landscape Construction Corp., with over 34 years of hardscaping experience — including hundreds of installing paver patio projects across Massachusetts. In this guide, I’ll walk you through every step so you can build it right the first time.
Relevant articles related to installing paver patio:
The Essential Guide to Installing Paver Patio Success
Success in installing paver patio surfaces isn’t about how fast you can lay the bricks; it’s about the patience you show during the “invisible” phases. If you’ve ever walked across a patio that felt like a roller coaster under your feet, you’re looking at a project where someone skipped the foundation steps.
In places like Woburn, Burlington, and Lexington, our soil goes through a brutal freeze-thaw cycle. Water in the ground expands by about 10% when it freezes, which can easily heave a poorly installed patio. To prevent this, your excavation depth and soil stability are non-negotiable.
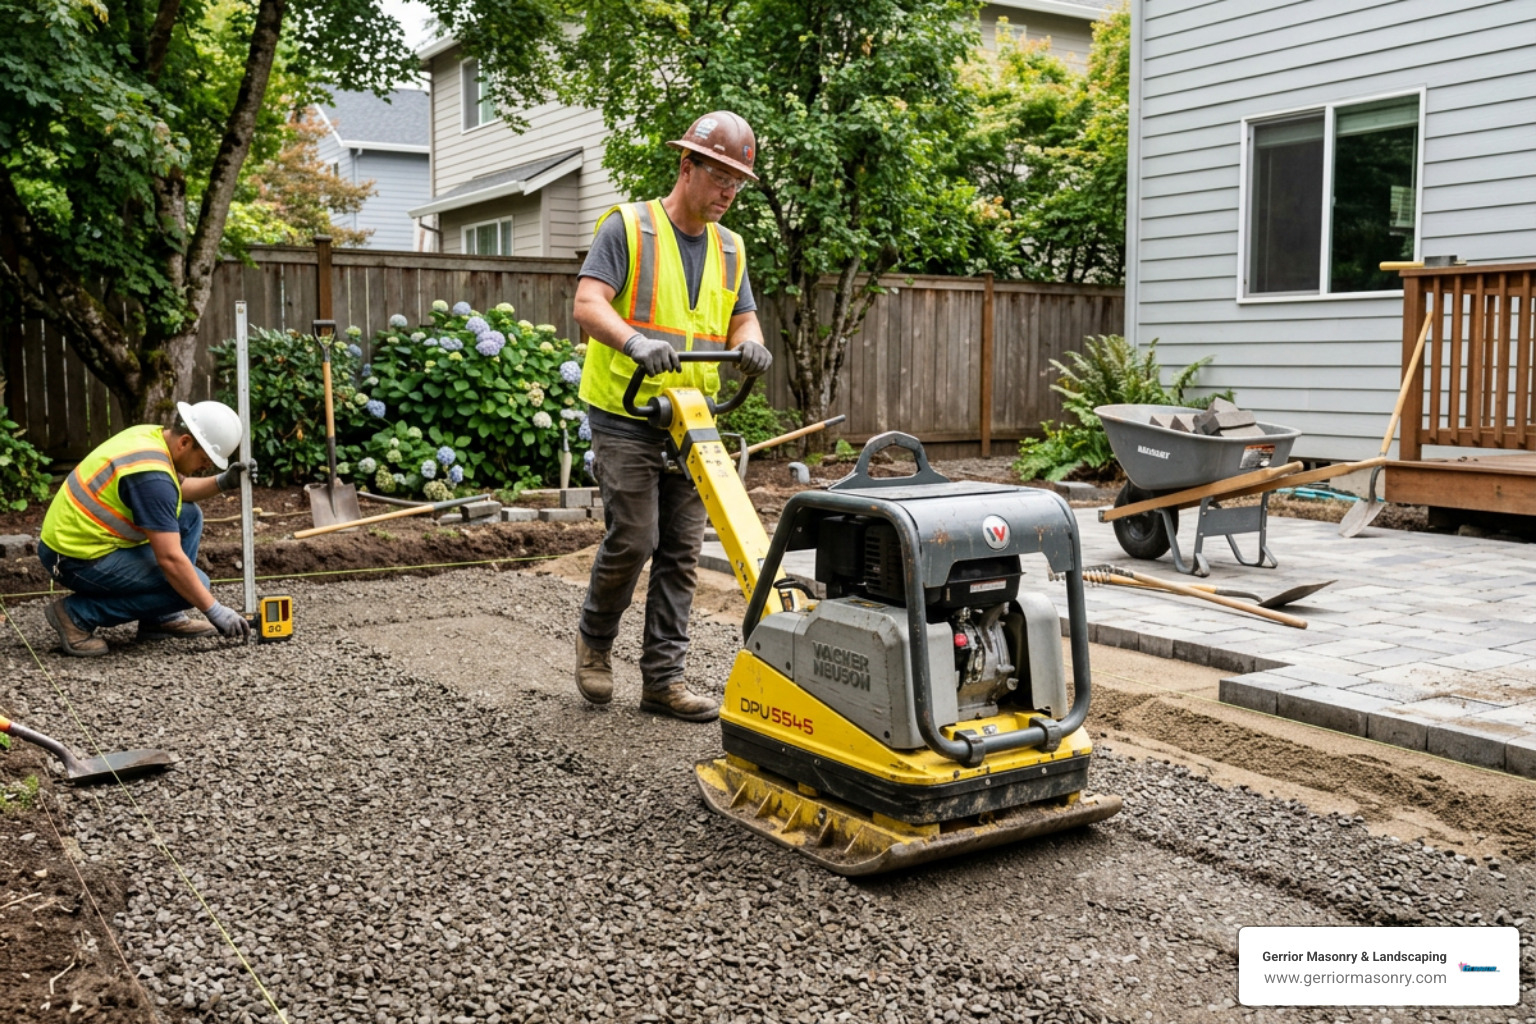
One of the most important pieces of equipment you’ll use is a plate compactor. While a hand tamper might work for a tiny 2×2 landing, anything larger requires the mechanical force of a plate compactor to ensure the gravel and sand layers are truly locked together.
Planning and Measuring for Your Installing Paver Patio Project
Before you pick up a shovel, you need a plan. Site selection is the first hurdle. You want a spot that is convenient for entertaining but also one that doesn’t sit in a natural basin where water collects. When marking your perimeter, use white marking paint for a rough outline before setting your stakes. This allows you to visualize the flow of the space. Consider how furniture will fit; a common mistake is building a patio that is too small for a dining table and chairs once they are pulled out. A good rule of thumb is to allow at least 3 feet of clearance around any table for chairs to be moved comfortably.
Calculating Materials To figure out how many pavers you need, calculate the total square footage (length x width) and add 10% for “wastage” (the pieces you’ll inevitably break or need to cut). For more complex patterns like a herringbone, we recommend adding 15%. Don’t forget the “fluff factor” for excavation; when you dig up soil, it occupies more volume than it did in the ground, so you’ll likely have 20-30% more debris to haul away than the hole’s dimensions suggest.
For a standard 10×10 foot patio (100 sq. ft.), you will typically need:
- Approximately 4-5 tons of crushed gravel (for a 6-inch base).
- 1 ton of coarse bedding sand.
- The pavers themselves.
- Edge restraints and 10-inch spikes.
Safety and Regulations In Massachusetts, you must call 811 before digging. This is a free service that marks your underground utility lines. Trust us, hitting a gas line or a fiber-optic cable will ruin your weekend (and your bank account) much faster than a little rain. You should also check with your local building department in towns like Reading or Andover to see if you need a permit or if there are specific HOA regulations regarding hardscaping materials.
Excavation, Slope, and Base Layer Preparation
Now comes the “elbow grease” phase. For a standard pedestrian patio, you need to excavate to a depth of 6 to 8 inches. This accounts for 4 inches of compacted gravel, 1 inch of sand, and the thickness of the paver itself. Removing sod is often the most physically demanding part of the project. You can rent a motorized sod cutter to make this easier, which peels the grass back in neat rolls. As you dig, keep a close eye on the soil consistency. If you hit “soft spots” or organic matter like buried stumps or large roots, you must dig deeper and replace that material with extra gravel base to prevent future settling.
The Golden Rule of Drainage Never build a patio perfectly level. You need a slope to ensure water runs away from your home’s foundation. Aim for a 1/4-inch drop per foot. If your patio is 10 feet wide, the far edge should be 2.5 inches lower than the edge closest to the house. You can verify this using mason’s string and a line level.
Building the Foundation
- Compact the Sub-grade: Once you’ve dug out the dirt, run the plate compactor over the native soil.
- Landscape Fabric: Lay down a heavy-duty geotextile fabric. This prevents the expensive gravel from sinking into the Massachusetts clay over time while still allowing water to drain.
- Gravel Lifts: Add your crushed stone in 2-inch “lifts.” For the base, use “3/4-inch minus” crushed stone. This specific mix contains both the larger rocks for structural strength and the “fines” (stone dust) that fill the gaps and allow for rock-hard compaction. Avoid rounded river stones or “pea gravel,” as these act like ball bearings and will never lock together. Compact each layer thoroughly before adding the next. Pro Tip: Expect your gravel base to shrink by about 15-20% after you compact it. If you need 4 inches of finished base, you’ll likely start with nearly 5 inches of loose stone.
Step-by-Step: Laying the Pavers and Cutting Edges
With your base compacted and your 1-inch layer of bedding sand screeded level (using PVC pipes as guides), it’s time for the fun part. Screeding is the most technical part of the prep. Use two 1-inch outside-diameter PVC pipes as your rails. Set them into the gravel and use a straight 2×4 board to “saw” the sand flat across the pipes. Once finished, remove the pipes and carefully fill the indentations with a trowel.
Choosing Your Pattern The pattern you choose affects both the look and the strength of the patio. A herringbone paver pattern is widely considered the strongest because the interlocking design prevents the pavers from shifting when weight is applied. If you’re looking for something simpler, a running bond pattern requires fewer cuts and is very beginner-friendly.
Laying Technique Start from a straight edge—usually the side against the house. Lay the pavers one by one using the “click-and-drop” method. You place the paver against the edge of the previously laid one and drop it straight down. This prevents sand from being pushed up into the joints. Do not slide them, or you’ll disturb your perfectly level sand bed. Use a rubber mallet to gently tap pavers into place, ensuring they are snug against their neighbors. Every 4-5 feet, use a long straightedge or a string line to check that your rows are staying straight. For more info about brick paver patio services, checking out professional layouts can give you great inspiration for borders and “soldier courses.”
Cutting for the Perfect Fit Unless your patio is a perfect multiple of your paver size, you will need to make cuts. Use a masonry saw with a diamond blade. Always wear safety goggles and a mask—breathing in silica dust is no joke. If you’re doing a curved edge, use a garden hose to mark the arc, then cut the pavers to follow that line.
Finishing Touches: Edge Restraints and Joint Sand
Once the bricks are down, you might think you’re done, but the patio isn’t “locked” yet. Without edge restraints, the pavers on the perimeter will eventually migrate into your lawn.
Securing the Perimeter Install plastic or metal edge restraints around the entire open perimeter. Secure them with 10-inch steel spikes driven into the gravel base every 8 to 12 inches. This creates a “frame” that holds everything together. You can find more info about paver patios and the different types of edging available through our service pages.
The Magic of Polymeric Sand Standard play sand will wash away in the first heavy rain. Instead, use polymeric sand. This is a high-tech mix of graded sand and binder (polymers) that hardens when wetted.
- Sweep the sand into the joints until they are full.
- Run the plate compactor (with a protective mat) over the pavers to vibrate the sand deep into the cracks.
- Add more sand and repeat until the joints are filled to about 1/8 inch below the paver surface.
- Crucial Step: Blow off every single grain of sand from the surface of the pavers. If sand stays on top when you add water, it will leave a permanent white haze.
- Mist the joints lightly with water to activate the polymers. Use a light shower setting on your hose nozzle. You want to saturate the sand without creating puddles or washing the sand out of the joints. Allow the patio to dry for at least 24 hours before walking on it.
For a deeper dive into the nuances of finishing, check out this guide on How to Install Patio Pavers.
DIY vs. Professional Installing Paver Patio Costs
Is it worth doing it yourself? Let’s look at the numbers. Please note that these are average costs based on internet data and are not actual quotes for Gerrior Masonry services.
| Item | DIY (10×10 Patio) | Professional (280 sq. ft. Avg) |
|---|---|---|
| Materials | $500 – $1,500 | $1,500 – $4,000 |
| Tool Rental | $200 – $400 | Included |
| Labor | $0 (Your sweat equity) | $2,000 – $11,000 |
| Total Range | $700 – $1,900 | $3,500 – $15,000+ |
As you can see, the cost of a paver patio varies wildly. A DIY project saves you thousands in labor, but it requires significant physical strength and at least 2–4 full days of work. A professional team like ours can often complete a 280-square-foot project in a single day because we have the heavy machinery to move tons of material in minutes.
Maintenance and Long-Term Care
A well-installed patio is low-maintenance, but it isn’t “no-maintenance.” In our Middlesex and Essex County climate, the biggest threats are weeds, moss, and the freeze-thaw cycle.
- Cleaning: Sweep regularly to remove organic debris. If leaves sit on the pavers and rot, they can leave tannins that stain the stone.
- Washing: You can pressure wash your patio, but keep the pressure under 2,000 PSI and don’t aim the nozzle directly into the joints, or you’ll blast out your polymeric sand.
- Resanding: Every 3 to 5 years, you may need to top off the polymeric sand in the joints.
- Sealing: While optional, applying a sealer can enhance the color of your bricks and provide a barrier against oil and food stains.
For more tips on keeping your space beautiful, read Regular maintenance advice from extension experts or see more info about backyard patio pavers on our blog.
Conclusion
Installing a paver patio is a major undertaking, but the result is a beautiful, durable space that adds significant value to your home. Whether you decide to tackle this as a DIY masterclass or decide that moving five tons of gravel isn’t your idea of a fun Saturday, the most important thing is that the job is done right. A professional installation doesn’t just look better; it functions better. We consider complex drainage patterns, soil composition, and the specific aesthetic of your home’s architecture. Whether it’s a classic brick look for a colonial home in Lexington or a modern large-format slab for a contemporary build in Wilmington, the foundation remains the most critical component.
At Gerrior Masonry & Landscaping, we’ve spent over 30 years perfecting the art of the New England patio. With owner oversight on every project and a team of dedicated craftsmen, we ensure that your “outdoor room” stands the test of time and the harshest winters. By following these steps, you ensure that your investment adds value to your property for decades to come.
If you’re ready to upgrade your backyard but want the peace of mind that comes with professional expertise, we’re here to help. You can find more info about patio design and installation on our website.
Gerrior Masonry & Landscape Construction is based in Woburn, MA, and services Middlesex and Essex County, Massachusetts, including communities like Winchester, Wilmington, Woburn, and beyond.