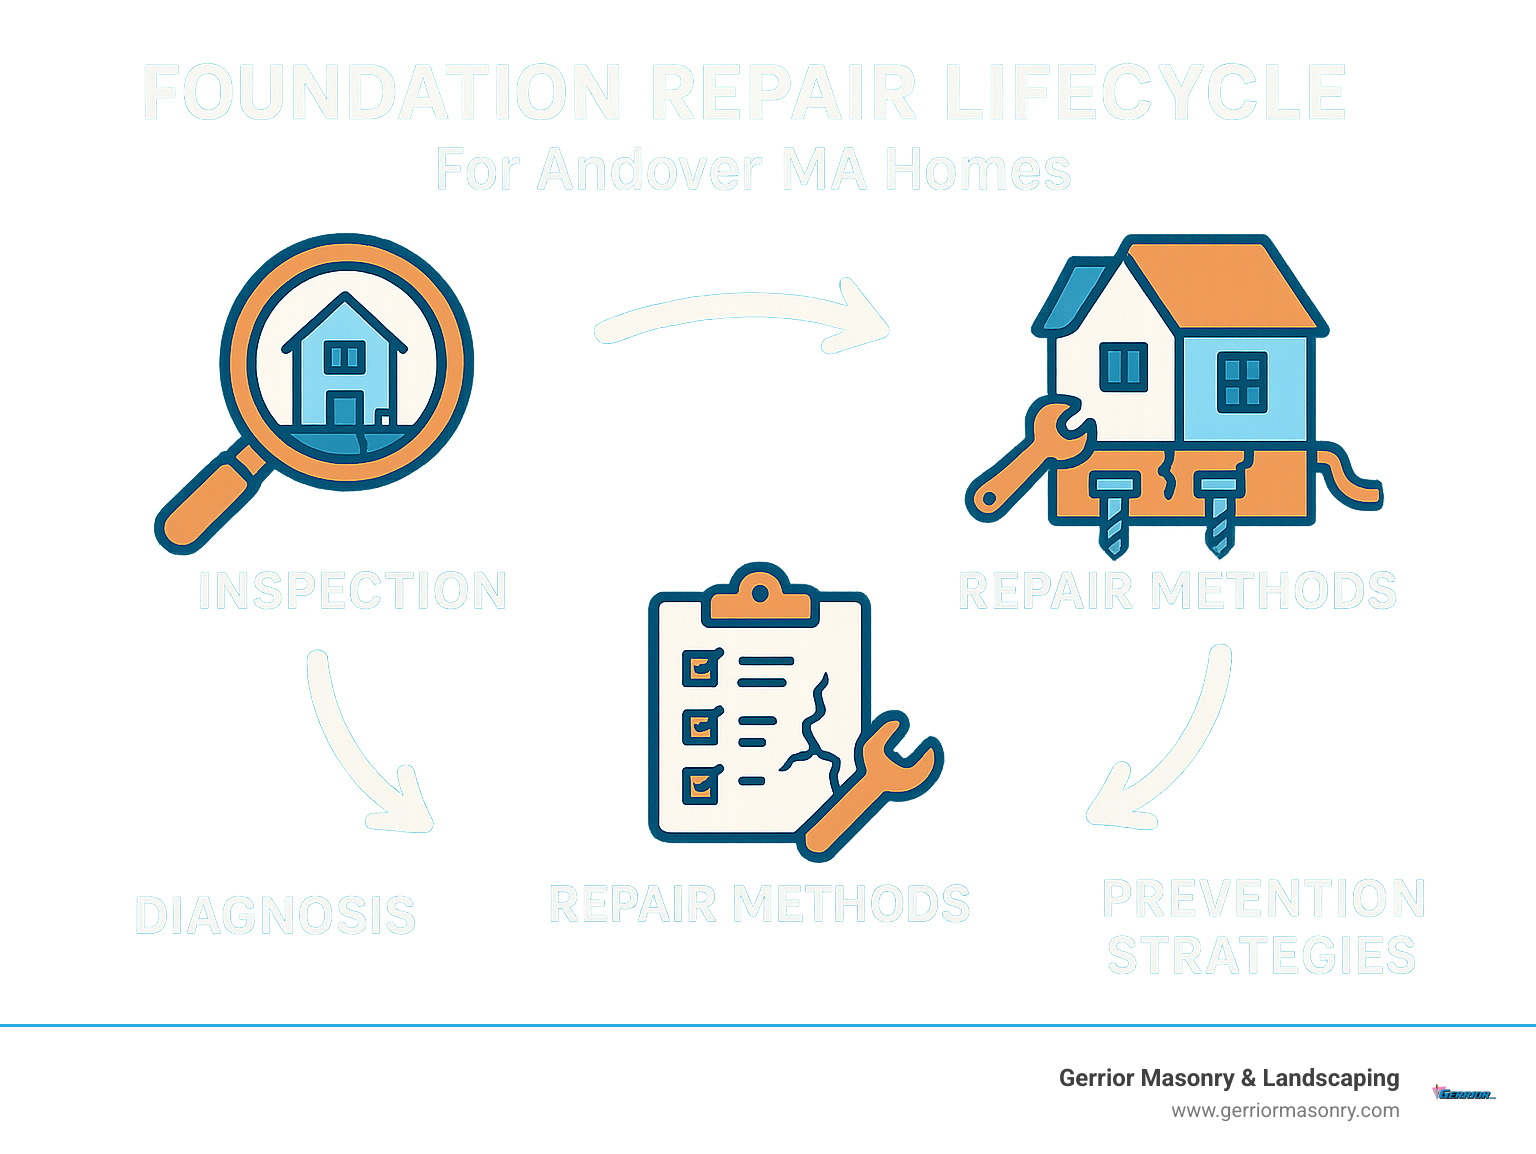
Foundation crack repair is essential for protecting your home’s structural integrity and value. Here’s a quick guide to understanding the urgency.
Quick Answer: What to Do About Foundation Cracks
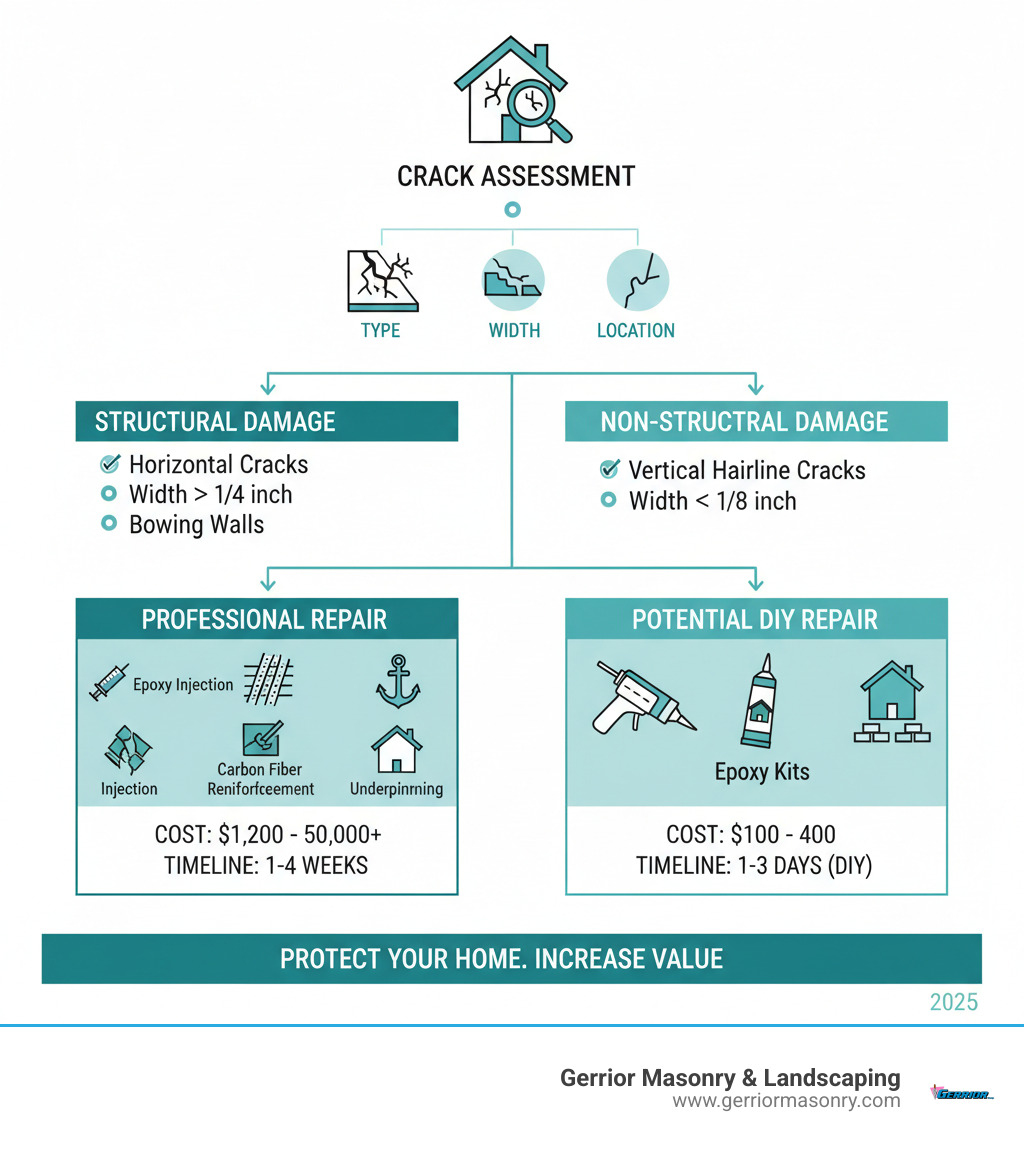
Hairline vertical cracks (< 1/8″): Often non-structural. May be a DIY fix with epoxy kits ($100-$400).
Horizontal or diagonal cracks: Signal serious structural issues. Require professional repair ($1,200-$50,000+).
Active leaking cracks: Need immediate professional attention, often with polyurethane injection.
Cracks wider than 1/4″: Always contact a foundation specialist for an assessment.
Professional repairs: Include warranties and a proper diagnosis of the underlying cause.
The sight of a crack in your foundation is unsettling for a good reason. These aren’t just cosmetic flaws; they are warnings that, if ignored, can lead to thousands of dollars in damage. While most foundation cracks are fixable, knowing which ones need an expert is key. Repair costs can range from a few hundred dollars to over $50,000 for major structural work.
The financial stakes are high. Homes with foundation problems often sell for 10-20% less than their market value. This is a significant loss on your largest investment.
I’m Joe Gerrior, owner of Gerrior Masonry & Landscape Construction Corp. For over 34 years, I’ve helped Massachusetts homeowners solve foundation crack repair challenges. In this guide, I’ll share what you need to know to protect your home and make informed decisions.
Understanding the Signs and Causes of Foundation Damage
Your foundation communicates through cracks. Learning to interpret them can save you thousands. Some are harmless, but others require immediate attention.
How to Identify Different Types of Foundation Cracks
Every crack tells a story. Here’s how to read them:
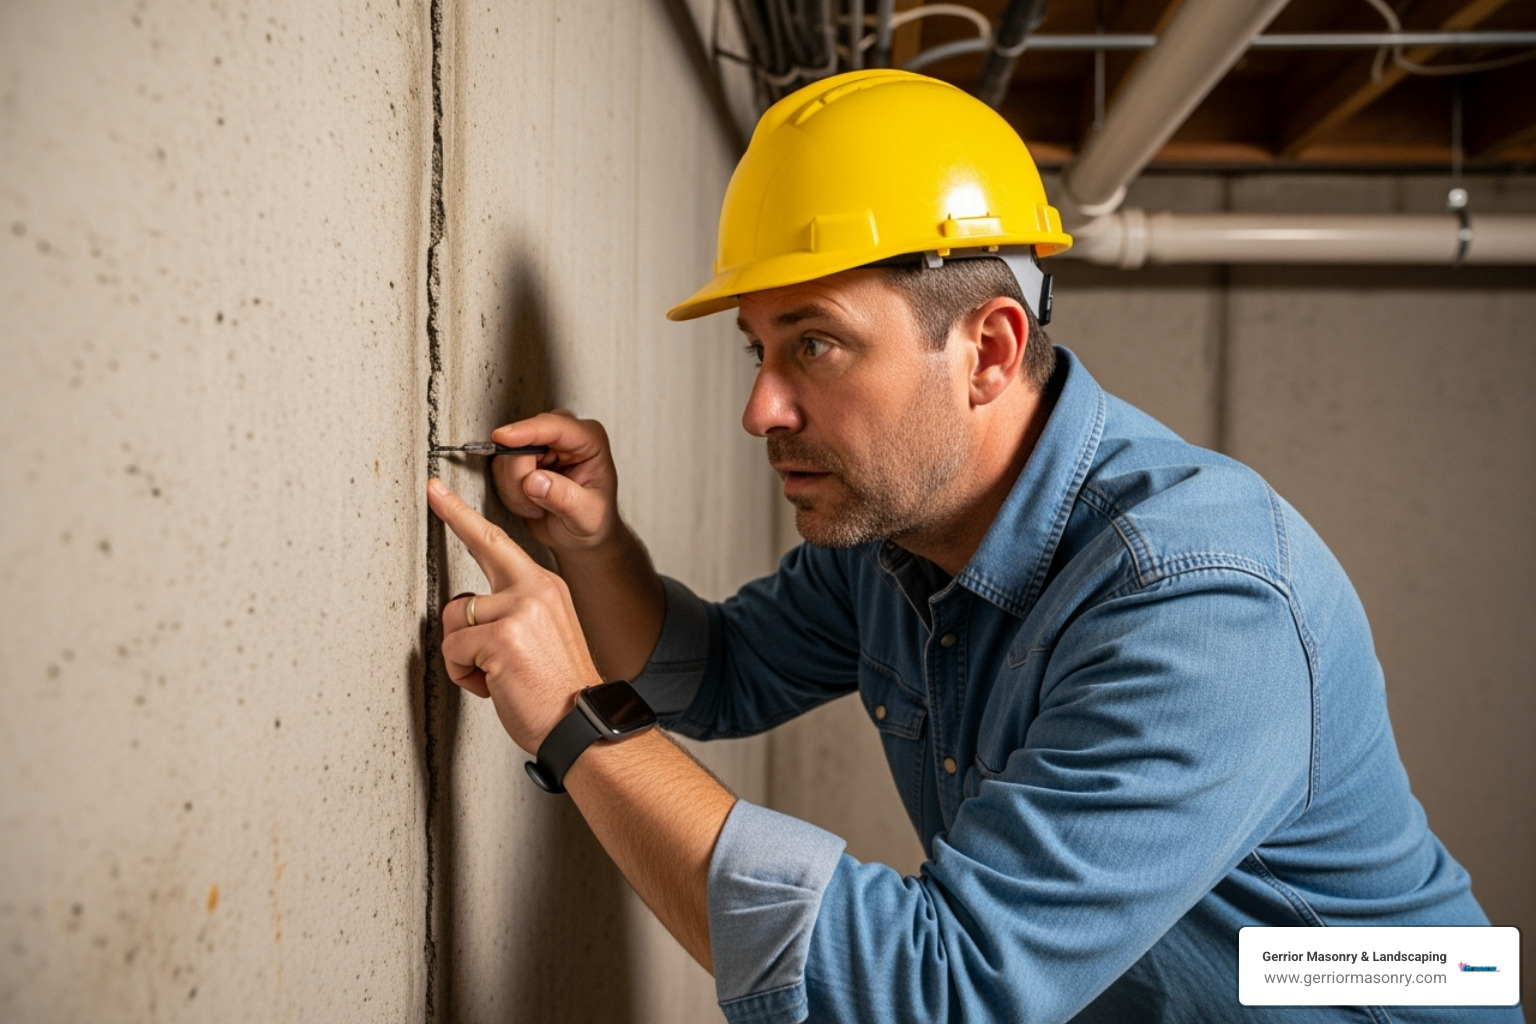
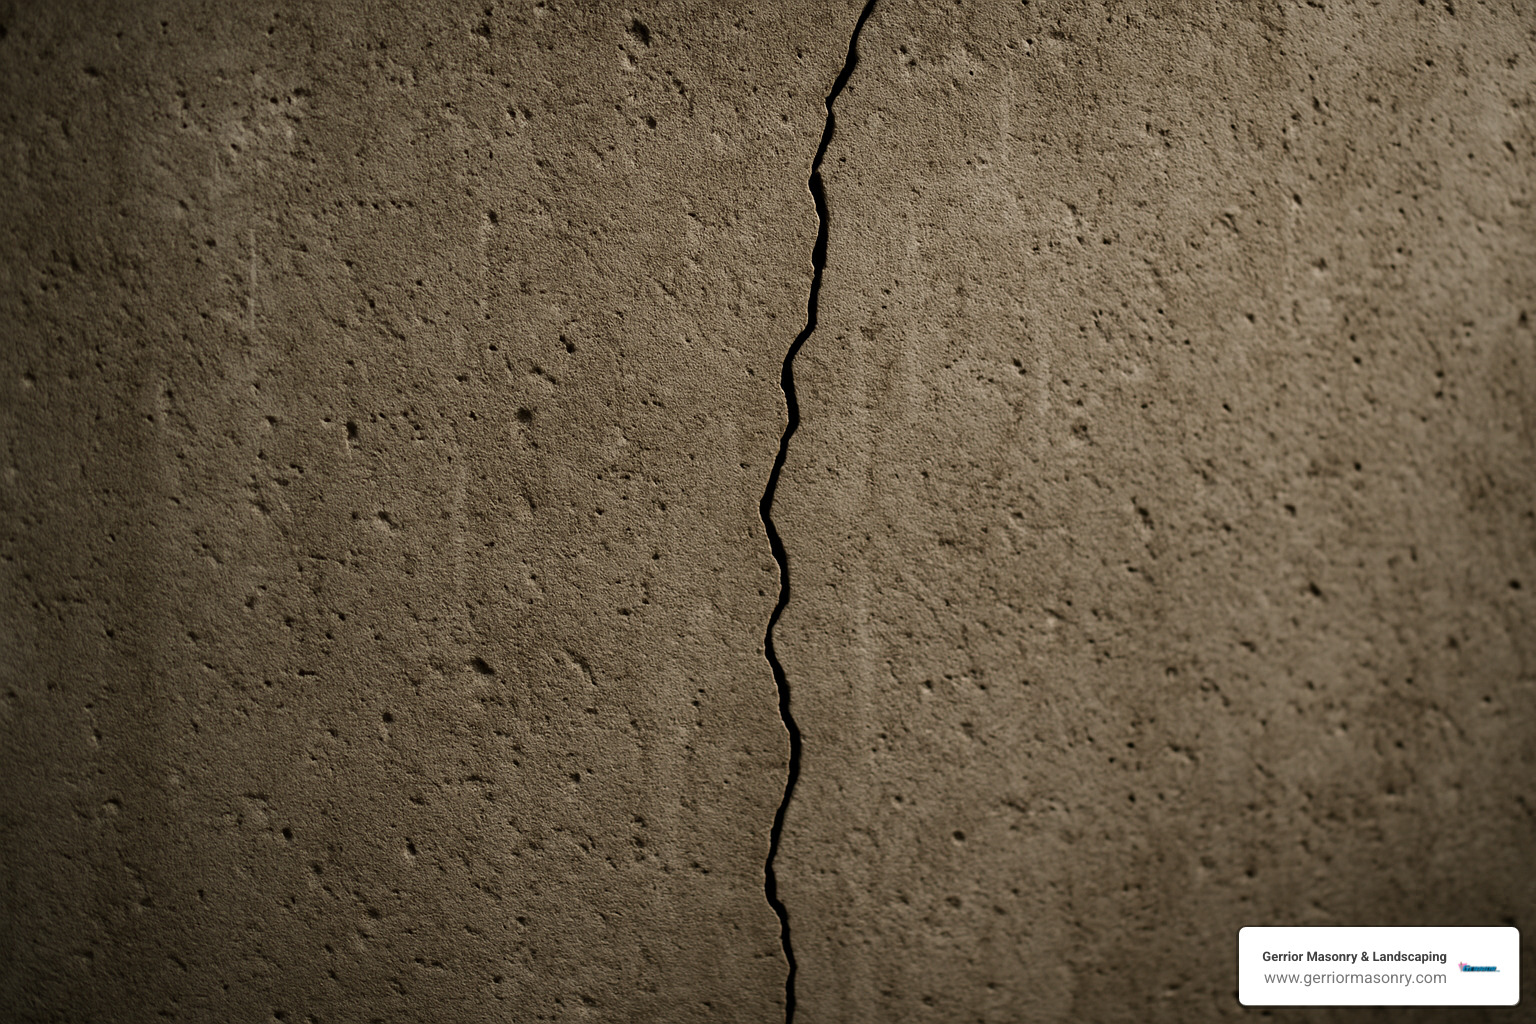
Vertical cracks: The most common type. Usually, hairline cracks (less than 1/8″ wide) from concrete curing are not a major concern. However, if they widen or leak, they need a closer look.
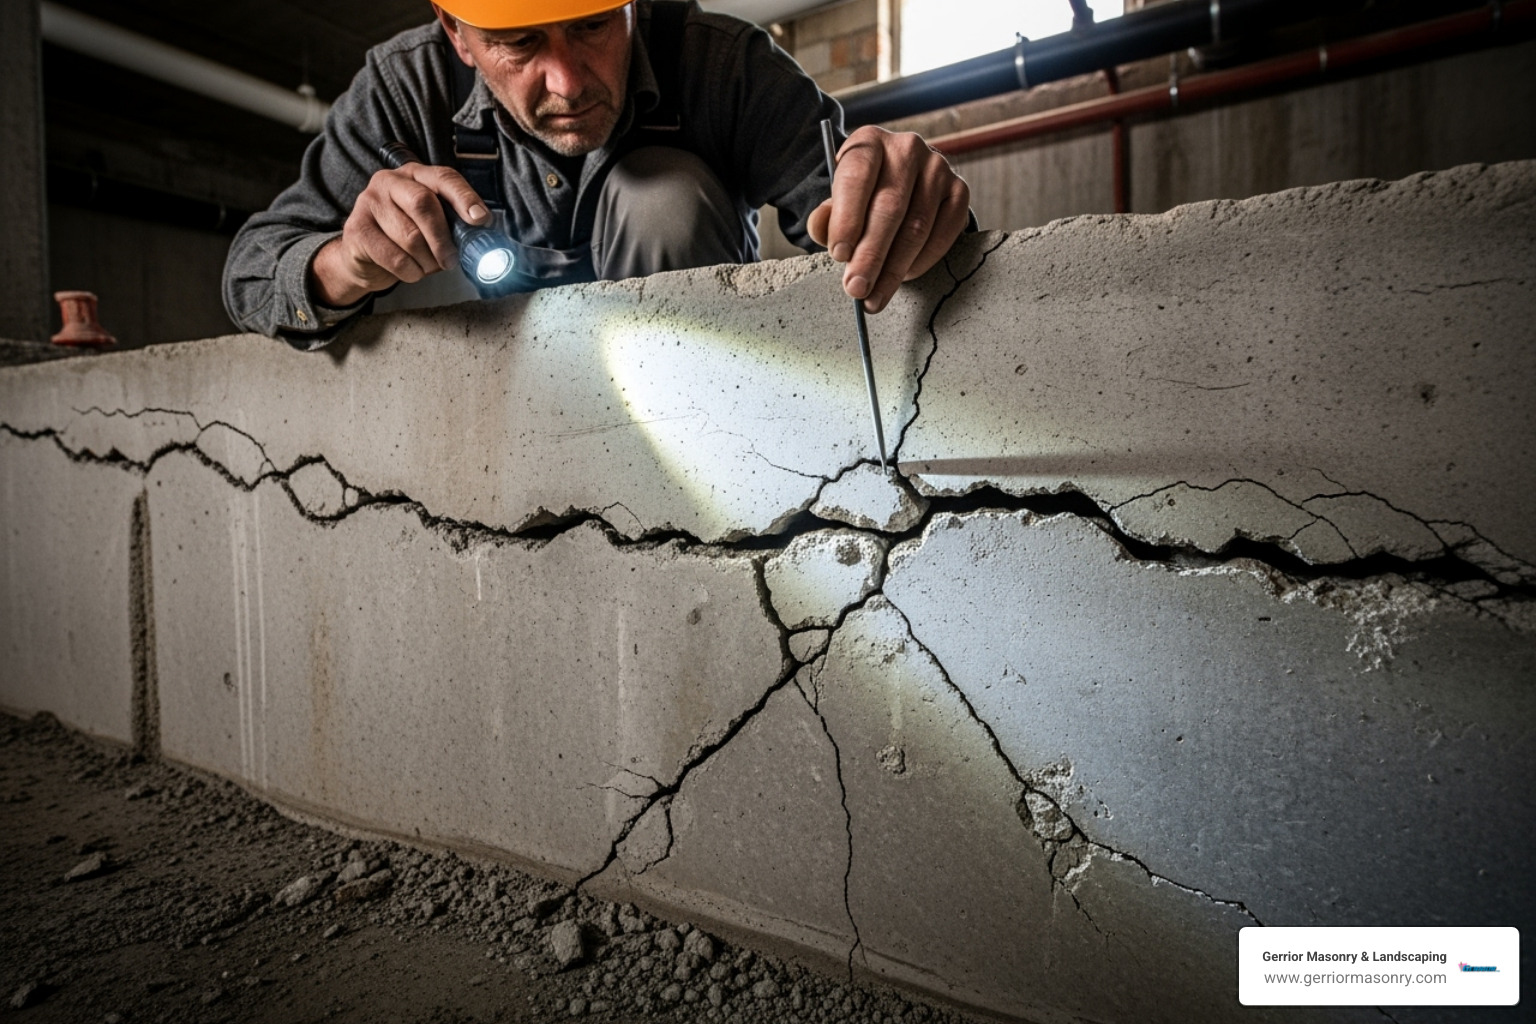
Horizontal cracks: These are a red flag. A crack running parallel to the floor indicates intense external pressure from soil or water, which can cause walls to bow. As Realtor.com notes, these are the most serious cracks and require a professional.
Diagonal cracks: These cracks, running at a 30- to 75-degree angle, often point to uneven foundation settlement. A wide or growing diagonal crack is a sign of a significant problem.
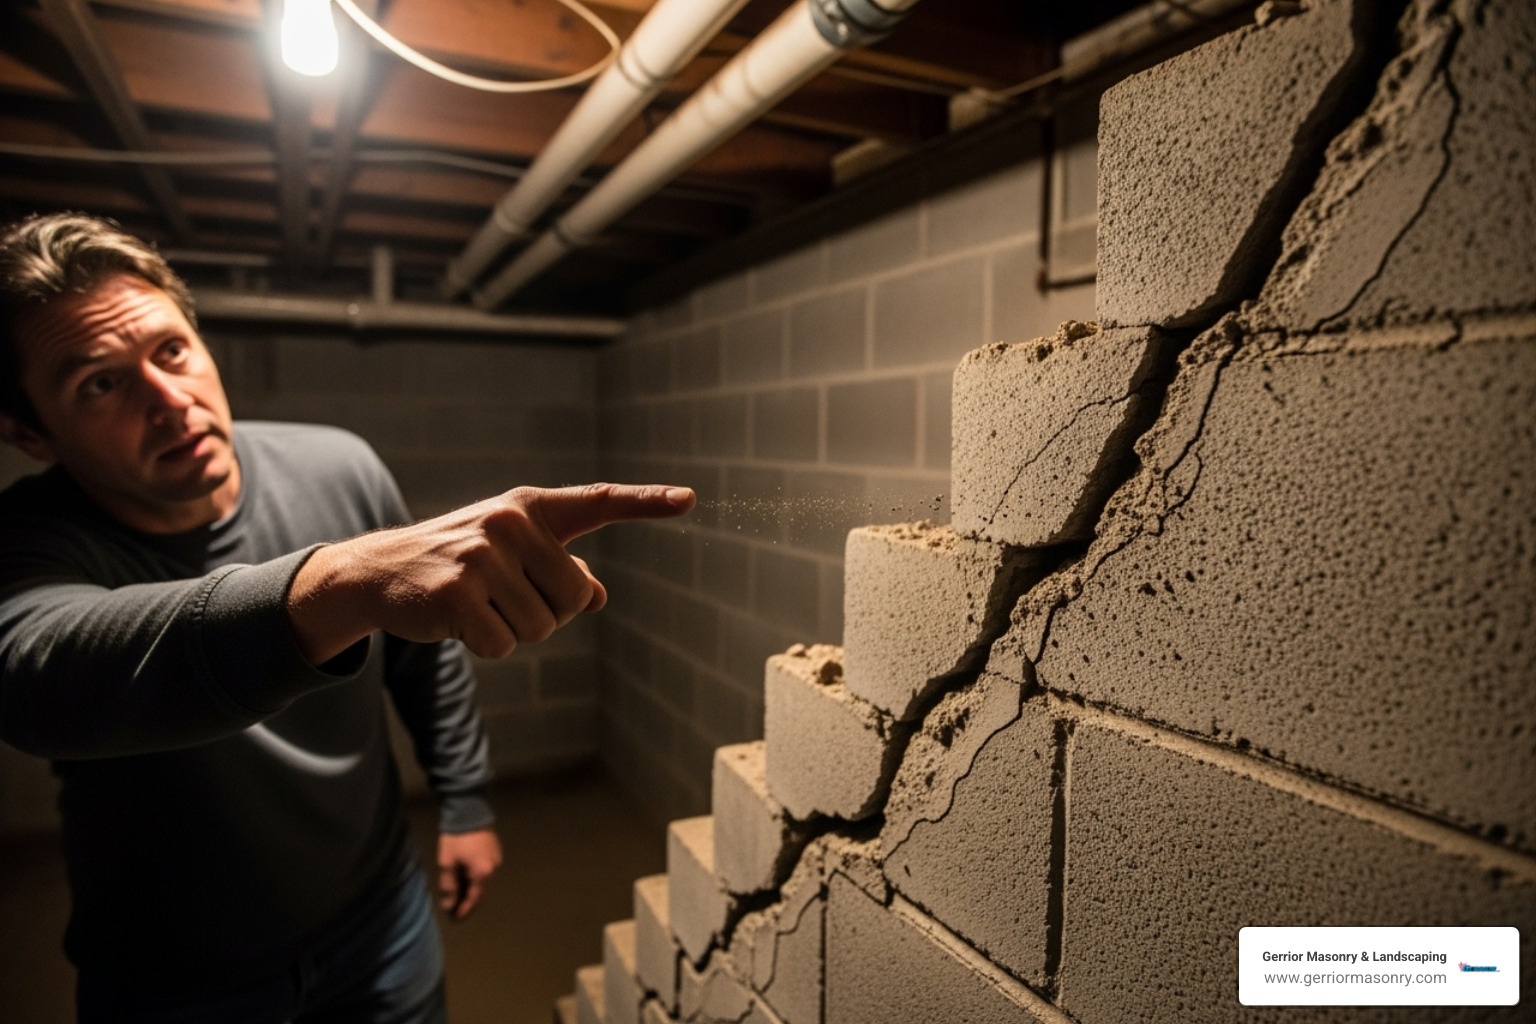
Stair-step cracks: Found in block or brick foundations, these follow the mortar lines and almost always indicate differential settlement. Pay close attention to these in a cinder block foundation or stone foundation.
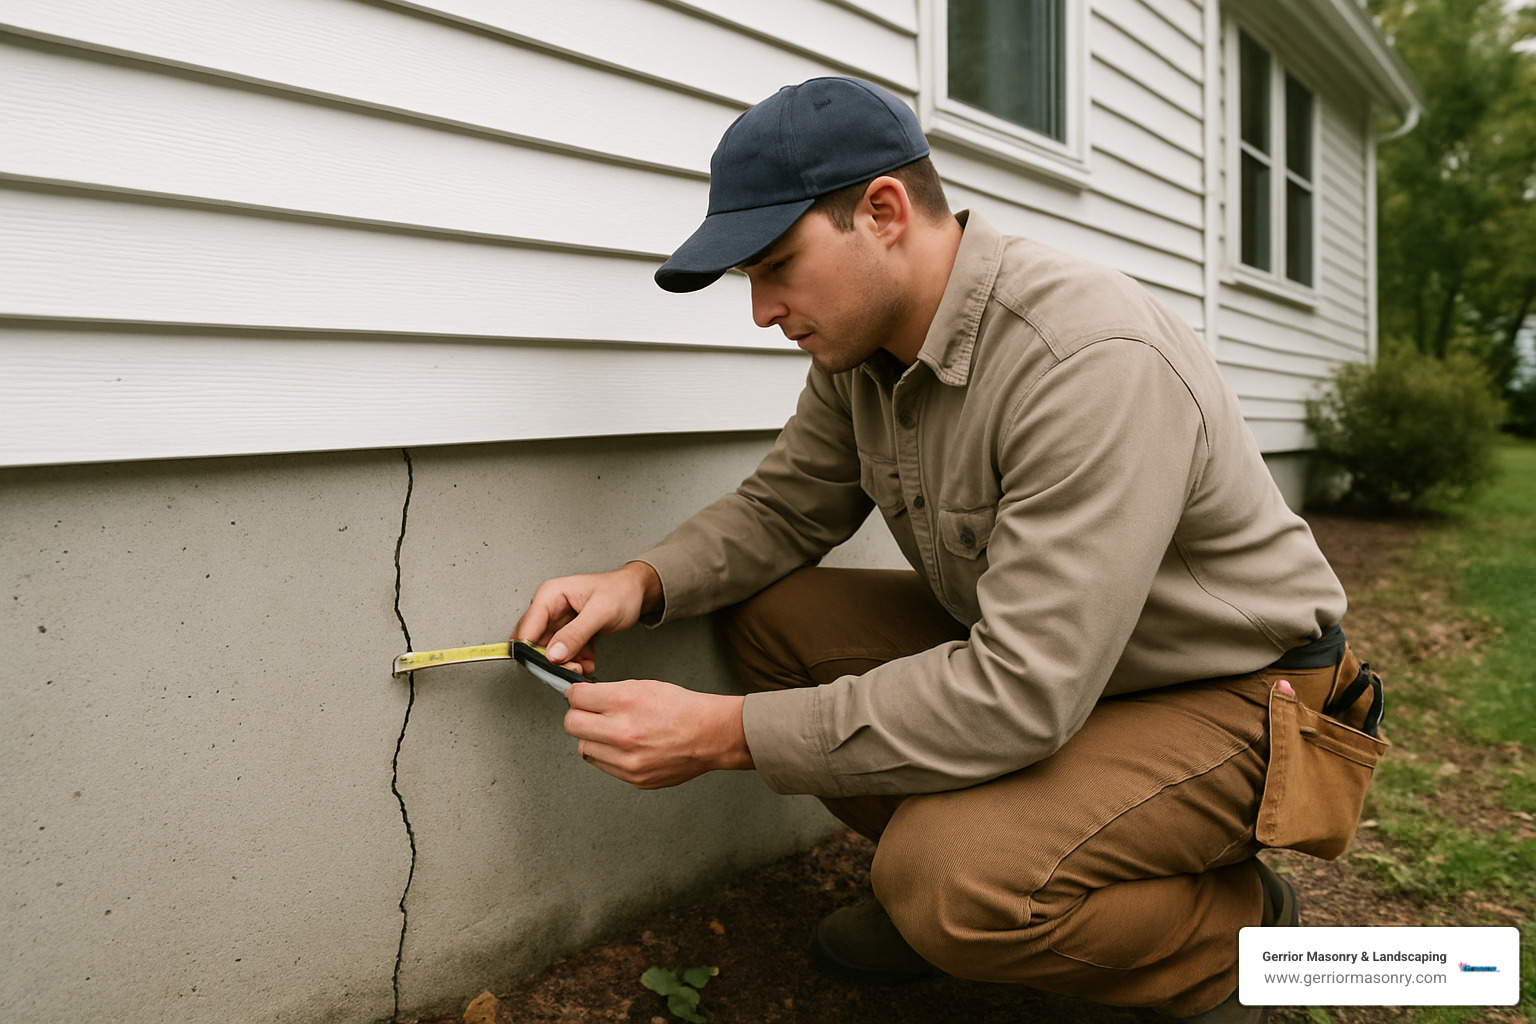
Crack width is a critical factor. Any crack wider than 1/4 inch needs a professional inspection. If water is seeping through any crack, regardless of size, call for help immediately to prevent mold and further damage.
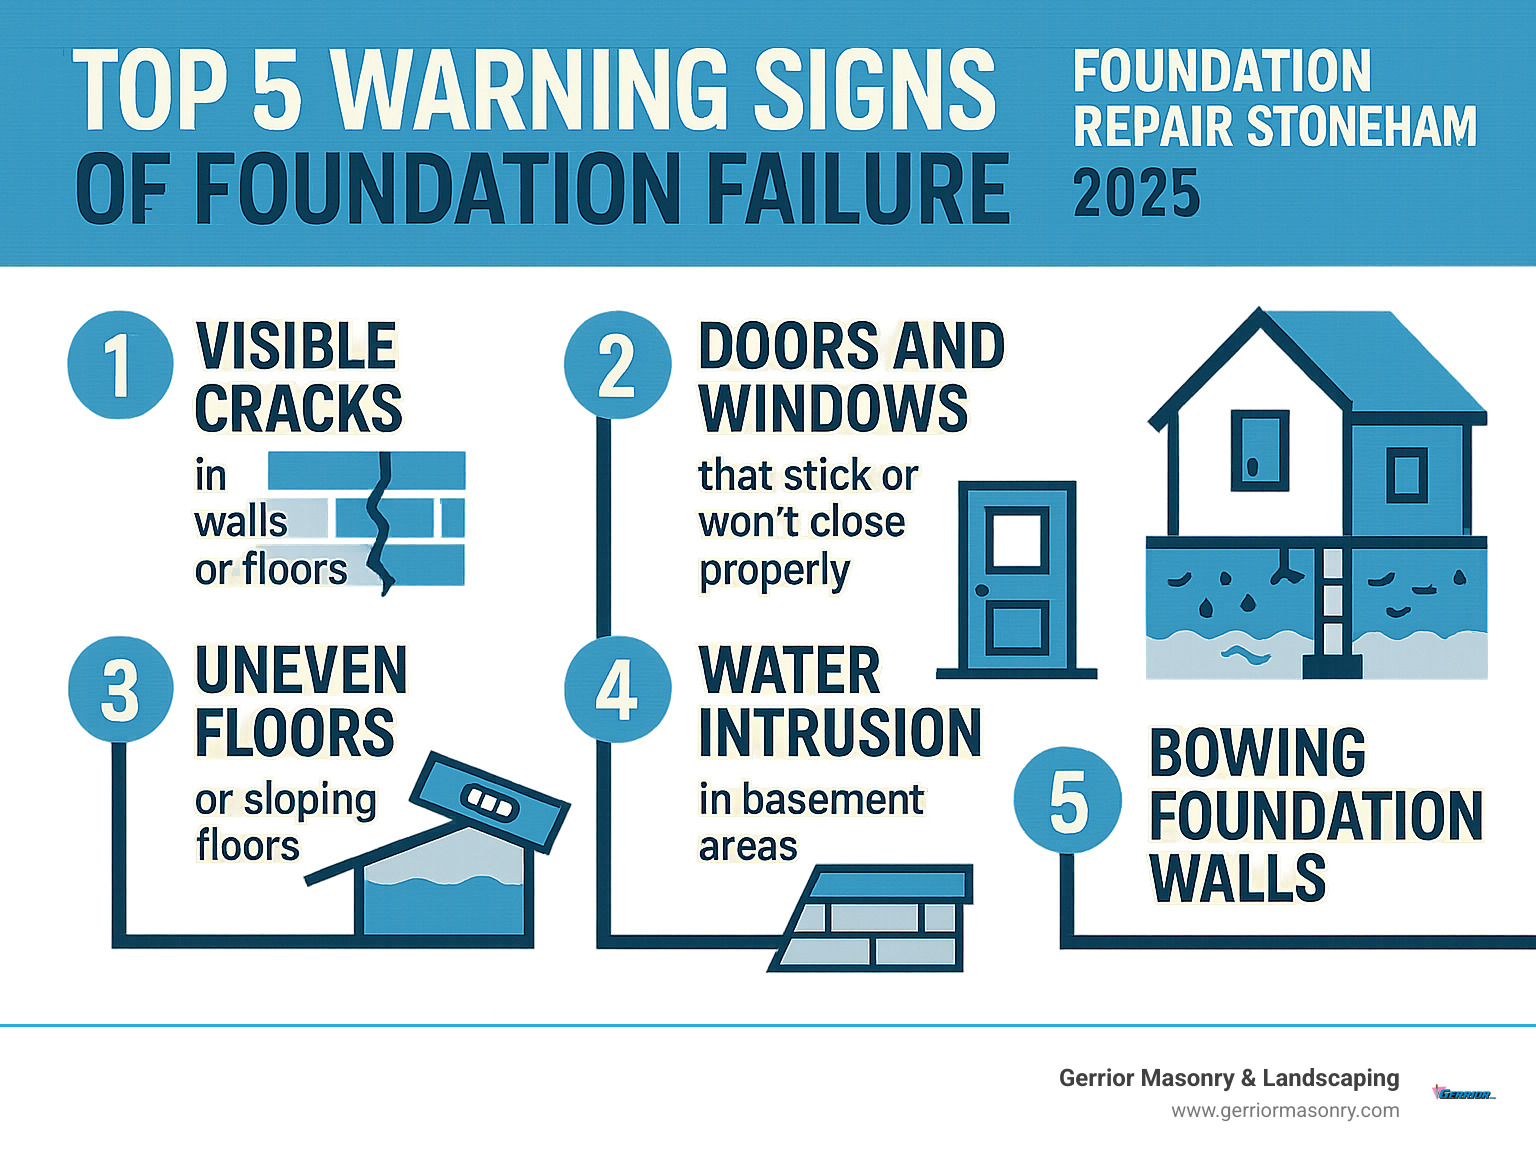
Other warning signs include sticking doors and windows, sloping floors, cracks in drywall, and bowing basement walls. Water pooling near your foundation after rain is also a major red flag.
What’s Causing Your Foundation to Crack?
Fixing a crack without addressing its cause is a temporary solution. Most issues stem from soil and water.
Foundation Settlement: The soil beneath your home can shift or compress, especially if it wasn’t properly compacted or if moisture levels change (like during a drought). This causes the foundation to settle unevenly, leading to cracks.
Expansive Soil & Hydrostatic Pressure: Clay soils expand when wet and shrink when dry, exerting immense pressure on foundation walls. Similarly, water accumulating in the soil creates hydrostatic pressure, pushing against your basement and forcing its way through any weak point. This is why proper drainage around foundations is non-negotiable.
Other Causes: Some minor hairline cracks form as concrete cures. In New England, the constant freeze-thaw cycle of winter also puts stress on foundations. Even tree roots planted too close can draw moisture from the soil or grow into existing cracks.
Identifying the root cause is the first step in any effective foundation crack repair strategy.
Gerrior Masonry & Landscape Construction Corp. is based in Woburn, MA, and proudly serves homeowners throughout Middlesex and Essex County, Massachusetts.
A Homeowner’s Guide to Foundation Crack Repair Solutions
Once you’ve identified a crack, the next step is finding the right solution. There’s a repair method for nearly every issue, from simple patches to comprehensive structural interventions. For an overview, see our Foundation Repair page or learn What is Foundation Repair.
Common Methods for Foundation Crack Repair
The right method depends on the crack’s type, severity, and cause.
Epoxy Injection: Ideal for dry, non-structural cracks. Epoxy bonds the concrete, creating a seal that’s stronger than the original material. While DIY kits exist, professional application ensures a superior, lasting bond.
Polyurethane Foam Injection: The go-to for actively leaking cracks. Polyurethane reacts with water and expands to create a flexible, watertight seal that can move with the foundation’s natural shifts.
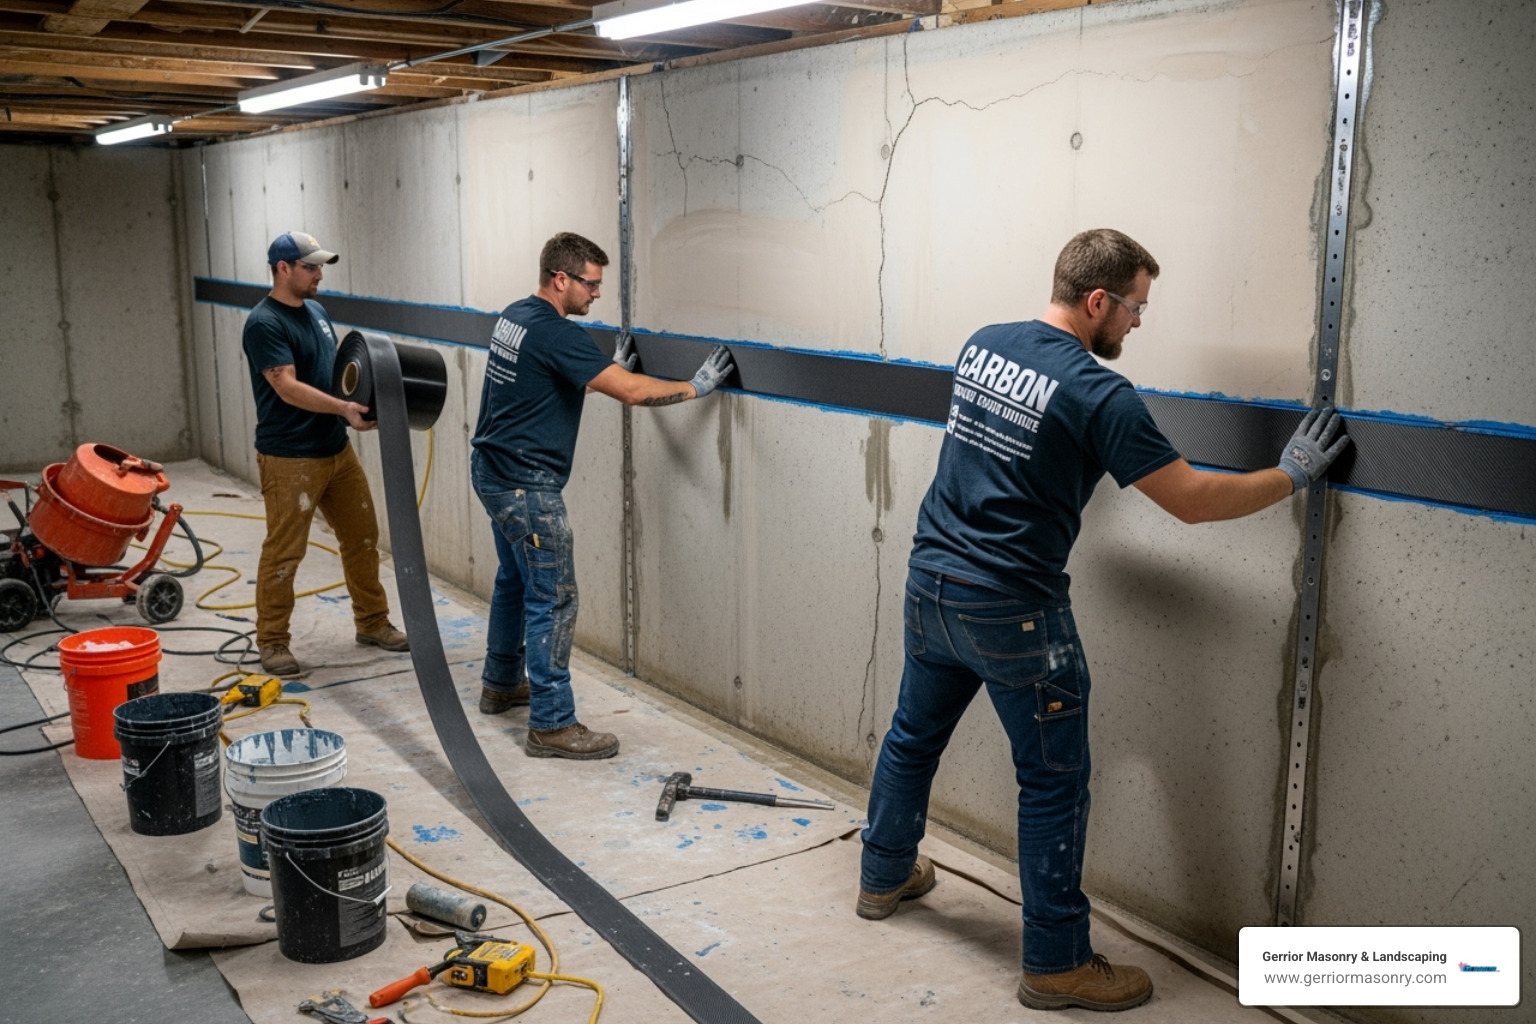
Carbon Fiber Reinforcement: Used for structural issues like horizontal cracks or bowing walls. Strong carbon fiber straps are applied across the crack to stabilize the wall and prevent further movement.
Underpinning or Piering: A heavy-duty solution for significant foundation settlement. This process extends the foundation down to more stable soil using steel piers, effectively correcting the settlement.
Wall Anchors: These are used to correct bowing or bulging walls by anchoring the wall to stable soil away from the foundation, gradually pulling it back into place.
Hydraulic Cement: A quick-setting material for patching minor, non-structural leaks. It’s a temporary fix and not suitable for moving or structural cracks.
Repointing: For masonry foundations, this involves replacing deteriorated mortar in the joints to restore the wall’s integrity. We specialize in Foundation Repointing.
Analyzing the Costs of Foundation Crack Repair
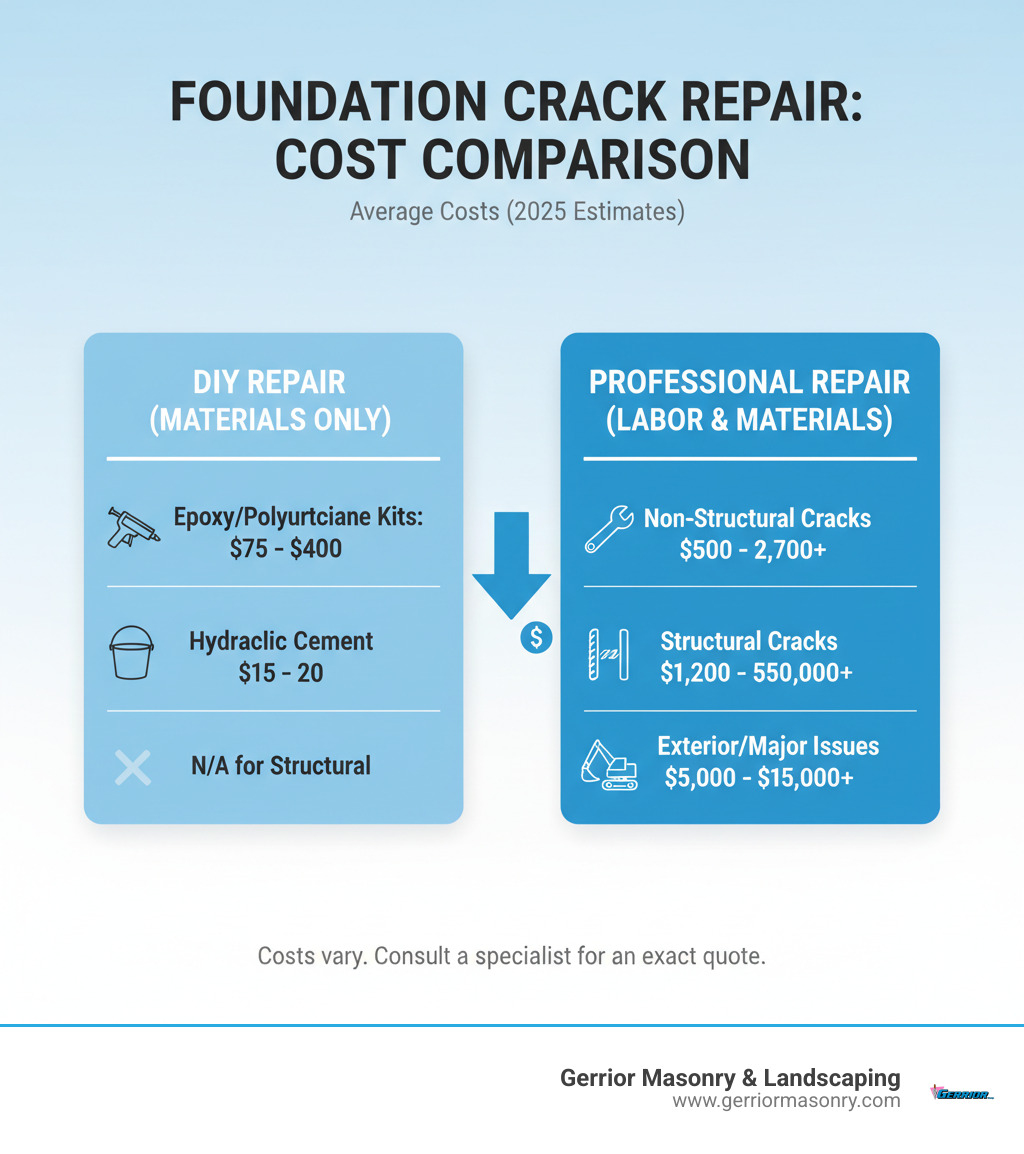
Foundation crack repair costs vary widely. Disclaimer: The prices below are average estimates based on internet data and industry standards, not a quote for our services. We provide a detailed quote after a thorough assessment.
DIY Repair Kits: Epoxy or polyurethane kits range from $75 to $400. Hydraulic cement is about $15-$20. These are for minor, non-structural issues only.
Professional Non-Structural Repair: For interior injections, costs typically range from $500 to $2,700+.
Professional Structural Repair: Methods like carbon fiber, wall anchors, or underpinning are more involved. Costs can range from $1,200 to $50,000+, with severe cases costing more.
Exterior Foundation Repair: This requires excavation and is the most intensive option, often starting at $5,000 and exceeding $15,000+.
Repair Type
DIY Average Cost
Professional Average Cost
Epoxy/Polyurethane Kits
$75 – $400
N/A
Non-Structural Crack
N/A
$500 – $2,700+
Structural Crack
N/A
$1,200 – $50,000+
Exterior Crack Repair
N/A
$5,000 – $15,000+
Foundation Inspection
Free (visual)
Free – $300
Remember: These are average costs based on internet data and not actual costs for Gerrior Masonry & Landscape Construction services. Your actual costs will depend on your foundation’s specific conditions.
The Risks of DIY vs. The Benefits of Professional Service
While DIY can seem tempting, your home’s foundation isn’t the place to experiment. The risks often outweigh the savings.
DIY Risks:
Misdiagnosis: Mistaking a structural crack for a cosmetic one can lead to disaster.
Improper Application: An incomplete seal will fail, allowing water intrusion to continue.
No Warranty: If the repair fails, you’re back at square one, often with a bigger problem.
Professional Benefits:
Expert Diagnosis: We identify the crack and its root cause to provide a permanent solution.
Pro-Grade Materials: We use materials engineered for long-term durability.
Warranties: Our work is backed by a comprehensive, often transferable warranty, protecting your investment.
Comprehensive Solutions: We can address related issues like drainage through our full Masonry Service.
Peace of Mind: Knowing your home is structurally sound is invaluable.
Protect Your Investment: When to Call the Pros
Now for the most important question: when is it time to call a professional? When it comes to your foundation, it’s always better to be safe than sorry. A small issue today can become a catastrophe tomorrow.
Is It a Structural Crack? Signs You Need an Expert Now
Don’t gamble with your home’s stability. Call a professional immediately if you see any of these signs:
Horizontal cracks of any size.
Any crack wider than 1/4 inch.
Bowing or bulging foundation walls.
Stair-step cracks in a block or brick foundation.
Multiple cracks appearing in different areas.
Cracks that are actively growing in length or width.
Water seeping through any crack.
As a Realtor.com article states, horizontal and jagged cracks are the most serious. Also, pay attention to indirect signs like sticking doors, uneven floors, or new cracks in drywall. If water is getting in, you need both foundation crack repair and a Waterproof Foundation solution.
My advice after 34 years: if you’re unsure, get a professional inspection. It’s a small step that can prevent a financial disaster.
How Foundation Repair Protects Your Home’s Value
Your home’s value rests on its foundation. Ignoring problems is like letting money drain away. A crack that costs $800 to fix today could become a $15,000 problem if left alone.
Professional foundation crack repair stops this domino effect. It prevents further damage and addresses the root cause, protecting your entire home structure.
Consider this: homes with known foundation issues often need a 10-20% price reduction to sell. On a $400,000 home, that’s a potential loss of $40,000 to $80,000.
A professionally repaired foundation with a transferable warranty changes everything. When selling your home, you must disclose known issues. Disclosing an unrepaired crack can kill a deal. Disclosing a professionally repaired crack with a warranty is a sign of a well-maintained home.
Restoring your foundation’s integrity makes your home safe for your family and protects its future value. At Gerrior Masonry & Landscape Construction, our Foundation Repair services provide lasting solutions that protect your investment.
When choosing a contractor, look for experience, proven methods, and strong warranties. Get multiple proposals and verify their credentials. You can learn more on our Masonry Contractors Near Me page.
Gerrior Masonry & Landscape Construction is based in Woburn, MA, and services Middlesex and Essex County, Massachusetts.
Foundation repair Stoneham services are crucial for maintaining your home’s structural integrity. In Stoneham’s challenging climate, foundations face stress from freeze-thaw cycles, soil expansion, and aging construction.
Ignoring foundation problems leads to more expensive and dangerous issues. A small crack can evolve into a major structural threat, compromising your home’s safety and value. Watch for warning signs like wall cracks, sticking doors, uneven floors, or basement water.
Our Top Foundation Repair Services in Stoneham:
Crack repair: Epoxy and polyurethane injection
Stone foundation repointing: Restoring mortar in fieldstone foundations
Wall stabilization: Carbon fiber straps and wall anchors
Underpinning: Push piers for settling foundations
Waterproofing: Basement sealing and drainage
I’m Joe Gerrior, owner of Gerrior Masonry & Landscape Construction Corp. For over 34 years, my team has provided expert Foundation repair Stoneham solutions. We handle everything from minor cracks to complete stone foundation restoration, ensuring your home is secure for years to come.
Understanding and Identifying Foundation Problems in Stoneham
Your foundation quietly supports your entire home, but Stoneham’s New England conditions can put it to the test. The good news is that Foundation repair Stoneham issues are easier and less expensive to fix when caught early. Ignoring a small problem can lead to widespread damage, much like an unrepaired roof leak.
Telltale Signs Your Foundation Needs Attention
Catching foundation issues early saves you money and stress. Here are the key warning signs to look for:
Foundation and Wall Cracks: Noticeable cracks in basement walls, drywall, or exterior brick—especially stair-step patterns—often indicate foundation settlement. While small hairline cracks can be from normal concrete curing, wider vertical or diagonal cracks suggest settlement. Horizontal cracks are particularly concerning as they often point to intense external pressure from soil or water, which can lead to wall failure.
Bowing or Leaning Walls: Walls that bulge inward are a serious sign of hydrostatic pressure from water-saturated soil. This requires immediate attention. You can check for bowing by placing a long, straight edge against the wall. Any gap between the edge and the wall indicates a bulge. This pressure can exceed the wall’s structural capacity, making it a critical safety hazard that needs immediate professional assessment.
Uneven or Sloping Floors: A floor that slopes, sags, or feels spongy can mean your foundation is settling unevenly. Try placing a marble on the floor; if it rolls consistently in one direction, you likely have a slope. This unevenness can strain floor joists and create tripping hazards throughout your home.
Sticking Doors and Windows: If doors and windows jam or don’t close properly, it could be due to the frame being distorted by foundation movement. When a foundation shifts, it twists the entire house frame. This distortion pulls door and window frames out of square, causing them to bind. You might also see cracks in the drywall around the corners of these frames.
Basement Water Intrusion: Damp spots, pooling water, or a musty smell point to cracks or waterproofing failures that can worsen foundation damage.
Crumbling Concrete or Stone: In historic Stoneham homes, deteriorating mortar in fieldstone foundations can compromise stability and allow water entry.
If you notice these signs, don’t wait. Small issues can quickly become costly structural problems.
Why Foundations Fail: Local Causes in Stoneham
Understanding the root cause is key to a lasting repair. In Stoneham, foundations are stressed by several local factors:
Freeze-Thaw Cycles: New England’s harsh winters cause soil to freeze and expand, exerting immense pressure (frost heave) on foundation walls. When the soil thaws, it can lead to settlement.
Soil Expansion: Clay-rich soils in the area expand when wet and shrink when dry. This constant movement puts stress on your foundation.
Poor Water Drainage: Clogged gutters and improper landscape grading that directs water toward your home are major culprits. This saturates the soil, creating hydrostatic pressure that can crack and bow walls. Learn more about our drainage solutions.
Aging Fieldstone Foundations: Many historic Stoneham homes have fieldstone foundations with lime mortar that deteriorates over time, weakening the structure and allowing water in. Repairing these requires specialized, historically appropriate materials.
The Professional Diagnosis: What to Expect During an Inspection
When you call us for a foundation repair Stoneham assessment, we provide a thorough, no-pressure evaluation. Our process includes:
Comprehensive Inspection: We examine your home’s interior and exterior, checking for cracks, bowing, and signs of moisture. We also assess your property’s drainage and grading.
Settlement Measurement: We use specialized tools to measure any foundation movement, giving us objective data to guide the repair.
Root Cause Analysis: We identify the underlying cause of the problem—be it soil conditions, water issues, or structural aging—to ensure a permanent solution.
Detailed Repair Plan & Estimate: You’ll receive a free, no-obligation estimate with a customized repair plan. We explain all your options and answer your questions so you can make an informed decision.
Gerrior Masonry & Landscape Construction is based in Woburn, MA, and proudly services Stoneham and surrounding communities throughout Middlesex and Essex County, Massachusetts.
A Homeowner’s Guide to Professional Foundation Repair in Stoneham
Once a foundation problem is diagnosed, the right repair method can restore your home’s security and your peace of mind. Matching the solution to the specific issue is key. As a contractor with over three decades of experience, I’ve seen how effective modern techniques are when applied correctly.
Common Solutions for Foundation Repair in Stoneham
We match the repair method to your specific problem, ensuring a lasting solution. Here are the most common techniques we use for Foundation repair Stoneham projects:
Underpinning with Push Piers: To fix a settling or sinking foundation, we drive steel piers deep into stable soil or bedrock. These piers support your home’s weight and can often lift it back toward its original level. The process involves excavating small sections at the base of the foundation, attaching heavy-duty steel brackets, and then hydraulically driving the pier sections through the bracket until they reach a load-bearing stratum. The weight of the house is then carefully transferred to the piers.
Wall Stabilization: For bowing walls, we use wall anchors that extend into stable soil in your yard to pull the wall back over time. For less severe bowing, carbon fiber reinforcement straps are bonded to the wall, providing strength greater than concrete. Wall anchors are ideal for significant bowing and require exterior excavation, while carbon fiber is a less intrusive, modern solution for walls that have bowed two inches or less and have stopped moving.
Crack Repair: We use epoxy injection for structural cracks, creating a bond stronger than the concrete itself. For non-structural leaks, polyurethane injection creates a flexible, waterproof seal. Learn more about our Crack Repair for Foundations.
Stone Foundation Repointing: We specialize in restoring historic fieldstone foundations by replacing deteriorated mortar with a historically appropriate lime mortar mix, preserving the foundation’s integrity.
Basement Waterproofing: To manage water intrusion, we install interior drainage systems and sump pumps to collect and redirect water away from your foundation. This relieves hydrostatic pressure. See our Basement Waterproofing Solutions.
Understanding the Cost and Timeline for Foundation Repair in Stoneham
Foundation repair costs depend on the method, severity of damage, and home accessibility. Prompt repairs are always more cost-effective than waiting for the problem to worsen.
Based on internet data and not actual costs for Gerrior Masonry services, Foundation repair Stoneham projects in the Boston area can range from $2,951 for minor repairs to over $9,000 for more complex work. Major structural repairs involving underpinning can exceed $20,000. We provide a detailed, written estimate after a thorough inspection.
Timelines vary from a day or two for crack injections to several weeks for extensive underpinning. Acting quickly saves money and prevents small issues from becoming major structural failures. A professional repair not only secures your home but also protects its value, a key factor for potential buyers. For more on this, see this Scientific research on home renovation ROI.
How to Hire the Right Contractor and Prevent Future Issues
Choosing the right contractor is critical. Look for:
Experience and Reputation: Choose a company with decades of local experience, positive reviews, and strong warranties. Our owner supervises every project to ensure quality.
Specialized Expertise: Ensure the contractor has specific, verifiable experience with your type of foundation (e.g., poured concrete vs. historic fieldstone) and the proposed repair method. A general contractor may not have the necessary skills for complex structural work.
Clear Communication: A good contractor provides detailed estimates and answers all your questions.
Preventing Future Issues:
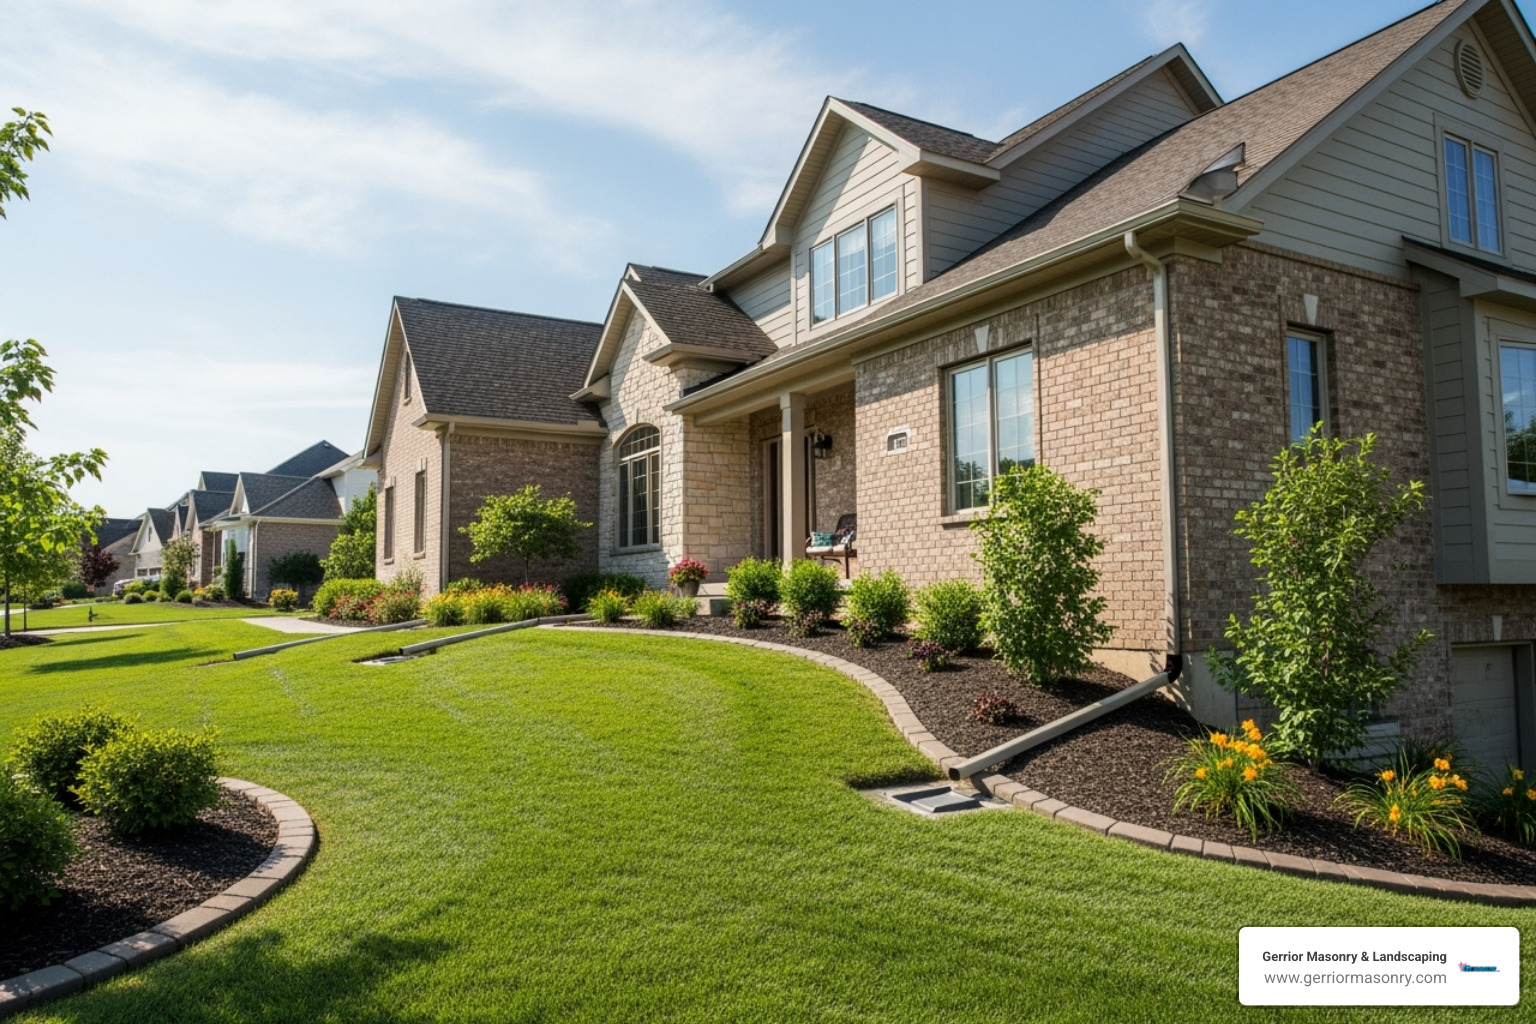
Manage Water: Keep gutters clean and extend downspouts 5-10 feet from your home. Ensure your yard has proper grading that slopes away from the foundation.
Landscape Wisely: Plant large trees and shrubs away from the foundation to prevent their roots from affecting soil moisture. Avoid overwatering near the house.
Protect Your Investment with Gerrior Masonry & Landscaping
Your home is your largest investment, and its foundation is the key to its security. As we’ve shown, foundation problems in Stoneham don’t fix themselves—they only get worse. Acting quickly protects your family’s safety, preserves your home’s value, and prevents small issues from becoming costly structural failures.
At Gerrior Masonry & Landscaping, we understand the unique challenges New England homes face. With over 30 years of experience in Foundation repair Stoneham projects, we combine traditional craftsmanship with modern techniques to deliver lasting solutions. Our owner supervises every project, ensuring our high standards are met whether we’re restoring a historic fieldstone foundation or installing carbon fiber supports.
Don’t let foundation concerns compromise your peace of mind. We provide free, no-obligation estimates to give you a clear, honest assessment of your home’s condition and your repair options.
Gerrior Masonry & Landscape Construction is based in Woburn, MA, and proudly services Stoneham and surrounding communities throughout Middlesex and Essex County, Massachusetts.
A french ditch is a drainage system consisting of a gravel-filled trench with a perforated pipe that redirects water away from your property to prevent flooding and foundation damage.
Quick Facts About French Ditches:
What it is: Underground drainage trench filled with gravel and perforated pipe
Purpose: Collects and redirects groundwater away from foundations and problem areas
Cost: DIY projects range $1,500-$5,000+, professional installation $5,000-$18,000+ (average costs based on internet data)
Lifespan: 20+ years with proper maintenance
Best for: Soggy yards, basement water issues, foundation protection
Water pooling around your home is a serious threat to your property’s foundation and value. Whether you’re dealing with a soggy lawn, water in your basement, or muddy areas that never dry, these problems won’t fix themselves. The good news is that French drains have been solving drainage problems for over 150 years. Named after Henry Flagg French, these simple systems use gravity to move water away from where you don’t want it, protecting your investment and restoring your outdoor space.
As Joe Gerrior, owner of Gerrior Masonry & Landscape Construction, I’ve installed countless french ditch systems across Massachusetts over the past 34 years. I’ve seen how the right drainage solution can transform a property and protect homeowners from costly water damage.
Understanding the French Ditch: How It Works and Why You Might Need One
What is a French Drain (French Ditch) and How Does It Work?
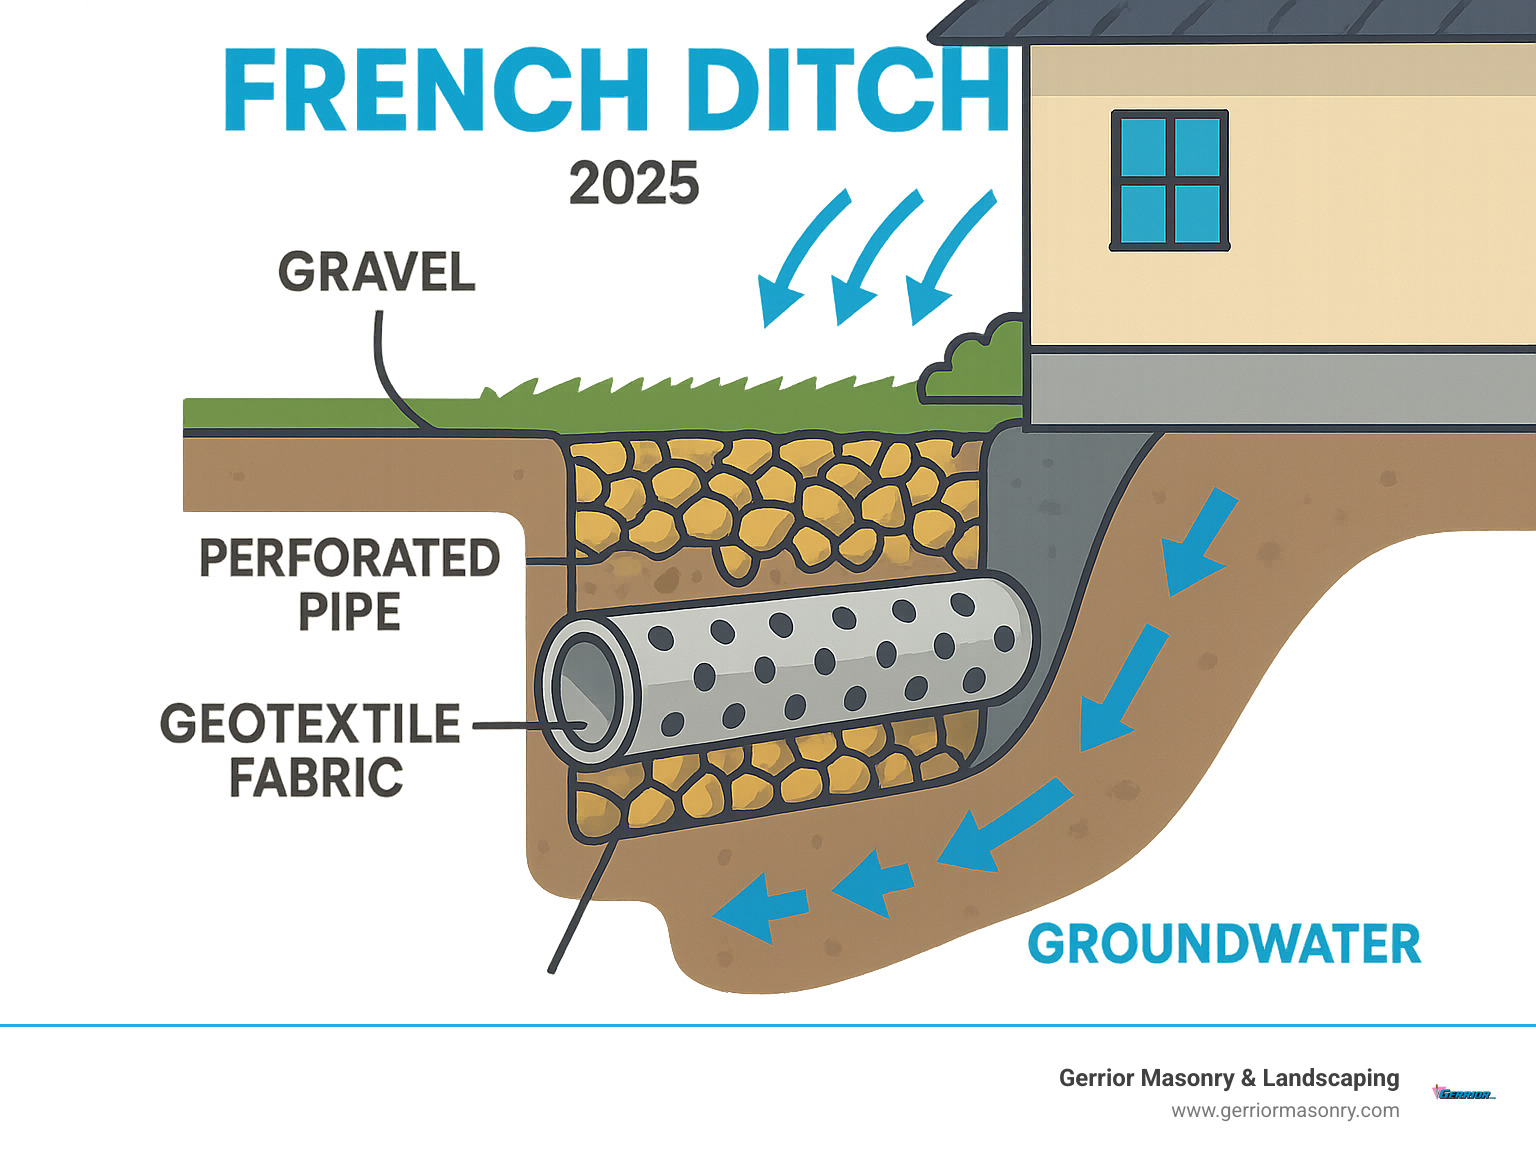
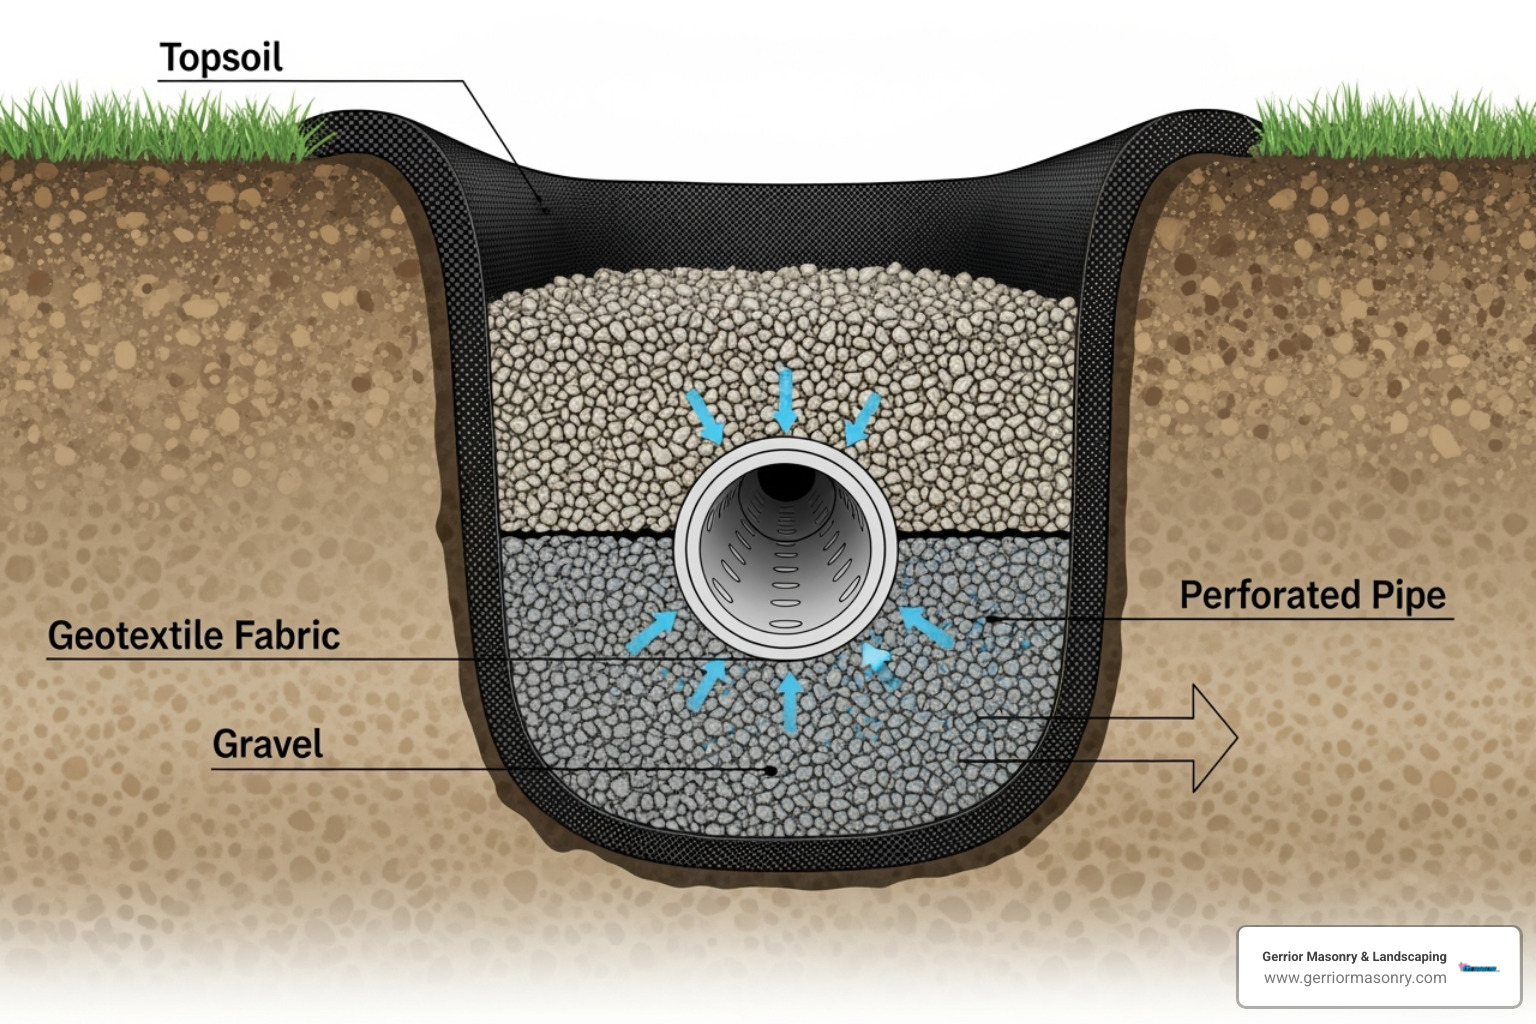
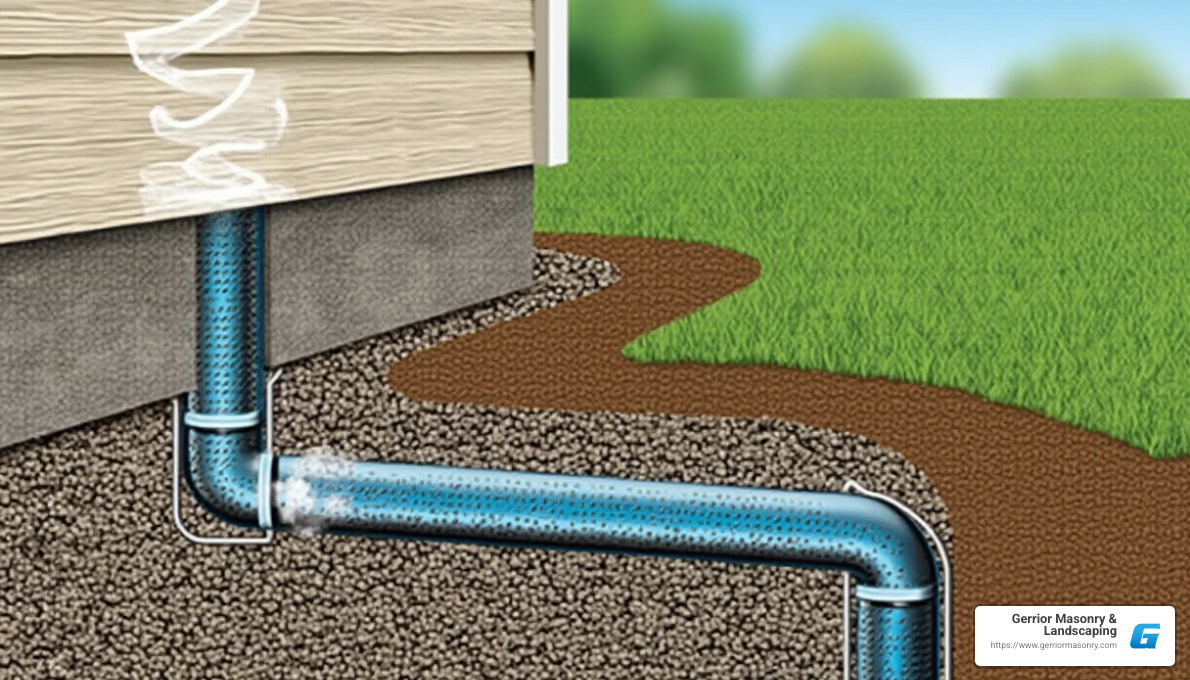
At its core, a french ditch is an underground drainage solution. It consists of a shallow trench, typically 18 to 24 inches deep, lined with a water-permeable fabric, filled with gravel, and containing a perforated pipe.
The system works by providing an easy path for water. Groundwater seeps through the gravel into the perforated pipe. The pipe is laid on a slight downward slope—at least one inch of drop for every 10 feet—allowing gravity to channel the water away from your foundation to a designated outlet like a municipal storm drain, a dry well, or a rain garden. The geotextile fabric liner is crucial, as it prevents soil and roots from clogging the system.
The system is not named after the country, but after Henry Flagg French, an American farmer from Concord, Massachusetts, who popularized the concept in his 1859 book, Farm Drainage. Modern materials like non-woven fabric and PVC piping have simplified installation and improved effectiveness.
For more comprehensive information about different drainage systems, including dry wells, and how they can benefit your property, we recommend exploring our detailed guide on drainage systems & dry wells. You can also dig into the historical text that popularized this method by checking out Henry F. French’s seminal work on Farm Drainage.
Key Benefits and Telltale Signs of Needing a French Ditch
How do you know if a french ditch is the right solution for your property? Look for these telltale signs:
Common Signs You Might Need a French Drain:
Soggy Yard or Patio: Your lawn remains squishy for days after rain, or puddles form in low spots.
Water Pooling Near Foundation: This is a major red flag that can lead to serious structural issues.
Basement Leaks or Dampness: Water seeping into your basement or damp spots on walls indicate hydrostatic pressure building against your foundation. Learn more about preventing these issues by exploring our basement waterproofing services.
Musty Odors in Crawl Space: Excessive moisture can lead to mold, mildew, and structural damage.
Foundation Cracks: Water pressure can cause cracks. For existing issues, our foundation repair services can provide lasting solutions.
Soil Erosion: A french ditch can help manage water flow and prevent soil from washing away.
The benefits of installing a french ditch are substantial:
Prevents Water Damage: Shields your home from water intrusion, protecting your foundation and interior spaces.
Protects Foundation: Alleviates pressure on foundation walls, preventing cracks and leaks.
Makes Yard Usable: Transforms waterlogged areas into functional, enjoyable outdoor spaces.
Increases Property Value: Effective drainage is a significant selling point.
Reduces Pest Problems: Eliminates standing water where mosquitoes and other insects breed.
Preserves Landscaping: Helps maintain healthy soil conditions for your plants.
Types of French Drains: Exterior, Interior, and Deep Drains
While the concept is consistent, applications vary. We primarily work with three main types:
Exterior French Drain (Curtain Drain): Installed outside the home, this common type intercepts surface and groundwater before it reaches the foundation. It’s excellent for soggy yards.
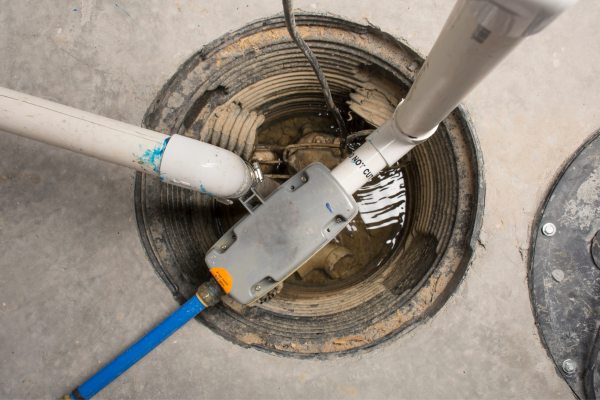
Interior French Drain (Basement Drain): Used for existing basement leaks, this system is installed inside the basement. A trench is cut into the concrete slab, and a pipe channels water to a sump pump, which pumps it out.
Deep Drain (Footer Drain): Installed deep at the foundation’s base during construction, this drain relieves hydrostatic pressure from below. It’s a proactive measure for new builds.
Here’s a comparison of these types:
Feature
Exterior French Drain (Curtain Drain)
Interior French Drain (Basement Drain)
Deep Drain (Footer Drain)
Aesthetics
Can be hidden under landscaping, grass, or decorative stone.
Mostly hidden, but requires breaking and repairing basement floor.
Completely hidden, installed during construction.
Maintenance
Relatively easy access for cleaning inlet grates.
Requires access to sump pump; less direct access to pipe for flushing.
Very difficult to access for maintenance once installed.
Cost
Lower to moderate. Average professional installation $10-$50 per linear foot.
Higher. Average professional installation $40-$100 per linear foot.
Varies depending on construction phase; often integrated into foundation work.
Effectiveness
Excellent for intercepting water before it reaches the foundation.
Highly effective for existing basement water intrusion.
Best for preventing water issues from the outset during construction.
Primary Use
Yard drainage, diverting surface water, protecting foundations from outside.
Remedying active basement leaks and moisture.
Proactive foundation protection during new construction.
Installing a French Ditch: Process, Costs, and Key Considerations
While a DIY approach is possible, professional installation is recommended for a long-lasting, effective system.
Key Materials:
Perforated Pipe: Typically 4-inch diameter PVC or flexible corrugated pipe.
Washed Gravel/Aggregate: Coarse, washed gravel (¾-inch or larger) allows water to pass through while filtering debris.
Landscape Fabric (Geotextile): A water-permeable fabric that lines the trench to prevent soil and roots from clogging the system.
General Installation Steps:
Plan: Identify the problem area and a suitable outlet at a lower elevation. Always call 811 before you dig to locate utility lines.
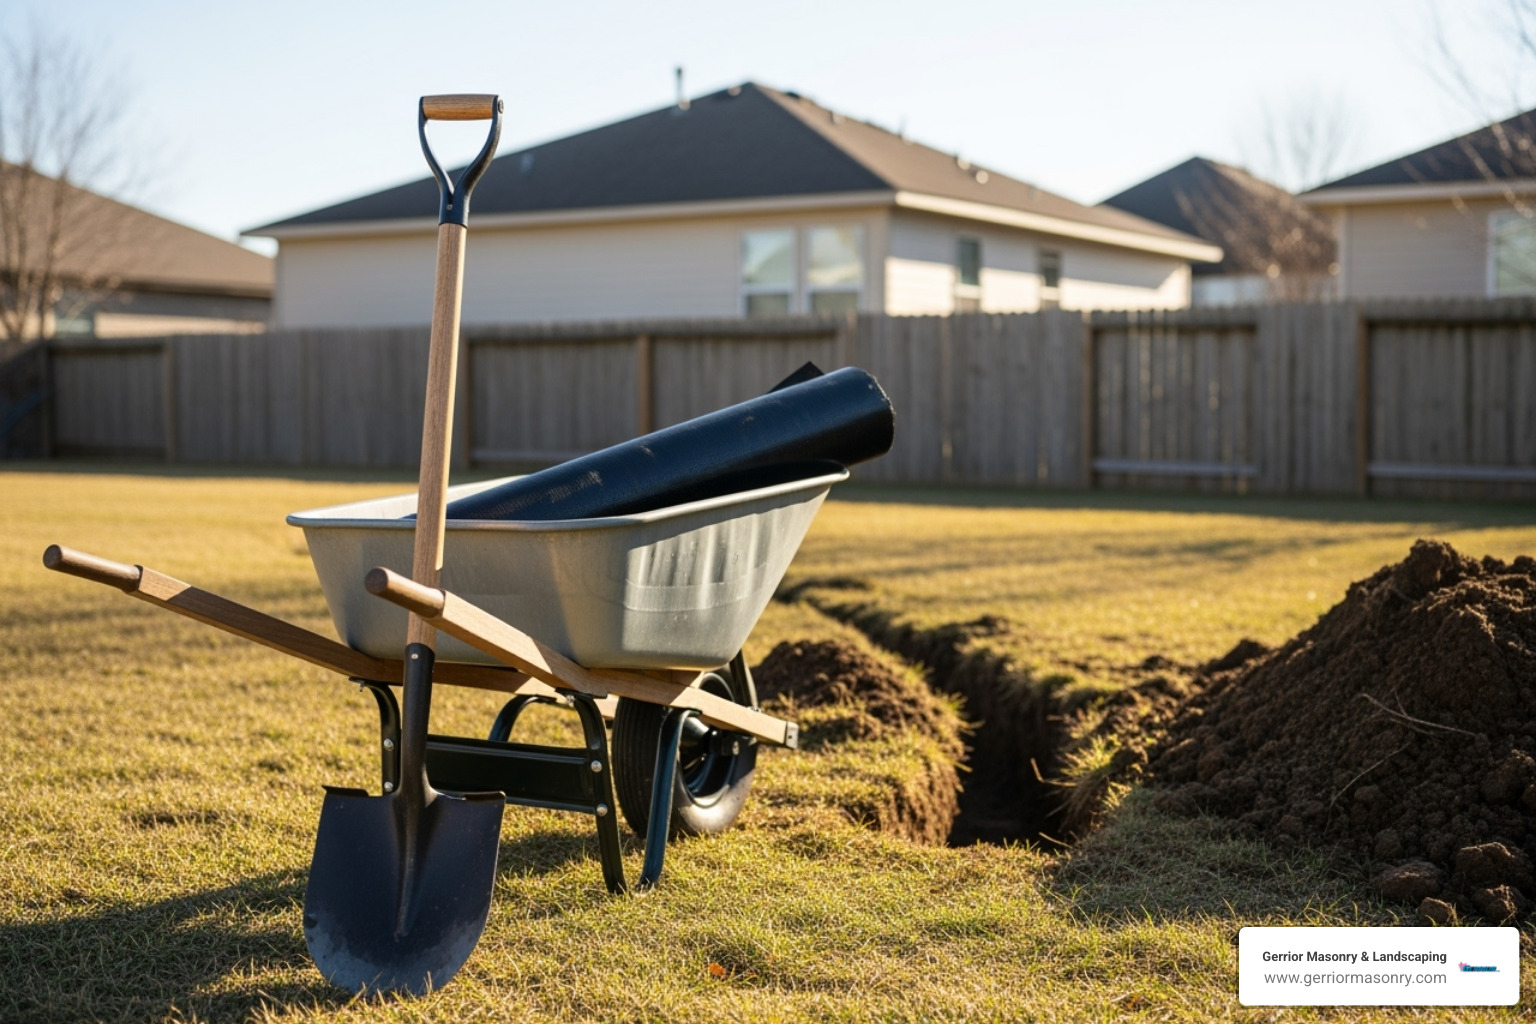
Dig: Excavate a trench about 18-24 inches deep and 9-12 inches wide, maintaining a slope of at least 1 inch per 10 feet. Our expert excavation services are ideal for this precision work.
Line: Place geotextile fabric in the trench, leaving enough excess to wrap over the top later.
Add Gravel & Pipe: Add a 3-inch gravel base, lay the perforated pipe (holes down), and connect sections.
Cover: Cover the pipe with gravel, then fold the fabric over the top to create a protective envelope.
Backfill: Fill the rest of the trench with more gravel, or topsoil for planting grass.
Costs Associated with Installing a French Ditch:
Costs vary based on length, depth, soil conditions, and whether it’s a DIY or professional job.
Please note: The following are average costs based on internet data and not actual costs for Gerrior Masonry & Landscaping services. We encourage you to contact us for a personalized quote.
DIY French Drain: Can cost $1,500 and up. This is labor-intensive, and mistakes can lead to system failure.
Professional Exterior French Drain: Typically $10 to $50 per linear foot, with average total costs around $5,000.
Professional Interior French Drain: More complex and can cost $40 to $100 per linear foot, with total costs potentially reaching $18,000 or more.
Key Considerations:
Utility Lines: Call 811 before digging to avoid dangerous and expensive accidents.
Soil Type: Heavy clay soils may require a wider trench or other measures to ensure proper drainage.
Permits: Check with your municipality, especially if connecting to a storm drain. For non-residential regulations, see the EPA’s guidelines on Class V Injection Wells.
Outlet Location: Ensure water drains to a suitable location without impacting neighbors.
Maintaining Your French Drain and Knowing When to Consider Alternatives
A well-installed french ditch can last for 20-plus years with minimal maintenance.
Annual Maintenance:
Clear Inlets/Outlets: Keep grates and exit points free of leaves and debris.
Flush the System: Periodically flush the pipe with a garden hose to clear sediment.
Specific Applications:
Protecting Retaining Walls: A french ditch behind a retaining wall relieves water pressure.
Keeping Patios Dry: Installing a drain along a patio edge diverts runoff.
When a French Drain is NOT the Appropriate Solution:
A French drain isn’t a silver bullet. Consider alternatives if you have:
Lack of Adequate Slope: The system relies on gravity. A sump pump may be needed for flat properties.
No Suitable Outlet: You must have a place for the water to go.
Major Grading Issues: Regrading or creating swales might be a better primary solution.
Gutter-Related Surface Water: Address downspout and gutter issues first.
In any complex drainage scenario, we recommend a professional assessment to find the most cost-effective solution for your property.
Your Drainage Solution Partner in Massachusetts
A French drain is a simple concept, but effective installation requires precision. Getting the slope, materials, and placement right is key to a system that lasts for decades, not just one season.
With over 34 years of experience, Gerrior Masonry & Landscaping has tackled drainage challenges across Massachusetts. We understand local soil and weather patterns, and we bring that accumulated knowledge to your property.
What sets us apart is owner oversight on every project. Joe Gerrior personally ensures your drainage system meets our high standards, giving you peace of mind that the job is done right the first time. No shortcuts, no unsupervised subcontractors.
From basement moisture in Woburn to standing water around an Andover patio, we design systems to handle the demanding Massachusetts weather. A properly installed french ditch protects your largest investment from devastating water damage while giving you back your outdoor spaces.
Retaining Wall With French Drain: 7 Powerful Ways to Prevent Failure 2025
Why Retaining Walls Need Proper Drainage
A retaining wall with french drain is essential for any wall that holds back soil and water. Without proper drainage, your retaining wall faces significant risk of failure.
Quick Answer: How to Install a French Drain with a Retaining Wall
Dig a trench at least 12 inches wide and 18-24 inches deep behind the wall
Line the trench with non-woven geotextile fabric
Place a 4-inch perforated pipe at the bottom with holes facing down
Ensure the pipe slopes at least 1 inch per 8 feet toward the outlet
Surround the pipe with clean, angular ¾-inch gravel
Wrap the fabric over the gravel like a burrito
Backfill the remaining space and grade soil away from the wall
Hydrostatic pressure from water buildup is the leading cause of retaining wall failure, accounting for up to 80% of structural issues in residential retaining walls. This invisible force can turn your beautiful landscape feature into a leaning, cracking eyesore—or worse, a complete collapse.
Properly installed French drains can extend the lifespan of a retaining wall by 2 to 3 times compared to walls without adequate drainage.
I’m Joe Gerrior, owner of Gerrior Masonry & Landscape Construction Corp., and I’ve installed hundreds of retaining walls with French drains over my 34 years in the industry, helping homeowners throughout Massachusetts protect their investments and prevent costly failures.
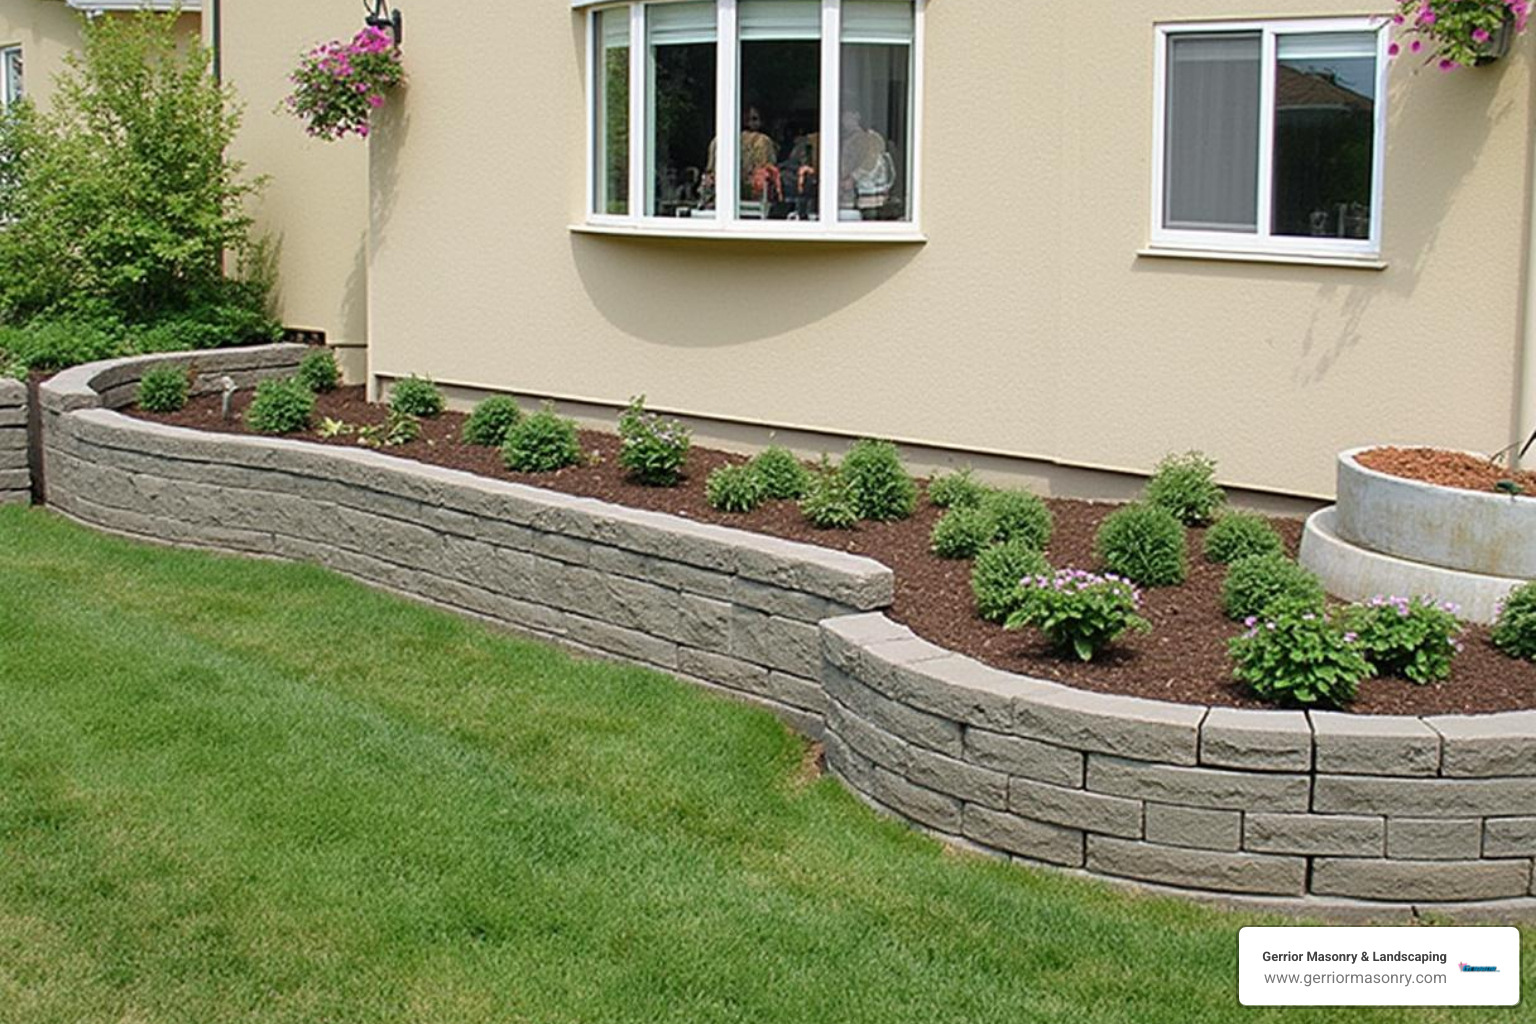
Retaining walls are the unsung heroes of challenging landscapes. They don’t just add visual appeal to your property—they’re hardworking structures that transform unusable slopes into functional outdoor spaces.
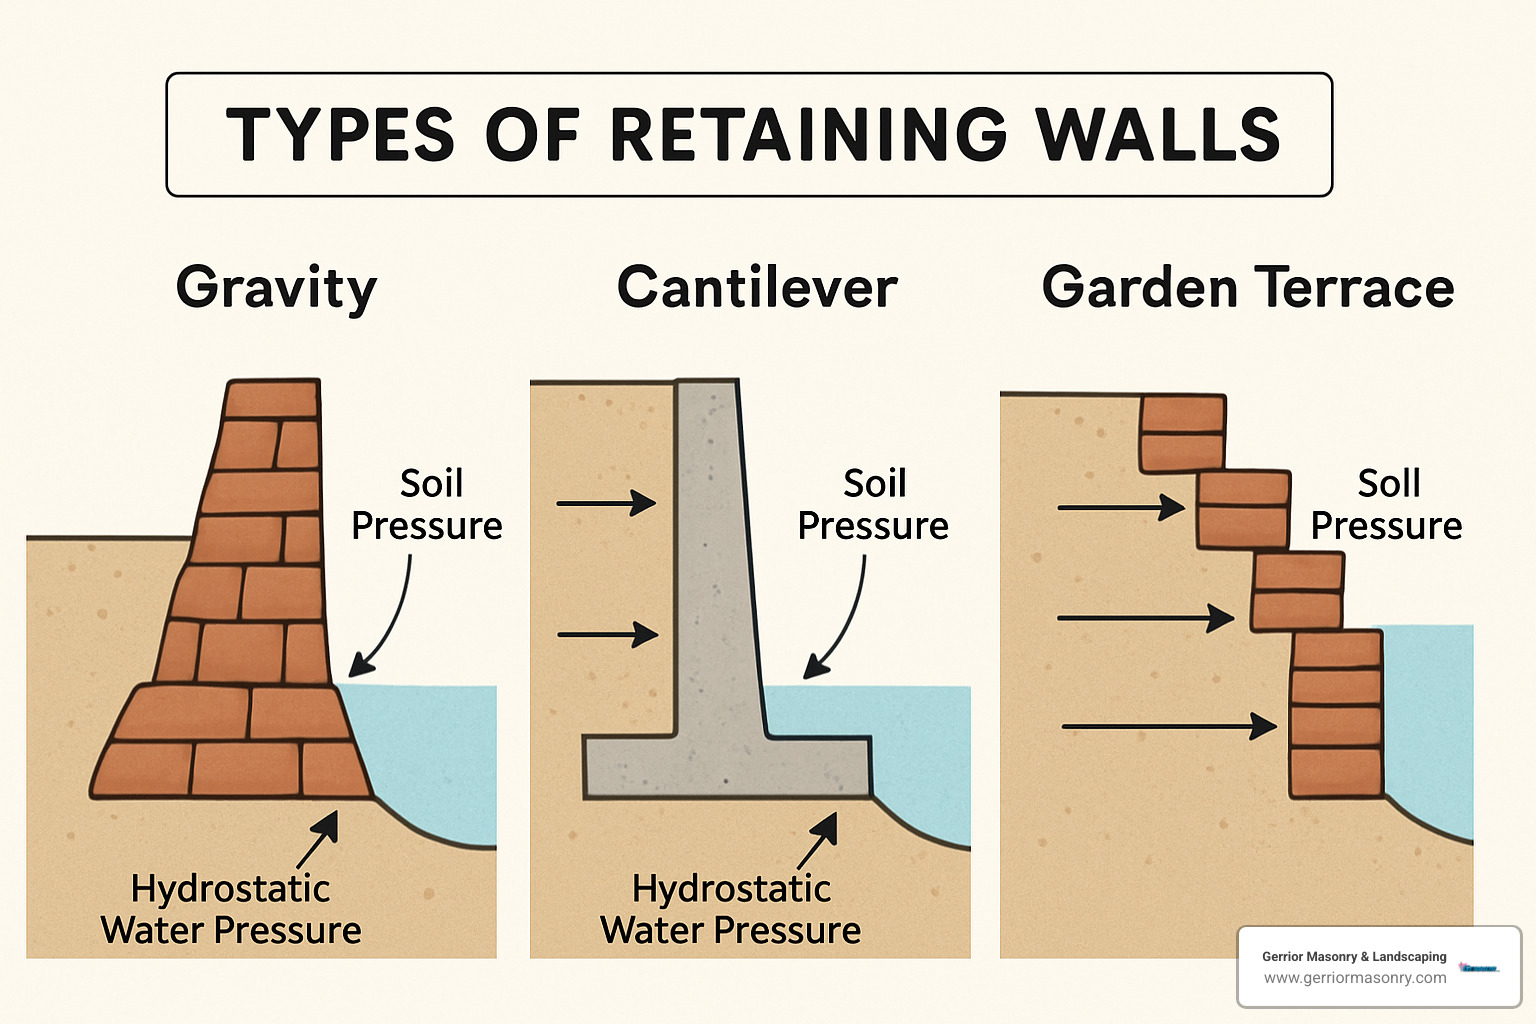
We typically build three main types of retaining walls:
Gravity walls use their substantial mass and weight to stand strong against soil pressure
Cantilever walls employ clever engineering with a reinforced base that extends under the soil
Garden terraces create beautiful stepped levels that provide multiple planting areas
Every retaining wall battles two relentless forces: the horizontal pressure from soil pushing outward and the tremendous force of water building up behind the structure. When winter arrives in Massachusetts, that trapped water freezes and expands, creating pressure that can crack even substantial walls if they’re not properly drained.
Your wall might be in trouble if you notice it leaning forward, bulging in the middle, cracking in the mortar or blocks, separation between sections, or soil washing out from underneath.
The difference between a well-built wall with proper drainage and one without is dramatic. Industry data shows that a retaining wall with french drain can last 50-100 years, while those without might fail within just 5-10 years.
Need some inspiration for your next project? Our Stone Wall Design Ideas page showcases beautiful examples of walls that deliver both stunning looks and rock-solid performance.
What Does a Retaining Wall Do?
A good retaining wall holds back soil that would otherwise slide downhill during heavy rains or spring thaws.
Beyond just preventing erosion, retaining walls transform steep slopes into usable terraces, effectively expanding your outdoor living space. For many of our clients in Middlesex and Essex County, this means turning previously wasted hillsides into beautiful garden beds, patios, or play areas.
Retaining walls also protect your home and other structures from the relentless pressure of moving soil. Without this protection, foundations can crack, basements can leak, and driveways can buckle.
How to Spot Trouble Early
Catching retaining wall problems early can save you thousands in repairs. Here’s what to watch for:
After a rainstorm, does water pool at the base of your wall? This suggests drainage issues. Notice white, chalky deposits (called efflorescence) on the wall face? That’s a telltale sign that water is moving through your wall.
Mold or algae growth indicates persistent moisture problems. Pay attention to blocks or stones that suddenly seem misaligned or if you hear cracking noises when walking near the wall.
Look for soil erosion or tunnels forming behind or beneath the wall, which indicate water is finding its own path. Even weeds or plants sprouting from the joints between stones can signal moisture issues that need addressing.
Why Drainage Matters More Than You Think
Water is both a life-giving force and a potential destroyer of structures. When it comes to your retaining wall, proper water management isn’t just important—it’s absolutely essential. Industry data reveals that hydrostatic pressure causes up to 80% of all residential retaining wall failures.
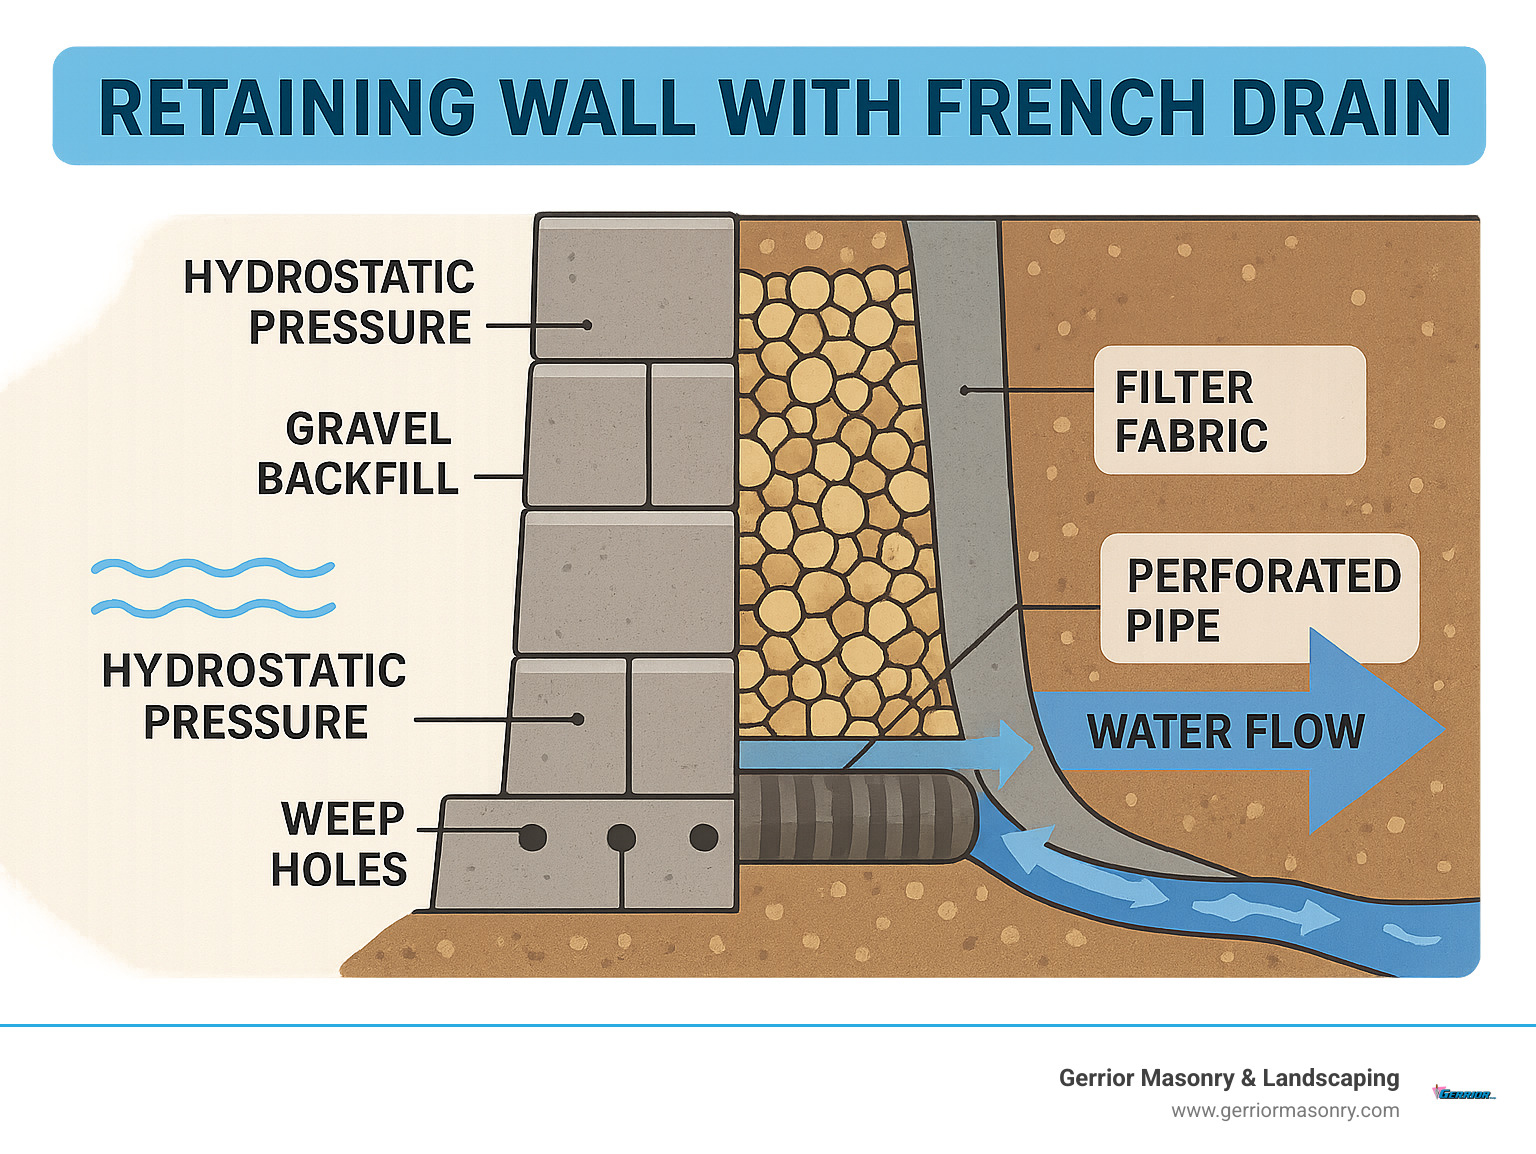
Hydrostatic pressure is simply the force exerted by standing water against a surface. As rainwater soaks into the soil behind your retaining wall, it accumulates and creates pressure that can be surprisingly powerful. This invisible force can literally push over or crack substantial walls over time.
Water creates several other problems beyond just pressure:
Soil erosion silently undermines your wall’s foundation, frost heave creates additional pressure during freeze-thaw cycles, mosquitoes find breeding grounds in standing water, and all wall materials experience accelerated deterioration when constantly wet.
Professional hardscapers use what we call the “drainage chimney” concept—creating a column of permeable material behind the wall that allows water to flow downward rather than building up pressure.
If you’re researching costs, this Forbes guide on retaining wall cost provides helpful context for understanding the investment required for a properly constructed wall.
Risks of Skipping Proper Drainage
Cutting corners on drainage is like skipping insurance—it might save money today, but the long-term gamble rarely pays off. When retaining walls lack proper drainage, the consequences can be severe and expensive.
Complete wall collapse is the most dramatic and dangerous outcome, potentially causing property damage or even injury. Foundation damage to nearby structures often follows as water redirects to the path of least resistance—usually toward your home’s basement or crawlspace.
Landscape washout can destroy carefully planned gardens and create unsightly erosion channels across your yard. Saturated clay soils expand and contract dramatically, creating even more pressure against your wall.
The initial investment in a retaining wall with french drain pays for itself many times over through extended wall life and avoided repairs.
Key Elements of an Effective Wall Drainage System
A comprehensive drainage system for your retaining wall isn’t complicated, but each component plays a vital role:
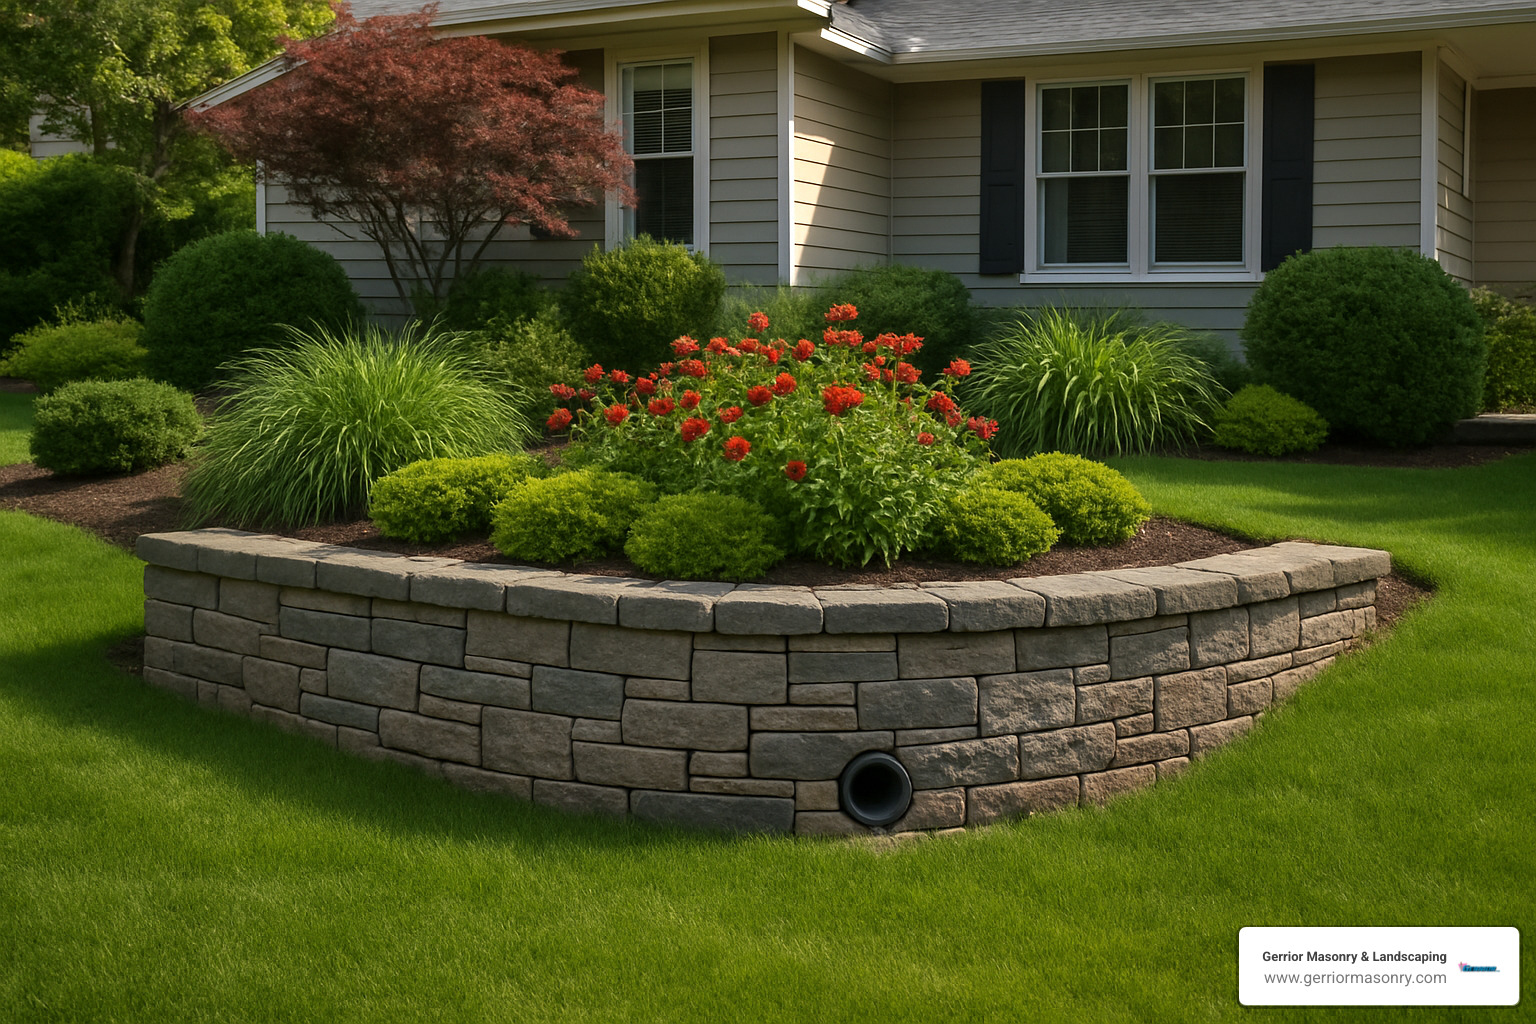
Weep holes create small openings at the base of the wall that allow water to escape. Filter fabric (geotextile) prevents soil from clogging your drainage system while allowing water to pass through.
Gravel backfill creates a permeable zone behind your wall. Industry guidelines recommend at least 12 inches of gravel backfill behind all retaining walls over 2 feet tall.
Perforated pipe (the French drain itself) collects and channels water away from your wall. Daylight outlet provides a protected exit point where water can safely discharge away from the wall.
Proper slope ensures water actually flows away. We maintain a minimum 1% slope (1 inch drop per 8 feet) so gravity keeps things moving in the right direction.
Meet the French Drain: Simple Physics, Big Protection
The French drain isn’t from France at all—it’s named after Henry French, a Massachusetts judge and farmer who popularized this drainage system in the 19th century. We find it fitting that this essential drainage solution has roots right here in Massachusetts!
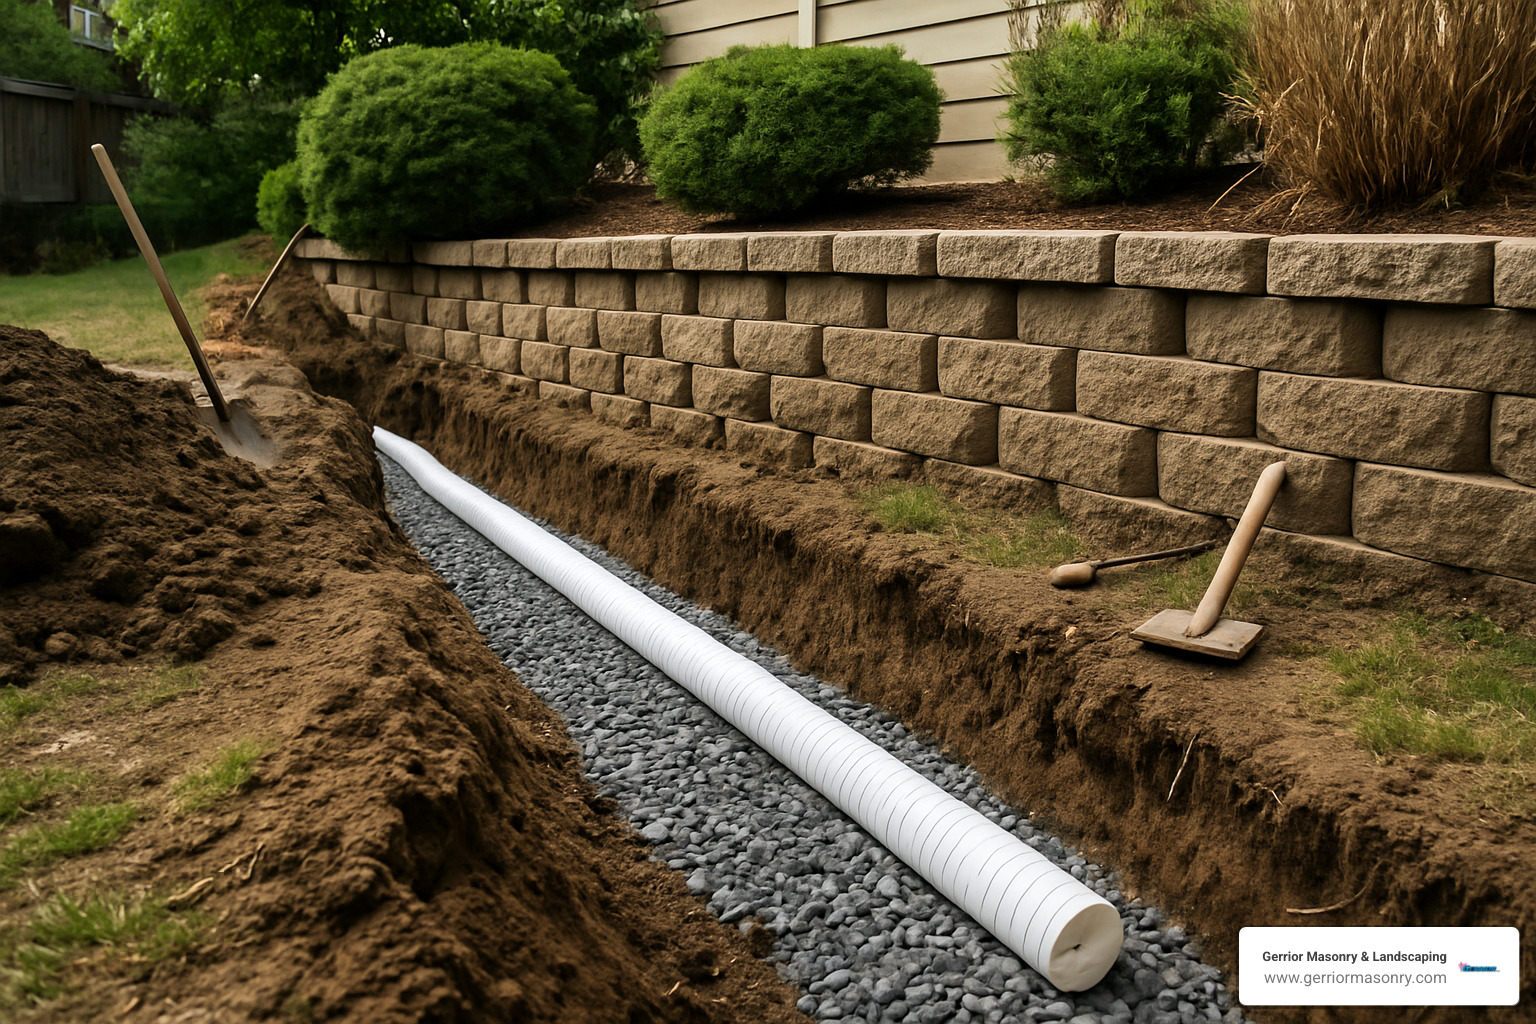
There’s a beautiful simplicity to a French drain—just a trench filled with gravel surrounding a perforated pipe that collects and redirects water. This humble system is remarkably effective at managing water and protecting your retaining wall investment.
When we install a retaining wall with French drain at Gerrior Masonry, we typically dig a trench 12-18 inches wide and 18-24 inches deep behind the wall. We then place a 4-inch perforated pipe wrapped in a filter sock at the bottom. The pipe needs a consistent downward slope—at least 1 inch per 8 feet—so gravity can work its magic moving water away from your wall.
Clean, angular gravel (½–¾ inch size) surrounds the pipe, creating pathways for water while providing structural support. We wrap this entire gravel-pipe package in geotextile filter fabric, creating what we often call a “drainage burrito” that keeps soil out while letting water flow freely.
The final piece of the puzzle is the outlet—where water safely exits the system. This might be a daylight discharge point on a slope, a dry well for dispersal, or connection to a sump pump in challenging situations. For more details on these options, check out our comparison of Dry Well vs French Drain systems.
How a French Drain Works
The genius of a French drain is how it harnesses gravity—nature’s most reliable force. When rain falls or groundwater rises behind your retaining wall, it naturally seeps into the permeable gravel layer we’ve installed. As water always seeks the lowest point, it filters down through the gravel toward the perforated pipe.
We typically position these pipes with the holes facing downward, which might seem counterintuitive at first. But this orientation actually prevents clogging while still allowing water to enter from below. Once inside the pipe, water follows the gentle slope we’ve created, flowing away from your wall to the outlet point.
The best part? This system works 24/7 with no electricity, no moving parts, and no maintenance headaches. It’s just physics doing what physics does best.
When & Where to Use a French Drain
After 30+ years installing drainage systems throughout Middlesex and Essex Counties, we’ve identified several scenarios where French drains are absolutely essential:
High rainfall areas are prime candidates, and let’s face it—New England weather keeps our drainage systems busy! Our region’s significant precipitation throughout the year makes proper drainage a necessity, not a luxury.
Properties with clay soil benefit tremendously from French drains. Clay acts like nature’s sponge, holding water and dramatically increasing hydrostatic pressure behind walls.
Industry standards recommend drainage for all retaining walls over 2 feet tall. The taller the wall, the greater the potential water pressure—and the more important proper drainage becomes.
French drains also excel at retrofitting existing walls that show early warning signs of water damage. If your wall is starting to lean forward or showing cracks, installing a French drain may save it from complete failure.
Installing a Retaining Wall with French Drain — Step-by-Step Guide
Installing a retaining wall with french drain is like building insurance for your landscape investment. It’s a project that demands attention to detail, but the payoff is a wall that will stand strong for decades instead of years.
Before grabbing your shovel, consider whether this project belongs in your DIY portfolio or if calling in the pros makes more sense:
$30-150 per linear foot (varies by wall type and site conditions)
Warranty
None
Often 1-5 years on workmanship
*Note: These are average costs based on internet data and not actual costs for Gerrior Masonry services. Complex sites with challenging access or soil conditions may cost significantly more, potentially $200+ per linear foot.
Planning & Layout: Slope, Depth, Width
Start with a topographic survey to understand how water naturally flows across your property. The goal is to identify the natural water pathways so you can work with them, not against them.
Determine where your drain will daylight (outlet). This should be downhill from your wall and away from any structures. For your trench dimensions, aim for 18-24 inches deep below the wall base and at least 12 inches wide. The slope should be 1-2% (that’s 1-2 inches of drop for every 8 feet of run).
Before you dig, always call Dig Safe at 811! Once you’re cleared to dig, use stakes and string to mark your trench location, checking your slope with a level as you go.
Materials You’ll Need
For a proper retaining wall with french drain, you’ll need:
4-inch SDR-35 perforated pipe is the industry standard for residential French drains. Clean, angular ¾-inch crushed stone provides both drainage and structural support. Non-woven geotextile fabric is your system’s filter.
You’ll also need a pipe sock (filter sleeve), compaction equipment, and outlet protection like a grate or stone cover.
Start by digging your trench to the planned dimensions, making sure to maintain that critical 1-2% slope. Line the entire trench with filter fabric, leaving enough excess hanging over the sides to fold over the top later. Add a 2-3 inch base layer of crushed stone and compact it well.
Place your perforated pipe with the holes facing DOWN, not up. This actually helps prevent clogging, as water enters from below where there’s less sediment. Check your slope again with a level—this is crucial for proper drainage.
Cover the pipe with more crushed stone, then fold the fabric over like you’re closing a burrito, overlapping any seams by at least 6 inches. Add your final layer of stone if needed, compacting in lifts no more than 6 inches thick.
Maintenance, Retrofits & Future Innovations
Even the best retaining wall with french drain system needs some TLC to keep it performing year after year. Think of it like changing the oil in your car—a little maintenance goes a long way toward preventing bigger problems down the road.
At Gerrior Masonry, we recommend a simple annual maintenance routine that takes just minutes but can save thousands in repairs. Each spring, check those drain outlets—clear away any leaves, soil, or debris that might be blocking water flow.
Every few years (typically 3-5), consider having your drainage pipes professionally flushed. This removes any sediment that’s gradually accumulated inside.
Be mindful of landscaping choices near your drainage system. Those beautiful maple trees have aggressive roots that love finding their way into perforated pipes. We recommend keeping trees at least 10 feet away from your drain lines whenever possible.
After heavy rains, take a quick look for any soil erosion around your wall or drain outlet. Catching these issues early prevents them from becoming major problems.
Common Mistakes to Avoid
When it comes to installing a retaining wall with french drain, even experienced DIYers can make critical errors. The most common mistake we see is insufficient slope—water needs gravity to flow, and a perfectly level pipe simply won’t drain. Always ensure your pipe drops at least 1 inch for every 8 feet of run.
Using the wrong stone is another frequent error. Those smooth, rounded pea stones might look nice, but they shift too easily and don’t provide the stability your system needs. Angular crushed stone locks together, creating stable drainage pathways that won’t settle over time.
Filter fabric issues plague many installations. Either it’s missing entirely (leading to clogged pipes within months) or it’s improperly installed, allowing soil to mix with your drainage stone.
Perhaps the most frustrating mistake is the buried outlet. Your drain system needs somewhere to discharge water, and if that outlet gets covered by landscaping or buried during yard work, the entire system backs up.
Average Cost Ranges*
Investing in proper drainage protection varies considerably based on your specific situation and property conditions:
Installing a French drain during initial wall construction typically runs $20–$45 per linear foot
Retrofitting an existing wall costs more, usually $50–$150 per linear foot
Complex sites with access challenges or difficult soil conditions can reach $200+ per linear foot
Additional features like dry wells or multiple outlet points add $300-900 each to the project
*These are average costs based on internet data and not actual costs for Gerrior Masonry services.
When considering these costs, repairing or replacing a failed retaining wall often costs 3-5 times more than getting it right the first time.
The drainage technology landscape continues to evolve with exciting innovations. Sensor-equipped smart drains can now monitor water levels and flow rates, alerting homeowners to potential issues before they become problems. Bio-swales offer environmentally friendly alternatives that filter water naturally while adding beauty to your landscape.
For more comprehensive information about drainage options beyond French drains, visit our detailed guide to Drainage Systems & Dry Wells.
Frequently Asked Questions about Retaining Wall Drainage
Do walls under 2 ft really need drains?
This is one of the most common questions we hear at job sites across Middlesex County. While industry guidelines often suggest that walls under 2 feet may not require extensive drainage, our experience in New England tells a different story.
The short answer? Yes, even small walls benefit from basic drainage.
Our region’s freeze-thaw cycles can be brutal on masonry structures. When water freezes behind a wall, it expands with tremendous force – enough to move even substantial structures over time.
For walls under 2 feet, we typically recommend a simplified system that includes:
– Gravel backfill behind the wall
– Geotextile separation fabric to prevent soil migration
– Weep holes if using solid materials like block or stone
– Proper surface grading away from the wall
The investment in these basic drainage elements is minimal – often just 10-15% of your total project cost – but the payoff in extended wall life and reduced maintenance is substantial.
How deep should the French drain sit behind the wall?
Proper placement of your retaining wall with French drain is crucial for system effectiveness. The drain should typically be positioned at or slightly below the bottom of the wall footing. This strategic placement ensures it captures water before it can accumulate and create pressure against the wall foundation.
For most residential retaining walls we install in the Woburn area:
– We dig the trench 18-24 inches deep (always below the frost line in our Massachusetts climate)
– The pipe sits on a 2-3 inch bed of crushed stone for stability and initial filtration
– The entire assembly remains protected from potential frost heave
This careful placement allows the drain to intercept groundwater before it reaches the wall while providing enough cover to protect the pipe from damage.
Can I tie gutter downspouts into the French drain?
I understand the temptation – you’ve got water from your roof and you’ve got a drainage system behind your wall. Why not connect them? Unfortunately, this is generally not a good idea for several important reasons.
First, volume concerns are significant. A typical roof can generate hundreds of gallons of runoff during even moderate rainfall. French drains are designed primarily for groundwater management, not the concentrated deluge from downspouts.
Second, debris issues create maintenance headaches. Leaves, twigs, and roof granules can quickly clog a French drain system designed with small perforations for groundwater entry.
Instead, we recommend these safer alternatives:
– Direct downspouts away from the wall using extensions or underground solid pipe
– Create a separate drainage system specifically designed for roof runoff
– Ensure downspout discharge points are at least 10 feet from any retaining wall
Conclusion
A retaining wall with french drain isn’t just a construction best practice—it’s essential insurance for your landscape investment. Throughout this guide, we’ve seen how proper drainage transforms a vulnerable structure into a resilient, long-lasting feature of your property.
The numbers tell a compelling story: walls with proper drainage systems typically last 2-3 times longer than those without. Think about that—the difference between a wall that needs replacement in 10 years versus one that stands strong for 30 years or more.
For simple walls on naturally well-draining sites, handy homeowners might successfully tackle installation themselves. But most retaining wall projects in our New England soil conditions benefit tremendously from professional expertise. Complex slopes, walls over 3 feet tall, or sites with clay soil really demand the knowledge and equipment that comes with years of experience.
Want to learn more about how we can help with your retaining wall project? Visit our Landscape Retaining Wall page for additional details and inspiration.
Gerrior Masonry & Landscaping—serving Woburn, MA and all of Middlesex & Essex County—has 30+ years of expert hardscaping experience to keep your retaining walls standing tall and dry. When we build a wall, we’re not just creating something that looks beautiful today—we’re constructing a feature designed to improve your property for decades to come.
Foundation repair Andover MA: 7 Proven Tips for Stress-Free Results 2025
Protecting Your Andover Home: Foundation Repair Essentials
Foundation repair Andover MA services typically range from $500-$12,000 depending on the severity and type of damage. For immediate help with foundation issues, consider reaching out to experienced local professionals who can properly assess your home’s needs.
Foundation issues in Andover homes are particularly common due to the region’s freeze-thaw cycles, heavy rainfall, and snowmelt that can cause significant stress on structural elements. When left unaddressed, small cracks can quickly develop into major structural problems that threaten your home’s safety and value.
I’m Joe Gerrior, owner of Gerrior Masonry & Landscape Construction Corp., and I’ve been providing expert foundation repair Andover MA solutions for over 34 years, helping homeowners address everything from hairline cracks to severe structural issues that require comprehensive stabilization.
Why This Guide Matters
Your home is likely your largest investment, and its foundation is quite literally what everything else rests upon. In Andover, where many homes date back decades or even centuries, foundation issues are not just common—they’re practically inevitable at some point.
This guide matters because:
Home Value Protection: Foundation problems can decrease your property value by 10-15% and make selling difficult
Safety Concerns: Structural issues can compromise the safety of your entire home
Cost Savings: Early intervention typically costs a fraction of what major repairs do
Peace of Mind: Understanding what’s happening beneath your feet helps you make informed decisions
As one Andover homeowner told us after we repaired their foundation: “I used to worry every time it rained heavily. Now I sleep soundly knowing my home is secure and protected.”
Spotting & Understanding Foundation Problems in Andover
Living in Andover means your home faces unique challenges from our New England weather and soil conditions. After three decades of fixing foundations across Essex County, I’ve seen how quickly small issues can become major headaches for homeowners.
The telltale signs of foundation trouble often start subtly. You might notice cracks wider than 1/8 inch zigzagging across your basement walls, or perhaps your walls have begun bowing or bulging inward—a clear sign that soil pressure is pushing against your foundation. Many homeowners first realize something’s wrong when doors or windows suddenly stick, which happens when frames shift out of square due to foundation movement.
A damp basement isn’t just unpleasant—it’s often your foundation crying for help. Water intrusion through cracks can lead to serious structural issues if left unchecked. Our team at Gerrior Masonry has helped countless Andover residents address these problems through our Foundation Repair services.
“In Andover, we often see foundation problems that have been developing for years before homeowners notice them,” explains our senior mason with over 25 years of experience. “The sooner you identify these issues, the easier and less expensive they are to fix.”
Understanding what different types of cracks mean can help you determine how worried you should be:
Crack Type
Characteristics
Severity
Typical Solution
Vertical
Straight up-down, often hairline
Usually non-structural
Epoxy/urethane injection
Horizontal
Run side-to-side on walls
Structural concern
May require wall stabilization
Stair-step
Follow mortar joints in block/brick
Moderate to serious
Depends on width and movement
Floor cracks
In basement or slab foundation
Varies by width
May indicate settlement issues
Diagonal
Angled across foundation wall
Often structural
Professional evaluation needed
Early-Warning Signs You Can’t Ignore
Your home will whisper before it shouts. Pay attention to these subtle warnings that foundation issues are developing:
Walking across uneven floors might seem like a quirk of an older home, but when that marble your grandchild left on the floor keeps rolling to the same corner, it’s time to investigate. Similarly, a leaning chimney isn’t just a visual oddity—it’s often a red flag that your foundation is shifting.
That musty odor you’ve been trying to mask with air fresheners? It’s likely moisture seeping through foundation cracks, creating the perfect environment for mold growth. And if you’ve noticed an uptick in insect invasions, those tiny creatures may be finding entrance through foundation gaps too small for you to spot.
The appearance of mold or mildew, especially in basement corners or lower walls, signals moisture problems that frequently trace back to foundation issues. As one Andover homeowner finded: “I noticed my kitchen cabinets seemed slightly uneven. I thought it was just poor installation until our inspection revealed foundation settlement on that side of the house. Catching it early saved us thousands.”
How Serious Is That Crack?
Not every crack means disaster, but knowing the difference is crucial for Andover homeowners:
Vertical cracks often result from normal settling as your home ages. While they should be monitored, they’re typically less concerning than other types—unless they’re wider than 1/8 inch or leaking water.
Horizontal cracks tell a different story. These suggest serious pressure against your foundation walls and warrant immediate professional attention. We’ve seen too many Andover homeowners wait until these cracks lead to wall failure.
When you spot step-cracks climbing your brick or block foundation like a staircase, it usually indicates uneven settlement that requires evaluation. Any bulges or outward pushing of foundation walls signals potential structural failure that needs urgent attention.
Perhaps most important is the rate of change. A crack that grows noticeably over weeks or months is far more concerning than one that’s remained stable for years.
“I tell Andover homeowners to take a photo of any crack they find and date it,” says our foundation specialist. “Check it again in a month. If it’s growing or widening, that’s when you need professional help right away.”
For homes with cinder block foundations, which are common in parts of Andover, we offer specialized Cinder Block Foundation Repair services to address their unique challenges.
Foundation problems rarely improve on their own. The sooner you address these issues, the more options you’ll have for repair—and the less you’ll ultimately spend to protect your home.
Why Foundations Fail: Climate, Soil & Risks of Delay
The unique environmental conditions in Andover create a perfect storm for foundation challenges. As a mason who’s worked in the area for decades, I’ve seen how our local conditions can stress even the best-built foundations.
Glacial till soils throughout Andover contain an unpredictable mix of clay, sand, and rocks—a direct result of our region’s geological history. This soil composition doesn’t just shift seasonally; it responds dramatically to moisture changes throughout the year.
Freeze-thaw cycles put tremendous pressure on foundations as New England winters force soil to expand when frozen and contract when thawed. This constant pushing and pulling creates microfractures that gradually widen over time.
“I’ve repaired foundations all over Essex County, but Andover homes face unique challenges due to the combination of soil composition and weather patterns,” explains our structural assessment specialist. “The yearly temperature swings here create more foundation movement than many other regions.”
Heavy rain and snowmelt are particularly problematic in Andover. When water saturates the soil around your foundation, it creates hydrostatic pressure—essentially water pushing against your foundation walls with surprising force. This pressure finds every weakness in your foundation and exploits it.
Mature tree roots near your home might provide beautiful shade, but they’re silently extracting moisture from the soil, causing shrinkage and settlement around your foundation. A large oak can remove dozens of gallons of water daily from the surrounding soil!
Many homes in Andover also face challenges from about Andover historical building practices. With numerous homes dating back many decades, aging infrastructure means foundations built 50+ years ago with materials that naturally deteriorate over time.
The erosion threats in our region shouldn’t be underestimated either. Andover’s sloping terrain in many neighborhoods means water runoff can gradually wash away supporting soil around foundations, particularly during our heavy spring rains.
Another less-discussed concern is radon intrusion. As foundation cracks develop, they can allow this naturally occurring gas to enter your home more easily—a health concern that’s particularly relevant in parts of Massachusetts.
Consequences of Waiting Too Long
Delaying foundation repairs in Andover typically leads to a cascade of increasingly serious problems:
Water damage is usually the first consequence. Once cracks form, even minor rainfall allows moisture to penetrate your foundation, damaging flooring, walls, and personal belongings. That small seepage can quickly become streams during heavy downpours.
Mold growth follows water intrusion almost inevitably. The moisture entering through foundation cracks creates ideal conditions for harmful mold varieties that can affect your family’s health and require expensive remediation.
Perhaps most concerning to homeowners is the reality of escalating repair costs. What might start as a $1,500 crack repair can quickly become a $15,000+ structural project if left unaddressed. This financial reality makes early intervention crucial.
When it comes time to sell, foundation issues must be disclosed and typically result in a decreased property value of 10-15%. Many potential buyers simply walk away rather than deal with foundation concerns, no matter how much they love other aspects of your home.
Most seriously, severe foundation problems can compromise your home’s safety hazards. Structural integrity isn’t just about resale value—it’s about your family’s wellbeing.
As one Andover homeowner learned the hard way: “We noticed a small crack in 2018 but thought it wasn’t serious. By 2021, that crack had widened enough to allow water in during heavy rains, causing mold in our finished basement. What would have been a simple repair became a major renovation project costing more than triple the original estimate.”
The science backs up these concerns. According to scientific research on soil pressure, the specific soil composition in Essex County creates particularly challenging conditions for foundation stability compared to many other regions in the Northeast.
Foundation repair Andover MA: Solutions, Process & Timelines
When it comes to foundation repair Andover MA solutions, we at Gerrior Masonry & Landscaping understand that every home is unique. After more than three decades of serving Andover homeowners, we’ve developed customized approaches that address everything from minor cracks to major structural concerns.
Foundation repair Andover MA: Interior Injection Methods
The most common repairs we perform involve sealing foundation cracks from the inside. This process starts with thoroughly cleaning the crack to remove any loose concrete, dust, or debris. This preparation step is crucial – even the best materials won’t adhere properly to a dirty surface.
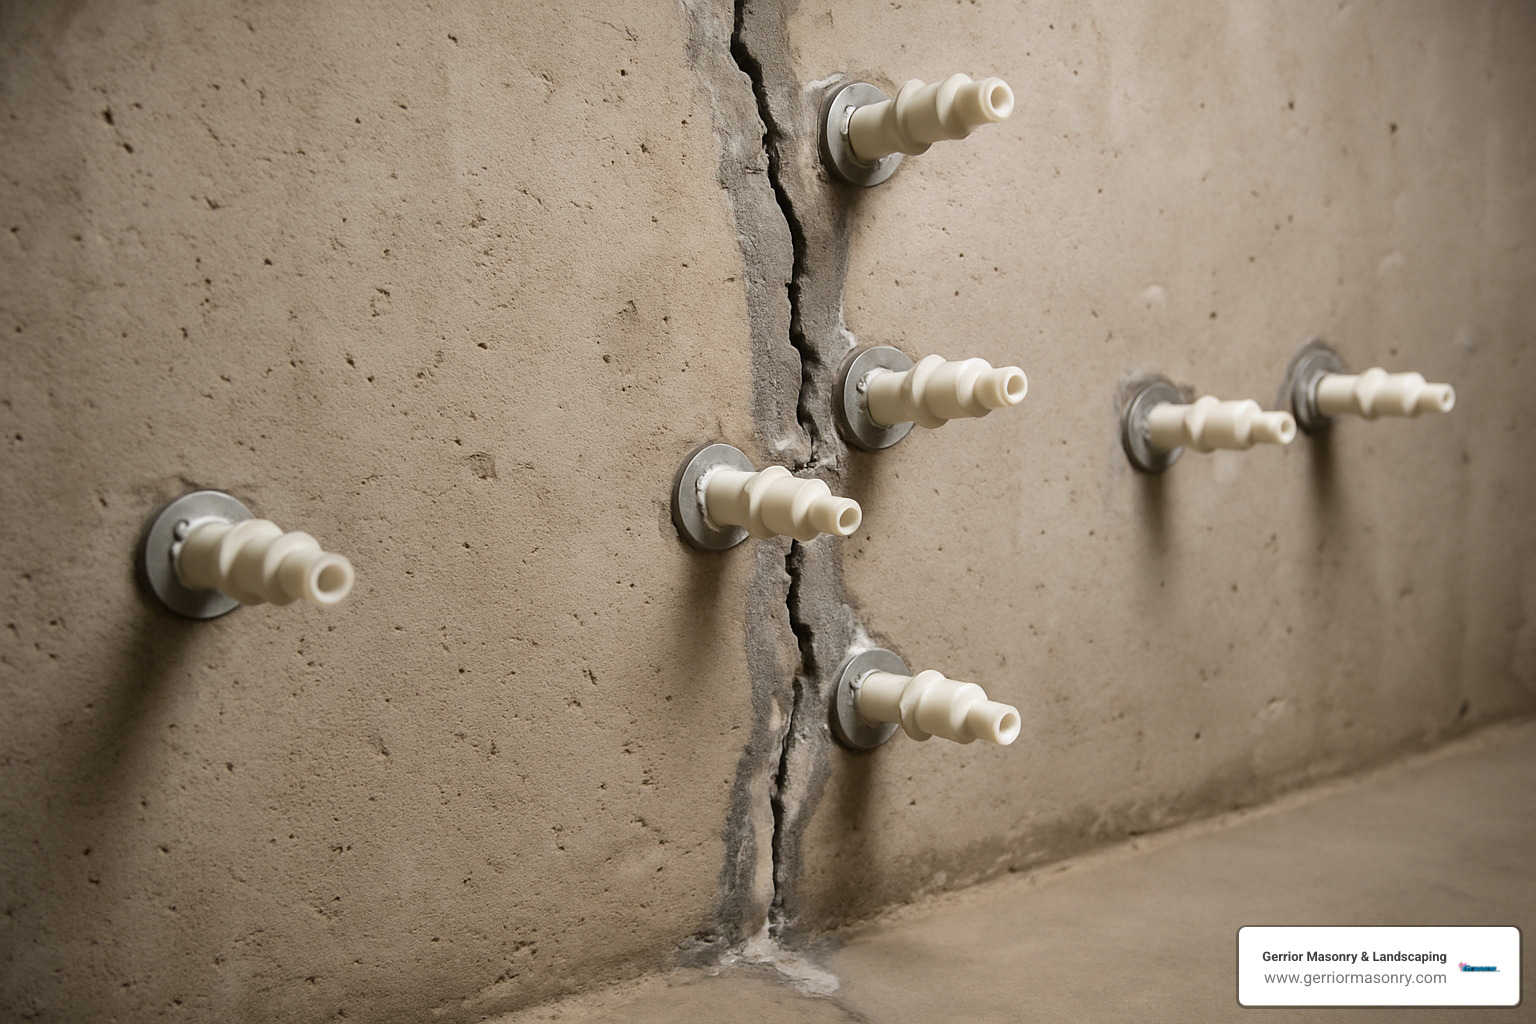
Next, we install injection ports along the crack, typically spaced 8-12 inches apart. These small plastic ports allow us to deliver repair materials deep into the crack. We then inject either epoxy or polyurethane, depending on whether the crack is actively leaking water.
“I was amazed at how clean the whole process was,” Mary from Andover told us after we completed her basement repair. “The team explained everything, contained their work area perfectly, and finished the job in just one afternoon. My basement has stayed bone-dry through several nor’easters since then.”
The injection material needs 24-48 hours to fully cure, but the process itself is typically completed in a single day. This approach works beautifully for vertical cracks under 1/4 inch wide and hairline cracks that might worsen without treatment. For more information on this technique, visit our Foundation Repair page.
Foundation repair Andover MA: Exterior Stabilization Options
When your foundation issues go beyond simple cracks, we offer several structural reinforcement options. For bowing walls, carbon fiber straps provide an excellent, minimally invasive solution. These industrial-strength reinforcements can stabilize walls without requiring exterior excavation.
For homes experiencing settlement, helical piers offer powerful support. These screw-like devices are driven deep into stable soil layers beneath your home. Similarly, push piers use hydraulic pressure to lift and stabilize foundations that have settled.
In cases of severe soil pressure, soil anchors counteract the force pushing against your foundation walls. As Tom, an Andover homeowner, shared: “Our 1920s Colonial had a seriously bowing foundation wall. I feared we’d need to rebuild it entirely, but Gerrior installed carbon fiber reinforcement that completely stabilized the wall without disturbing our landscaping. Five years later, everything’s still perfectly straight.”
For the most severe cases, we do need to excavate around your foundation. This process involves carefully exposing the affected walls, applying professional-grade waterproofing membranes, installing proper drainage systems, reinforcing the structure as needed, and then properly backfilling and restoring your yard. While more intensive, this approach solves even the most challenging foundation problems. For specific techniques used on block foundations, see our Cinder Block Foundation Repair page.
How Long Does It Take & Can You Stay Home?
One of the first questions homeowners ask is how long repairs will take and whether they’ll need to relocate. The good news is that most foundation repairs allow you to stay in your home throughout the process.
Timelines vary based on the repair method:
– Simple crack injections typically take just one day, with a brief 24-48 hour curing period
– Carbon fiber reinforcement installations are usually completed in 1-2 days
– Interior waterproofing systems require 2-5 days depending on your basement size
– Pier installations generally take 3-7 days, varying with the number needed
– Complete excavation and exterior waterproofing projects can take 1-2 weeks
Our crews take pride in minimizing disruption to your daily life. We establish clean work areas with dust barriers, create clear pathways through your home, schedule work during convenient hours, and keep noise to a minimum.
“I was convinced we’d need to move out during our foundation work,” shared Sarah from Andover. “But the Gerrior team was so professional—they contained their work area beautifully and coordinated their schedule around our family’s needs. We never had to leave home, and the whole process was far less stressful than I expected.”
Protecting Your Investment: Costs, Insurance, Contractors & Prevention
When it comes to foundation repair Andover MA, understanding the costs and finding the right professionals can feel overwhelming. Let’s break it down in a way that makes sense for your home and budget.
Foundation Repair Costs in Andover
“How much is this going to set me back?” It’s often the first question homeowners ask. Based on internet data and industry averages (not specific to Gerrior Masonry pricing), you might expect to pay:
For a simple crack injection, costs typically range from $500-$1,500, while more comprehensive interior waterproofing might run between $3,000-$9,000. If your walls need structural reinforcement, carbon fiber solutions generally cost $4,000-$12,000, and pier installation could range from $5,000-$15,000+. In extreme cases where complete foundation rebuilding is necessary, internet averages suggest $20,000-$100,000+.
Mary, an Andover homeowner, shared her experience: “The cost was significant, but Gerrior Masonry walked me through every expense line by line. They helped me prioritize the critical repairs first, and honestly, preventing further damage has already made the investment worthwhile.”
What drives these costs? Several factors come into play:
Your foundation type matters tremendously—poured concrete, block, or historic stone foundations each require different approaches. Accessibility can dramatically affect labor costs (tight crawlspaces are more challenging than open basements). The extent of water damage, any structural concerns, and additional waterproofing needs all influence the final price tag.
Many Andover homeowners find that financing options or phased repair approaches can make these projects more manageable. Some repairs may even qualify for home improvement loans with favorable terms, especially when they address safety concerns.
Choosing the Right Contractor in Andover
Finding a trustworthy foundation repair Andover MA specialist requires doing your homework. The right contractor should have deep local experience with Andover’s unique soil and weather patterns. Always verify proper licensing and insurance—this protects both you and the workers on your property.
Be wary of vague estimates. Quality contractors provide detailed written proposals outlining exactly what work will be performed and which materials will be used. Ask for references from Andover homeowners with similar foundation types to yours.
“After three estimates, we chose Gerrior Masonry because they actually explained what was happening with our foundation and why,” explains Robert from Andover. “They weren’t the cheapest or the most expensive, but their knowledge and thoroughness won us over.”
Pay special attention to warranty terms. Quality repairs should come with warranties that transfer to new owners if you sell your home. At Gerrior Masonry, we believe in standing behind our work long-term, giving you peace of mind for years to come.
Perhaps most importantly, look for companies where owners maintain direct involvement. When Joe Gerrior personally oversees projects, it reflects our commitment to quality that larger, less personal operations simply can’t match.
Prevention Strategies for Andover Homes
An ounce of prevention is worth a pound of cure—especially when it comes to foundation health. The science behind soil pressure shows how proper drainage can dramatically reduce foundation stress.
Proper drainage starts with functioning gutters that direct water at least 6 feet away from your foundation. Many Andover homes benefit from drainage systems around the house that manage our region’s heavy precipitation.
Maintain a proper slope around your home that gently directs water away from your foundation—aim for a drop of at least 6 inches over the first 10 feet from your foundation walls. This simple grading can prevent thousands in repair costs.
Be mindful of tree placement. Those beautiful maples are wonderful for shade, but their aggressive root systems can destabilize your foundation when planted too close. Keep large trees at least 20 feet from your foundation.
Seasonal maintenance matters too. Clear gutters before winter and spring rains, and consider using dehumidifiers in basements to reduce condensation and moisture levels that can contribute to foundation deterioration.
“Simple maintenance saved my foundation,” says Jennifer from Andover. “After extending my downspouts and fixing the grading around my 1920s home, my previously damp basement has stayed dry through three New England winters.”
Quick-Fire FAQs
When does homeowners insurance pay for foundation repairs?
Typically, insurance covers sudden events like burst pipes but not gradual deterioration or settling. Check your specific policy and consider adding riders for water backup or sump pump failure.
How long do quality foundation repairs last?
Professional repairs should last the lifetime of your home. At Gerrior Masonry, we provide warranties designed to give you confidence in our work for years to come.
What are the risks of DIY foundation repairs?
While minor cosmetic cracks might be DIY-appropriate, structural issues require professional expertise. DIY attempts on serious problems often lead to more costly repairs down the road—sometimes doubling or tripling what you would have initially paid.
Will foundation work affect my property assessment?
Properly documented repairs typically protect your home’s value rather than increasing your tax assessment. They demonstrate proper maintenance, which preserves long-term value.
The peace of mind that comes with professional foundation repair Andover MA services is invaluable. When your home stands on a solid foundation, you can focus on enjoying life rather than worrying about what’s happening beneath your feet.
Gerrior Masonry & Landscape Construction is based in Woburn, MA, and proudly services Middlesex and Essex County, Massachusetts.
Conclusion
Foundation issues can be intimidating for Andover homeowners, but with proper knowledge and professional assistance, even serious problems can be effectively addressed. The key is early detection and prompt intervention before small issues become major structural concerns.
When you notice signs of foundation problems—whether it’s a small crack, sticking doors, or water seepage—remember that these are often warning signs of underlying issues that won’t resolve themselves. Professional evaluation is the crucial first step in protecting your home.
At Gerrior Masonry & Landscaping, we’ve been serving Andover homeowners for over three decades, providing honest assessments and lasting repairs. Our approach focuses on identifying the root cause of foundation issues, not just treating symptoms, to ensure long-term stability and protection.
Your home’s foundation supports everything you value—from the structure itself to the memories you create inside it. Investing in proper foundation care is truly an investment in your family’s security and comfort.
For expert foundation repair Andover MA services you can trust, reach out to Gerrior Masonry & Landscape Construction Corp. We’re based in Woburn, MA, and proudly serve homeowners throughout Middlesex and Essex County, Massachusetts.
Drainage Around Foundation: 5 Essential Improvements
Drainage around foundation is crucial for safeguarding your home against structural issues and moisture damage. A well-maintained foundation ensures the stability of your property, preventing water from compromising its integrity. Here are three foundational solutions for enhancing drainage:
Proper Grading: Slope your yard away from the foundation to guide water flow.
Gutter Efficiency: Install and maintain gutters to redirect rainwater from the roof to safe discharge areas.
Foundation Drainage Systems: Implement exterior drains with permeable covering to prevent moisture buildup.
Addressing drainage around foundation can save you from costly repairs. This step is particularly vital for homeowners in Massachusetts where heavy rains and snow can challenge home foundations.
My name is Joe Gerrior, and with over 34 years in the industry, I’ve seen how important proper drainage around foundation is for maintaining the longevity and safety of homes. I’m here to guide you through effective strategies to protect your investment.
When it comes to protecting your home, drainage around foundation is a key player. Water is sneaky, and it can slowly damage your home if not properly managed. Let’s break down the essentials of foundation drainage so you can keep your home safe and sound.
What is Foundation Drainage?
Foundation drainage refers to systems and techniques designed to channel water away from your home’s foundation. Without it, water can accumulate and cause significant damage over time. This is especially true in areas like Massachusetts, where heavy rain and snow can wreak havoc on homes.
The Role of Exterior Foundation Drains
Exterior foundation drains are installed along the outer walls of your home. They act as a barrier, preventing water from seeping into the foundation. Think of them as your home’s first line of defense against water intrusion.
These drains are typically made up of perforated pipes that collect water and direct it away from the house. They are essential for reducing hydrostatic pressure, which can lead to cracks and leaks in the foundation.
Gravel and Soil Cover: A Winning Combination
To improve the effectiveness of these drains, a layer of gravel is often used. This gravel layer allows water to flow freely into the drain pipes without clogging them. On top of the gravel, a layer of soil is added to direct surface water away from the foundation.
Here’s a simple breakdown of how it works:
Gravel: Promotes easy water flow and prevents pipe clogging.
Soil Cover: Directs surface water away from the foundation.
This combination not only aids in water diversion but also helps prevent soil erosion around the foundation, preserving the structural integrity of your home.
By understanding and implementing these foundation drainage techniques, you’re taking proactive steps to protect your most valuable asset—your home.
Now that you know the basics of foundation drainage, let’s dive into the different types of systems you can use to keep your home dry and safe.
Types of Foundation Drainage Systems
When it comes to keeping your home dry and safe, choosing the right drainage around foundation is crucial. Let’s explore some of the most effective systems available.
French Drain
The French drain, also known as a weeping drain, is a popular choice for homeowners. It consists of a perforated pipe wrapped in landscape fabric and surrounded by gravel. This setup allows water to seep into the pipe and be directed away from the house.
Pros:
Reduces risk of water damage by preventing flooding.
Lasts between 30 and 40 years.
Cost-effective and blends well with landscaping.
Cons:
Installation can be lengthy and costly.
May require removal of existing structures like decks or walkways.
Not suitable for homes near water sources or utility lines.
Footing Drainage
Footing drainage is similar to the French drain but is installed at the level of the foundation’s footing. It effectively channels water away from the foundation to a sump pump, sewer, or nearby body of water.
Pros:
Prevents water accumulation, reducing settlement risk.
Can last up to 50 years with proper installation.
Cost-effective solution for new foundations.
Cons:
Installation is costly, typically done during foundation construction.
Requires maintenance to prevent mud clogging.
Potential for nitrate contamination in nearby water bodies.
Grading Drainage
Grading drainage involves creating a slope around your home’s perimeter to naturally direct water away from the foundation. It’s one of the simplest and most cost-effective solutions.
Pros:
Naturally redirects water flow, preventing clogs.
Increases usable space for gardening or landscaping.
Inexpensive to implement.
Cons:
Poor installation can lead to water pooling and damage.
Over-saturation can affect garden soils.
Standing water may become a breeding ground for mosquitoes.
Sump Pit and Pumps
Best for areas with heavy rainfall or snowfall, a sump pit and pump system collects excess water and pumps it away from the foundation. It’s a mechanical solution that works well when slopes aren’t enough.
Pros:
Effective in preventing basement flooding.
Can handle large volumes of water.
Provides a safety net for homes with crawl spaces.
Cons:
Relies on electricity, so power outages can be an issue.
Requires regular maintenance and checks.
Installation can be complex and costly.
By understanding these foundation drainage systems, you can make an informed decision to protect your home from water damage. Next, we’ll explore steps to improve drainage around your foundation.
Steps to Improve Drainage Around Your Foundation
Improving drainage around your foundation is essential for maintaining the health and safety of your home. Here are some practical steps you can take:
Gutter Installation
Gutters are your first line of defense against water damage. They collect rainwater from your roof and direct it away from your home’s foundation. Make sure your gutters are properly installed and free of debris. Regular cleaning is crucial to prevent blockages that can lead to water overflow and foundation issues.
Tip: Consider installing gutter guards to minimize leaf and debris buildup.
Downspout Extension
Once the water is collected by your gutters, it needs to be channeled away from your home. Downspout extensions are a simple solution. Extend your downspouts at least 5 to 10 feet away from the foundation to ensure water is safely diverted. This helps prevent water from pooling around the base of your home.
Surface Drainage Improvement
Improving surface drainage involves reshaping the land around your home. This is also known as grading. Ensure that the ground slopes away from your foundation. A slope of 1 inch per foot for at least 6 to 10 feet is recommended. This natural drainage method helps keep water from collecting near your foundation.
Fun Fact: Did you know proper grading can also improve your garden’s usability and aesthetic appeal?
Hardscape Drainage Evaluation
Hardscapes like patios, driveways, and walkways can sometimes hinder drainage if not properly designed. Evaluate these areas to ensure they allow water to flow away from your home. If necessary, consider installing drainage channels or permeable pavers that let water pass through.
French Drains
For more serious drainage issues, a French drain might be the solution. This involves installing a perforated pipe surrounded by gravel to channel water away from your foundation. French drains are particularly effective in areas with high water tables or poor natural drainage.
Case Study: A homeowner in Arlington, MA, installed a French drain and saw a significant reduction in basement moisture issues. This system can last up to 40 years with proper maintenance.
By following these steps, you can significantly improve the drainage around your foundation and protect your home from potential water damage. Next, we’ll address some frequently asked questions about drainage solutions.
Frequently Asked Questions about Drainage Around Foundation
How to fix drainage around house foundation?
Fixing drainage around your foundation starts with a few key strategies:
Gutter Improvement: Ensure your gutters are clean and functioning properly. Blocked gutters can cause water to overflow and seep into the foundation. Consider adding gutter guards to reduce debris buildup.
Downspout Extension: Extend your downspouts to direct water at least 5 to 10 feet away from the house. This simple fix can prevent water from pooling at the base of your foundation.
Surface Drainage: Properly grade the soil around your home. Aim for a slope of 1 inch per foot extending 6 to 10 feet away from the house. This helps channel water away naturally.
What is drainage around foundation called?
The term “drainage around foundation” often refers to a few specific systems:
Footing Drainage: Installed at the foundation’s base, this system helps collect and redirect water away from the home. It’s especially effective in preventing water accumulation around the foundation.
French Drain: A popular option, this involves a perforated pipe surrounded by gravel, directing water away from the foundation efficiently. French drains are known for their durability and effectiveness in managing water flow.
What to put around foundation for drainage?
To improve drainage, consider using the following materials:
Coarse Gravel: Placing gravel around the foundation helps facilitate water flow and prevent soil erosion. It’s a simple yet effective way to improve drainage.
Organic Mulch: While primarily used for landscaping, organic mulch can also help absorb excess water and prevent it from pooling around your foundation. Just ensure it doesn’t touch the foundation directly to avoid moisture buildup.
By addressing these common questions, you can take proactive steps to protect your home from water damage and improve the overall drainage around your foundation.
Conclusion
Protecting your home’s foundation is crucial. Water damage can lead to costly repairs and structural issues. That’s why focusing on drainage around your foundation is so important.
At Gerrior Masonry & Landscaping, we understand the significance of a well-maintained foundation. With over 30 years of experience, we specialize in providing custom solutions to keep your home safe and dry. Our skilled team ensures that every project receives the attention it deserves, from expert evaluations to high-quality installations.
Our approach begins with a comprehensive expert evaluation. We assess your property’s unique requirements and design a drainage system that effectively manages water flow. Whether it’s installing a French drain, improving surface grading, or extending downspouts, we ensure that each solution is both effective and sustainable.
Why trust Gerrior Masonry & Landscaping? Our commitment to excellence and owner oversight guarantees that every project meets the highest standards. We prioritize your home’s safety and longevity, making sure that our drainage solutions not only protect but also improve your property’s value.
Take the first step towards safeguarding your home. Contact Gerrior Masonry & Landscaping for a consultation and let us help you achieve peace of mind with a solid foundation and effective drainage system.