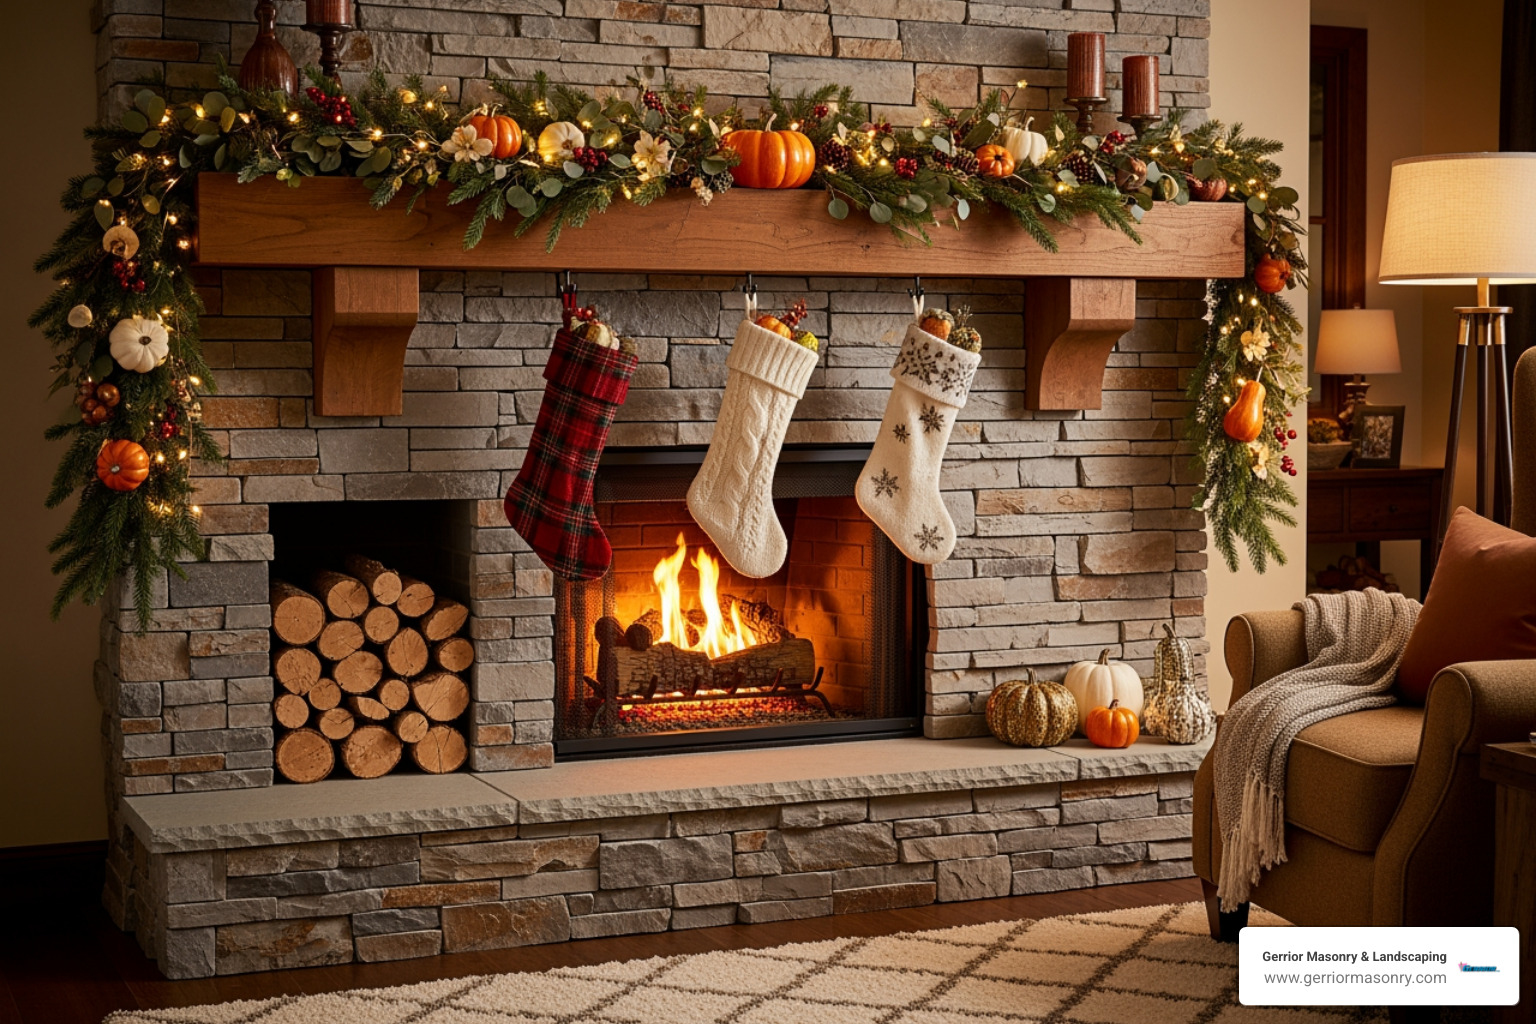
Why Modern Stone Fireplaces Are Changing Living Spaces
Modern stone fireplaces are more than just a heat source; they are a focal point that brings timeless beauty, practical benefits, and significant value to any home.
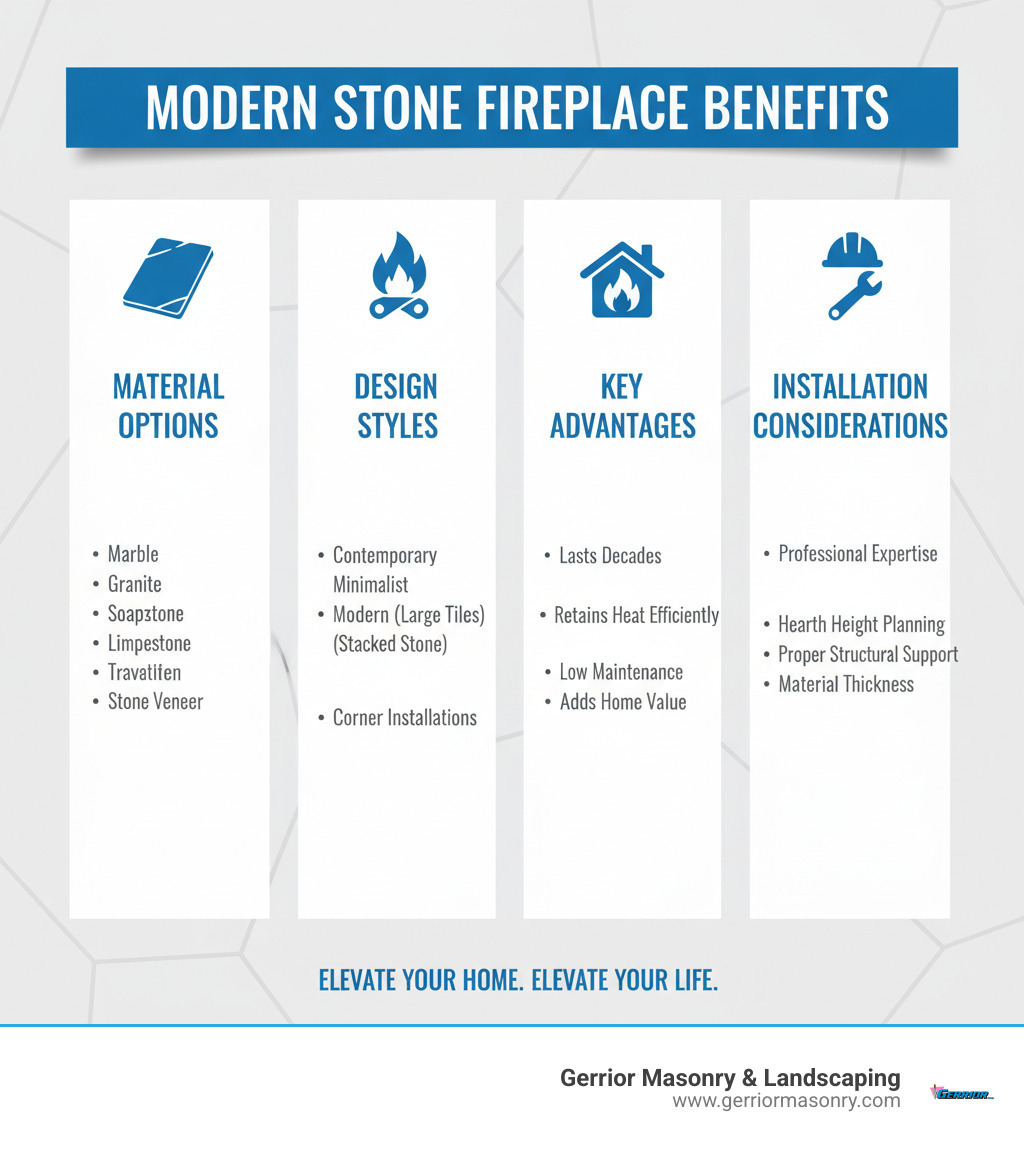
What makes a modern stone fireplace stand out?
Natural Materials: Options like marble, granite, and quartzite add unique texture.
Contemporary Designs: Clean lines and minimalist aesthetics define modern looks.
Durability: Stone lasts for decades with minimal maintenance.
Heat Efficiency: Natural stone retains and radiates heat effectively.
Home Value: A quality stone fireplace is a recognized asset to buyers.
Design Flexibility: Stone complements contemporary, rustic, or minimalist interiors.
Stone fireplaces have evolved from traditional brick structures into works of art, pairing natural materials with sleek profiles to create stunning centerpieces. This shift reflects a desire for lasting beauty, as natural stone is durable, fire-resistant, and easy to maintain. Whether it’s a full-height statement wall or a subtle surround, stone transforms the entire room.
I’m Joe Gerrior, owner of Gerrior Masonry & Landscape Construction Corp. For over 34 years, my team and I have helped Massachusetts homeowners create stunning modern stone fireplaces. We bring artistry and technical expertise to every project, ensuring your fireplace becomes the centerpiece you’ve envisioned.
Gerrior Masonry & Landscape Construction is based in Woburn, MA, and services Middlesex and Essex County, Massachusetts.
The Ultimate Guide to Your Modern Stone Fireplace
Choosing the Perfect Material for Your Modern Stone Fireplace
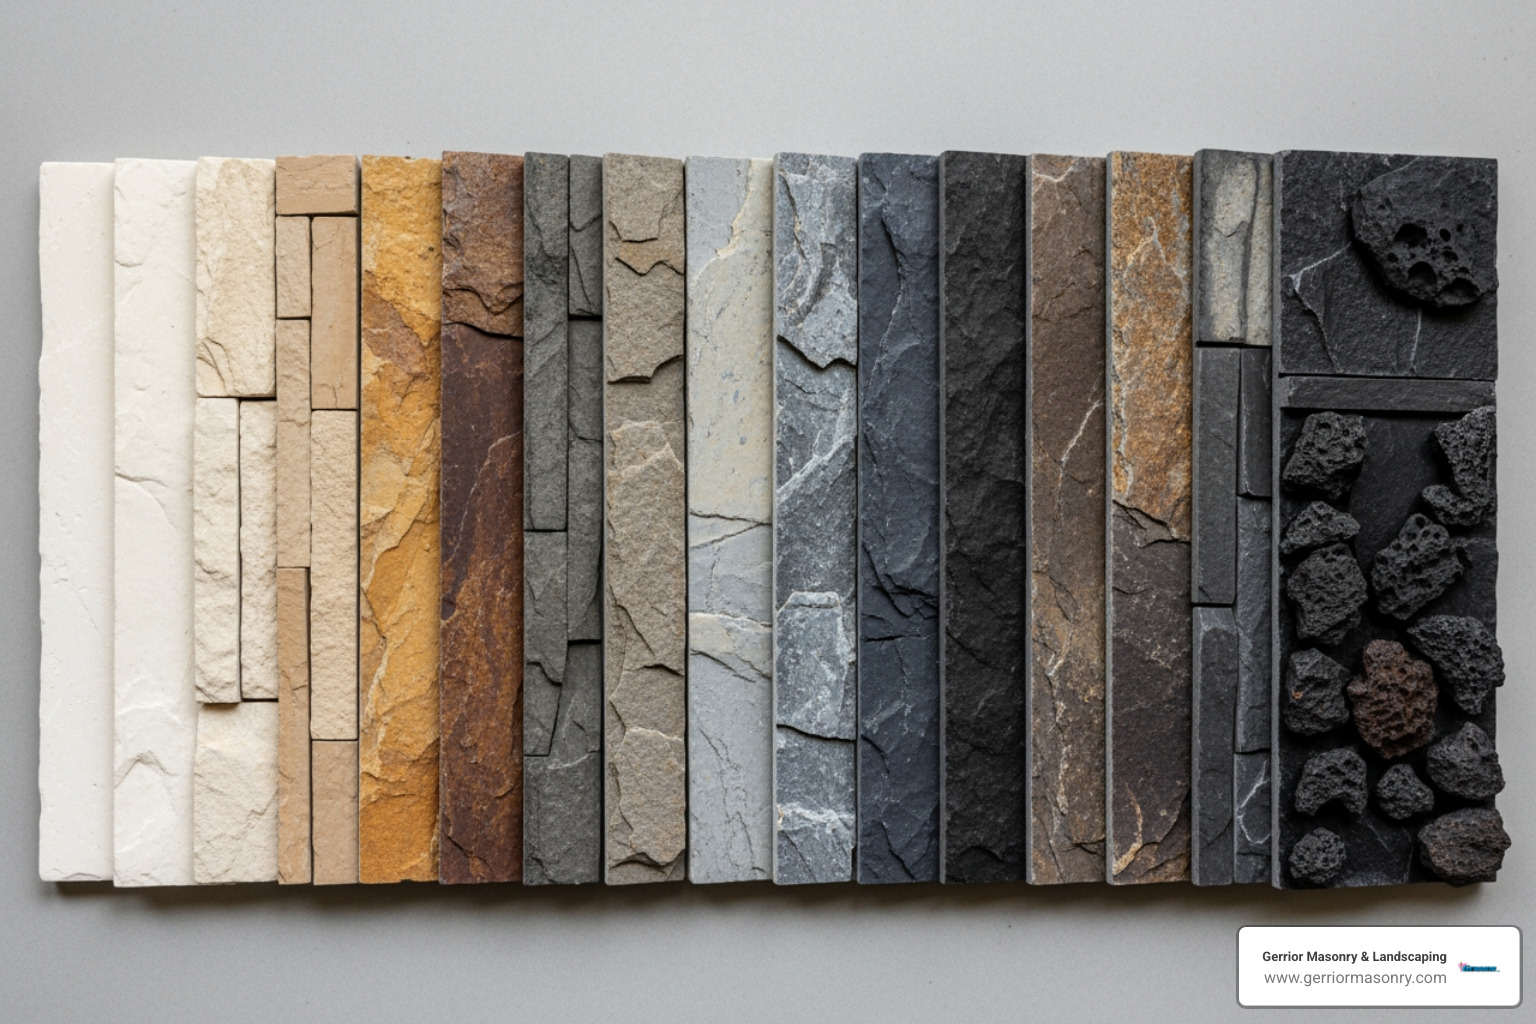
Choosing the right stone for your modern stone fireplace is where the art begins. Natural stone offers character that manufactured materials can’t match, with unique veining and color variations formed over millions of years.
Why Natural Stone Outshines the Rest
The practical benefits are just as impressive. A properly installed stone fireplace will outlast most other features in your home. Stone is naturally fire-resistant and acts like a thermal battery, slowly releasing heat to keep your room cozy. For resale value, a well-crafted modern stone fireplace signals quality and attention to detail. Compared to traditional brick, which can feel dated, natural stone offers a cleaner, more sophisticated presence that fits seamlessly into contemporary homes.
Finding Your Perfect Stone Match
Each type of natural stone brings its own personality to your fireplace:
Marble: The classic showstopper, known for its distinctive veining. It creates a luxurious, one-of-a-kind look but is softer and more porous, requiring regular sealing. Its classic elegance is often associated with high-end interiors, but its porous nature means it is susceptible to staining from soot if not properly sealed and maintained. Popular varieties like Carrara and Calacatta offer distinct veining.
Granite: A durable workhorse that doesn’t compromise on looks. This hard stone resists scratches and heat and comes in countless speckled patterns. It’s less porous than marble but still benefits from sealing. As one of the most durable natural stones, granite is an excellent choice for a high-use fireplace area. Its granular appearance can range from subtle to bold, fitting various modern aesthetics. Sealing is recommended every few years to maintain its stain resistance.
Quartzite: Offers the beauty of marble with the durability of granite. It’s exceptionally hard and resistant to heat, scratches, and etching, making it ideal for active households. Not to be confused with man-made quartz, natural quartzite is a metamorphic rock that is incredibly dense and resilient. This means it won’t easily scratch or etch, making it a worry-free option for a stunning fireplace surround.
Soapstone: Has a unique silky feel and excellent heat-retention properties. This dense, non-porous stone develops a rich patina over time, and minor scratches can often be buffed out. Traditionally used for wood stoves, its ability to absorb, hold, and radiate heat is exceptional. The color, typically a range of grays, deepens over time and can be enhanced with mineral oil, which also helps hide minor scratches.
Limestone: Provides earthy, subtle tones for an inviting atmosphere. Its porous nature requires sealing, and its softer composition allows for beautiful carved details. This sedimentary rock’s soft, muted palette of beiges and grays creates a warm feel. While its softness allows for intricate carvings, it also means it’s more prone to scratches and requires diligent sealing to prevent stains.
Travertine: A type of limestone with a characteristic pitted surface and warm colors. It can be left unfilled for a rustic look or filled and polished for a contemporary feel. Sealing is highly recommended. Formed in mineral springs, its signature pits can be filled for a smooth, modern look or left unfilled for rustic texture. Like other porous stones, it must be sealed to protect its surface.
Exploring Stone Alternatives
Budget or design goals may lead you to alternatives like cast stone or stone veneer.
Cast stone is a manufactured product that convincingly mimics natural stone. It’s made from aggregates and bonding agents, offering controlled color and texture. It’s also lighter than solid stone, which can simplify installation.
Stone veneer consists of thin layers of natural or manufactured stone applied to a surface. It provides impressive visual impact at a lower cost and weight than full-thickness stone. For more on this option, see our Fireplace Veneer Installation Complete Guide.
Here’s a quick comparison:
Feature
Natural Stone
Stone Veneer (Manufactured)
Cost
Higher (Internet Average: $2,000 – $15,000+)
Lower (Internet Average: $500 – $5,000+)
Weight
Heavy, may require structural reinforcement
Lighter, easier to install
Maintenance
Low, but some require periodic sealing
Very low, generally just cleaning
Appearance
Unique, organic, natural variations
Consistent, can mimic many natural stones
Durability
Exceptional, lasts for decades
Very durable, designed for longevity
Please note: All pricing mentioned in this table represents average costs based on internet data and not actual costs for Gerrior Masonry & Landscape Construction services. The high end of these ranges reflects custom or complex installations.
Inspiring Modern Stone Fireplace Design Styles
A modern stone fireplace is a centerpiece that brings a room to life. Modern design is flexible, allowing for timeless yet personal creations.
The Beauty of Less: Contemporary Minimalism
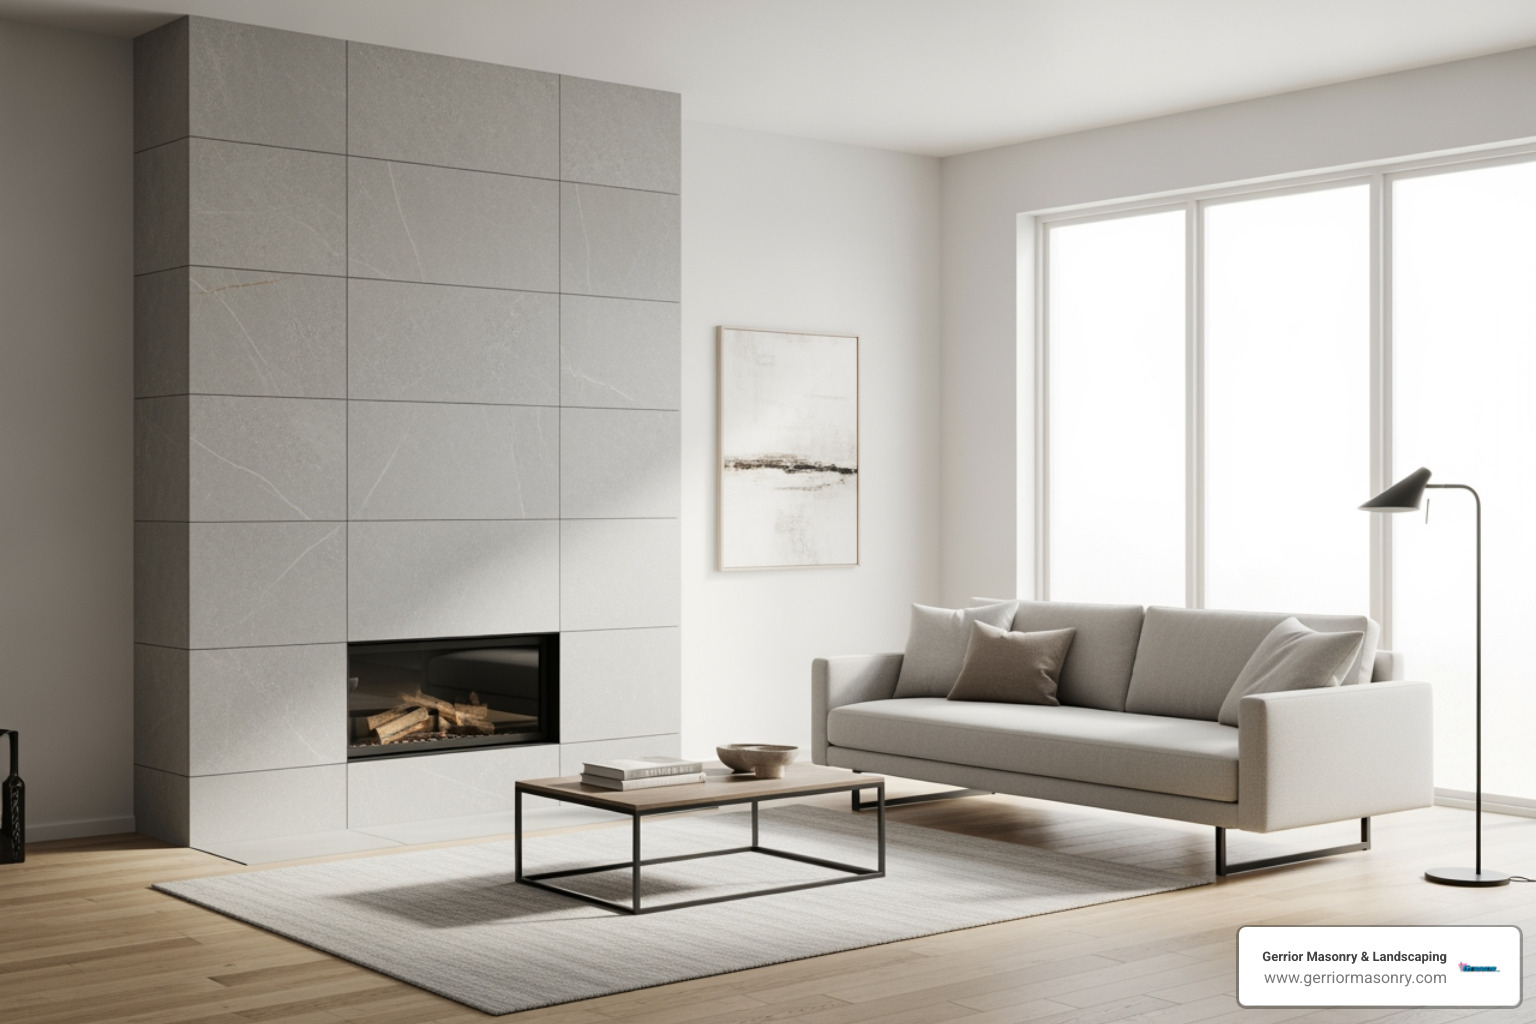
This approach celebrates simplicity with impact. It favors clean lines and bold shapes over ornate details. Heavy mantels are replaced with sharp angles and smooth surfaces, creating a statement through sophisticated restraint. Seamless looks are a hallmark, often achieved with large-format tiles that minimize grout lines for a dramatic, uninterrupted surface. Monochromatic palettes of whites, grays, and blacks let the stone’s natural texture shine, creating a serene backdrop.
Bringing Warmth: Modern Rustic Style
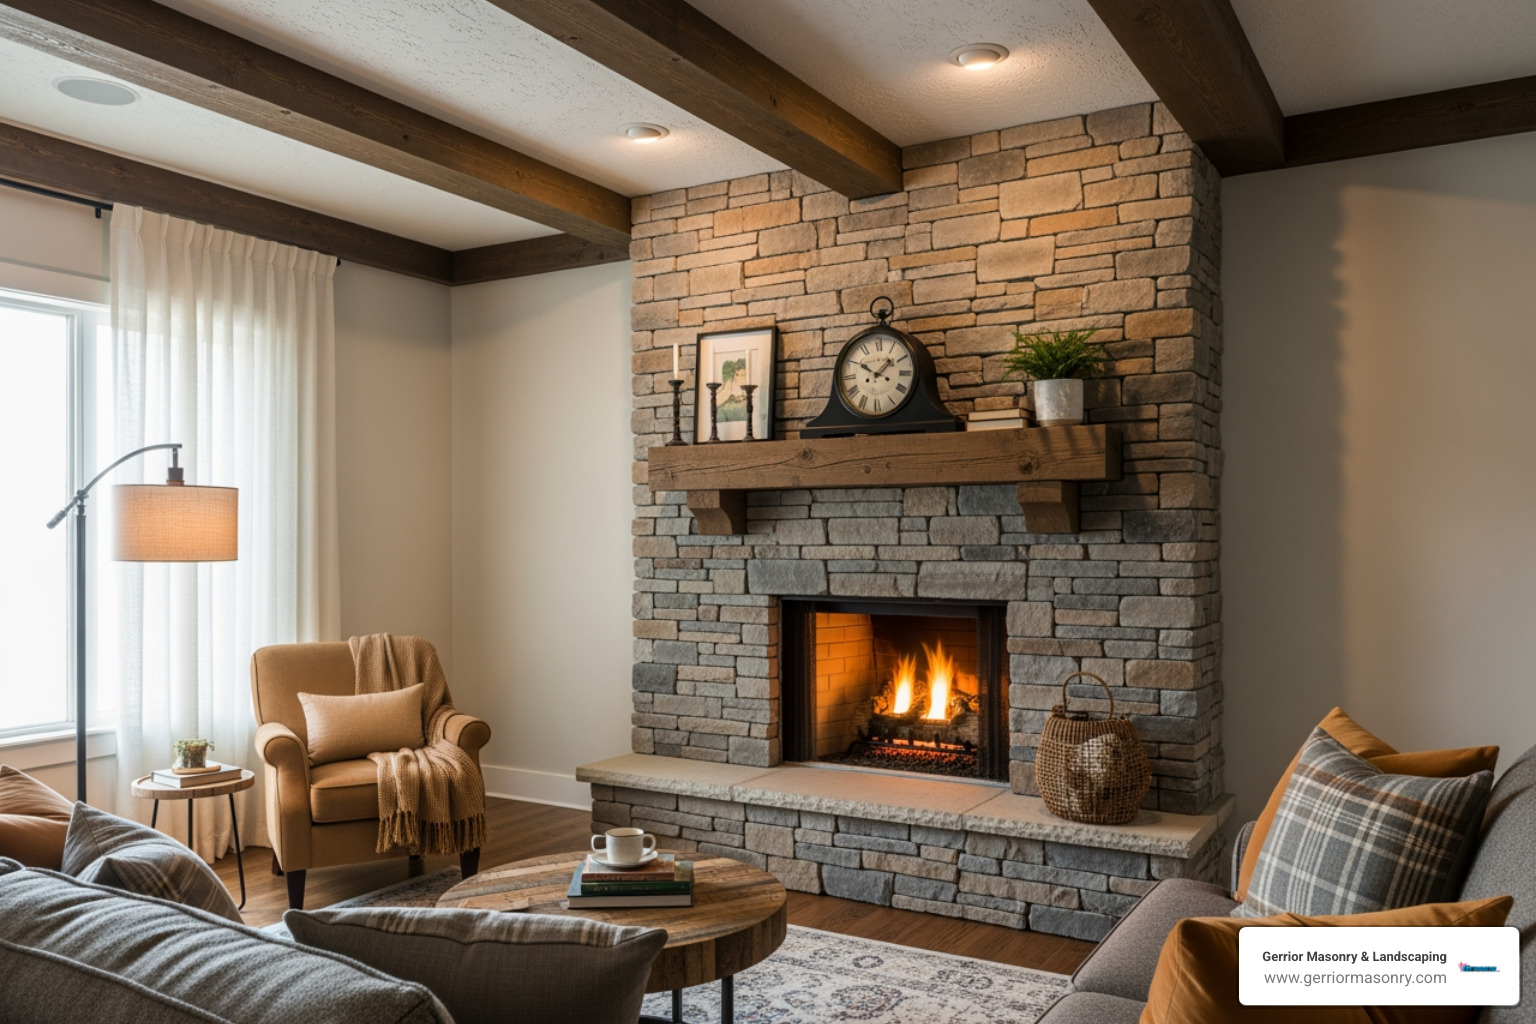
This style blends contemporary design with natural, earthy elements. It accepts the organic feel of stone, using heavier textures and irregular shapes. Stacked stone designs are popular, creating a layered, three-dimensional texture that adds visual interest while maintaining clean lines. A modern rustic fireplace pairs beautifully with leather furniture, industrial lighting, or a reclaimed wood mantel, anchoring the room with warmth and authenticity.
Making the Most of Your Space
Not every fireplace needs to be centered. Corner fireplaces can be stunning focal points in smaller rooms or unique layouts. To create a statement piece, we can play with contrasts, like pairing rustic stone with a smooth limestone surround, or use a floor-to-ceiling installation to add height and drama. Thoughtful design considers the entire room, ensuring your fireplace shines. For more ideas, explore our Fireplace Design Ideas.
Installation & Maintenance Essentials
Bringing your dream modern stone fireplace to life requires careful planning and skilled execution.
Why Professional Installation Matters
Installing a stone fireplace isn’t a weekend DIY project. It involves structural engineering, adherence to strict safety codes like the NFPA 211 standard from the National Fire Protection Association (NFPA), and craftsmanship that takes years to master.
Key considerations include:
Hearth Height: Replacing thinner materials with thicker natural stone can create an awkward height difference with your floor. Professionals can modify the structure for a seamless transition.
Structural Support: Natural stone is heavy. Walls often need reinforcement to support the weight safely and prevent issues down the line.
New Builds vs. Remodels: New construction allows for integrated planning, while remodels can uncover surprises. An experienced team anticipates and manages these challenges.
Choosing a reputable Masonry Contractor ensures your project is handled by experts who can solve problems and deliver a beautiful, safe installation.
Keeping Your Stone Looking Stunning
Natural stone is remarkably low maintenance. For everyday cleaning, simply wipe it down with a soft, damp cloth and a pH-neutral cleaner designed for stone. Avoid harsh or abrasive chemicals.
Many porous stones like marble and limestone require periodic sealing to protect against soot and spills. If soot accumulates, clean it promptly with a stone-safe cleaner and a soft brush. For issues with mortar joints or the stone itself, professional help is best. Timely Fireplace Mortar Repair or using the correct Fireplace Cement can prevent small issues from becoming big problems.
Finalizing Your Fireplace Project
You’ve explored the materials and designs to create your perfect fireplace. Now, it’s time to bring that vision to life.
A modern stone fireplace is an investment in your home’s beauty and value. The right material—from dramatic quartzite to versatile stone veneer—sets the tone, while a thoughtful design ensures it becomes a true focal point.
However, the most critical element is professional craftsmanship. Navigating structural requirements, material specifications, and safety codes is not a DIY task. It requires the experience and attention to detail that only a seasoned team can provide.
At Gerrior Masonry & Landscape Construction, we’ve spent over 30 years perfecting our craft. Our team understands stone, and every project receives owner oversight to guarantee exceptional results. We take pride in creating fireplaces that anchor a room and invite people to gather.
Why Choosing the Right Driveway Paver Installers Makes All the Difference
Driveway paver installers transform your home’s entrance from a simple concrete slab into a statement of quality and style. Here’s what professional installers should provide:
What to Expect from Quality Driveway Paver Installers:
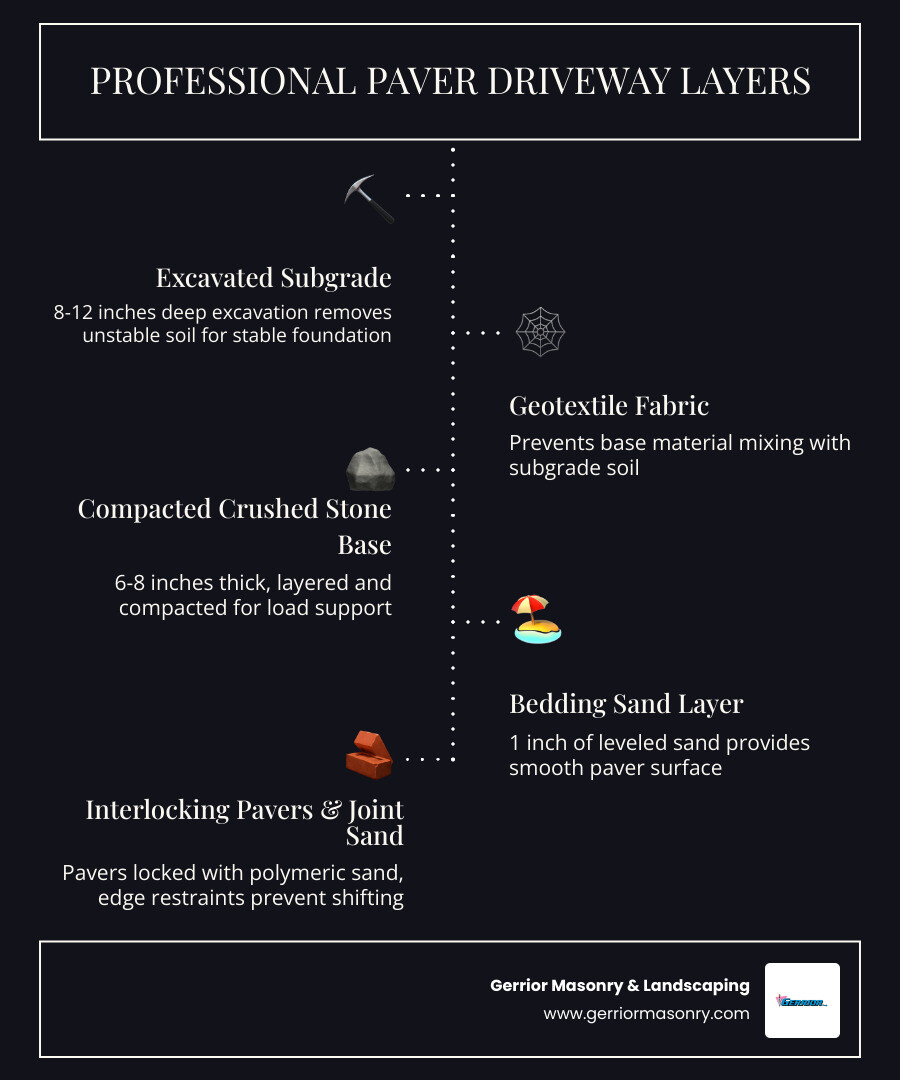
Complete excavation and grading to proper depth (typically 8-12 inches)
Compacted stone base using crushed aggregate and geotextile fabric
Precise edging installation to prevent paver migration
Professional-grade equipment including plate compactors and wet saws
Licensed, insured credentials with verifiable references
Written warranties covering both workmanship (2+ years) and materials
Realistic timelines with clear communication throughout the project
A properly installed paver driveway can last 20 to 30 years when done right. But a rushed or amateur installation? You’ll see settling, shifting, and costly repairs within just a few years.
The difference comes down to the foundation work you can’t see. Professional installers know that what happens beneath the pavers matters more than the pavers themselves. They excavate to the correct depth, compact the base in layers, and ensure proper drainage from day one.
Many homeowners discover this truth the hard way. One testimonial from the research highlighted a contractor who “made the wall Better Than New” by going beyond standard repair techniques—demonstrating that true craftsmen don’t just meet specifications, they exceed them.
I’m Joe Gerrior, and for over 34 years, I’ve built Gerrior Masonry & Landscape Construction on the principle that quality installation isn’t optional. We’ve seen countless driveways fail because the original driveway paver installers skipped critical steps to save time or money, and we’ve rebuilt them the right way.
Choosing the Right Driveway Paver Installers for Your Project
Selecting the right driveway paver installers is about more than just finding the lowest bid; it’s about finding a team that understands the unique geological challenges of Massachusetts. From the clay-heavy soils in parts of Middlesex County to the coastal humidity of Essex County, your driveway needs a foundation that can withstand the brutal freeze-thaw cycles of our New England winters.
When we sit down with homeowners in towns like Lexington or Winchester, the first conversation is always about material selection. The “best” paver depends entirely on your home’s architecture, your budget, and how you plan to use the space.
Material Type
Durability
Maintenance
Aesthetic
Concrete Pavers
Very High
Low
Modern/Versatile
Brick Pavers
High
Medium
Classic/Traditional
Natural Stone
Exceptional
Low/Medium
Luxury/Unique
Material Selection and Customization
For those seeking a timeless, high-end look, natural stone pavers like granite or cobblestone offer unmatched longevity. They don’t just sit on your property; they become part of the landscape. If you prefer a more uniform, engineered approach, interlocking pavers are a fantastic choice. These are designed to fit together like puzzle pieces, distributing weight evenly across the surface, which prevents individual stones from cracking under the weight of heavy SUVs or delivery trucks.
We also specialize in permeable solutions. These are specifically designed to allow rainwater to filter through the joints and back into the ground. This is a critical component of modern drainage systems, helping to prevent icy patches from forming on your driveway during the winter and reducing runoff into local storm drains. For the environmentally conscious homeowner, these are the best eco-friendly driveway pavers available today.
Services Offered by Driveway Paver Installers
A full-service contractor shouldn’t just “lay stones.” Our team provides a comprehensive suite of hardscaping services to ensure your project is cohesive. This includes:
Excavation and Grading: Removing the old surface and ensuring the ground slopes away from your home’s foundation is a critical step in preventing basement flooding and water damage.
Driveway Widening: If your family has grown or you’ve added a new vehicle, driveway widening with matching pavers can add much-needed functionality.
Edging Installation: We provide driveway edging pavers that act as a “frame” for your driveway, keeping the interior stones locked tightly in place.
Driveway Aprons: Often installed where the driveway meets the street, driveway apron pavers add a touch of elegance and reinforce the most-trafficked part of your entrance.
Walkway Integration: We can seamlessly connect your new driveway to your front door or backyard using walkway integration, creating a unified flow throughout your property’s exterior.
Custom Patterns: From herringbone to circular fans, we can execute complex driveway design ideas that reflect your personal style.
Why Professional Driveway Paver Installers Outperform DIY
We get it—the DIY spirit is strong in Massachusetts. You might think, “It’s just laying stones in the dirt, right?” Unfortunately, that’s the mindset that leads to driveways looking like a roller coaster after three years.
Professional driveway paver installers bring assets to the table that a weekend warrior simply can’t access:
Structural Integrity: We understand soil stabilization. If the soil beneath your driveway isn’t properly prepared, the weight of your car will eventually cause “rutting.” We use heavy machinery, like commercial-grade plate compactors and excavators, to ensure the ground is rock-solid and ready to support thousands of pounds of vehicle weight.
Precision Leveling: A half-inch mistake in grading can lead to a puddle that turns into a dangerous ice sheet in January. We use laser-leveling technology to ensure every drop of water goes exactly where it’s supposed to, protecting your landscaping and foundation from erosion.
Credential Verification: Before hiring anyone, you should verify contractor credentials and reviews. A professional team will be fully insured, protecting you from liability if an accident occurs on your property.
Long-Term Savings: While the upfront cost of professional durable construction is higher, the investment analysis shows that you save thousands over the decades by avoiding the “rip out and redo” cycle associated with poor DIY attempts.
The Professional Installation Process
When you hire us, we follow a strict, multi-step protocol designed for maximum durability. We don’t skip steps, and we don’t take shortcuts.
Site Assessment: We check for underground utilities (calling 8-1-1 is a legal requirement!) and assess the current drainage patterns to identify issues before we even break ground.
Excavation: We dig down 8 to 12 inches to remove unstable organic matter.
Geotextile Fabric: We lay down a high-strength fabric that prevents the stone base from sinking into the native soil while still allowing water to drain.
Sub-base Compaction: We add crushed stone in 2-inch “lifts,” compacting each one with a heavy vibrating plate.
Bedding Sand: A 1-inch layer of coarse sand provides the final leveling bed for the pavers.
Joint Sanding: We use polymeric sand, which hardens when misted with water, to lock the joints and prevent weed growth.
Final Compaction: We run the compactor over the finished pavers to set them firmly into the bedding sand.
Sealing: Depending on the material, we offer sealing options to protect against oil stains and UV fading.
Essential Questions to Ask Your Contractor
Before you sign a contract with any driveway paver installers, put them in the hot seat. A reputable company will be happy to answer these:
How many years of experience do you have? (We’ve been at this for over 30 years).
Can I see your project portfolio? You should always view a local project gallery to see the quality of their work in person.
What kind of workmanship guarantees do you offer? For instance, we stand behind our work, and manufacturers like Unilock offer workmanship guarantees through their authorized networks.
Are you fully insured? Ask for proof of liability and workers’ compensation.
What is the estimated timeline? A standard driveway usually takes 5 to 10 days, depending on weather and complexity.
What is your cleanup procedure? You don’t want a pile of gravel left on your lawn for a month; we ensure the site is left in pristine condition.
Understanding the Cost of Paver Installation
Let’s talk numbers. We believe in transparency, even though every project is unique.
Based on general internet data, the average cost for driveway paver installation is approximately $5,264. However, because every home in towns like Andover or Lynnfield has different requirements, the range is quite broad. You can expect a typical price range of $2,925 to $16,500+.
The high end of that range usually involves premium natural stone, complex custom patterns, or significant excavation and retaining wall work. Please note: These are average costs based on internet data and are not actual costs for Gerrior Masonry services. Our pricing is provided via a custom quote after a thorough on-site evaluation of your specific property needs.
When you do a cost comparison to concrete, pavers offer a higher return on investment. If a concrete driveway cracks, you usually have to replace the whole slab or live with an ugly patch. If a paver is damaged, we simply pop it out and replace it with a new one—it’s that simple.
Conclusion: Securing a Lifetime of Durability
A driveway shouldn’t be something you have to think about every year. When installed by expert driveway paver installers, it should be a “set it and forget it” feature of your home. With minimal maintenance—just an occasional sweep and a fresh coat of joint sand every few years—your driveway will look as good in year 20 as it did on day one.
At Gerrior Masonry & Landscaping, we take pride in being the team that doesn’t cut corners. We know that our reputation is only as good as the last driveway we built in Woburn or Reading. If you’re ready to upgrade your curb appeal with a surface that’s built to last, contact our paving experts today for a consultation.
Gerrior Masonry & Landscape Construction is based in Woburn, MA, and services Middlesex and Essex County, Massachusetts. We provide expert masonry and hardscaping, including custom driveways and commercial snow removal. (Please note: We do not offer residential snow services).
Elevate Your Outdoors: The World of Custom Outdoor Kitchen Builders
Are you looking to transform your backyard into the ultimate entertainment and culinary hub? Custom Outdoor Kitchen Builders specialize in creating personalized outdoor cooking and entertainment spaces that go far beyond a simple grill setup. They offer comprehensive services including:
Design & Planning: Crafting unique layouts that optimize your specific backyard topography and selecting materials to match your home’s architectural vision.
Appliance Integration: Expertly installing high-performance grills, specialized pizza ovens, outdoor-rated refrigerators, sinks, and even wine coolers.
Utility Connections: Safely managing complex gas, electrical, and plumbing lines to ensure your kitchen functions as seamlessly as your indoor one.
Construction: Building durable, long-lasting structures using weather-resistant materials like natural stone, brick, and stainless steel.
Permit Assistance: Guiding you through the maze of local Massachusetts regulations and permit applications to ensure your project is fully compliant.
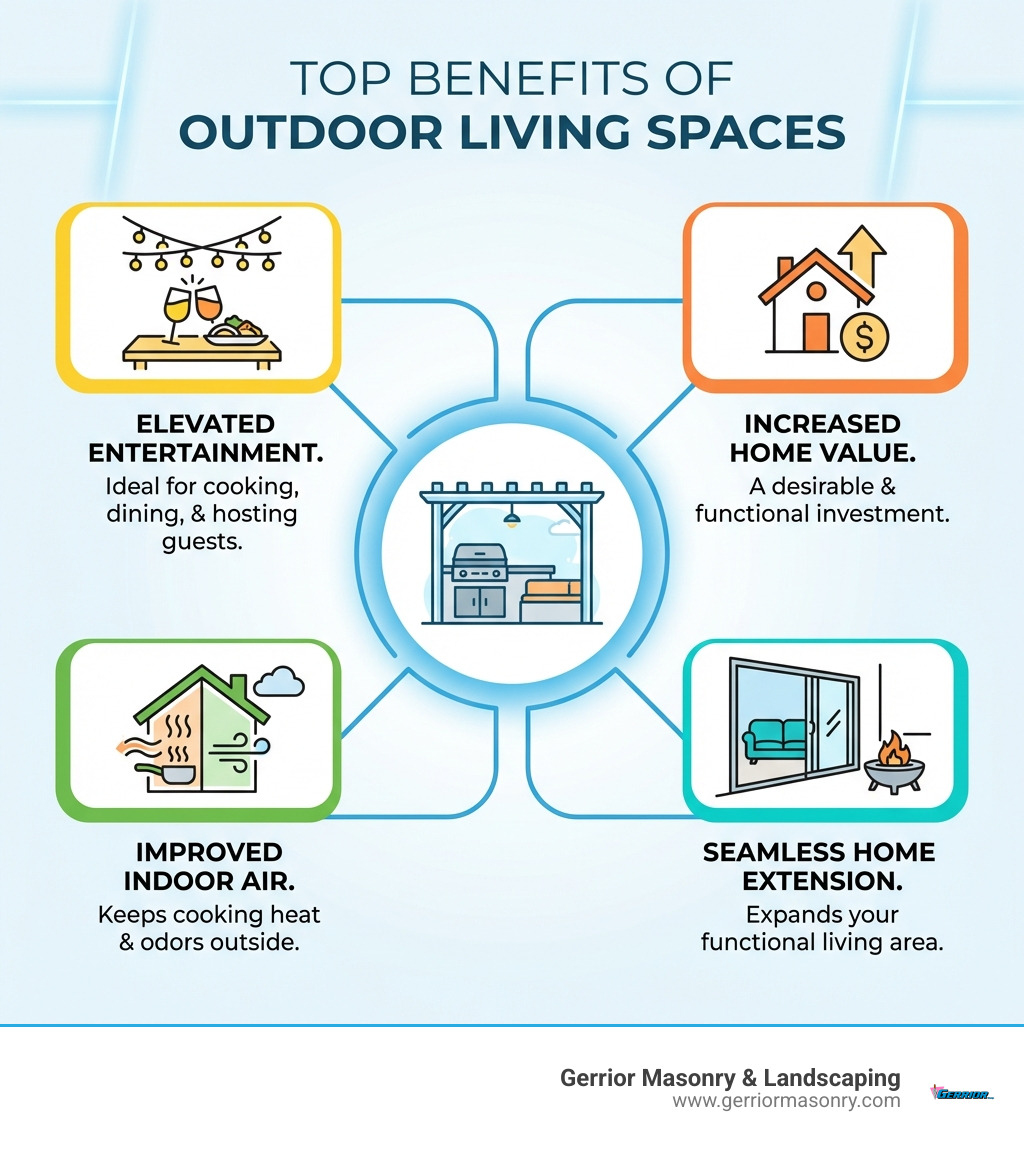
A custom outdoor kitchen is more than just a grill on a patio; it is a sophisticated extension of your home. It is a dedicated space designed for cooking, dining, and entertaining in the fresh air, allowing you to enjoy the beautiful New England seasons to their fullest. Imagine grilling a gourmet meal while sipping a chilled beverage at your custom-built outdoor bar, or hosting friends and family in a space that feels like a high-end resort. These kitchens significantly enhance your outdoor living experience, increase your home’s overall market value, and can even improve indoor air quality by moving cooking odors, smoke, and excess heat outside.
I’m Joe Gerrior, owner of Gerrior Masonry & Landscape Construction Corp. With over 34 years of dedicated experience, our team brings exceptional craftsmanship to every project. We work as premier Custom Outdoor Kitchen Builders to create stunning, functional outdoor spaces for Massachusetts homeowners. This guide will walk you through everything you need to know about designing and building your dream outdoor kitchen, from the initial concept to the first meal served under the stars.
Why Hire Professional Custom Outdoor Kitchen Builders?
When you decide to move your culinary talents outside, it is tempting to think a trip to the local big-box store for a standalone grill is enough. However, creating a true “outdoor kitchen” involves complex engineering and structural considerations that require the expert touch of professional Custom Outdoor Kitchen Builders.
Building an outdoor sanctuary isn’t just about placing a grill; it’s about meticulous site preparation and ensuring long-term structural integrity. In regions like Middlesex and Essex County, the ground shifts significantly with the changing seasons. Without a properly laid foundation—something we specialize in with our patio design and installation—your beautiful new kitchen could end up with cracked masonry, shifting walls, or uneven counters after just one harsh New England winter.
Professional builders provide comprehensive “design-build” services, meaning we handle the project from the first conceptual sketch to the final steak on the grill. This includes:
Utility Integration: Running natural gas lines for continuous fuel, electricity for task lighting and refrigeration, and plumbing for sinks and ice makers.
Safety Standards: Ensuring that heat-intensive appliances are housed in fire-resistant frames (like welded steel or heavy-duty masonry) rather than combustible wood, which is a common DIY mistake.
Traffic Flow and Ergonomics: Designing the “work triangle”—the efficient distance between your prep area, cooking station, and refrigeration—to ensure you aren’t constantly bumping into guests or struggling to find tools.
Longevity and Material Selection: Using mold-proof, rust-proof, and UV-resistant materials that can withstand the specific humidity, heavy rain, and deep snow levels of towns like Woburn, Lexington, and Concord.
The Benefits of Working with Custom Outdoor Kitchen Builders
Working with a specialist allows you to move beyond the cookie-cutter “BBQ island” and into a space that truly reflects your lifestyle. Personalized layouts mean if you are a pizza enthusiast, we can center the design around a high-capacity wood-fired oven. If you love hosting cocktail hours, we can prioritize a large bar area with built-in ice makers, speed rails, and integrated seating.
Weatherproofing is another massive advantage. Professional Custom Outdoor Kitchen Builders use materials specifically rated for outdoor exposure. This prevents common issues like mold growth behind cabinets, stone veneers peeling off due to moisture infiltration, or countertops cracking during a deep freeze. Furthermore, a well-constructed outdoor kitchen offers a significant return on investment (ROI). It expands your usable square footage without the massive cost and disruption of a full indoor room addition.
Essential Features and Appliances for Your Design
What makes a kitchen “luxury”? It’s the features that make cooking outside as convenient—if not more so—than cooking inside. When we sit down for an outdoor kitchen design consultation, we often discuss these essential components:
High-End Grills and Smokers: The heart of the kitchen. Whether you prefer natural gas, propane, or a ceramic pellet smoker, these are built directly into the masonry for a seamless, professional look.
Pizza Ovens: These have become a staple in Massachusetts backyards, offering a fun, interactive way to feed a crowd and create a focal point for gatherings.
Refrigeration and Wine Coolers: No more running back inside for a cold drink or fresh ingredients. Restaurant-style outdoor refrigerators and wine coolers are designed to maintain steady temperatures even when it’s 90 degrees in the shade.
Weatherproof Storage Solutions: Specialized cabinetry, such as 304-grade stainless steel or high-density polyethylene (HDPE), keeps your tools, linens, and spices dry, clean, and bug-free year-round.
Side Burners and Power Burners: Perfect for boiling corn, heating sauces, or frying fish without taking up space on the main grill or bringing odors inside.
Fire Features and Heating: Integrating a fireplace or fire pit near the dining area, or installing overhead infrared heaters, extends the usability of the space into the crisp autumn and early spring months.
Planning Your Project: Materials, Permits, and Budgeting
The success of your project depends heavily on the materials you choose. As experts in masonry services, we always advocate for materials that offer a blend of beauty and brawn.
Natural Stone: There is nothing quite like the look of fieldstone or granite veneers. It’s timeless, incredibly durable, and blends perfectly with the Massachusetts landscape.
Granite Countertops: Granite is the gold standard for outdoor surfaces. It is heat-resistant, easy to clean, and won’t fade or degrade under the harsh UV rays of the summer sun.
Stainless Steel: For appliances and cabinet doors, 304-grade stainless steel is essential to prevent rust and corrosion in our coastal Massachusetts climate.
Durability Comparison Table
Material
Durability
Maintenance
Best Use
Natural Stone
Extremely High
Low
Base structures, walls, pillars
Brick
High
Moderate
Traditional aesthetics, flooring
Granite
Extremely High
Low
Countertops, food prep areas
Stainless Steel
High
Moderate
Appliances, cabinetry, sinks
Before we can start laying stone, we have to navigate the complexities of local permits. Most towns in Middlesex and Essex County require building permits for any structure that involves gas, electrical, or plumbing work. Zoning laws may also dictate “setbacks,” which determine how close your kitchen can be to your property line or existing structures. As your Custom Outdoor Kitchen Builders, we assist with this entire process, ensuring that all plans are drawn to code and all necessary inspections are passed.
Navigating the Process with Custom Outdoor Kitchen Builders
We believe the construction process should be as enjoyable as the finished product. Here is how we typically handle a transformation:
Initial Consultation: We visit your home in Amesbury, Andover, or wherever you are located to assess the site. We look at existing utility lines, drainage patterns, and the architectural style of your home.
3D Rendering and Design: We create virtual designs so you can see exactly how the kitchen will look in your space before a single brick is laid. This helps in making informed decisions about layout, lighting, and material colors.
Permit Acquisition: We handle the paperwork and applications with your local town hall, taking the stress out of the administrative side of the project.
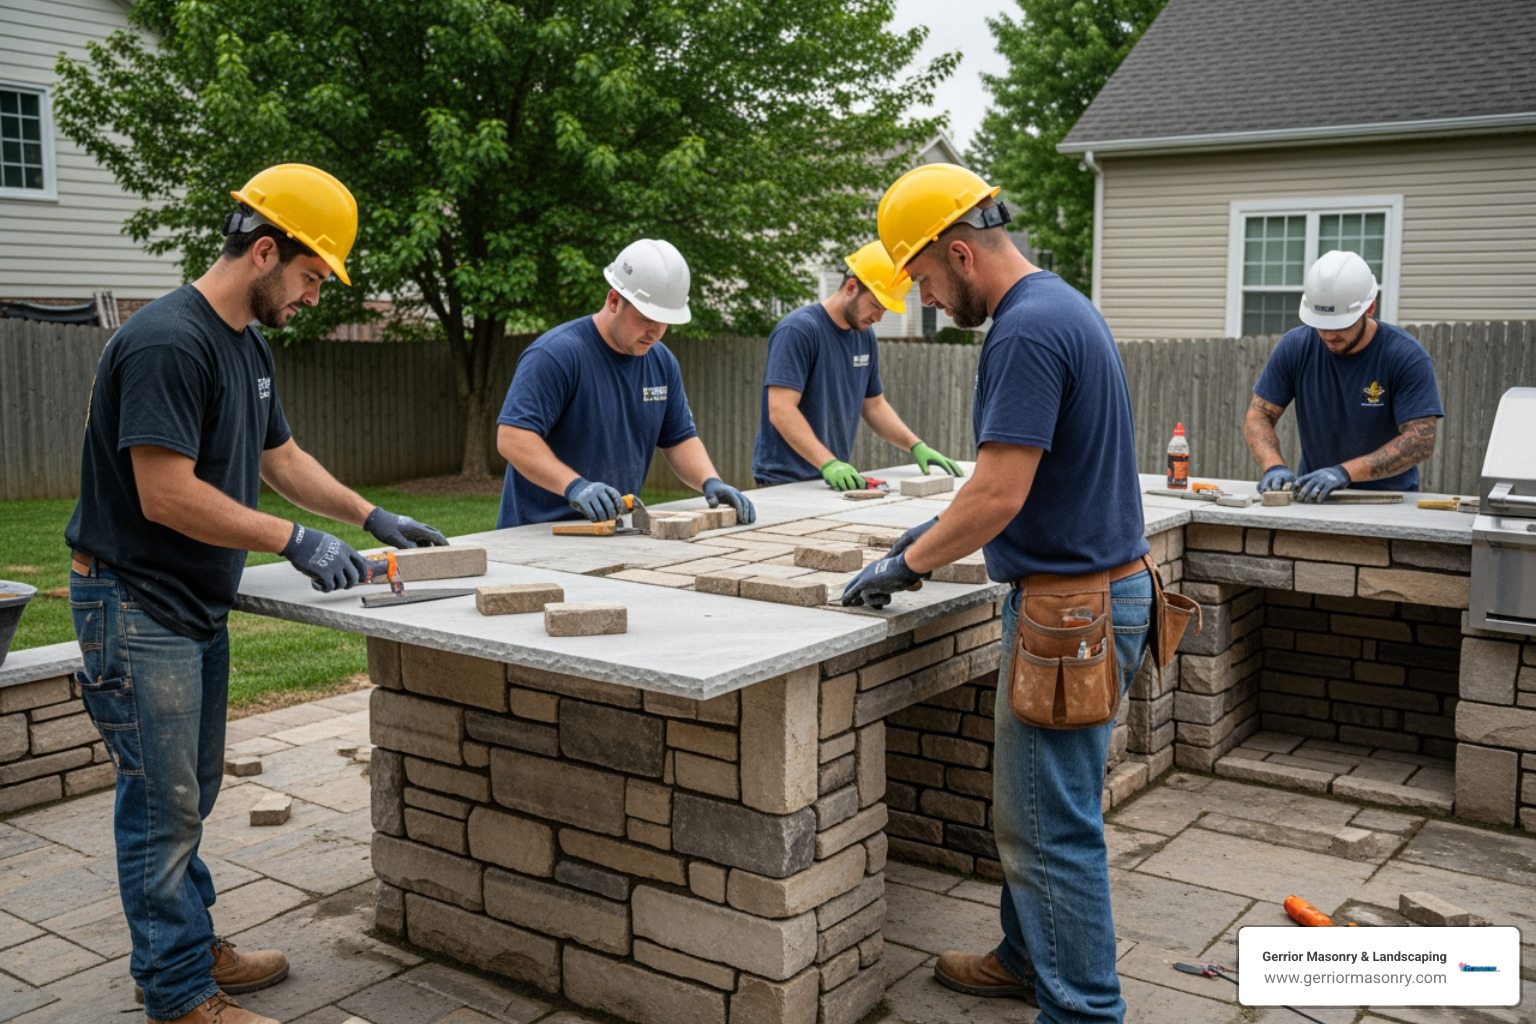
Construction and Installation: Our skilled team, overseen by the owner, begins the masonry and installation work. We pride ourselves on keeping a clean, organized job site and minimizing disruption to your daily life.
Final Walkthrough and Testing: We test all appliances, utility connections, and lighting with you to ensure everything is perfect and you are comfortable operating your new equipment.
Budget Considerations and Average Costs
Budgeting for an outdoor kitchen requires looking at three main “tiers”: the structure (masonry), the surfaces (countertops), and the appliances.
Note on Pricing: All pricing mentioned is based on average internet data and does not represent actual costs for Gerrior Masonry services. A typical custom project can range widely from $12,000 to over $75,000 depending on the complexity, site conditions, and appliance selection.
Several variables can influence where your project falls on that spectrum:
Site Preparation: Does the land need significant clearing, leveling, or the installation of a new drainage system?
Utility Runs: How far are the gas, water, and electric lines from the main house? Longer runs require more trenching and materials.
Material Choice: Natural stone veneers and high-end granite generally cost more than stucco finishes or concrete counters.
Appliance Package: A professional-grade rotisserie grill, built-in kegerator, and specialized pizza oven will naturally increase the investment compared to a standard built-in grill.
Choosing the Right Partner for Your Backyard Transformation
Your backyard is a significant part of your home’s identity and value. When choosing Custom Outdoor Kitchen Builders, you want a partner who understands the local landscape, the technical requirements of high-end masonry, and the challenges of the New England climate.
At Gerrior Masonry & Landscaping, we bring over 30 years of experience to the table. Our unique selling point is our skilled team and direct owner oversight on every project. Whether you are in Arlington, Bedford, or Winchester, we ensure that the quality of the craftsmanship matches the vision in your head. We don’t just build kitchens; we build “outdoor oases” that become the center of your family’s memories for decades to come.
From walkways and stairs that lead your guests to the dining area to the stone walls that frame your cooking space, we handle every detail with precision.
Ready to put your indoor stove to shame? We invite you to explore our blog for more inspiration or contact us to start your design journey.
Gerrior Masonry & Landscape Construction is based in Woburn, MA, and services Middlesex and Essex County, Massachusetts.
Why Finding the Right Masonry Contractor Matters for Your Massachusetts Home
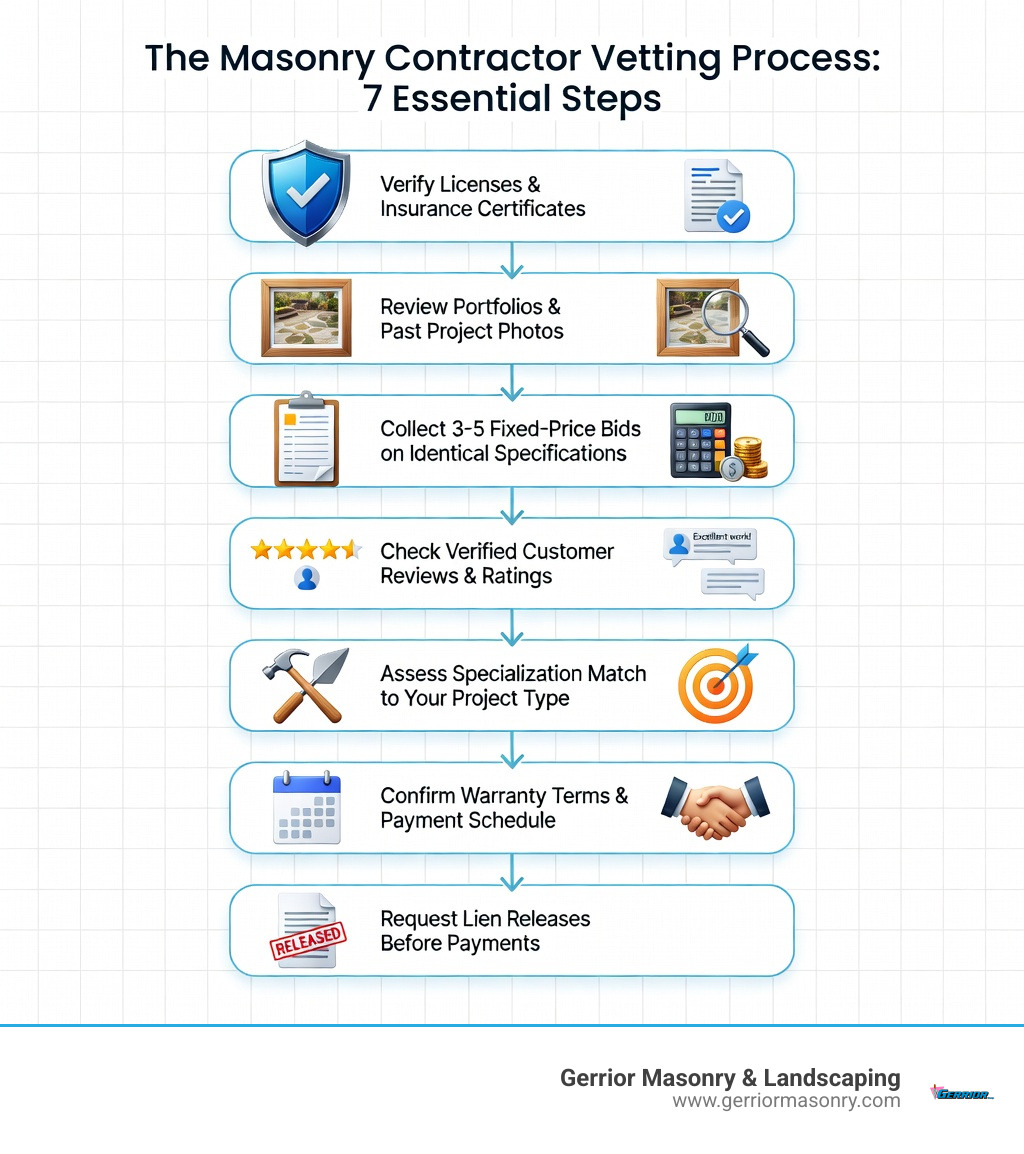
To find masonry contractor professionals in your area, start by:
Verify credentials – Check for proper licensing, bonding, and insurance coverage
Read local reviews – Look for verified customer feedback and ratings (4.4+ average is strong)
Get 3-5 fixed-price bids – Compare detailed proposals on identical project specifications
Ask for portfolios – Review photos of completed projects similar to yours
Check references – Contact past clients directly, not just contractor-provided references
Confirm specialization – Match the contractor’s expertise to your specific project type (brick, stone, concrete, etc.)
Whether you’re dreaming of a beautiful stone patio, need chimney repairs, or want to install a custom retaining wall, choosing the right masonry contractor can mean the difference between a project that adds lasting value to your home and one that becomes an expensive headache. With over 738 masonry contractors operating in Virginia alone—and similar density in Massachusetts markets—homeowners face both opportunity and challenge in selecting the right professional.
The stakes are high. Masonry work is permanent, visible, and often structural. A poorly built retaining wall can fail catastrophically. Improper chimney work can create fire hazards. Even aesthetic projects like patios and walkways require proper drainage, base preparation, and material selection to avoid cracking, settling, or water damage within just a few years.
Common contractor complaints include improper work, refusal to correct errors, mid-project price increases, and poor communication—problems that proper vetting can help you avoid. The research shows that many masonry contractors specialize in specific materials and job types, so matching their expertise to your needs is essential.
As Joe Gerrior, owner of Gerrior Masonry & Landscape Construction Corp., I’ve spent over 34 years helping Massachusetts homeowners find masonry contractor solutions that combine craftsmanship with reliability. Our family-owned business has navigated countless projects—from foundation repairs to custom hardscaping—and I’ve seen what separates successful masonry investments from costly mistakes.
The Smart Way to Find Masonry Contractor Professionals
When you set out to find masonry contractor experts, you aren’t just looking for someone who can stack bricks. You are looking for an artisan, an engineer, and a reliable project manager all rolled into one. The search often begins online, but it shouldn’t end there.
The first step is leveraging professional networks and local directories. While platforms like the Procore Construction Network are excellent for identifying the sheer volume of contractors in a state—for instance, Virginia has over 738 active masonry firms—homeowners in Massachusetts should look for similar density and local presence. A contractor with a strong local reputation in cities like Woburn, Lexington, or Winchester is often more accountable than a “storm chaser” or a company that travels too far from their home base.
Vetting is a multi-layered process. Beyond looking at a company’s website, you should consult specialized industry resources. The Mason Contractors Association of America provides a directory that helps you filter by project type and material expertise. This is vital because a contractor who excels at commercial block work might not have the “old world” finesse required for an artisanal fieldstone wall.
Always prioritize masonry services that offer transparency. A reputable pro will show you their work, explain their process, and won’t shy away from technical questions about soil drainage or foundation depth.
Essential Services to Find Masonry Contractor Experts
The scope of masonry is vast. To find masonry contractor teams that fit your needs, you must first define your project. Most highly-rated masons specialize in one or more of the following:
Brickwork and Tuckpointing: This involves everything from building new brick walls to repairing the mortar joints in existing ones. If your bricks are “spalling” (crumbling), a specialist is needed to prevent structural failure.
Stone Masonry: Working with natural stone, flagstone, or stone veneer requires a high degree of craftsmanship. This is common for brick masonry projects and high-end outdoor living spaces.
Foundation and Bulkhead Work: Structural integrity starts at the bottom. We often see homeowners needing cinder block foundation repair or bulkhead replacements to keep basements dry and secure.
Outdoor Living: This includes the design and installation of custom kitchens, fire pits, and fireplaces.
Before hiring, confirm the contractor holds a valid Massachusetts HIC (Home Improvement Contractor) license and CSL (Construction Supervisor License) where applicable. Furthermore, never settle for a verbal promise of insurance. Request current certificates for both General Liability and Workers’ Compensation. This protects you from being held liable if a worker is injured on your property.
Regional Insights and Local Reviews
Geography plays a significant role in masonry. In Massachusetts, our harsh freeze-thaw cycles mean that masonry work must be built to withstand extreme temperature swings. When you find masonry contractor reviews, look for mentions of how the work held up after a few New England winters.
In the New England climate, understanding the 48-inch frost line is non-negotiable. When you find masonry contractor experts in Massachusetts, they should be able to explain how they set footings deep enough to prevent ‘frost heave’—a common cause of cracked patios and leaning walls. This technical expertise ensures that your investment doesn’t shift or settle when the ground freezes and thaws.
Research into homeowner satisfaction shows that the average rating for highly-rated local masons often sits around 4.4 out of 5 stars. In densely populated areas like Middlesex and Essex County, you have the advantage of hundreds of verified reviews. Look for patterns in these testimonials:
Responsiveness: Did they answer the phone?
Cleanliness: Did they leave the job site a mess?
Reliability: Did they finish on time and on budget?
Industry resources like the Masonry Buyer’s Guide can provide additional context on standards and what to expect from professional-grade materials.
Questions to Ask Before You Find Masonry Contractor Teams
A consultation is your best opportunity to interview your potential pro. Don’t be afraid to dig deep. Here are the “must-ask” questions:
“Who will be supervising the site daily?” At Gerrior Masonry, we believe owner oversight is the key to quality.
“Can you provide a portfolio of similar projects?” A beautiful outdoor fireplace is a great sign of skill.
“How do you handle soil drainage?” For outdoor projects, poor drainage is the #1 killer of masonry. A smart pro might suggest a drainage test (filling a 12-inch hole with water to see if it drains within 24 hours).
“What is your project timeline?” Masonry is weather-dependent, but a pro should provide a clear start and end window.
“Do you use subcontractors?” Knowing exactly who is on your property is essential for consistent quality control.
One of the biggest mistakes homeowners make when they try to find masonry contractor help is choosing the lowest bid. In masonry, “cheap” often means cutting corners on the base preparation—the part you can’t see, but the part that keeps the structure from sinking.
When comparing bids, ensure you are looking at “apples to apples.” Each proposal should include:
Detailed material specifications (type of stone, brick, or paver).
The depth of the base and type of aggregate used.
A clear payment schedule (e.g., 20% down, progress payments, and a final holdback).
Explicit warranty terms.
Be wary of ‘red flags’ during your search to find masonry contractor professionals. These include contractors who demand a large cash deposit upfront, those who cannot provide a local physical address, or anyone who lacks a portfolio of recent work. A legitimate professional will always provide a detailed, written contract that protects both parties and clearly defines the project’s milestones and material specifications.
Average Costs for Common Masonry Projects
Pricing in the masonry world varies wildly based on site accessibility, material choice, and project complexity. Below are average cost ranges based on internet data. Please note: these are average costs based on internet data and not actual costs for Gerrior Masonry services.
Project Type
Average Cost Range (Internet Data)
High-End / Complex Range
Small Brick Repair
$350 – $600
$1,800+
Patio Installation
$2,500 – $8,000
$24,000+
Chimney Repair/Rebuild
$1,000 – $4,500
$13,500+
Retaining Wall (per sq ft)
$20 – $60
$180+
Driveway (Pavers/Concrete)
$5,000 – $15,000
$45,000+
As you can see, the high end can be at least 3x the average depending on artisanal details, reinforced foundations, or premium natural stones. For a better understanding of what goes into these numbers, explore our pages on patio design and installation or walkways and stairs.
Maintenance and Long-Term Care
Once you find masonry contractor experts and complete your project, the work isn’t quite over. Maintenance is the key to longevity.
Sealing: Applying a high-quality sealer to concrete and certain stones can prevent water penetration and staining.
Cleaning: Regular washing prevents the buildup of dirt and organic growth.
Efflorescence: That white, powdery substance you sometimes see on bricks is just salt. It can usually be cleaned with a mild acidic solution, but it’s often a sign of moisture behind the masonry.
Mortar Repair: Keep an eye on your joints. If mortar starts to crumble, have it repointed immediately to prevent water from getting behind the units and freezing.
Finding the right professional doesn’t have to be a “rocky” experience. By verifying licenses, checking verified reviews, and asking the right questions about drainage and supervision, you can ensure your home improvement project stands the test of time.
At Gerrior Masonry & Landscaping, we bring over 30 years of experience to every job site. Our unique approach relies on a highly skilled team and direct owner oversight to ensure that the vision we discuss during your consultation is exactly what is delivered. Whether you are looking for a new patio, a structural retaining wall, or a bulkhead replacement, we are here to help.
Gerrior Masonry & Landscape Construction is based in Woburn, MA, and services Middlesex and Essex County, Massachusetts. We also provide professional commercial snow services to keep local businesses safe and accessible during the winter months.
Why Fire Pit Mortar Matters for Your Outdoor Project
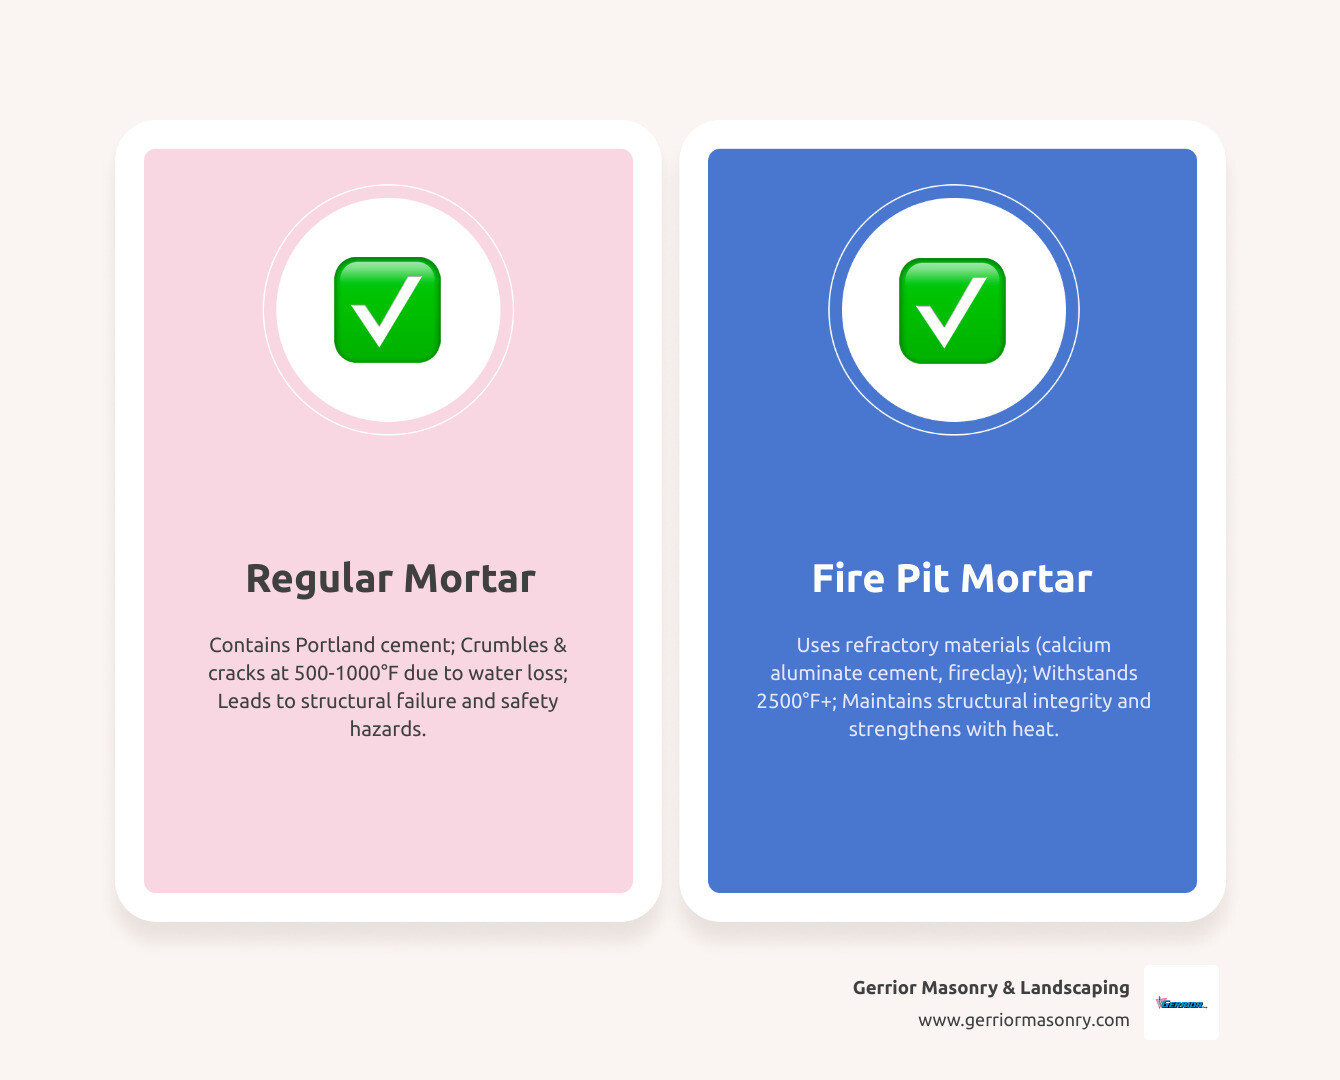
Fire pit mortar is a specialized, heat-resistant mortar designed to withstand extreme temperatures (2,500°F or higher) without failing. Unlike regular masonry mortar, which contains Portland cement that crumbles under high heat, fire pit mortar uses refractory materials like calcium aluminate cement to maintain structural integrity. Using the wrong mortar is a safety hazard that can lead to cracks and structural collapse.
Quick Reference: Fire Pit Mortar Essentials
Temperature Rating: Must withstand 2,500°F minimum
Common Types: Dry mix, pre-mixed cartridges, castable cement
Application Thickness: 1/8″ to 1/4″ joints
Cure Time: 24-72 hours air dry, then gradual heat curing
Cost Range: $8-$70 per container (varies by type and quantity)
As Joe Gerrior, owner of Gerrior Masonry & Landscape Construction Corp., I’ve spent over 34 years helping homeowners in Massachusetts build safe, durable outdoor features. Using proper fire pit mortar and masonry techniques is the first step toward a fire pit that will serve your family safely for decades.
What is Refractory Mortar and Why Is It Essential?
When building anything that involves fire, you can’t use standard mortar. You need refractory mortar, a high-performance material designed for extreme heat.
The key difference is how it reacts to high temperatures. Regular mortar relies on Portland cement, which cures through a chemical reaction with water (hydration) to form calcium silicate hydrates. This works perfectly for general construction, but when exposed to temperatures above 500°F, this chemical bond breaks down. The water bound within its structure is driven off, causing the mortar to dehydrate, crumble, and lose all binding strength. This can lead to catastrophic structural failure in your fire pit.
Refractory mortar is engineered to prevent this. Instead of a water-based bond, it forms a ceramic bond when fired. Its resilience comes from specialized ingredients:
Calcium Aluminate Cement (CAC): This replaces Portland cement. It forms stable hydraulic bonds that are resistant to high temperatures and can actually gain strength when heated, maintaining its integrity.
Fireclay: A heat-resistant clay that acts as a binder and helps the mortar resist thermal shock (sudden temperature changes).
Silica Aggregates: Specially selected sands that are stable at high temperatures and won’t expand or contract excessively, which prevents cracking.
In short, refractory mortar’s ingredients are chosen for their thermal stability, ensuring your fire pit remains strong, safe, and durable for years.
Understanding Different Types of Fire Pit Mortar
Fire pit mortar comes in several types, each suited for different needs. The main categories are dry mix, pre-mixed (cartridge), and castable refractory cement.
Mortar Type
Ease of Use
Cost (Average)
Application
Best Use Case
Dry Mix
Moderate (requires precise mixing)
$30 – $80 per 10-50 lb bag
Laying firebrick, new construction
Large projects, building from scratch, experienced DIYers
Pre-Mixed (Cartridge)
High (ready-to-use)
$5 – $20 per 10.3 oz cartridge
Small repairs, sealing, tuck-pointing
Quick fixes, minor cracks, sealing gaps, beginners
(Note: The cost ranges provided are average costs based on internet data from various manufacturers and retailers and are not actual costs for Gerrior Masonry services. Prices can vary significantly based on brand, quantity, and supplier.)
Dry Mix Mortar
Dry mix refractory mortar (e.g., Rutland or Tenon) comes in a bag and requires you to add water. It’s cost-effective for large projects and offers flexibility in consistency, but requires accurate mixing. Always use clean, cold, potable water, as impurities can compromise the mortar’s performance.
Pre-Mixed (Cartridge) Mortar
Pre-mixed mortars come in caulk-gun cartridges (e.g., Rutland or MEECO’S RED DEVIL) and are ready to use. They are extremely convenient for small repairs, sealing minor cracks, and tuck-pointing old joints. However, they are not intended for structural applications like laying a full course of firebrick and are more expensive per ounce, making them unsuitable for large construction.
Castable Refractory Cement
Castable refractory cement (e.g., Rutland or GIRtech) can be poured or molded into custom shapes. It’s ideal for creating monolithic (single-piece) structures like pizza oven domes, custom fireboxes, or even the entire floor of a fire pit. This eliminates joints, which are often the weakest points in a high-heat structure. While incredibly durable, it can be more challenging to work with and is often the most expensive option.
Key Specifications: Temperature Ratings and Durability
The most critical specification for fire pit mortar is its temperature resistance rating. A wood fire can easily exceed 1,000°F, with embers reaching up to 2,000°F, so the mortar must be up to the task. While gas fire pits typically burn at lower, more consistent temperatures, using refractory mortar is still recommended for safety and longevity.
Look for mortars rated for 2500°F+ resistance. Products like Sakrete High-Heat Mortar (2550°F) and Tenon Refractory Mortar (2,550°F) are designed for these conditions. The ASTM C199 standard is a key industry benchmark that verifies a mortar’s ability to perform under sustained high temperatures without significant shrinkage or cracking.
Beyond heat resistance, the mortar must have excellent thermal shock resistance—the ability to handle rapid heating and cooling cycles without cracking. Imagine your fire pit is blazing hot and a sudden downpour of cold rain begins; this extreme temperature change can cause inferior materials to crack or spall. A quality refractory mortar is formulated to withstand this stress, which is essential for long-term durability in an outdoor environment.
A properly installed refractory mortar can last for many years. Key factors influencing its lifespan include the quality of the mortar, proper mixing and application, and correct curing.
How to Properly Apply Your Mortar
Applying fire pit mortar correctly is just as important as choosing the right type. Follow these steps for a durable, long-lasting build.
Tools and Safety Equipment:
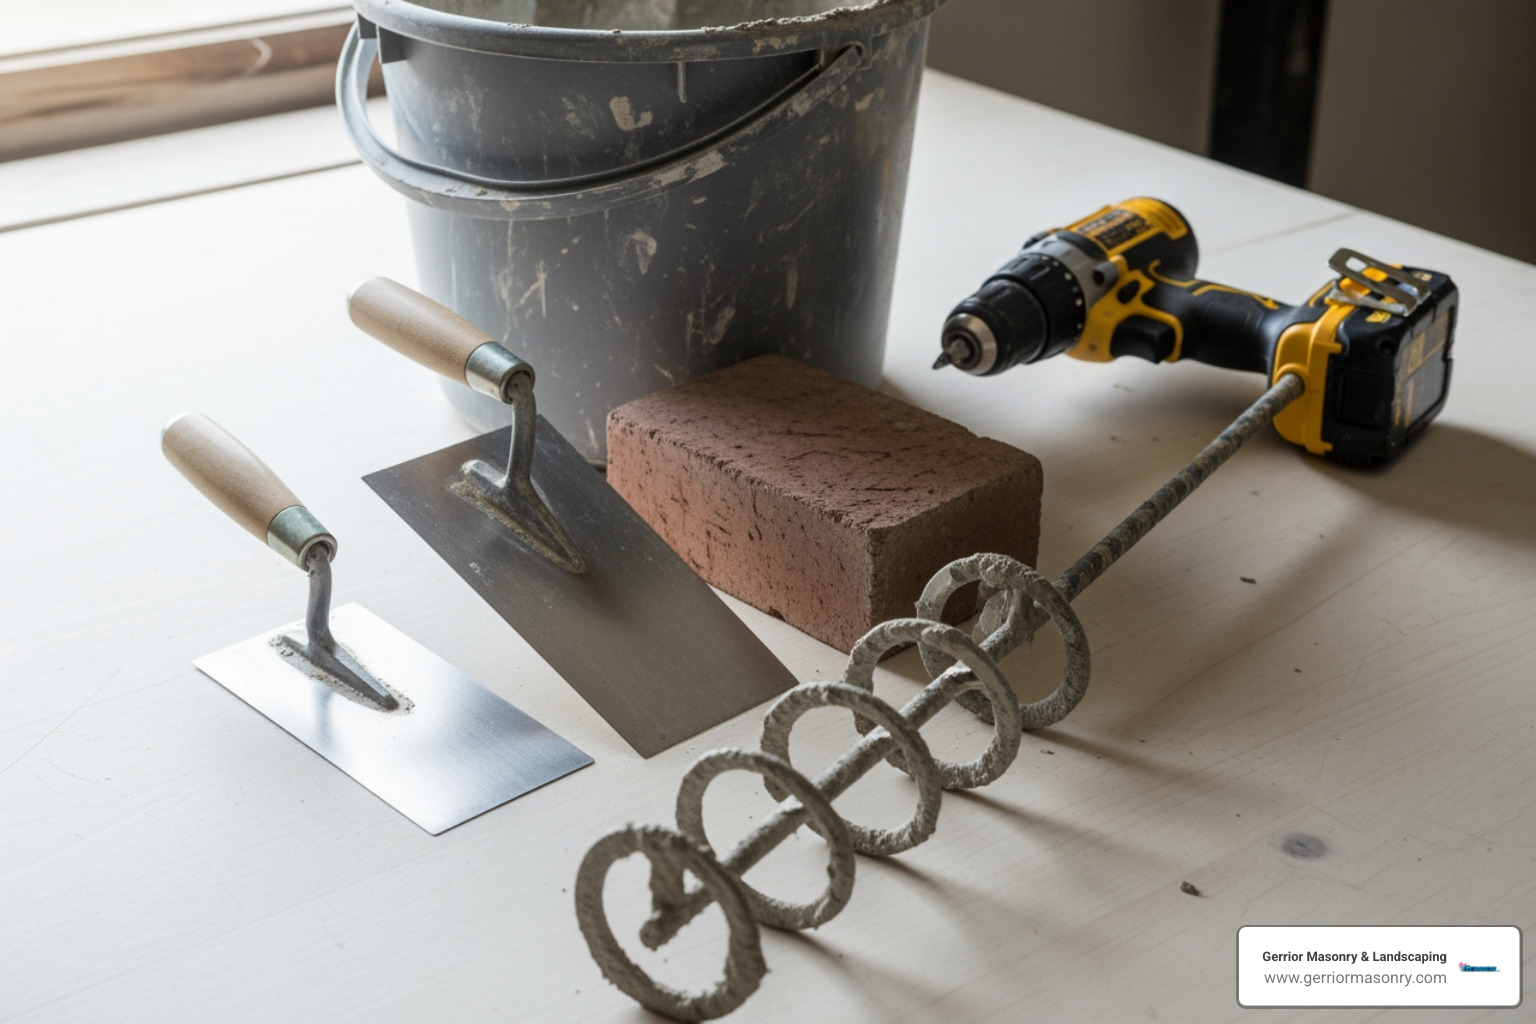
Gather a trowel, mixing bucket, drill with mixing paddle, stiff brush, spray bottle, safety glasses, heavy-duty gloves, and a dust mask.
1. Surface Preparation:
Clean your fire bricks of all dust, soot, and loose particles with a wire brush. A clean surface is essential for proper adhesion.
2. Dampening Fire Bricks:
Lightly mist the fire bricks with water before applying mortar. If the bricks are too dry, they will pull moisture from the mortar too quickly, weakening the bond.
3. Mixing (for Dry Mix Mortar):
Follow the manufacturer’s instructions, aiming for a consistency like thick peanut butter. Add the dry mix to cold water gradually while mixing. Never use warm water or remix mortar once it begins to stiffen.
4. Application:
Use a trowel to apply the mortar in thin joints, typically between 1/8″ and 1/4″ thick. Thicker joints are weaker and more prone to cracking. Press bricks firmly into the mortar bed and scrape off any excess immediately.
Once your fire pit mortar is applied, the curing process is vital for its long-term performance. Do not rush this step, as it is crucial for developing the mortar’s final strength and heat resistance.
1. Air Drying Period:
Let the mortar air dry for at least 24-72 hours, depending on humidity and temperature. This allows excess moisture to evaporate naturally. Protect the new masonry from rain during this time with a tarp, ensuring there is still airflow.
2. Heat Curing Process:
Refractory mortar is strengthened by a gradual heat cure, which drives out the remaining chemical water and forms a ceramic bond. A sample curing schedule might look like this (always defer to the manufacturer’s specific instructions):
First Fire: After air drying, build a very small kindling fire for about 1-2 hours. The goal is to keep the temperature of the masonry below 212°F (the boiling point of water). You should be able to comfortably hold your hand near the outside of the fire pit.
Second Fire: 24 hours later, build a slightly larger fire and maintain it for 2-3 hours, allowing the temperature to rise to around 500°F.
Third Fire: After another 24 hours, you can build a normal-sized fire. This gradual process prevents the trapped moisture from turning to steam too quickly, which would create pressure and cause cracks or spalling.
Common Mistakes to Avoid:
Improper Mixing: Using warm water or re-tempering (adding more water to mortar that has started to set) will ruin the chemical bonding process and weaken the final bond.
Curing Too Quickly: Skipping the air-dry period or building a large, roaring fire too soon is the most common cause of failure. This will cause thermal shock and crack the new mortar.
Using the Wrong Mortar: Regular Portland cement-based mortar will fail under high heat. Always use a genuine refractory mortar for any surface exposed to flames.
Applying Joints That Are Too Thick: Stick to the recommended 1/8″ to 1/4″ joint thickness. Mortar is designed to bond masonry units, not to be a filler. Thick joints shrink more as they dry, creating internal stress that leads to cracking. They also create a weak point in the structure that is more susceptible to heat damage than the dense firebrick itself.
Choosing the Right Mortar and Other Applications
Selecting the right fire pit mortar depends on your project. For new construction, a high-quality dry mix or castable refractory cement is ideal. For small repairs, a pre-mixed cartridge is a convenient solution.
While refractory mortar is more expensive than regular mortar, it should be viewed as a crucial safety investment. The specialized engineering that allows it to withstand extreme temperatures is what ensures the safety and longevity of your fire feature. The higher material cost is a small price to pay for peace of mind.
Beyond fire pits, refractory mortar is essential for other high-heat applications:
Fireplaces and Chimneys: Used for setting firebricks in the firebox and for general chimney repairs.
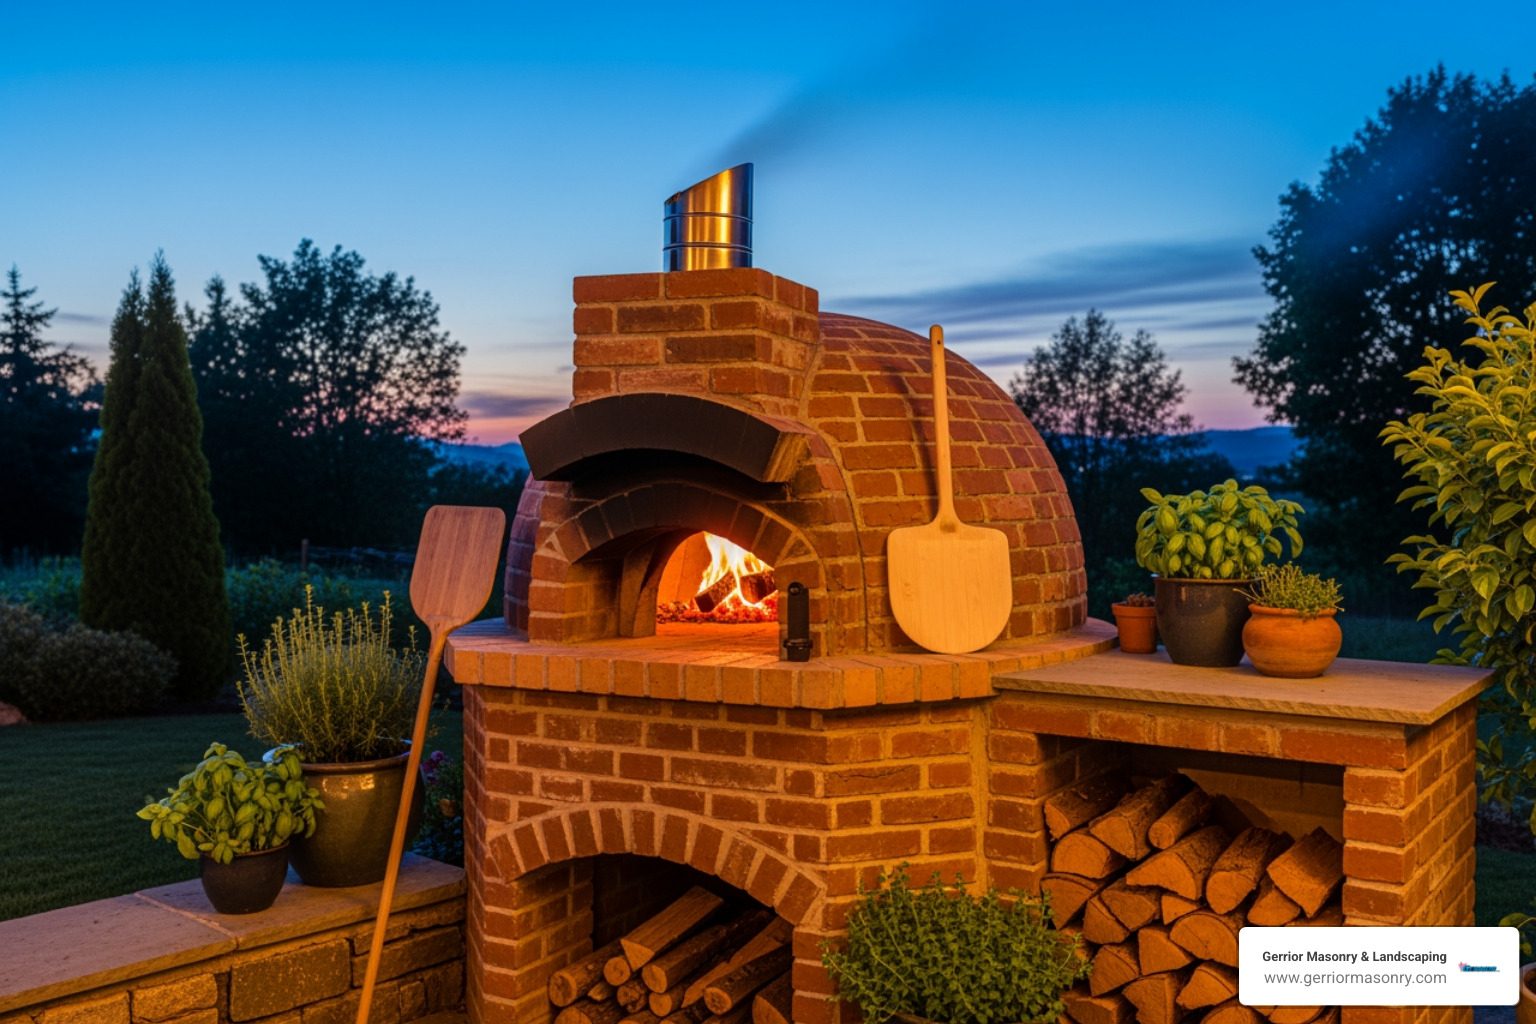
Pizza Ovens: Required for building the dome and hearth to withstand high cooking temperatures.
Forges and Kilns: Used to construct and repair industrial or hobbyist forges and kilns.
Wood-burning Stoves: Seals and secures internal components and flue connections.
Safety Warnings:
Always wear a dust mask or respirator when mixing dry mortar, as many products contain silica. Read product labels for any safety warnings, such as the P65 Cancer & Reproductive Harm Warning, and follow all manufacturer instructions.
Conclusion: Build Your Fire Pit with Confidence
We’ve covered what makes fire pit mortar unique, the different types available, and the correct methods for application and curing. The key takeaway is clear: for any high-heat masonry project, using a specialized refractory mortar is essential for safety and durability. This investment protects your property and ensures your fire pit will be a source of enjoyment for years to come.
For those in Massachusetts seeking professional masonry and hardscaping, our team at Gerrior Masonry & Landscaping brings over 34 years of experience to every project, including custom fire pits, patios, and chimney repairs.
If you’re planning an outdoor project that demands precision and heat resistance, we’re here to help. Contact us for your outdoor fire pit project and let us build something beautiful and enduring. Gerrior Masonry & Landscape Construction is based in Woburn, MA, and services Middlesex and Essex County, Massachusetts.
Transform Your Hearth: An Introduction to Stone Veneer
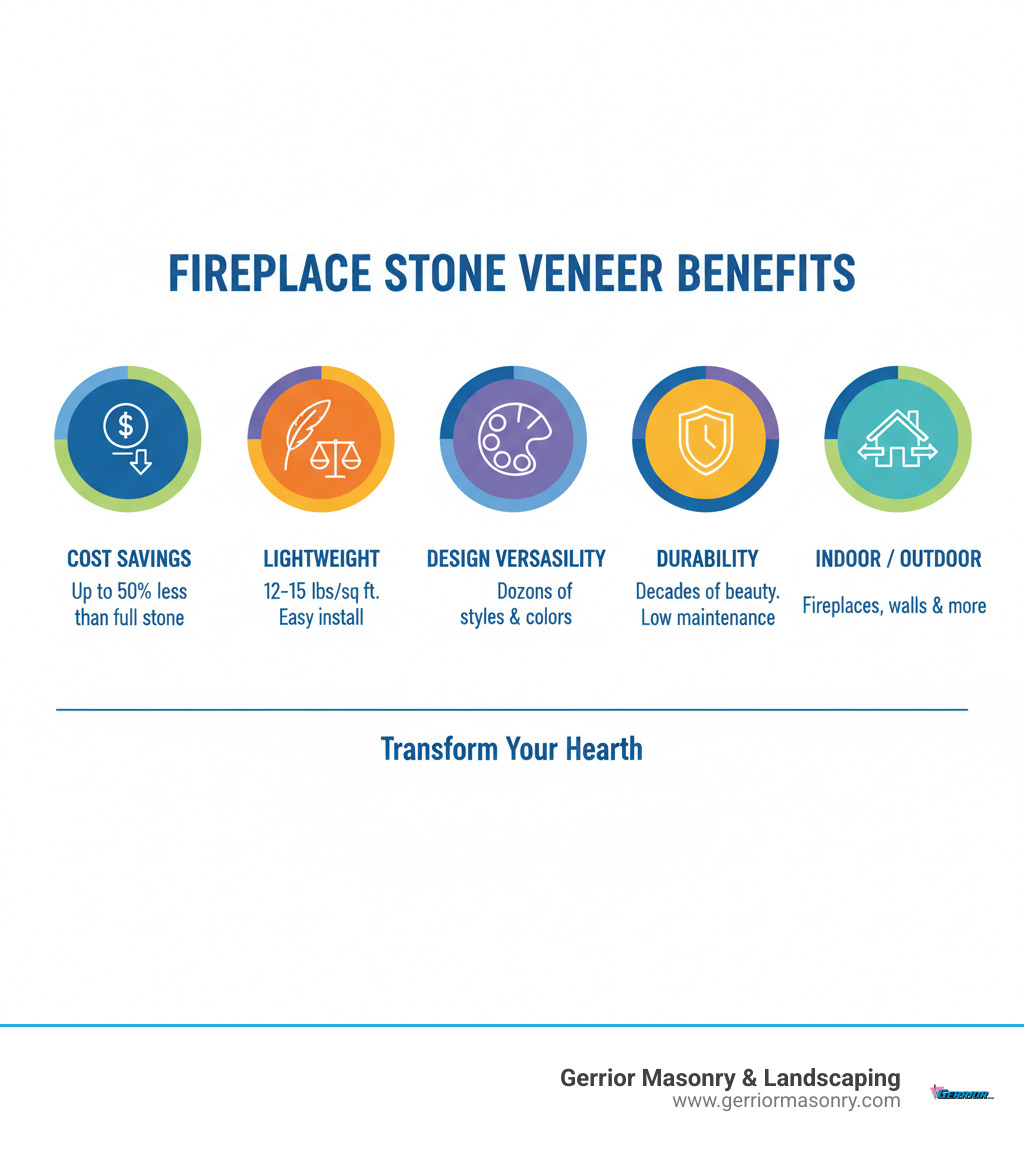
Fireplace stone veneer is a thin layer of natural or manufactured stone applied to a fireplace surface to create the look of full-thickness masonry without the weight, cost, or complex structural needs. Here’s a quick overview:
Types: Natural (real stone cut thin), manufactured (concrete-based), and faux panels (polyurethane).
Thickness: Typically 1″ to 2″, far lighter than full-bed stone.
Uses: Interior and outdoor fireplaces, accent walls, and chimneys.
Benefits: Cost-effective, easier to install, and offers a wide variety of styles.
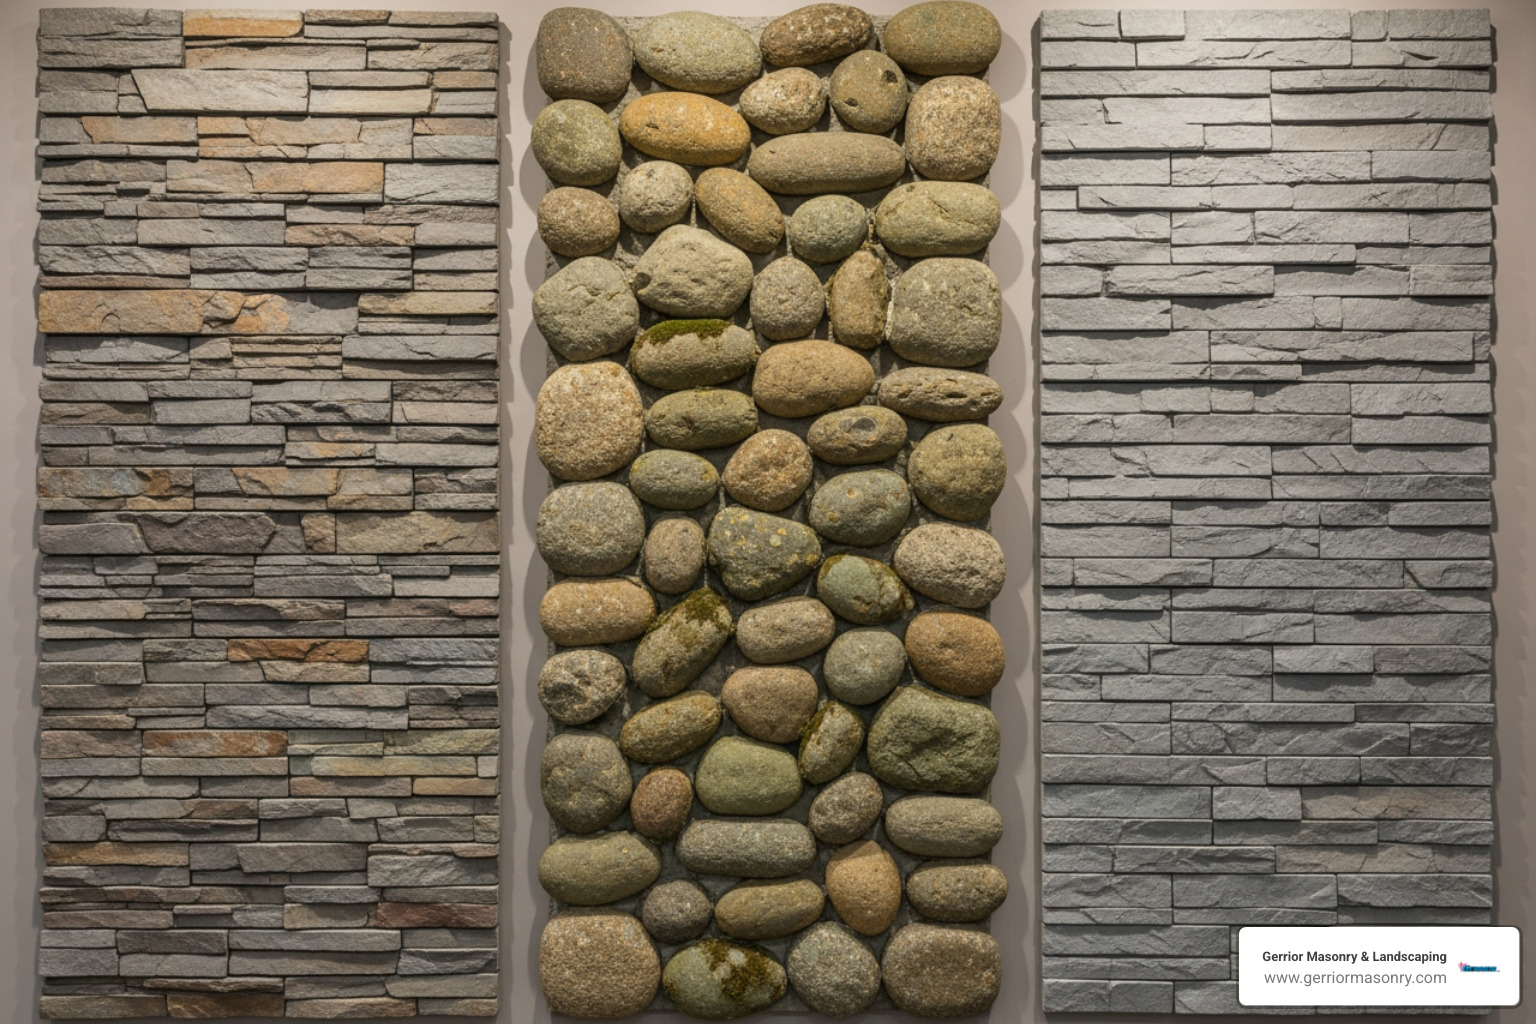
Popular Styles: Ledgestone, fieldstone, stacked stone, and river rock.
Stone veneer offers incredible design flexibility, allowing you to achieve anything from a rustic, Old-World hearth to a sleek, contemporary focal point. While natural stone offers best authenticity, manufactured stone provides consistency, and faux panels are a budget-friendly DIY option.
Proper installation is critical for safety and longevity, requiring a stable substrate, the right mortar, and strict adherence to building codes regarding heat clearances. Professional installation is recommended to ensure your fireplace is both beautiful and safe.
I’m Joe Gerrior, owner of Gerrior Masonry & Landscape Construction Corp. With over 34 years of experience, my team has transformed countless Massachusetts homes with expert fireplace stone veneer installations. This guide draws from our decades of hands-on work to help you make the best choice for your project.
Choosing the Perfect Fireplace Stone Veneer
Changing your fireplace can transform your entire living space. The right fireplace stone veneer turns an ordinary hearth into a stunning centerpiece. Whether you want a cozy rustic retreat or a sleek modern statement, stone veneer has a solution. Let’s explore the types, styles, and design choices to find the perfect match for your home.
Types of Veneer: Natural, Manufactured, and Faux Stone
You have three main options for stone veneer, each with distinct advantages in cost, durability, and installation.
Feature
Natural Stone Veneer
Manufactured Stone Veneer
Faux Stone (Panel)
Cost
Higher end, reflects natural sourcing and cutting
Mid-range, more affordable than natural
Most budget-friendly
Durability
Extremely durable, weather-resistant
Very durable, engineered for longevity
Durable, but can be less impact-resistant than real stone
Weight
Moderate (12-15 lbs PSF for thin veneer)
Moderate (similar to natural thin veneer)
Very lightweight
Installation
Requires skilled masonry, pieces vary in shape
Easier due to uniform sizes, flat backs, and sometimes panels
Simplest, often DIY-friendly with interlocking panels
Aesthetic Authenticity
Best, unique patterns and colors from nature
Highly realistic, molded from natural stone
Can look convincing, but sometimes less depth
Composition
Real stone, quarried and cut thin
Cement, aggregates, and pigments
Polyurethane, sometimes with foam backing
Natural stone veneer is real stone cut thin (around 1 inch). Each piece is unique, offering unparalleled authenticity and character. While it’s at the higher end of the price spectrum and requires skilled installation, its natural beauty is a worthy investment for many.
Manufactured stone veneer (or cultured stone) is a concrete-based product molded from real stones. It provides a highly realistic look with the practical benefits of consistent size and shape, making installation simpler. Many quality products are certified by the National Concrete Masonry Association (NCMA) and compliant with standards from The IAPMO Group, making them a versatile choice for both interior and exterior projects.
Faux stone panels are made from lightweight polyurethane, making them the most budget-friendly and DIY-friendly option. While they may lack the texture and impact resistance of real or manufactured stone, modern panels can be visually convincing and are resistant to moisture and pests.
Popular Fireplace Stone Veneer Styles to Match Your Home
After choosing a material, select a style that defines your fireplace’s personality.
Ledgestone: Features long, narrow pieces stacked horizontally with tight joints (a dry-stack look). Its clean lines are perfect for modern and transitional homes.
Fieldstone: Irregularly shaped stones create a classic, rustic charm ideal for farmhouse or traditional styles.
Stacked Stone: Emphasizes a tight, interlocking appearance with varied depths, creating rich texture that suits both contemporary and traditional designs.
River Rock: Smooth, rounded stones bring a calming, natural quality, perfect for a cabin-like feel.
Limestone: Uniform, slab-shaped pieces offer a refined, orderly appearance for more formal or classic interiors.
Granite: A less common but highly durable option with a unique crystalline structure for a luxurious statement.
Color is key. Warm tones (browns, reds, golds) create a cozy, inviting atmosphere, while cool tones (grays, blues, whites) feel fresh and contemporary. Mixed tones are versatile and can tie different room elements together. Always view physical samples in your home’s lighting before making a final decision.
Texture adds depth. Rough, rugged textures like fieldstone feel earthy and authentic. Smooth or honed textures found in limestone offer a more refined, neat look. Many stacked and ledgestone styles feature varied depths for captivating shadow play.
Don’t forget grout. A matching grout creates a seamless look, while contrasting grout highlights the individual stones. The popular dry-stack look uses minimal or no visible grout for a clean, modern finish.
From Installation to Upkeep: What You Need to Know
Proper installation and care are essential for a safe, durable, and beautiful fireplace stone veneer. This section covers the practical side of your project, from safety codes and budgeting to simple maintenance.
Fireplace Stone Veneer Installation and Safety Essentials
Safe, professional installation is non-negotiable for fireplaces. The process begins with preparing the wall surface by applying a moisture barrier and metal lath, which gives the mortar a surface to grip. A “scratch coat” of mortar is applied over the lath, creating the ideal foundation for the stone.
Each stone is then set in place with specialized mortar. However, the most critical aspect is adhering to building codes.
Firebox Clearance: Codes mandate a minimum distance between the firebox opening and any combustible materials (like wood framing behind the veneer). This is a crucial fire safety requirement.
Hearth Extension: The non-combustible floor area in front of the fireplace must meet minimum size requirements to catch embers.
Ventilation: The veneer must not block any air intakes or vents essential for your fireplace’s operation.
Project costs for fireplace stone veneer vary based on materials, complexity, and labor. The prices shared here are average estimates based on internet data and are not actual costs for Gerrior Masonry & Landscaping services. For a precise quote, please contact us directly.
Material Costs (per square foot):
Faux Stone Panels: $7 – $30+
Manufactured Stone Veneer: $10 – $40+
Natural Stone Veneer: $15 – $70+
Professional Installation Labor typically ranges from $15 to $50+ per square foot. This cost is influenced by regional rates, project complexity, and the type of stone being installed. When combining materials and professional labor, most projects fall between $25 and $120+ per square foot.
While a DIY approach can save on labor, the safety risks associated with fireplace installations make it a job best left to professionals who can guarantee compliance with fire codes.
Maintaining Your Beautiful Stone Fireplace
Fireplace stone veneer is remarkably low-maintenance.
Cleaning: For interior fireplaces, regular dusting with a soft brush or vacuum attachment is usually sufficient. For smudges, use a soft bristle brush with a mild, pH-neutral cleaner and water. Avoid harsh or acidic chemicals. For exterior stone, a gentle rinse with a garden hose will often suffice.
Mortar Joints: Periodically inspect mortar for cracks or crumbling. Minor issues can be addressed with fresh mortar. We offer guides on How to Repair Fireplace Mortar and using the correct Fireplace Cement. For high-heat areas inside the firebox, use specialized Fire Brick Mortar.
Sealing: A breathable, penetrating sealer can offer extra protection against stains, especially for natural stone. This is optional but can make cleaning easier.
With proper installation and simple care, your stone veneer fireplace will last for decades. Both natural and high-quality manufactured stone are built for longevity, often coming with lifetime limited warranties.
Your Dream Fireplace Awaits
Changing your hearth with fireplace stone veneer is an achievable goal. We’ve covered the key decisions, from choosing between natural, manufactured, and faux stone to selecting a style like ledgestone or fieldstone that reflects your taste. We’ve also highlighted the importance of color, texture, and safe, professional installation that adheres to all building codes.
A stone veneer fireplace adds more than just monetary value; it creates a warm, inviting gathering place where memories are made. It’s an investment in timeless beauty and lasting durability.
At Gerrior Masonry & Landscape Construction, we have spent over 30 years perfecting the art of stone veneer installation. My team and I are committed to skilled craftsmanship and owner oversight on every project, ensuring your vision becomes a reality with the highest standards of quality and safety.
If you’re ready to take the next step, we invite you to explore our expert masonry services and contact us for a consultation. Let’s work together to build the heart of your home.
Gerrior Masonry & Landscape Construction is based in Woburn, MA, and proudly serves Middlesex and Essex County, Massachusetts.