Why Poor Backyard Drainage Can Wreck Your Yard — and What to Do About It
Backyard landscaping drainage is the system that moves rainwater away from your home, lawn, and garden — and when it fails, the damage adds up fast.
Here are the most effective ways to fix backyard water issues:
Regrade your yard to slope at least 1-2% away from your foundation
Install a French drain to capture and redirect subsurface water
Add a dry creek bed or swale to channel surface runoff
Build a rain garden in low spots to absorb excess stormwater naturally
Extend downspouts at least 3-4 feet from your home’s foundation
Improve your soil by aerating and adding organic matter to break up compaction
Install a catch basin or dry well for areas where water persistently pools
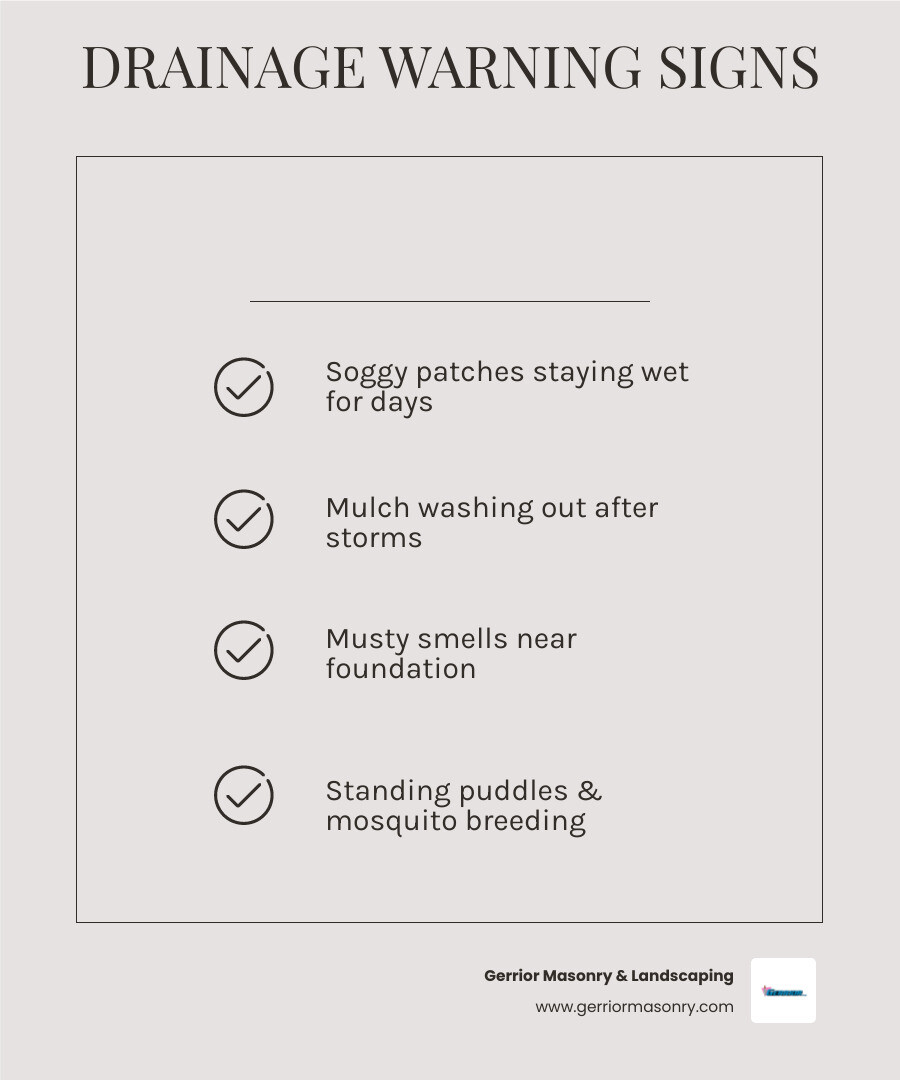
Poor drainage shows up in ways that are hard to ignore — soggy patches that stay wet for days, mulch washing out of beds after every storm, or that musty smell near your foundation. Left untreated, standing water can damage your lawn, rot plant roots, attract mosquitoes, and threaten your home’s foundation.
The good news? Most drainage problems have clear solutions, whether you tackle them yourself or bring in a professional.
I’m Joe Gerrior, owner of Gerrior Masonry & Landscape Construction Corp., with over 34 years of experience solving backyard landscaping drainage problems for homeowners across Massachusetts. Let’s walk through exactly what to look for — and how to fix it.
Essential Strategies for backyard landscaping drainage
Before you start digging up your lawn or buying pallets of stone, you need a diagnosis. We often see homeowners try to fix a symptom rather than the cause. To truly master backyard landscaping drainage, you have to “think like water.” Water is patient, persistent, and always follows the path of least resistance (gravity). In Middlesex and Essex County, we often encounter ‘hardpan’ layers—dense subsoil that prevents vertical drainage regardless of surface grading. Identifying these early prevents the frustration of a failed DIY project.
Site Diagnosis: Identifying the Culprit
The first step is a rainy-day walk. Put on your boots and observe where the water goes. Are your gutters overflowing? Is water cascading off a neighbor’s sloped driveway into your flower beds?
We recommend a simple percolation test to check your soil’s natural ability to handle water. Dig a hole about 12 inches deep and 6-12 inches wide. Fill it with water and time how long it takes to empty. If it drains in under 30 minutes, your drainage is excellent. If it takes more than three hours, you likely have high clay content or severe compaction that requires intervention. You can also perform a ‘ribbon test’ by squeezing moist soil; if it forms a long, stable ribbon, clay content is high.
Runoff Patterns and Elevation
Understanding the topography of your property is vital. Many local yards suffer from “bowl” effects where the center of the lawn is lower than the perimeter. We use elevation checks to determine the highest and lowest points. You want a consistent slope of at least 1-2% away from your foundation. In practical terms, that means the ground should drop about one inch for every four to ten feet of distance.
Assessing DIY Feasibility
Some fixes are perfect for a weekend warrior. Cleaning gutters or adding downspout extensions are easy wins. However, fixing pooling water in yard spaces often requires heavy machinery and precise grading. If you are dealing with water entering a basement or massive erosion, the project’s scope has moved beyond a shovel and a wheelbarrow.
Surface Solutions and backyard landscaping drainage
Surface drainage focuses on moving water that you can see. These solutions are often the most affordable and can be integrated beautifully into your existing landscape design.
Swale Construction
A swale is essentially a wide, shallow, grass-lined ditch. It doesn’t look like a ditch; it looks like a natural dip in the lawn. The goal is to catch runoff and direct it to a safe exit point, like a storm drain or a rain garden. We generally aim for a minimum slope of 1 foot of drop for every 50 feet of length to ensure water doesn’t stagnate. Swales are highly effective for managing large volumes of surface water without the need for pipes.
Decorative Dry Creek Beds
If you want to combine function with curb appeal, a dry creek bed is a fantastic option. By lining a shallow trench with landscape fabric and a mix of river rocks, boulders, and pea gravel, you create a dedicated path for stormwater. Using a variety of stone sizes—from small river jacks to large anchor boulders—not only looks more natural but also helps break the velocity of rushing water during heavy downpours, preventing further erosion of the underlying soil.
Rain Gardens: Nature’s Sponge
A rain garden is a depressed area planted with native, water-loving perennials and shrubs. It’s designed to hold water for a short period (usually less than 24 hours), allowing it to soak slowly into the ground. Species like Swamp Milkweed or Turtlehead have evolved to handle the ‘feast or famine’ water cycles of New England. Not only does this solve a drainage issue, but it also filters pollutants and provides a habitat for local pollinators.
Catch Basins and Channel Drains
For hard surfaces like patios and driveways, we often recommend channel drains for yards. These are long, narrow grates installed flush with the pavement to catch water before it reaches your garage or foundation. For low spots in the lawn, a catch basin (a buried box with a grate on top) can trap water and funnel it into an underground pipe.
When surface solutions aren’t enough, we have to look underground. Subsurface systems are the heavy hitters of backyard landscaping drainage.
The Anatomy of a French Drain
The French drain is perhaps the most misunderstood tool in landscaping. It isn’t just a pipe in the ground. A true French drain involves:
A Trench: Typically 6-12 inches wide and 18-24 inches deep.
Filter Fabric: To prevent soil from clogging the system. We use the ‘burrito wrap’ technique, lining the trench and folding the fabric over the top to create a protected envelope that allows water in while keeping fine silt out.
Perforated Pipe: Laid with the holes facing down (counter-intuitive, but it allows water to rise into the pipe from below).
Aggregate Layers: Clean, 3/4-inch crushed stone that allows water to flow freely.
This system is perfect for a drain on side of house application, where it intercepts groundwater before it can seep into your basement.
Dry Wells: Deep Percolation
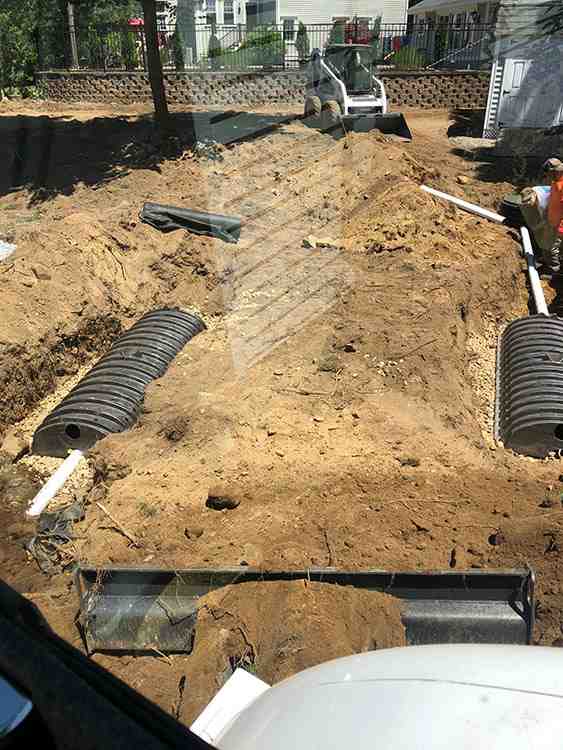
If you have nowhere to send the water (no storm drain or lower curb), you might need a dry well. We are expert dry well installers who understand how to size these systems correctly. A dry well is an underground plastic or concrete basin, or a large pit filled with stone, that collects runoff and allows it to dissipate into the deep soil layers. When calculating size, we account for the total square footage of the contributing roof area; a 1,000-square-foot roof section can produce nearly 600 gallons of runoff in a one-inch rain event.
Improving Soil Health for backyard landscaping drainage
Sometimes the problem isn’t the slope; it’s the soil itself. In many parts of Massachusetts, we deal with heavy, compacted clay that acts like a concrete slab.
Breaking Up Clay Compaction
Clay particles are tiny and flat, meaning they pack together tightly, leading to soil compaction that leaves no room for water to move. To fix this, you can:
Aerate: Use a core aerator to pull plugs of soil out of the ground. This creates instant channels for air and water.
Amend with Organic Matter: Adding compost or well-rotted manure improves soil structure over time.
Gypsum Application: In some cases, gypsum can help loosen the chemical bonds in clay soil, though it’s a slow process.
If you have a spot that is perpetually damp, don’t fight nature—work with it. Planting moisture-loving species like Red Twig Dogwood, River Birch, or various ferns can help “drink” the excess water. These plants have root systems that thrive in anaerobic (low oxygen) conditions where typical turfgrass would die of root rot.
Even the best-designed backyard landscaping drainage system requires maintenance. We’ve seen $10,000 systems fail because of a $10 clog.
Gutter and Downspout Management
Your roof is a massive water collector. During a one-inch rainstorm, a 2,000-square-foot roof sheds about 1,250 gallons of water. If your downspouts drop that water right at the base of your foundation, you’re asking for trouble.
We recommend extending downspouts at least 3-4 feet (ideally 10 feet) away from the house. You can even bury these lines and have them exit through a “pop-up emitter” in the lawn. For more on this, see Gutter Runoff Woes: Build a Dry Well for Downspouts.
Maintenance Tips
Debris Removal: Clean your gutters twice a year (spring and fall).
System Flushing: Every few years, use a garden hose to flush out French drains or catch basins to ensure silt hasn’t built up.
Inspect After Storms: Walk your yard after a heavy “Nor’easter” to ensure your swales haven’t eroded and your grates aren’t covered in leaves.
Understanding the budget is a key part of planning. The following table provides average internet costs for various drainage solutions. Please note that these are average internet-based estimates and not actual quotes for Gerrior Masonry services. Local factors like soil type, accessibility, and permit requirements will influence the final cost.
Drainage Solution
Average Internet Cost Range (Material & Labor)
French Drain
$10 – $300 per linear foot
Dry Well
$500 – $15,000 per unit
Channel Drain
$30 – $450 per linear foot
Swale
$5 – $45 per square foot
Rain Garden
$5 – $20 per square foot
Dry Creek Bed
$3 – $12 per square foot
Yard Drain / Catch Basin
$100 – $300 per unit
Note: The wide range reflects the difference between simple DIY material costs and complex, large-scale professional installations requiring excavation and engineering.
When to Hire a Professional Landscaper
While many homeowners enjoy a DIY project, backyard landscaping drainage is an area where mistakes can be incredibly costly. If you grade your yard incorrectly, you might accidentally send water into your neighbor’s basement—a legal and financial nightmare.
Why Experience Matters
At Gerrior Masonry & Landscaping, we bring over 30 years of experience to every job. Whether it’s patio design and installation or complex excavation services, we ensure the foundation of the project—the drainage—is handled first.
Owner oversight is a hallmark of our work. We don’t just send a crew; we ensure the grading is precise and the systems are built to last for decades, not just until the next storm.
Permitting and Regulations
Did you know that some towns in Massachusetts require permits for dry wells or specific drainage alterations? We can help you navigate these requirements. If you’re wondering, “Do I need a permit to install a dry well?“, we have the answers.
If your yard is currently a swamp or you’re worried about your foundation, don’t wait for the next big storm. Our team provides comprehensive residential drainage solutions tailored to the unique soil and climate of Eastern Massachusetts.
Gerrior Masonry & Landscape Construction is based in Woburn, MA, and services Middlesex and Essex County, Massachusetts. From Arlington and Bedford to Winchester and Wilmington, we are here to ensure your property stays dry and beautiful.
Why Flagstone Patio Construction Is Worth Doing Right
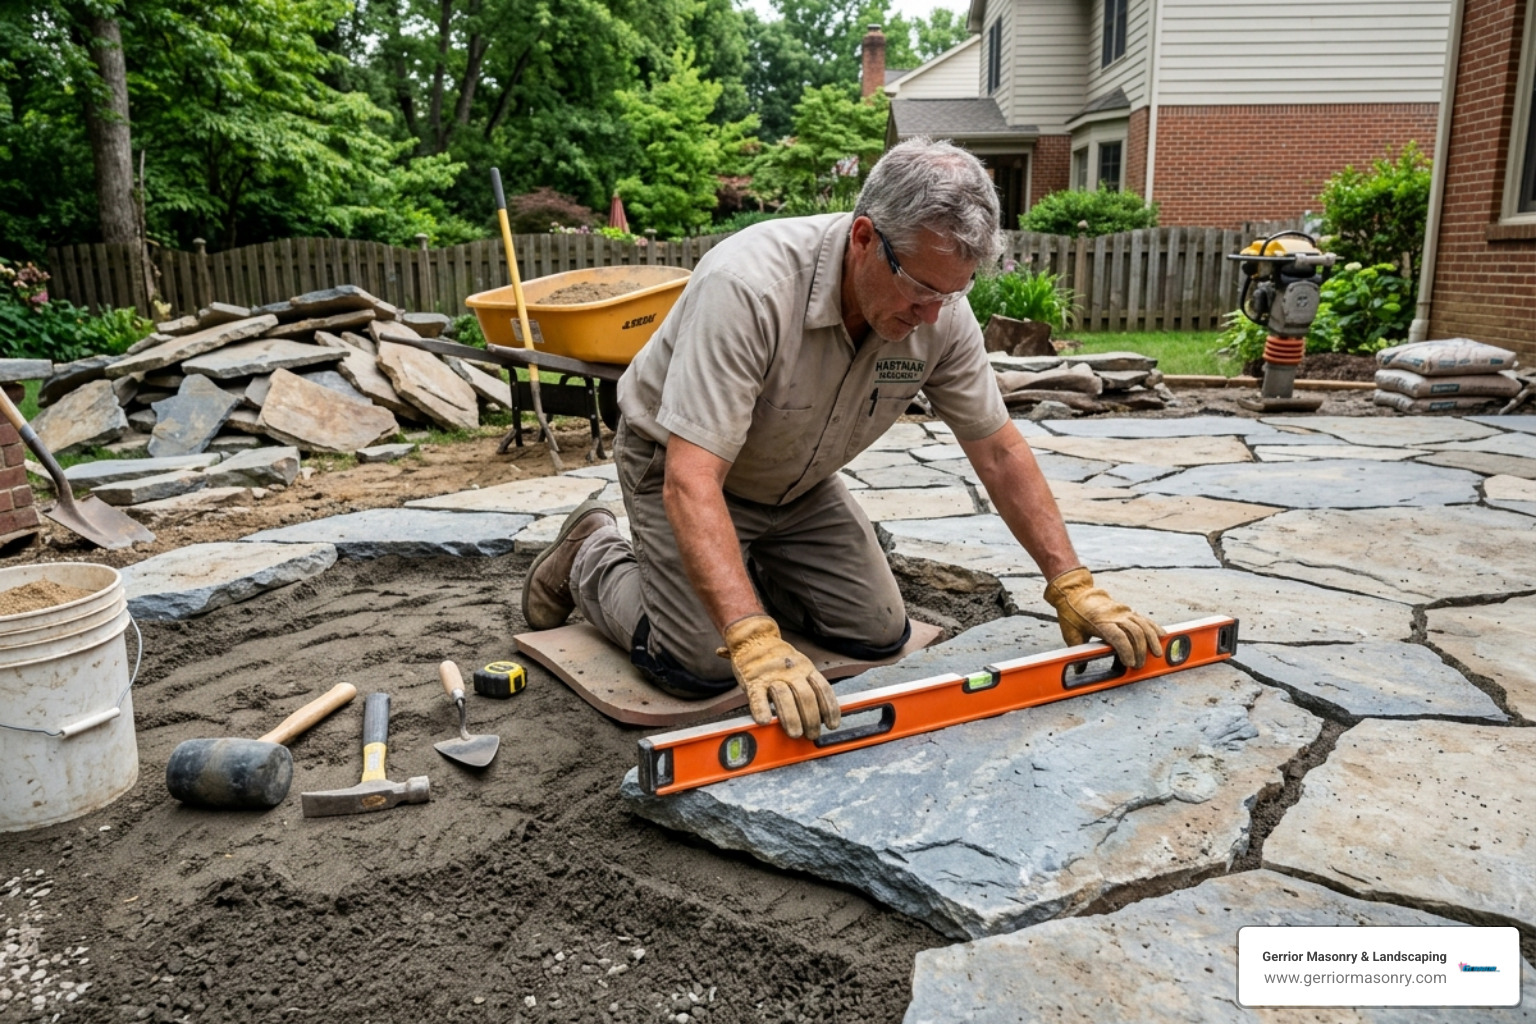
Flagstone patio construction is one of the most rewarding hardscaping projects a homeowner can take on — but only if the foundation is built correctly. For homeowners in Massachusetts, a well-constructed patio provides a durable outdoor living space that withstands the local climate while adding significant aesthetic value to the property.
Here’s a quick overview of how it works:
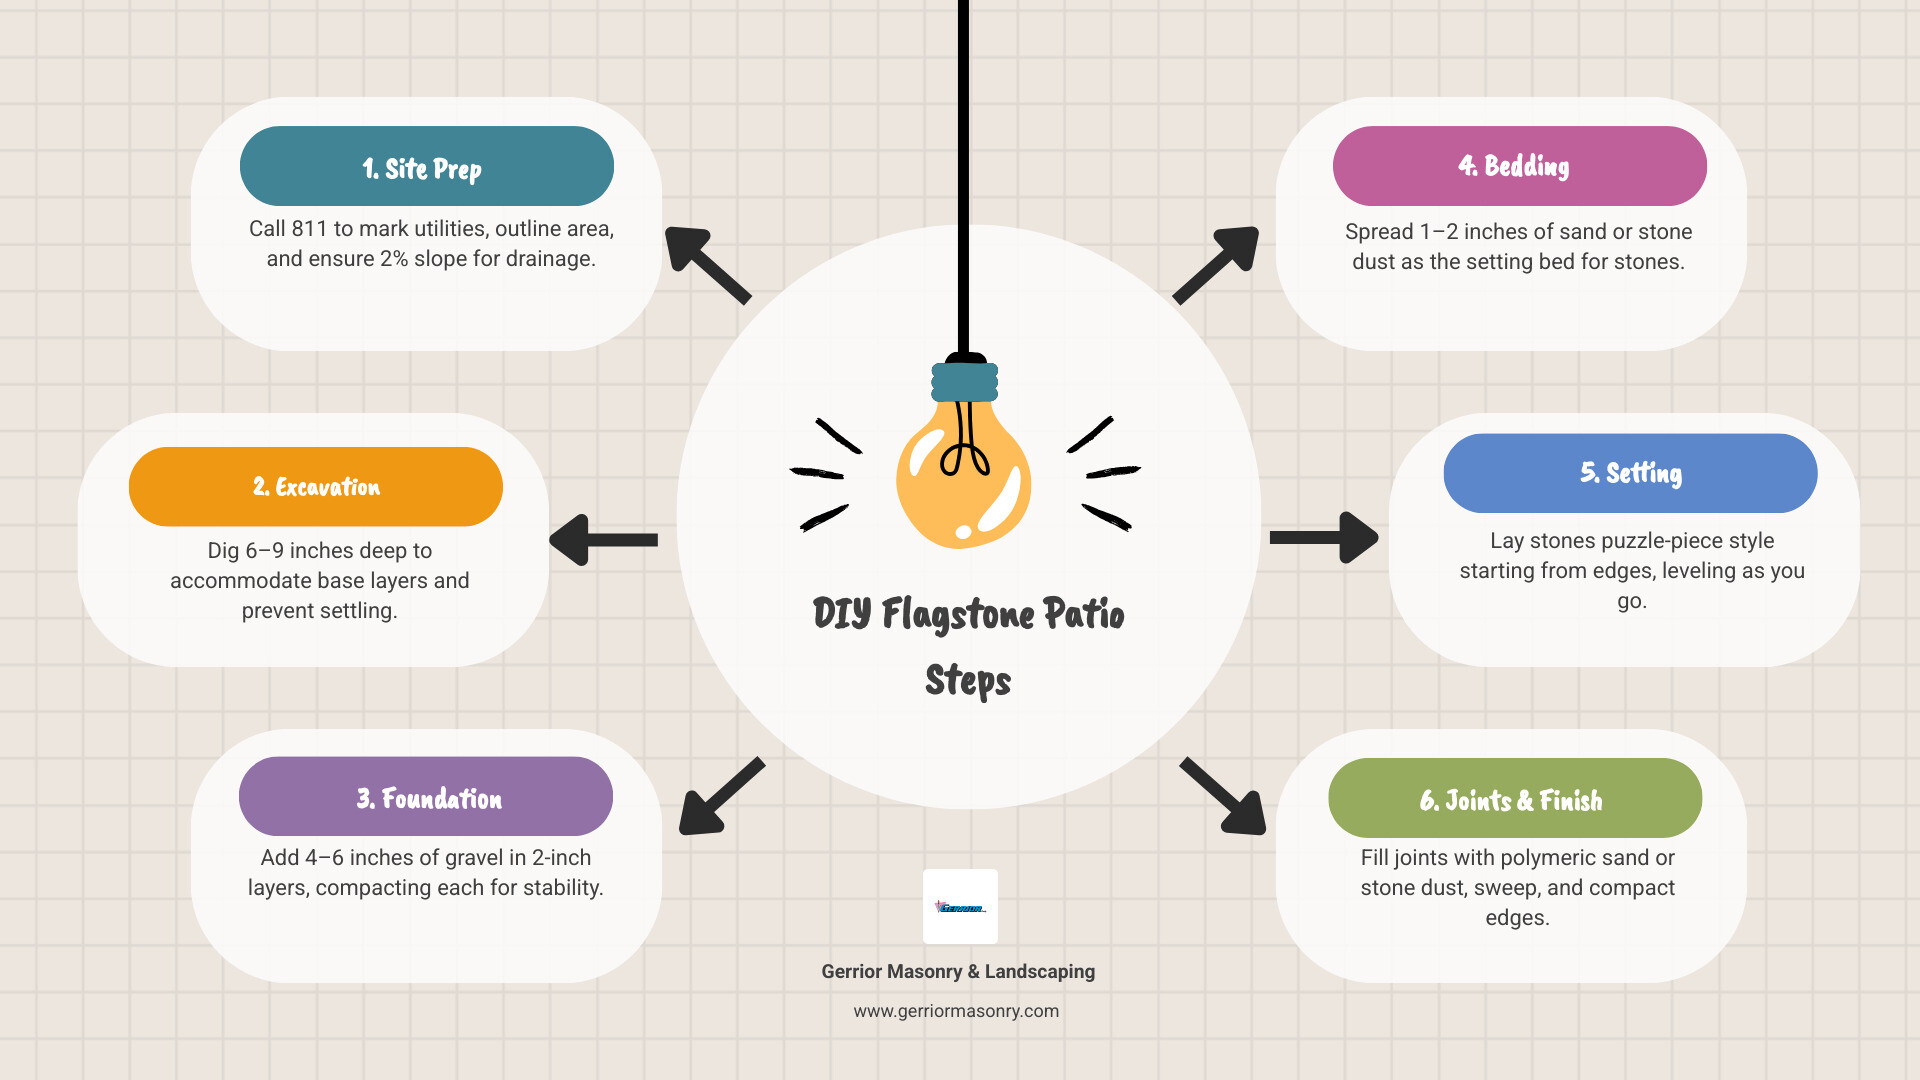
Plan and mark your patio area with stakes and string
Call 811 to have underground utilities marked before digging
Excavate 6–9 inches deep depending on stone thickness and climate
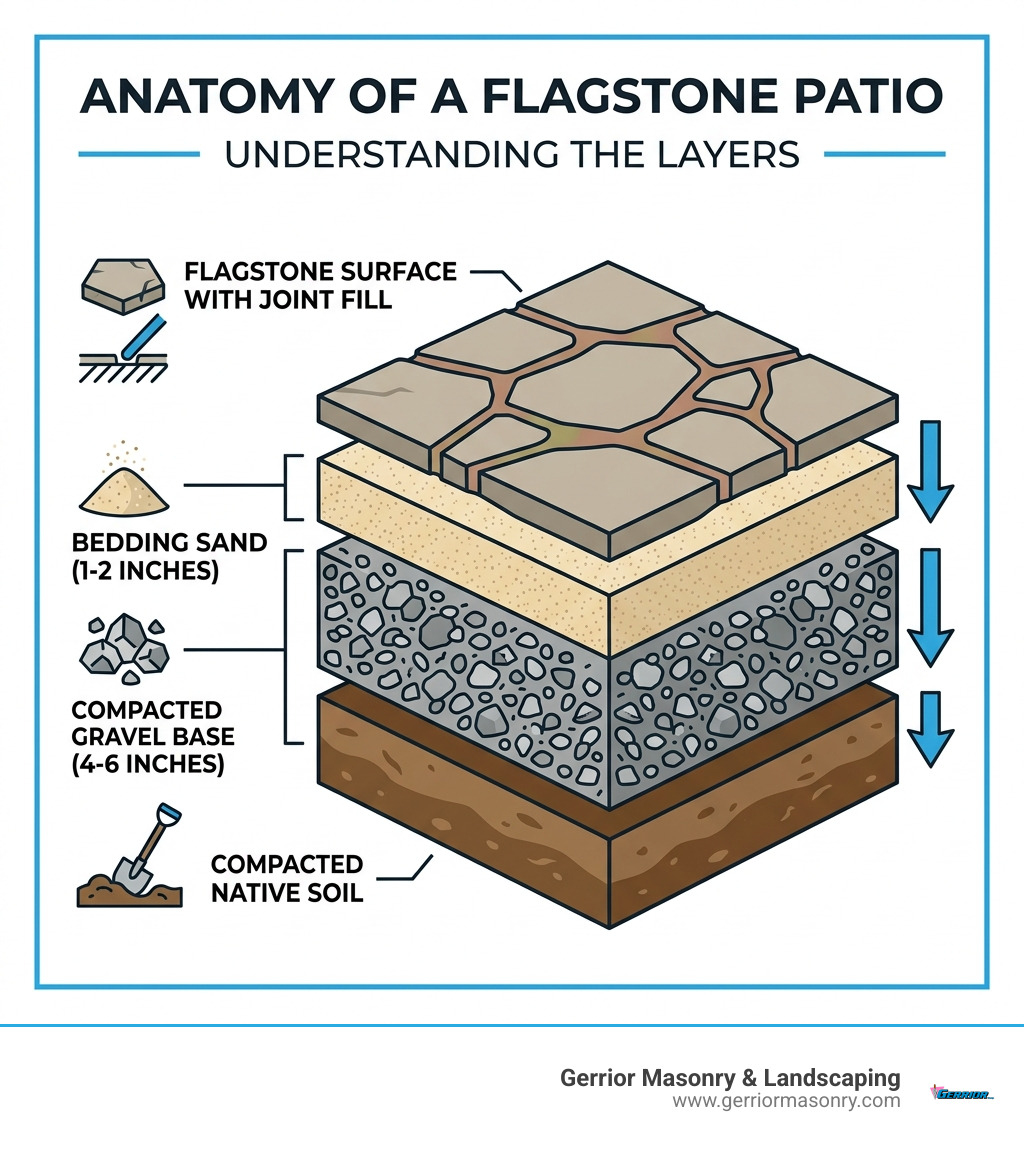
Compact a gravel base (4–6 inches) in 2-inch layers
Add a bedding layer of sand or decomposed granite (1–2 inches)
Lay the flagstone pieces, leveling each one individually
Fill joints with polymeric sand, stone dust, or decomposed granite
Install edging to lock the perimeter in place
Flagstone is a flat, naturally occurring sedimentary rock that splits into smooth slabs. It’s quarried — not manufactured — which gives each patio a one-of-a-kind look. It also handles the intense Massachusetts freeze-thaw cycles well when installed correctly, which matters a lot for local longevity. Because the stone is natural, it maintains its color and integrity far longer than many synthetic alternatives.
A dry-laid flagstone patio for a typical 120-square-foot space costs roughly $1,800–$2,200 in DIY materials. Professional installation in Massachusetts ranges from $2,500 to $15,000 or more depending on stone choice and site complexity. These are average costs based on internet data, not a quote from Gerrior Masonry.
I’m Joe Gerrior, owner of Gerrior Masonry & Landscape Construction Corp., with over 34 years of experience in masonry and hardscaping — including flagstone patio construction — serving residential and commercial clients across Massachusetts. In this guide, I’ll walk you through everything you need to build a flagstone patio that lasts for decades.
Essential Planning for Flagstone Patio Construction
Before you pick up a shovel in Woburn or Winchester, you need a solid plan. Successful flagstone patio construction starts with selecting the right materials and understanding the local environment. In Massachusetts, we deal with significant temperature swings, meaning your stone choice needs to be as tough as a local winter. Proper planning ensures that your investment remains level and beautiful despite the shifting ground common in our region.
Selecting Stone Types and Essential Tools
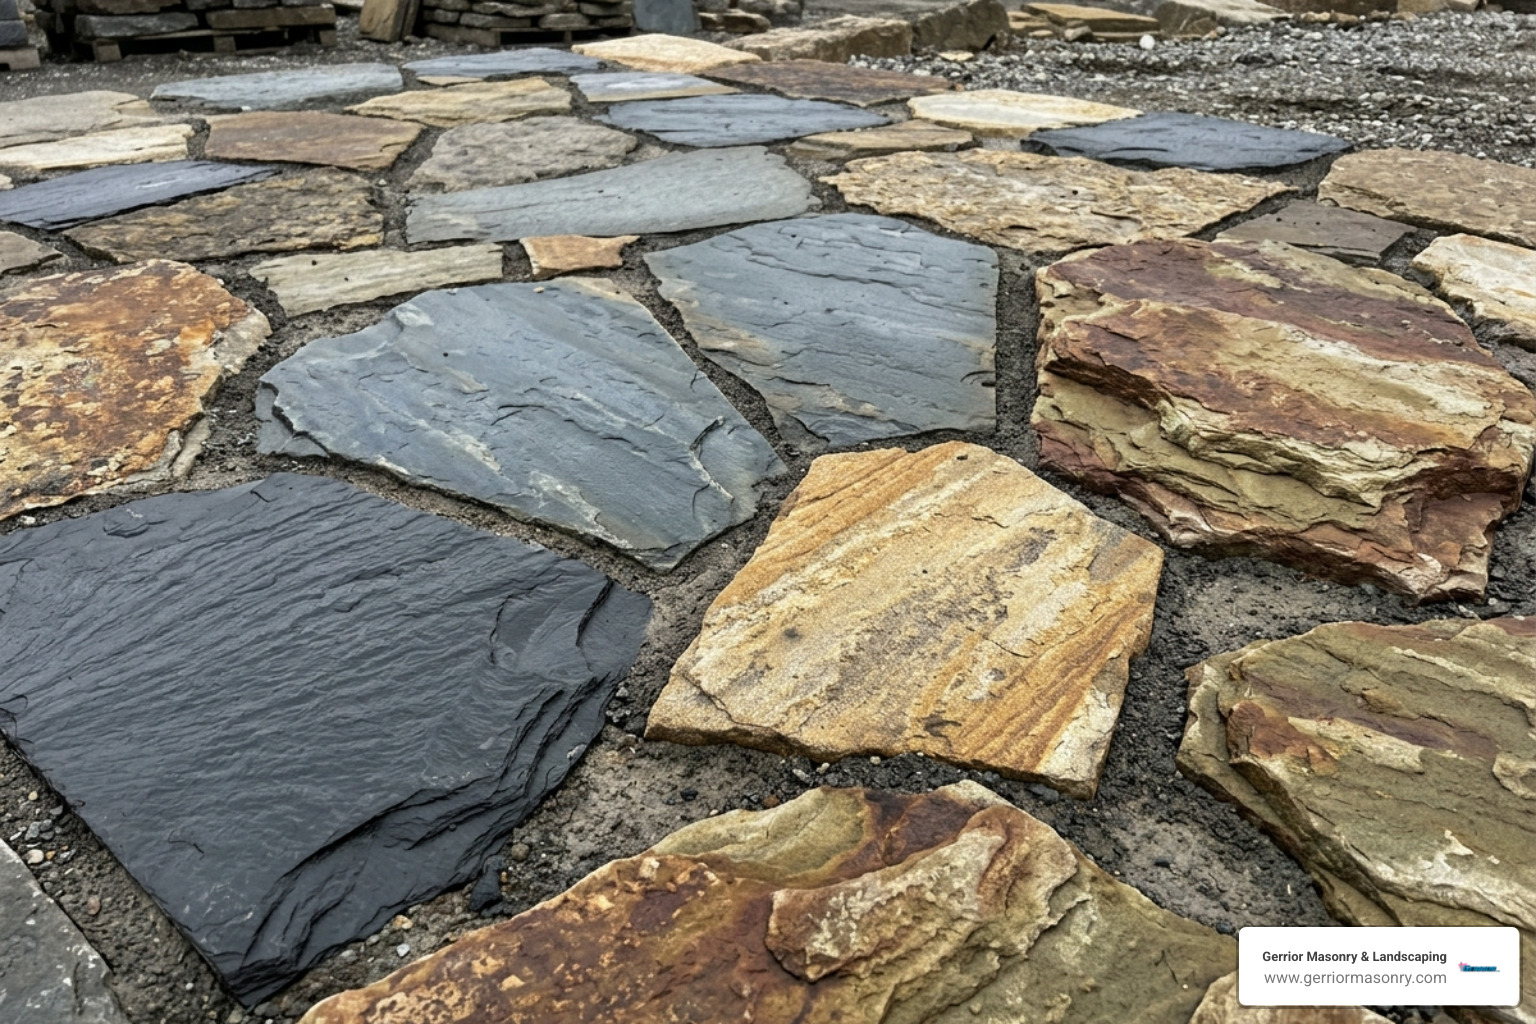
Choosing your stone is the fun part, but it’s also the most critical for durability. Flagstone is a generic term for several types of flat stone:
Bluestone: A dense, blue-gray sandstone that is a staple for Massachusetts hardscaping. It’s incredibly popular in towns like Lexington and Concord because it’s durable and offers a classic look.
Sandstone: Known for warm tans and reds. It’s porous but stays relatively cool underfoot during our humid July afternoons.
Slate: Offers a beautiful, layered texture. However, it can be prone to “spalling” (layers peeling off) if it’s not high quality.
Limestone: Elegant and light-colored, but can be slippery when wet.
When selecting your stone, thickness is your best friend. We recommend stones that are at least 1.5 to 2 inches thick. Anything thinner is likely to crack under foot traffic or shift during the first deep freeze of the year. For more help on material selection, check out our guide on choosing the perfect flooring material for your outdoor patio.
Safety Gear: Work gloves, safety glasses, and hearing protection (especially if you’re using a plate compactor).
Layout Tools: Stakes, mason’s string, and marking paint.
Excavation Tools: Shovel, pickaxe, and a wheelbarrow.
Compaction Equipment: A hand tamper for small areas, but we strongly suggest renting a gas-powered plate compactor for anything over 50 square feet.
Setting Tools: A 4-foot level, a rubber mallet, and a stone chisel for shaping pieces.
Excavation and Base Preparation Requirements
If there is one thing we’ve learned in 30 years of masonry, it’s this: your patio is only as good as what’s underneath it. Skipping base preparation is the #1 reason for patio failure in Middlesex County.
First, call 811. Whether you’re in Arlington or Andover, you must have your underground utilities marked. You don’t want to strike a gas line while looking for a place to put your grill.
The Excavation Process:
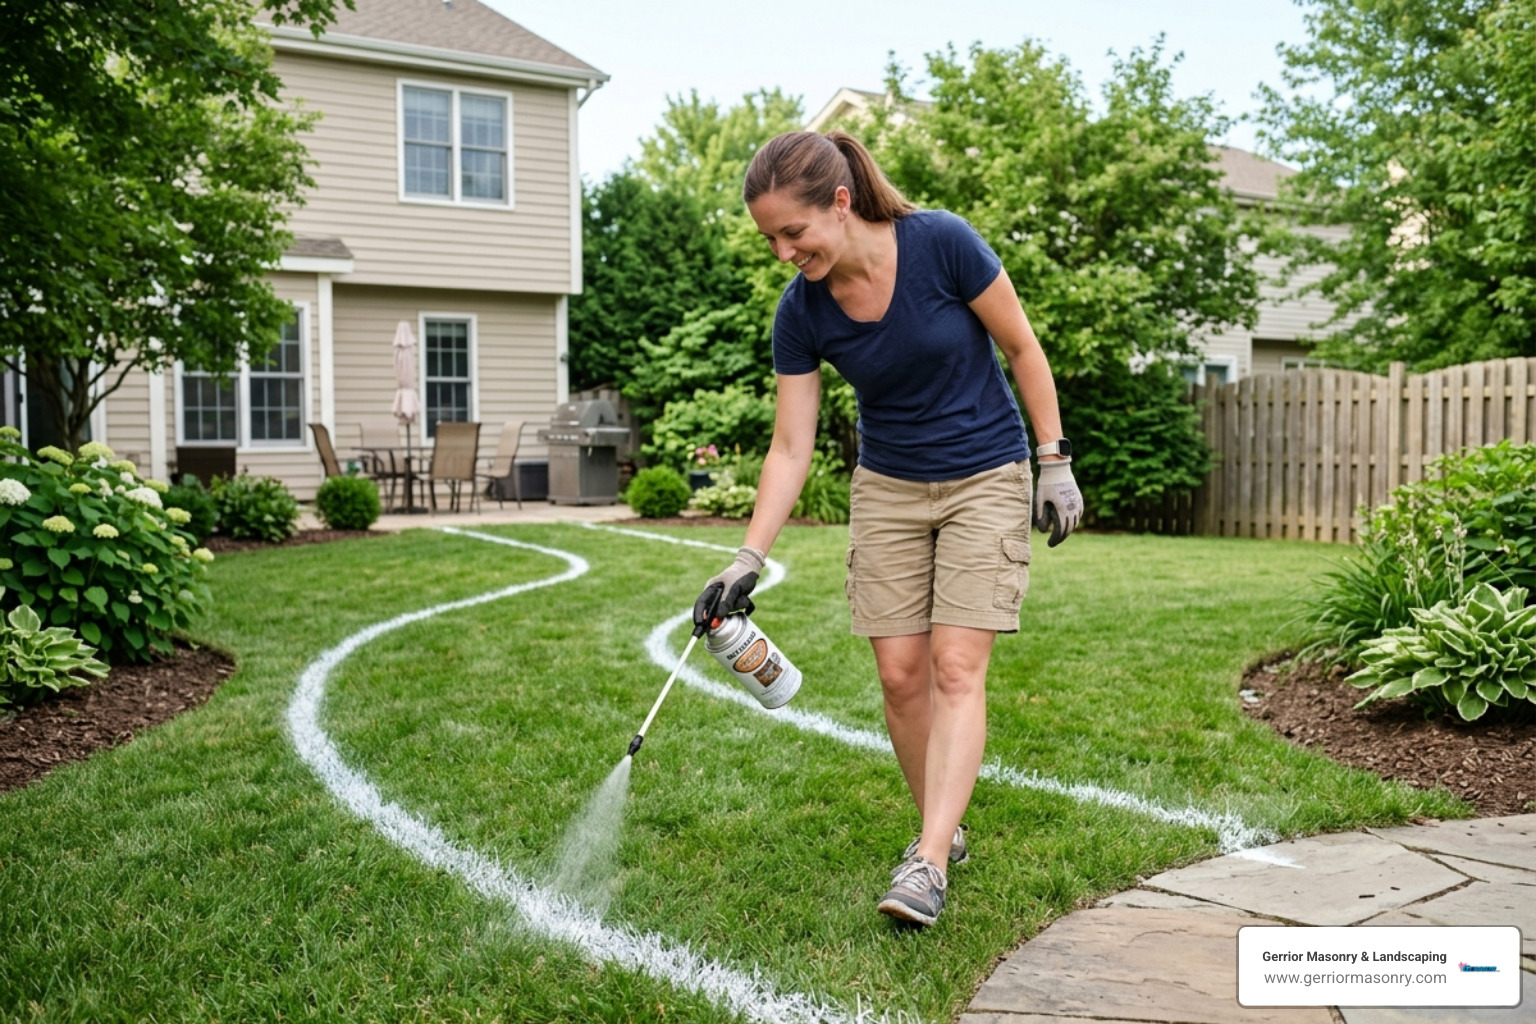
Mark the Area: Use spray paint to outline the footprint.
Determine the Depth: You need to dig deep enough to accommodate 4–6 inches of compacted gravel, 1–2 inches of bedding sand, and the thickness of the stone itself. Usually, this means excavating 6–9 inches deep.
Establish the Slope: To prevent water from flooding your basement in Medford or Malden, the patio must slope away from your house. Aim for a 2% slope, which is roughly a 1/4-inch drop for every foot of distance.
Compact the Subgrade: Before adding gravel, use your plate compactor on the raw soil.
For a deeper dive into what makes a stable foundation, read our article on the base for flagstone walkway construction.
Dry-Laid vs. Mortared Flagstone Patio Construction
There are two main ways to build your patio: dry-set or mortared.
Dry-Laid (Dry-Set): This is the most DIY-friendly method. The stones are set on a bed of gravel and sand. It’s permeable, meaning water can filter through the joints into the ground. It’s also flexible; if a stone shifts due to frost, you can easily lift it, add a bit of sand, and reset it.
Mortared: This involves laying flagstone over a reinforced concrete slab and filling the joints with wet mortar. While it looks formal and high-end, it’s much harder for a DIYer. If the slab isn’t perfect, the mortar will crack when the ground moves.
Feature
Dry-Laid Method
Mortared Method
DIY Difficulty
Intermediate
Advanced
Drainage
Permeable (Good)
Impermeable (Requires Drain)
Maintenance
Occasional weeding/refilling
Repairing cracked grout
Foundation
Gravel/Sand Base
Poured Concrete Slab
If you are considering the mortared route, you might want to learn about concrete patio construction to understand the foundation requirements.
Step-by-Step Installation and Maintenance
Once your base is compacted and your sand is screeded level (following your slope!), it’s time to play the world’s heaviest game of Tetris.
Laying the Stone and Joint Finishing
Start laying stones at the most visible corner or along a straight edge (like the house foundation).
The Fit: Place your largest stones first. Try to keep the gaps between stones (the joints) consistent, ideally between 3/8 of an inch and 1.5 inches. If a stone doesn’t fit, you can use a hammer and chisel to knock off “ears” or sharp points.
Leveling: This is the tedious part. Every single stone needs to be checked with a level. If a stone is too low, lift it and add a handful of sand. If it’s too high, whack it with a rubber mallet. It should feel rock-solid when you step on it.
Joint Filling: Once the stones are set, you need to fill the gaps.
Polymeric Sand: This is our favorite for DIYers in towns like Burlington and Billerica. It’s sand mixed with additives that harden when wet. It resists weeds and ants.
Stone Dust: A more natural, rustic look, but it will require more weeding over time.
Edging: Install metal or plastic landscape edging around the perimeter. Secure it with 10-inch spikes to prevent the stones from “creeping” outward over time.
Avoiding Common Mistakes in Flagstone Patio Construction
Even with the best intentions, things can go wrong. Here are the pitfalls we see most often in Massachusetts:
Poor Compaction: If you only use a hand tamper on the gravel, your patio will sink. Rent the plate compactor. It’s worth the $100.
Inadequate Drainage: If you don’t maintain that 1/4-inch-per-foot slope, you’ll end up with an ice rink in the winter. For serious water issues, you may need to look into drainage systems and dry wells.
Small Stones at the Edges: Small pieces shift easily. Use your largest, heaviest stones for the perimeter.
Ignoring the “811” rule: Nothing ruins a weekend like a broken water main.
Cost Estimates and Professional Services in Massachusetts
Let’s talk numbers. Building a patio is an investment in your home’s value.
DIY Costs: If you do the labor yourself, expect to pay between $10 and $12 per square foot for natural flagstone. For a standard 120-square-foot patio, your material total (including gravel, sand, and stone) will likely fall between $1,800 and $2,200.
Professional Costs: Hiring a pro ensures the job is done right the first time. In the Massachusetts area, professional flagstone patio construction generally ranges from $2,500 to $15,000. The higher end of that range accounts for large-scale projects, complex patterns, or sites that require significant excavation and retaining walls.
At Gerrior Masonry & Landscaping, we’ve spent three decades perfecting the art of the stone patio. Whether you’re in Newton, Natick, or North Reading, we bring owner-supervised quality to every backyard. If the DIY route feels a bit too heavy (literally), we are here to help with our patio installations services.
Frequently Asked Questions
Can I install flagstone over an existing concrete slab? Yes, you can! If the slab is in good condition and has a proper slope, you can mortar the stones directly to the concrete. This is a great way to “face-lift” an old, ugly concrete patio in places like Lynnfield or Salem.
How long does a flagstone patio last? A properly installed dry-laid patio can last 30 to 50 years. Because it’s natural stone, it won’t fade in the sun like concrete pavers might.
How do I maintain it? Sweep it regularly to keep organic debris out of the joints. If you used polymeric sand, you might need to top it off every 3–5 years. If stones become uneven due to extreme frost, simply lift them and relevel the sand underneath.
How much stone should I order? Always order 10–15% more than your square footage calculation. This accounts for breakage and the pieces you’ll inevitably have to cut to fit the “puzzle.”
Summary of DIY Steps
Site Prep: Call 811, mark the area, and ensure a 2% slope.
Excavation: Dig 6–9 inches deep.
Foundation: Add 4–6 inches of gravel, compacting every 2 inches.
Bedding: Add 1–2 inches of sand or stone dust.
Setting: Lay stones, starting from the edge.
Finishing: Level each stone, install edging, and fill joints.
Building a patio is hard work, but there is nothing quite like sitting on a stone surface you built yourself while the sun sets over the Massachusetts hills. Whether you are in Woburn, Arlington, or Beverly, we hope this guide helps you create the outdoor space of your dreams.
Gerrior Masonry & Landscape Construction is based in Woburn, MA, and services Middlesex and Essex County, Massachusetts. Average costs for Massachusetts based on internet data range from $855 to $6,600 for DIY projects, while professional installations typically range from $2,500 to $15,000 or more depending on stone choice and site complexity.
Ready to transform your backyard? If you’d rather spend your weekend relaxing than hauling tons of stone, give us a call. From stone patio contractors near me searches to full landscape design projects, Gerrior Masonry & Landscaping has the experience to get it done right.
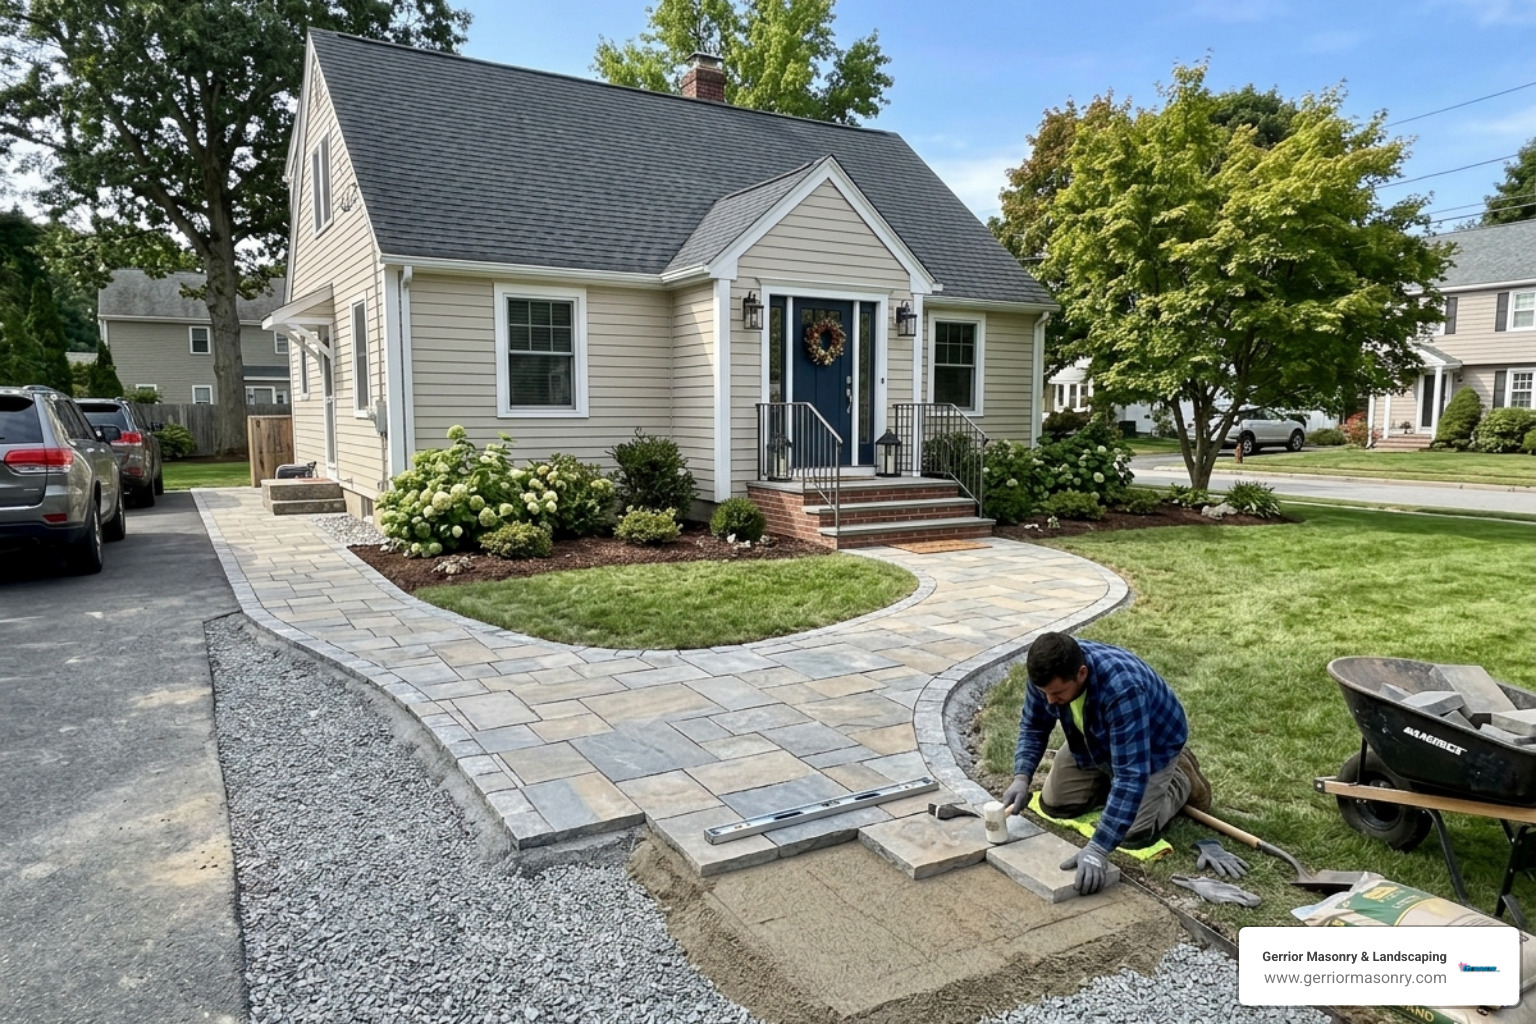
Putting in a paver walkway is one of the best ways to boost your home’s curb appeal and add lasting value to your property. In the Massachusetts landscape, where seasons shift dramatically, a well-constructed path is both a functional necessity and a visual asset. Here’s a quick overview of how it’s done:
Plan your layout – Mark the path, check for utilities (call 811), and determine width (36-48 inches standard)
Excavate – Dig 7-8 inches deep to allow for base layers and proper drainage
Build the base – Add 4 inches of compacted gravel, then 1 inch of bedding sand
Install edge restraints – Secure the perimeter before laying pavers to prevent lateral shifting
Lay the pavers – Set in your chosen pattern, cut to fit edges with a masonry saw
Finish with polymeric sand – Sweep into joints, compact, and wet to activate the binding agents
A properly installed paver walkway can last 20 to 25 years with basic maintenance. But cut corners on the base prep, and you’ll be dealing with shifting, cracking, and drainage headaches far sooner. This is especially true in our local climate, where the freeze-thaw cycle can wreak havoc on poorly supported hardscaping.
In Massachusetts, professional installation typically runs anywhere from $8 to $150 per square foot depending on materials, complexity, and site conditions — based on average internet data for the MA area, not a quote from Gerrior Masonry. A confident DIYer can do it for less, but the prep work is heavy, and mistakes are costly to fix. Moving several tons of material by hand is a significant physical undertaking that requires the right tools and a lot of stamina.
This guide walks you through every step — from planning and excavation to laying patterns and long-term care — so you can make the right call for your home.
I’m Joe Gerrior, owner of Gerrior Masonry & Landscape Construction Corp. in Woburn, Massachusetts, with over 30 years of experience in hardscaping and masonry, including putting in a paver walkway for hundreds of residential and commercial clients across the state. Whether you’re planning a DIY project or considering professional help, I’ll share what actually works — and what to avoid.
When we talk to homeowners in Woburn or Andover about putting in a paver walkway, the conversation usually starts with aesthetics. Everyone wants that perfect brick walkway or elegant stone path. However, the secret to a walkway that doesn’t turn into a roller coaster after one New England winter lies entirely beneath the surface.
The process is a system of layers. Think of it like building a house; you wouldn’t put a roof on a shaky foundation. For a walkway, that “foundation” is your excavated soil and compacted gravel. If you’re looking for more info about walkway installation services, you’ll find that the pros spend 70% of their time on prep and only 30% actually laying the stones. This preparation ensures that the walkway remains level even as the ground beneath it shifts with the changing seasons.
According to scientific research on concrete paver durability, the success of your installation depends on how well you manage drainage and compaction. Without a proper slope, water pools under the pavers, freezes, and causes “frost heave”—the mortal enemy of Massachusetts hardscaping. We recommend a total excavation depth of roughly 7 to 10 inches to accommodate the necessary layers of gravel and sand bedding. This depth is crucial for creating a stable environment that resists the upward pressure of freezing groundwater.
Planning, Permits, and Putting in a Paver Walkway Layout
Before you even touch a shovel, you need to play detective. In Massachusetts, the first and most critical step is calling 811. Whether you’re in Burlington or Lexington, you must have your underground utility lines marked. This service, often referred to as “Dig Safe,” is a legal requirement and a safety necessity. Trust us, hitting a gas line or a fiber optic cable is a very fast way to turn a weekend project into a local news story and a massive financial liability.
Next, consider the dimensions. A standard walkway should be at least 36 inches wide. This is the minimum for wheelchair accessibility and allows a single person to walk comfortably without stepping off the edge. If you want two people to walk side-by-side, aim for 48 to 60 inches. If you’re incorporating steps into a slope, they should be spaced naturally to match a human stride, typically requiring a 12-inch tread depth for safety.
For more info about how to design a paver walkway, remember the “1-inch rule.” You need a slope of approximately 1 inch for every 4 to 8 feet of length (or 1/4 inch per foot) to ensure water runs away from your home’s foundation. This pitch is subtle enough to be unnoticeable to the eye but effective enough to prevent basement flooding and ice patches.
To layout the path:
Use landscape stakes and masonry string to define the edges and set your height.
For curves, a garden hose or spray paint works best to visualize the flow and ensure the curves are smooth.
Check for squareness using the 3-4-5 triangle method (measure 3 feet on one side, 4 feet on the other; the diagonal should be exactly 5 feet).
Don’t forget to check with your local town hall in places like Winchester or Natick regarding permit requirements. While many small walkways don’t require them, some towns have strict “permeable surface” ratios that limit how much of your yard can be covered by non-porous materials to manage local stormwater runoff.
Excavation and Base Preparation for Putting in a Paver Walkway
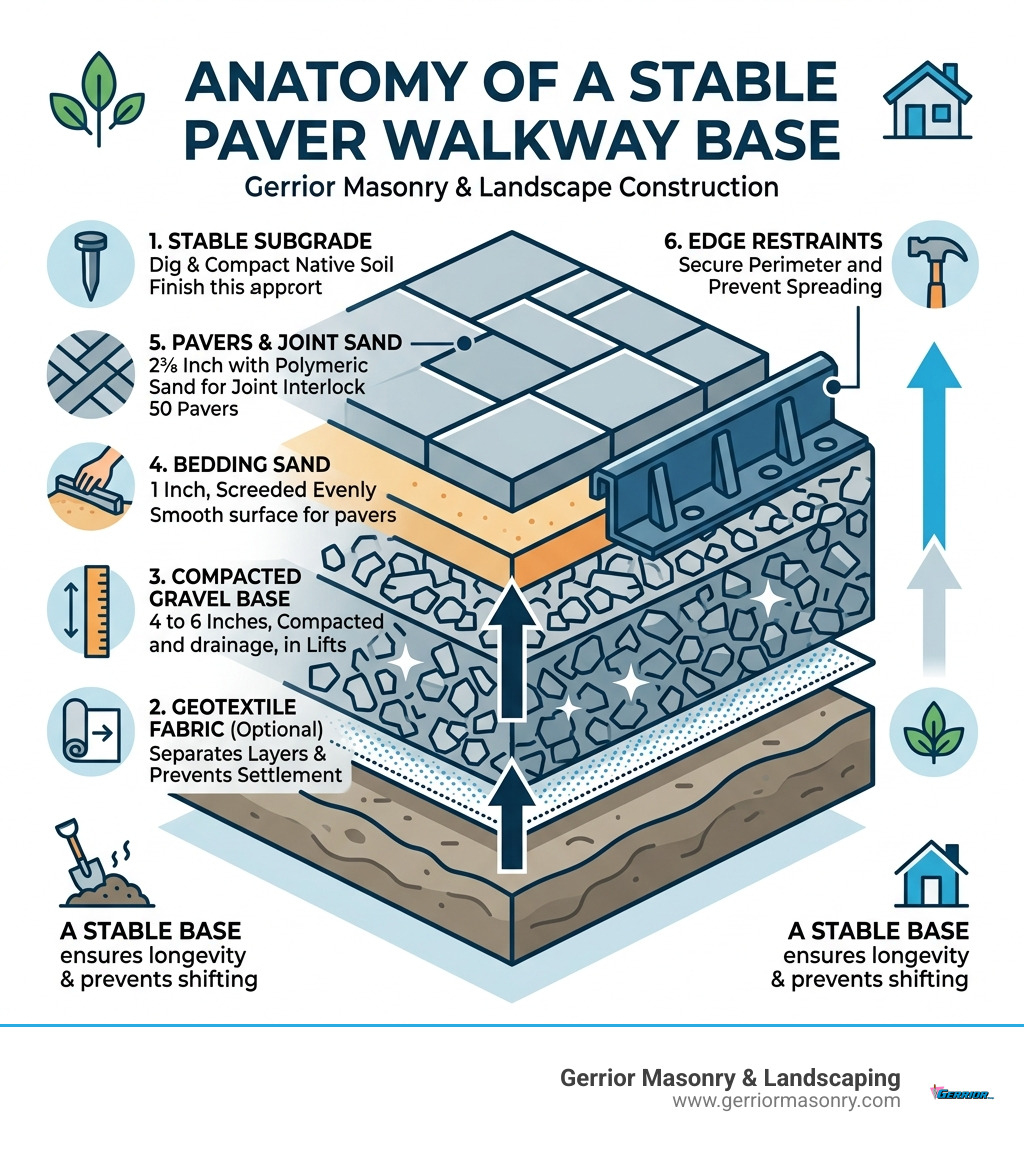
Now comes the most labor-intensive part of the project—the digging. To do this right, you need a trench that is 7 to 8 inches deep. This allows for:
4 inches of compacted gravel (crushed stone, not rounded pea gravel).
1 to 1.5 inches of bedding sand (coarse washed sand).
The thickness of the paver itself (usually 2 to 3 inches).
For more info about paver walkway base layers, we always suggest using a geotextile fabric at the bottom of the trench. This woven fabric acts as a barrier that prevents your expensive gravel from sinking into the native Massachusetts clay or silty soil over time, which is the leading cause of sunken walkways.
When adding the gravel, don’t just dump it all in. Add it in 2-inch increments and use a plate compactor (which you can rent at most local hardware stores) to pack it down until it’s rock-hard. A pro tip: if you can drive a steel spike into the gravel with a light tap, it’s not compacted enough. You should need a 3-pound sledgehammer to make a significant dent. Proper compaction is the only way to prevent the pavers from settling unevenly.
Once the gravel is set, lay down two 1-inch PVC pipes to act as “screeding” guides. Pour your bedding sand between them and use a straight 2×4 board to “screed” the sand perfectly flat. Once you pull the pipes out, fill the remaining grooves with sand and do not walk on it. This sand layer is what keeps your pavers level and provides a slight cushion for the stones.
Laying Pavers, Patterns, and Edge Restraints
Now for the fun part: picking your pattern. The pattern isn’t just about looks; it affects the structural integrity of the walkway.
Running Bond: Simple and classic, great for beginners and minimizes waste.
Herringbone: The strongest interlocking pattern, excellent for preventing shifting under foot traffic, but requires more complex cuts.
Jack-on-Jack: Clean and modern, but shows every tiny misalignment and is less stable over time.
When ordering materials, always add a 5-10% overage to your square footage calculation to account for broken stones or the many cuts you’ll need for curves. For more info about paver walkway designs, look at how different colors can complement your home’s siding or existing stone features.
As you lay the pavers, use a rubber mallet to set them into the sand. Use a string line every 10 rows to make sure your lines stay straight. Once the pavers are down, you must install edge restraints. These are typically plastic or metal strips secured with 12-inch galvanized spikes driven into the gravel base. Without these, your walkway will eventually “spread” outward into the lawn, creating gaps between the stones.
The final step is joint stabilization. We use polymeric sand, which contains special glues that activate when wet. Sweep it into the cracks, run the plate compactor over the pavers to vibrate the sand deep into the joints, sweep off every bit of excess from the surface, and mist it lightly with water. In 24 to 48 hours, those pavers will be locked in like concrete, preventing weed growth and ant hills.
Costs, Maintenance, and When to Call the Pros
Installing a walkway is a rewarding project, but it’s also a grueling one. A 24-foot path might look small on paper, but it involves moving thousands of pounds of dirt, stone, and sand. Before you commit, it’s worth looking at the data and considering the long-term implications of the work.
Scientific research on leveling paving stones shows that even a 1/8-inch error in the base can lead to significant tripping hazards within two years. In our local climate—spanning from the coastal salt air of Marblehead to the inland frost of Chelmsford—the ground is constantly moving. For more info about stone walkway costs, let’s look at what you can expect to spend in the Middlesex and Essex County areas.
Massachusetts Installation Costs and Project Timelines
Costs can vary wildly based on whether you choose basic concrete pavers or high-end natural stone like bluestone or granite. Below is a comparison based on average internet data for the Massachusetts area. Note: These are industry averages and do not represent a specific quote from Gerrior Masonry.
Feature
DIY Installation
Professional Installation
Cost per Sq. Ft.
$3 – $15
$8 – $150+
Total Time
20 – 40+ hours
5 – 15 hours
Equipment
Manual labor + rentals
Heavy machinery included
Warranty
None
Typically 1–5 years
For a standard 36-inch wide, 20-foot long walkway (60 sq. ft.), a DIYer might spend $500 to $1,000 on materials and tool rentals. A professional job for the same area could range from $1,500 to $9,000 depending on the complexity of the site, the need for retaining walls, and the stone selected. For more info about the cost of a paving stone walkway, factor in that labor is the largest portion of a professional quote because of the literal tons of material being moved and the specialized equipment required to do it efficiently.
The best time for putting in a paver walkway in Massachusetts is between April and October. You want the ground to be completely thawed to ensure proper compaction, but you should try to avoid the peak “mud season” of early spring when the soil is too saturated to work effectively.
Long-Term Maintenance and Avoiding Common Mistakes
One of the most common questions we get from homeowners in towns like Reading and Lynnfield is: “How do I keep weeds from growing between the bricks?” The answer is simple: Maintenance and proper initial installation.
Seal your pavers: Every 2–3 years, apply a high-quality sealer. This protects the color from UV rays, prevents oil stains, and helps the polymeric sand stay bonded. It also makes the surface easier to clean.
Avoid Rock Salt: In the winter, rock salt (sodium chloride) can eat away at the surface of concrete pavers through a chemical reaction. Use calcium chloride or plain sand for traction instead. This is vital for preserving the finish of your walkway during harsh Massachusetts winters.
Don’t Power Wash the Joints: A common mistake is using a high-pressure washer directly on the joints. This blasts out the polymeric sand, leaving the door open for weeds, moss, and ants to take over. If you must power wash, do so at a low angle and be prepared to refill the joints.
Check for Shifting: If you notice a paver starting to dip or a joint opening up, fix it immediately. Pop the stone out, add a little bedding sand, and reset it before the surrounding pavers start to follow suit. Small repairs prevent total failures.
For more info about brick walkway ideas, consider adding landscape lighting along the edges. Not only does it look great, but it also makes the path safer at night, highlighting the texture of the stone and providing clear guidance for guests.
Why Professional Expertise Matters for Your Woburn Home
While we love a good DIY spirit, some projects are best left to a team with the right equipment and years of experience. At Gerrior Masonry & Landscaping, we’ve spent over 30 years perfecting the art of the Massachusetts walkway. We understand the unique challenges posed by our local geology and weather patterns.
What makes us different?
Owner Oversight: Joe Gerrior is on-site for projects, ensuring that the “Don’t Pave Your Way to Misery” tips are actually followed and that every stone is set to our high standards.
The Right Gear: We use commercial-grade excavators and heavy-duty compactors that most homeowners simply can’t access. This allows us to achieve a level of compaction that manual tamping can never match.
Local Knowledge: We know the heavy clay soil in Woburn, the strict permit rules in Concord, and the specific frost patterns in Andover. This local expertise allows us to anticipate problems before they happen.
We are proud to serve our neighbors throughout Middlesex and Essex County, providing everything from high-end masonry to commercial snow removal services during our tough winters. Our commitment to quality has made us a trusted name in the community for over three decades.
Gerrior Masonry & Landscape Construction is based in Woburn, MA, and services Middlesex and Essex County, Massachusetts, including Acton, Andover, Bedford, Belmont, Beverly, Burlington, Carlisle, Chelmsford, Concord, Danvers, Lexington, Lincoln, Lynnfield, Malden, Medford, Melrose, Middleton, Natick, Newton, North Reading, Peabody, Reading, Salem, Saugus, Stoneham, Tewksbury, Topsfield, Wakefield, Waltham, Watertown, Wayland, Wenham, Westford, Weston, Wilmington, and Winchester.
Finding the Right Pool Patio Paver Installer for Your Massachusetts Home
A pool patio paver installer can completely transform your backyard — turning a plain concrete slab into a safe, beautiful, and durable outdoor living space that adds real value to your home.
Here are five of the best qualities to look for when comparing pool patio paver installers:
Material expertise — Can they work with travertine, concrete, and brick pavers?
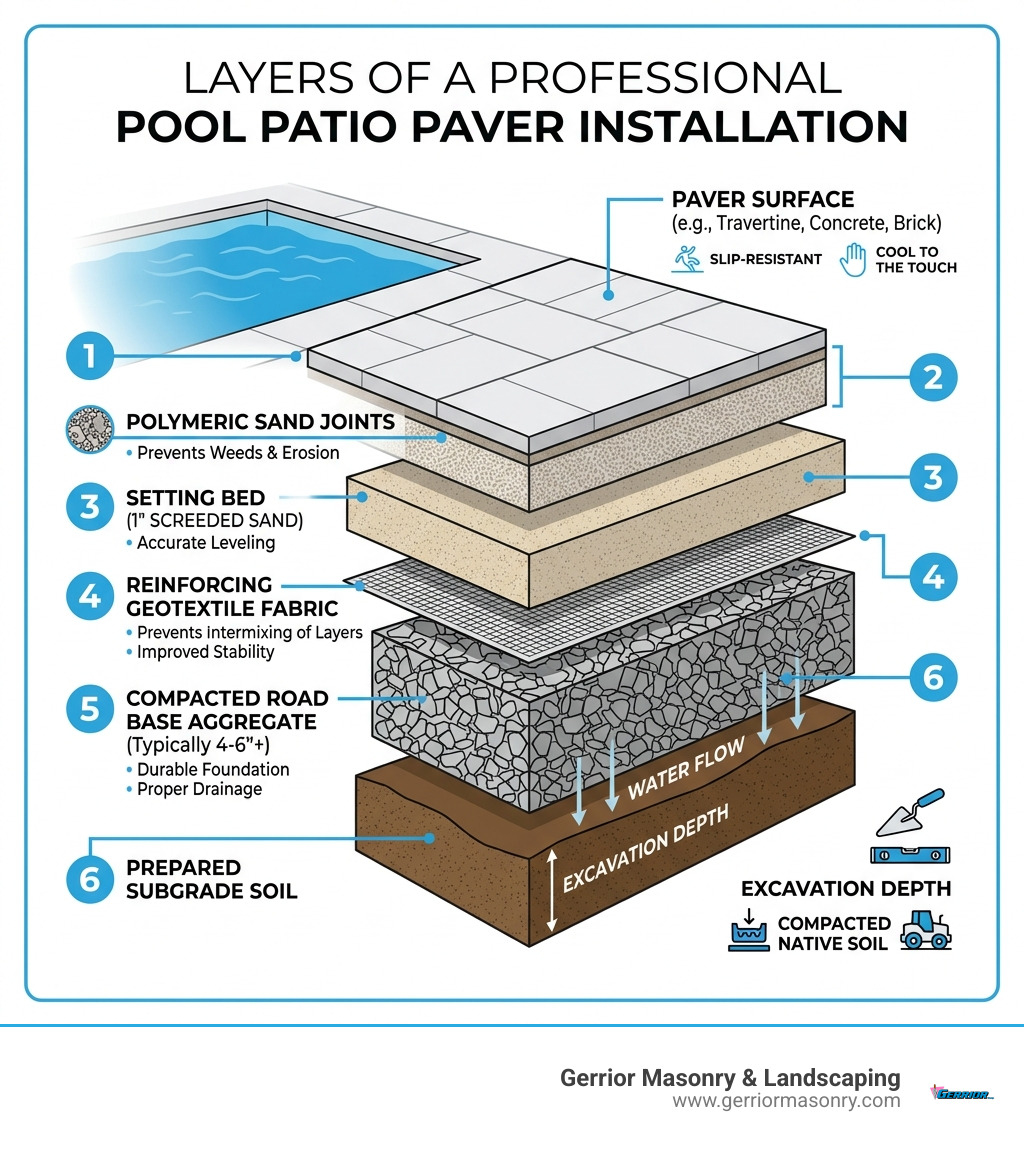
Proper installation process — Do they excavate, compact the base, and manage drainage correctly?
Safety standards — Are their pavers slip-resistant and cool to the touch in direct sun?
Warranty and maintenance support — Do they offer a workmanship guarantee and sealing services?
Transparent pricing — Do they provide detailed, written estimates upfront?
Choosing the wrong installer can mean cracked pavers, poor drainage, and safety hazards around your pool. Choosing the right one means a surface that lasts for decades with minimal upkeep.
I’m Joe Gerrior, owner of Gerrior Masonry & Landscape Construction Corp., with over 34 years of hands-on experience in masonry and hardscaping — including pool patio paver installation for Massachusetts homeowners. In this guide, I’ll break down exactly what separates a great pool patio paver installer from one that will cost you more money down the road.
Key Considerations When Selecting a Pool Patio Paver Installer
When you start searching for a Pool Patio Paver Installer in areas like Arlington, MA or Beverly, MA, you aren’t just looking for someone to lay down stones. You are looking for an engineer, a designer, and a safety expert all rolled into one.
The Massachusetts climate is particularly “fun” (and by fun, I mean challenging) because of our intense freeze-thaw cycles. An installer who works in Florida might get away with a thinner base, but here in Middlesex County, if your installer doesn’t dig deep enough, your beautiful pool deck will look like a mountain range after the first winter.
Comparing Pool Patio Materials
Before you hire a contractor, you need to know which material fits your lifestyle. Here is a quick comparison of the big three:
Feature
Concrete Pavers
Travertine
Brick Pavers
Durability
Extremely High
High
High
Heat Retention
Moderate
Very Low (Stays Cool)
Moderate to High
Slip Resistance
High (Textured)
Excellent (Porous)
Moderate
Maintenance
Low
Low
Moderate (Weed control)
Cost
Budget-Friendly
Premium
Mid-Range
A top-tier Pool Patio Paver Installer should be able to walk you through these options and help you create the perfect poolside paradise based on your home’s architecture and your family’s needs.
1. Material Expertise: Travertine, Concrete, and Brick
One of the first things we look for in a quality installation is material versatility. Your pool deck isn’t just a walkway; it’s a functional surface that has to deal with splashed chlorine, salt (if you have a saltwater pool), and bare feet.
Travertine: The Luxury Choice
Travertine is a natural stone that has become incredibly popular for paver patios around pools. Why? Because it is naturally porous, meaning it stays remarkably cool even in the middle of a July heatwave in Woburn. According to Geology.com, travertine is a form of limestone that provides a unique, high-end look. It also absorbs water quickly, which helps prevent slippery puddles from forming.
Concrete Pavers: The Versatile Workhorse
Modern concrete pavers are engineered to be salt-resistant and come in hundreds of colors and patterns. If you want a specific “look” — like weathered wood or sleek modern slate — concrete pavers are your best bet. They are interlocking, which gives them the flexibility to shift slightly with the ground during our Massachusetts winters without cracking like a solid concrete slab would.
Brick: The Timeless Classic
Brick offers a traditional aesthetic that looks stunning with older New England homes in Lexington or Concord. However, ensure your Pool Patio Paver Installer uses high-quality, high-fired bricks. These have a low water absorption rate (around 5%), which is vital for preventing the bricks from crumbling after being exposed to pool chemicals.
2. The Professional Pool Patio Paver Installation Process
If an installer tells you they can finish a 1,000-square-foot pool deck in two days, run. A professional pool deck contractor knows that the “pretty” part — the pavers — is only 20% of the job. The other 80% is what’s happening underground. We follow the industry best practices established by the Concrete Masonry & Hardscapes Association to ensure a foundation that lasts for decades.
Step 1: Excavation and Site Prep
In Massachusetts, we typically need to dig 7 to 10 inches below grade. This allows enough room for a substantial base that won’t heave when the ground freezes. We remove the “bad” soil (clay and organic matter) and replace it with something that drains.
Step 2: The Base and Compaction
This is the most critical step. We install 4 to 6 inches of compacted “crusher run” gravel (or up to 8 inches in areas with poor drainage). This base is compacted using heavy machinery to ensure there is zero settling. If this isn’t done correctly, your pavers will eventually sink, creating trip hazards.
Step 3: Drainage Systems
Water pooling is the enemy of a pool patio. A skilled Pool Patio Paver Installer will “pitch” the patio away from the pool and the house — usually a 1-inch drop for every 8 to 10 feet. In complex yards, we might install “dry wells” or French drains to ensure heavy rain doesn’t turn your backyard into a swamp.
Can you install pavers over existing concrete?
We get asked this a lot in Newton and Bedford. The answer is: Yes, but with caveats. If your existing concrete is stable and not severely cracked, we can do a “thin remodel” installation. This saves you the cost of demolition while still providing a massive aesthetic upgrade.
3. Safety Standards: Slip Resistance and Heat Retention
When you have kids running around a pool, safety is the only thing that matters. A great Pool Patio Paver Installer prioritizes two things: traction and temperature.
Slip Resistance
We always recommend pavers with a textured surface. While polished marble looks great in a magazine, it’s a skating rink when wet. Materials like tumbled travertine or textured concrete pavers provide excellent “grip” for wet feet.
Heat Reduction
Dark colors might look sleek, but they act like a frying pan in the sun. In our experience, light-colored pavers—whites, light greys, and tans—can be 20 to 30 degrees cooler than dark materials or standard asphalt. This is a huge factor for child safety and overall comfort during those long summer afternoons.
Choosing an installer who understands these pool decks and patios safety features ensures your backyard remains a fun zone, not an injury zone.
4. Long-Term Maintenance and Warranty
One of the biggest benefits of pavers is that they are “modular.” If a single paver gets stained or cracked (maybe you dropped a heavy grill?), you don’t have to rip up the whole deck. You just pop out that one stone and replace it.
The Power of Polymeric Sand
A professional installer will always use polymeric sand to lock the joints. This isn’t your everyday sandbox sand. It’s a special mix that hardens when misted with water, creating a bond that:
Prevents weeds from growing between pavers.
Stops ants from building hills in your patio.
Prevents the sand from washing away during heavy rain.
Cleaning and Sealing
To keep your patio looking brand new, we recommend a patio installation service that includes cleaning and sealing every 2 to 3 years. Sealing protects the pavers from UV rays (which can fade the color) and makes it much easier to wash away spills or pool chemicals.
The Workmanship Warranty
Reputable installers in the industry often offer a 1-year or 2-year labor warranty. This gives you peace of mind that if a stone shifts or a drainage issue appears after the first winter, the company will come back and fix it at no cost to you.
5. Average Costs for a Pool Patio Paver Installer in Massachusetts
Let’s talk about the elephant in the backyard: the budget. It is important to note that the following figures are average costs for Massachusetts based on internet data and do not represent the actual pricing for Gerrior Masonry services.
Prices for a professional Pool Patio Paver Installer in our region can vary wildly. While the average installation typically ranges from $25 to $35 per square foot, complex projects with premium materials can reach much higher price points.
Basic Concrete Pavers: $15 – $30 per square foot.
Mid-Range Brick or Premium Concrete: $35 – $60 per square foot.
High-End Travertine or Natural Stone: $75 – $125+ per square foot.
Factors That Affect Your Quote:
Accessibility: Can we get our heavy equipment into your backyard easily, or do we have to move everything by hand?
Demolition: Are we removing an old wood deck or a 6-inch thick concrete slab?
Coping: The “edge” of the pool (the coping) requires specialized labor and materials, which usually costs more than the flat patio areas.
Custom Features: Adding a paver fire pit or a retaining wall will increase the project’s scope.
When searching for a “paver patio install near me,” always ask for a detailed breakdown. A “cheap” quote often means the installer is cutting corners on the base material or skipping the polymeric sand — mistakes that will cost you thousands to fix later.
Conclusion: Transforming Your Backyard with Gerrior Masonry & Landscaping
Your pool is the centerpiece of your home’s outdoor life. Whether you are hosting a summer BBQ in Burlington or enjoying a quiet morning coffee by the water in Winchester, the quality of your patio defines the experience.
At Gerrior Masonry & Landscaping, we bring over 30 years of experience to every project. What makes us different?
Owner Oversight: Joe Gerrior is on-site, ensuring that every stone is level and every base is compacted to perfection.
Local Expertise: We know Massachusetts soil and weather better than anyone. We build patios that stand up to our brutal winters.
Full-Service Solutions: From initial design to final sealing, we handle it all. We even provide commercial snow removal for local businesses during the off-season!
If you are ready to stop looking at that cracked concrete and start enjoying a luxury outdoor lifestyle, we are here to help.
Gerrior Masonry & Landscape Construction is based in Woburn, MA, and proudly services Middlesex County and Essex County, Massachusetts.
Why Patio Design and Installation Transforms Your Home’s Outdoor Space
Patio design and installation is one of the most impactful upgrades you can make to your home. In today’s real estate market, outdoor living spaces are no longer just a luxury; they are a necessity for homeowners looking to maximize their property’s footprint. A well-built patio extends your living space, boosts property value, and gives you a place to relax, entertain, and enjoy the outdoors year-round. Whether you are hosting a summer barbecue or enjoying a quiet autumn evening by a fire pit, the right design makes all the difference.
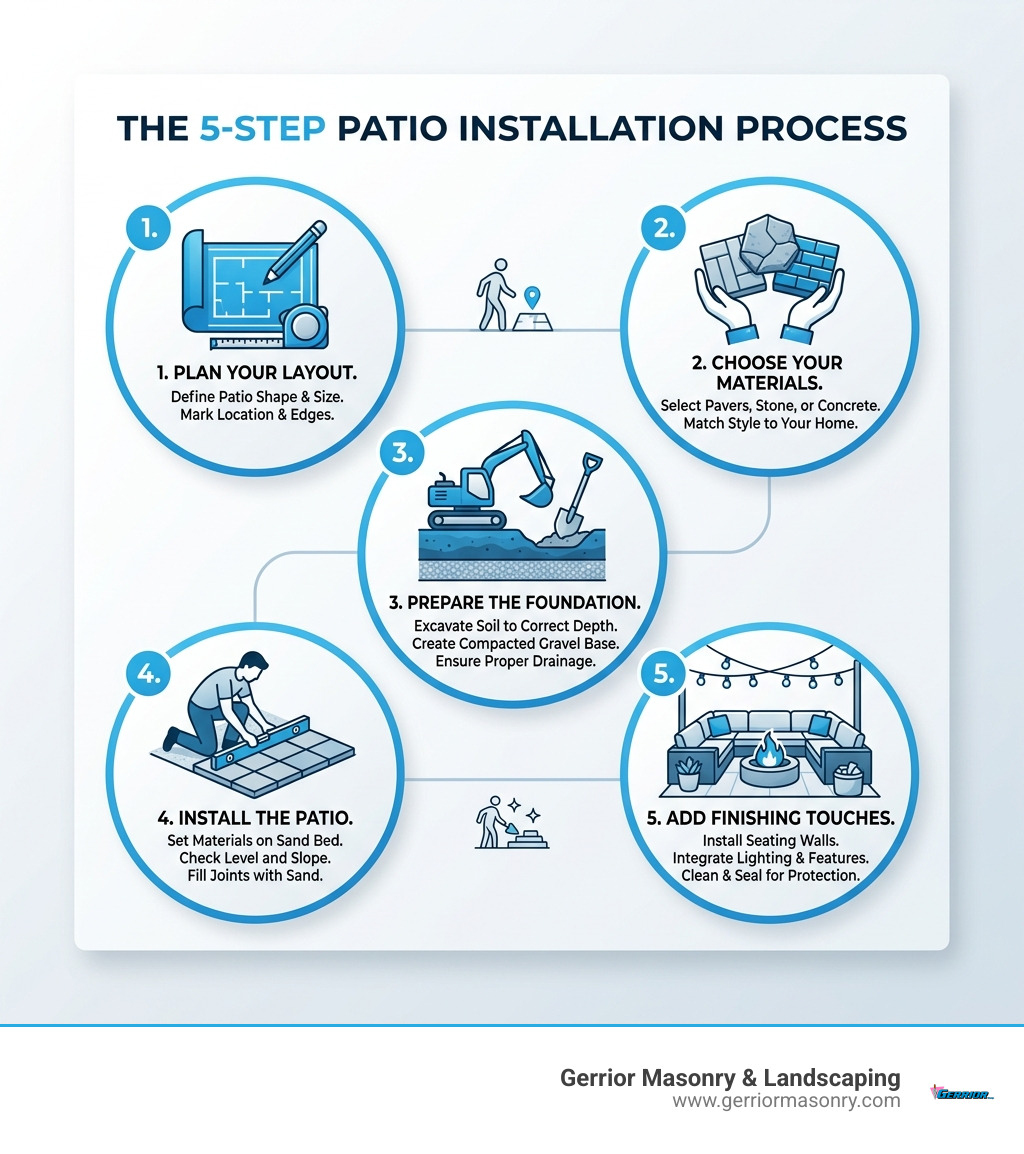
Here’s a detailed overview of what the professional process involves:
Plan your layout – This is the most creative phase. You must decide on the size, shape, and location while considering how you’ll use the space. Do you need a large area for a dining table, or a cozy nook for a reading chair? We also consider the sun’s path to ensure you have shade when you need it most.
Choose your materials – This is where your personal style shines. Pavers, natural stone, brick, or concrete each have different costs, maintenance requirements, and aesthetic benefits. We help you match the material to your home’s existing architecture.
Prepare the foundation – This is the most labor-intensive part. Proper excavation, a thick gravel base, and strategic drainage are critical for longevity. Without a solid base, the freeze-thaw cycles of New England will quickly ruin your investment.
Install the patio – Our team lays the materials level, ensuring the correct slope for water runoff and applying the proper joint treatment to keep everything locked in place.
Add features – To truly customize the space, we can integrate fire pits, seating walls, outdoor kitchens, and low-voltage lighting. These elements turn a simple stone floor into a complete outdoor room.
Maintain it – While stone is durable, it isn’t maintenance-free. Regular cleaning, periodic sealing, and re-sanding the joints keep it looking brand new for decades.
A patio that’s built right can last for decades with minimal upkeep. One that skips the foundation work? It may start sinking, shifting, or cracking within just a couple of years. I’m Joe Gerrior, owner of Gerrior Masonry & Landscape Construction Corp., with over 34 years of experience in patio design and installation for Massachusetts homeowners. In this guide, I’ll walk you through everything you need to know to get a patio that’s built to last through the toughest New England winters.
Planning Your Patio Design and Installation
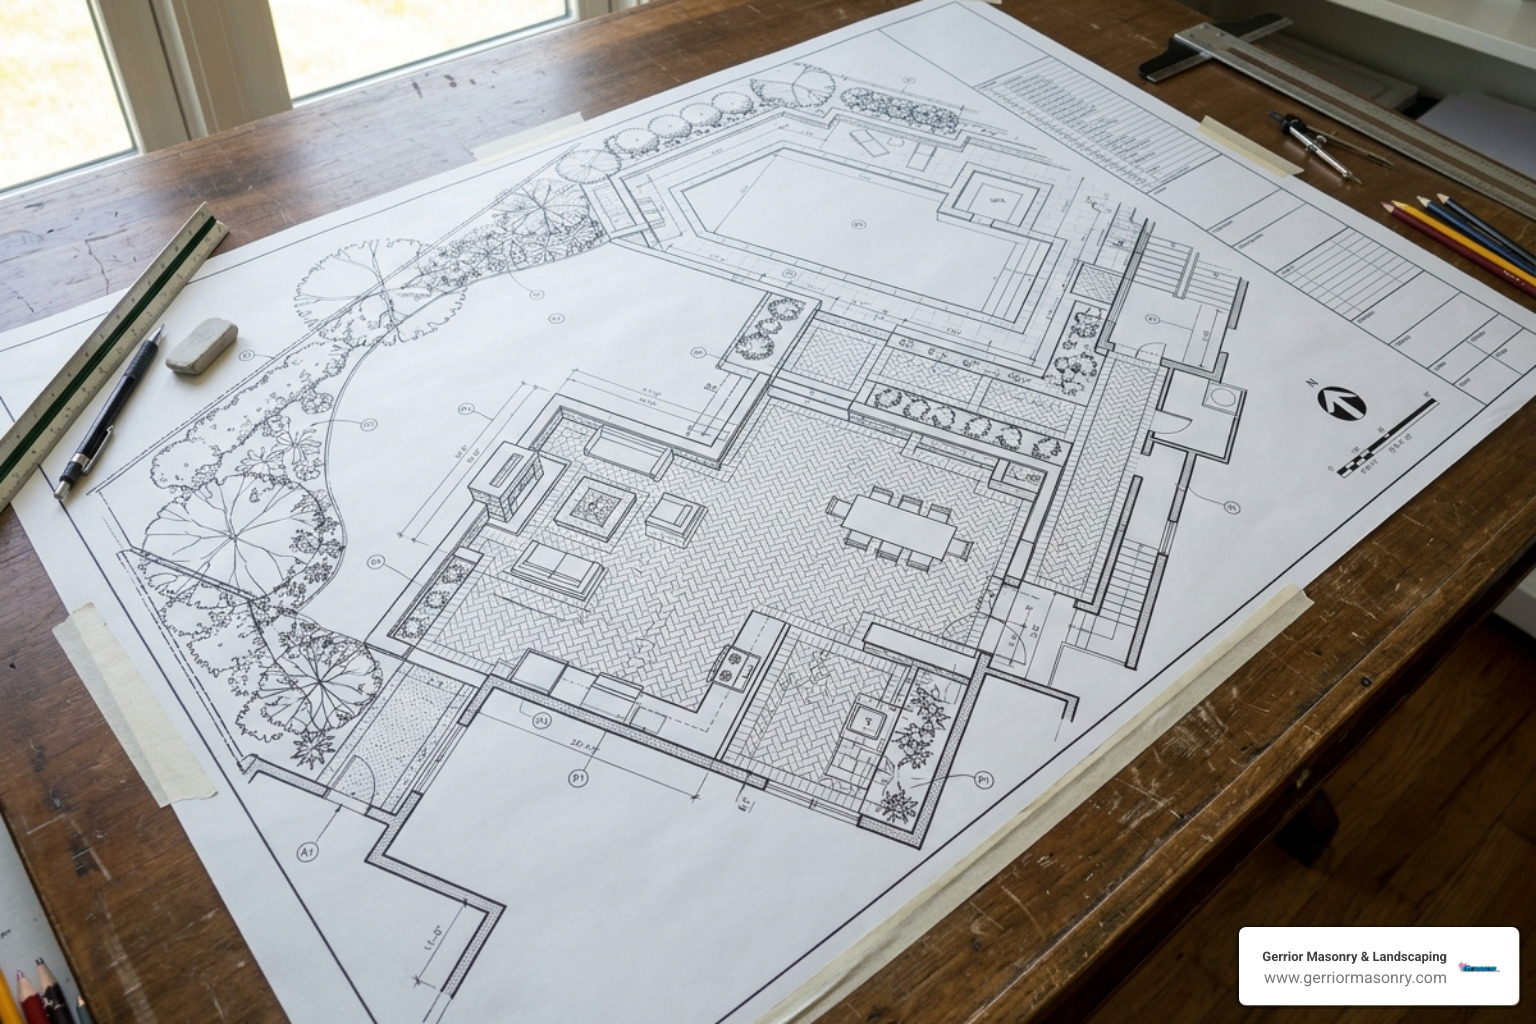
Planning is the most critical phase of any hardscaping project. When we sit down with homeowners in towns like Lexington, Winchester, or Arlington, we don’t just look at the dirt; we look at the architecture of the house and the flow of the yard. A successful Patio Design and Installation should feel like a natural extension of your indoor living room, mirroring the style and scale of your home’s interior.
The first step is a comprehensive site analysis. We need to consider sun exposure (nobody wants to bake in the mid-day sun without an umbrella), traffic flow from the back door, and existing landscaping. If you have a beautiful oak tree or a prized garden bed, we want to design around it, not through it. We also look for potential obstacles like underground utility lines or septic tanks that might influence the final layout.
Material Selection: Finding Your Style
Choosing the right material is a balance of aesthetics, budget, and long-term durability. In Middlesex and Essex County, materials must be able to handle the intense freeze-thaw cycles of our winters. If a material is too porous, water will enter, freeze, and cause the stone to spall or crack.
Material
Durability
Maintenance
Best For
Concrete Pavers
High
Low
Modern looks, high-traffic areas, and versatility
Natural Stone
Very High
Medium
Traditional/Luxury aesthetics and unique textures
Brick
High
Medium
Colonial-style homes and historic charm
Poured Concrete
Medium
Low
Budget-conscious projects and simple utility
For those looking for a timeless, high-end finish, we often recommend Bluestone Patio Installation. Bluestone is a classic New England staple that offers incredible durability and a natural color palette that complements almost any home. It is available in “thermal” finishes for a smooth surface or “natural cleft” for a more rustic feel. If you prefer a more structured, classic look, a Brick Paver Patio is an excellent choice, especially for the historic colonial homes found in Concord and Salem.
Choosing Materials for Your Patio Design and Installation
When evaluating materials, think about longevity. Interlocking pavers are a favorite for Patio Design and Installation because they are flexible. Unlike a solid slab of concrete, which can crack when the ground shifts during a deep freeze, individual pavers move slightly with the earth. If one happens to break or get stained by oil, you can simply pop it out and replace it without tearing up the whole yard.
Maintenance is another factor to weigh. While natural stone may require periodic sealing to prevent staining from leaf litter or spilled wine, concrete pavers are often factory-sealed for extra protection. We suggest exploring various backyard patio designs to see how different textures—from smooth modern slabs to tumbled, rustic stones—change the “vibe” of the space. For many of our clients, paver patios offer the best “bang for the buck.” They provide the look of natural stone but are often easier to install and more cost-effective.
Essential Foundation and Drainage Requirements
If you take one thing away from this guide, let it be this: your patio is only as good as what’s underneath it. Proper base preparation is the difference between a patio that looks great for thirty years and one that looks like a roller coaster after two winters. We follow a rigorous excavation process. This involves digging out the soil to a specific depth, usually around 8 to 12 inches, depending on the soil type and the chosen material. We then lay a 6-inch layer of crushed gravel, which is compacted in stages using heavy machinery to create a rock-solid foundation. On top of that goes a 1-inch layer of leveling sand to ensure the pavers sit perfectly flat.
Drainage is the silent hero of Patio Design and Installation. Water pooling on a patio isn’t just annoying; it’s a structural hazard that can lead to ice patches in winter. We ensure every patio has a slight slope—typically 1 inch of drop for every 4 to 8 feet of length—to direct water away from your home’s foundation. In some cases, we integrate drainage systems like French drains or dry wells to handle heavy runoff from gutters and prevent erosion in your lawn.
Custom Features: Fire Pits and Outdoor Kitchens
Once the floor is set, it’s time for the fun stuff. A flat patio is a surface, but features make it a “destination.”
Fire Pits: These are the ultimate gathering spots. Whether you want a wood-burning pit for that authentic campfire smell or a gas-powered unit for instant ambiance, we can build it directly into your paver design. Check out our options for outdoor fireplaces if you want something even more substantial.
Seating Walls: Why clutter your patio with plastic chairs? Built-in seating walls define the perimeter of your space and provide permanent spots for guests to sit. They are usually 18 to 24 inches high—the perfect height for a comfortable perch and a great way to manage changes in grade.
Outdoor Kitchens: For the home chef, a custom outdoor kitchen is a game-changer. We can install grill islands, pizza ovens, and even outdoor refrigerators, all wrapped in stone that matches your patio perfectly.
Professional Execution and Long-Term Care
While the DIY spirit is alive and well in Massachusetts, Patio Design and Installation at this scale is a heavy lift—literally. A standard 400-square-foot patio involves moving tons of earth, gravel, and stone. This isn’t just about physical labor; it’s about the engineering required to ensure the structure doesn’t fail after the first heavy rain or deep freeze.
When you hire professional patio installers, you’re paying for precision and peace of mind. At Gerrior Masonry & Landscaping, we provide owner oversight on every project. This means Joe Gerrior is personally ensuring that the levels are perfect, the cuts are clean, and the site is left spotless. We also offer a workmanship warranty, giving you confidence that your investment is protected against structural failure.
Estimating the Cost of Patio Design and Installation
Budgeting is always the biggest question for homeowners. It’s important to understand that labor often accounts for a significant portion of the total cost because of the intense site preparation required. Based on internet data, average costs for standard Patio Design and Installation projects typically range from $4,000 to $12,000+. However, keep in mind that custom work, high-end materials, and additional features can easily push costs higher. For a more complex project involving multi-tiered natural stone and an outdoor kitchen, the high end of the range can reach $36,000 or more. Please note that these are average costs based on internet data and not actual costs for Gerrior Masonry services.
Factors that influence your price include:
Accessibility: Can we get our heavy equipment into your backyard easily, or do we need to move materials by hand through a narrow gate?
Site Prep: Does the yard need significant grading, tree removal, or the demolition of an old concrete slab?
Materials: Rare natural stones or imported pavers cost more than standard local concrete pavers.
Features: Adding gas lines for fire pits or plumbing for outdoor sinks increases the technical scope and cost.
Before we ever strike a shovel into the ground, safety and legality come first. Most towns in our service area, like Bedford, Billerica, or Reading, have specific building codes regarding “impervious surfaces.” This means there may be limits on how much of your yard can be covered by a patio to prevent flooding in the neighborhood. We handle the permitting process for our clients, ensuring the design meets all local setbacks and regulations. We also follow the 10 Step Guide to Installing Pavers Like a Pro, which includes calling 811 to mark underground utility lines. Hitting a gas or water line is a quick way to ruin a project—and a budget.
Maintenance and Finishing Touches
A common misconception is that a stone patio is “set it and forget it.” While they are low-maintenance compared to a wooden deck, they aren’t no-maintenance.
Cleaning: A simple sweep and an occasional wash with a garden hose go a long way. For tougher stains like grease or wine, we recommend professional-grade cleaners that won’t damage the stone’s surface.
Sealing: Especially for natural stone like bluestone or granite, sealing every 3-5 years helps protect against UV fading and deep food stains. It also enhances the natural color of the stone.
Polymeric Sand: This special sand is used to fill the joints between pavers. It contains a binder that hardens when wet, preventing weeds from growing and keeping ants from making a home under your patio. If the sand washes out over several years, it needs to be topped off to maintain structural integrity.
Lighting and Plants: To truly finish the space, consider low-voltage LED lighting integrated into the steps or walls. Softening the edges with native Massachusetts plants like hydrangeas, hostas, or boxwoods can make the hardstone feel more integrated into the garden.
If you’re ready to stop dreaming and start building, reaching out to experienced patio contractors is the best way to get an accurate assessment of your property’s potential. Whether you are in Woburn, Andover, or Melrose, we are here to help you navigate the entire process from the first sketch to the first fire in your new pit. Patio Design and Installation is an investment in your happiness at home, and we take that responsibility seriously. Gerrior Masonry & Landscape Construction is based in Woburn, MA, and services Middlesex and Essex County, Massachusetts.
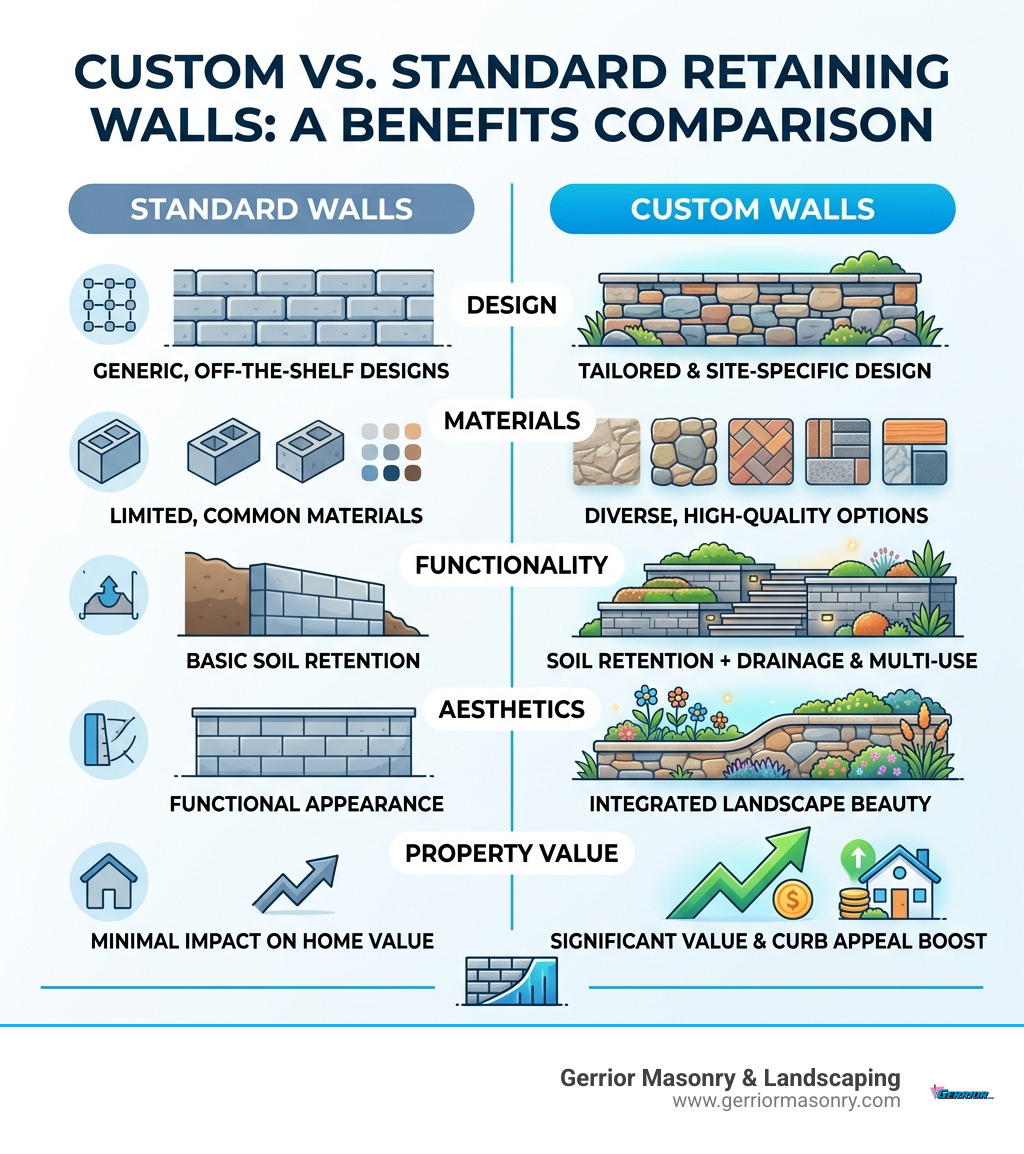
Custom retaining walls are engineered, site-specific structures built to hold back soil, manage water runoff, and transform sloped or uneven land into usable outdoor space — while also looking great doing it.
Here’s a quick snapshot of what sets them apart:
Feature
Standard Retaining Walls
Custom Retaining Walls
Design
Generic, off-the-shelf
Tailored to your property
Materials
Limited options
Natural stone, concrete block, brick, and more
Function
Basic soil retention
Erosion control, drainage, terracing, outdoor living
Aesthetics
Functional only
Integrated with landscape style
Value added
Minimal
Significant curb appeal and property value boost
Whether you’re dealing with a sloped backyard, soil erosion after heavy rain, or simply want to carve out more usable space on your property, a custom retaining wall is one of the most practical — and visually impactful — investments you can make in your home.
They aren’t just about holding dirt in place. A well-designed retaining wall can create tiered garden beds, frame a patio, add built-in seating, and give your entire yard a more polished, intentional look.
In April 2026, more Massachusetts homeowners are combining retaining walls with outdoor living features — stairs, lighting, and integrated patios — making them a centerpiece of the landscape rather than an afterthought.
I’m Joe Gerrior, owner of Gerrior Masonry & Landscape Construction Corp., and I’ve been designing and installing custom retaining walls across Massachusetts for over 34 years. In this guide, I’ll walk you through everything you need to know — from materials and engineering requirements to costs and how to choose the right contractor.
Designing and Engineering Custom Retaining Walls
When we sit down to plan a project in Middlesex or Essex County, we aren’t just looking at the height of the wall. We’re looking at the invisible forces acting upon it. Designing Custom Retaining Walls is a science as much as it is an art.
The primary job of any wall is to resist soil pressure. If you’ve ever seen a wall that looks like it’s “leaning” or has a “belly” in the middle, that’s a failure of engineering. The soil behind the wall exerts constant pressure, which increases significantly when that soil becomes saturated with water.
The Role of Surcharge Loads
We also have to consider “surcharge loads.” This is a fancy term for any extra weight on top of the soil being retained. If your wall is holding up a slope that leads directly to a driveway or a swimming pool, that wall needs to be much stronger than a wall simply holding up a flower bed.
Understanding the soil composition is equally vital. In Massachusetts, we often deal with heavy clay or rocky “glacial till.” Clay retains water and expands, creating significantly more pressure than sandy soil. Before we begin any Custom Retaining Walls project, we assess the soil to determine if we need to over-excavate and replace the native soil with clean, well-draining crushed stone to prevent future shifting and frost heave.
Site Preparation and Foundation
Success starts underground. You can’t just stack stones on top of the grass and hope for the best. Proper site preparation involves Excavation services to reach stable subsoil.
One of the most common questions we get is how to Build A Retaining Wall On A Slope. The answer always involves a “stepped” foundation. Instead of one long, angled base, we create a series of level benches. This ensures the weight of the wall is pushing straight down into the earth, not sliding down the hill.
Furthermore, the Base For Retaining Wall must consist of compacted structural gravel. This provides a level surface and, crucially, allows for drainage so the wall doesn’t heave during our notorious Massachusetts winters.
Material Selection for Custom Retaining Walls
Choosing the right material is where your personal style meets the functional needs of your property. In our 30+ years of experience, we’ve found that while aesthetics matter, the local climate (hello, freeze-thaw cycles!) should dictate the final choice.
Natural Stone: There is nothing quite like the look of Natural stone retaining walls. Whether it’s fieldstone, granite, or bluestone, natural stone offers a timeless, high-end look that matures beautifully. It’s incredibly durable but requires a high level of masonry skill to install correctly.
Concrete Blocks: Modern Hardscape Retaining Walls often utilize engineered segmental retaining wall (SRW) blocks. Brands like Unilock or Redi-Rock offer blocks that mimic the look of natural stone but feature interlocking systems for incredible structural strength.
Brick: For a classic, historic New England look, Brick Retaining Wall Ideas are often the way to go. Brick walls provide a formal appearance that complements traditional architecture in towns like Lexington or Concord.
For walls exceeding a certain height, we also utilize “Geogrid.” This is a high-strength synthetic mesh that we lay between the layers of block or stone and extend back into the soil. It essentially hooks the wall into the earth behind it, using the weight of the soil to hold the wall in place. This is a critical component for structural integrity in tiered landscapes and high-pressure areas.
Durability and Maintenance Comparison
Material
Durability
Maintenance Level
Best Use Case
Natural Stone
Extremely High
Low (Occasional repointing)
High-end residential, gardens
Concrete Block
Very High
Very Low
Structural slopes, driveways
Brick
High
Moderate (Mortar checks)
Formal landscapes, historic homes
Structural Integrity and Engineering Requirements
We take safety seriously. In the masonry world, there is a general “2-foot height rule.” For structural retaining walls exceeding 2 feet in height, especially those supporting surcharge loads, a qualified civil engineer review is often required to prevent issues like bulging, cracking, or total collapse.
When we move into larger-scale projects, we often look toward Engineered Retaining Wall Systems with Redi-Rock. These systems are backed by over 25 years of testing. For example, Redi-Rock blocks have a minimum compressive strength of 4,000 PSI wet cast concrete, specifically designed for freeze-thaw environments. Similarly, Unilock blocks are often engineered with a minimum compressive strength of 5,000 PSI.
Why does this matter? Because in Massachusetts, the ground expands and contracts as it freezes. If your material isn’t strong enough, it will crumble. If the wall is over 4 feet, it’s not just a wall; it’s a major structural component of your property that requires professional oversight to ensure structural longevity.
Drainage and Water Management Features
If you remember one thing from this guide, let it be this: Water is the #1 enemy of retaining walls.
When water gets trapped behind a wall, it creates “hydrostatic pressure.” This is a massive amount of weight that can push even the heaviest stones out of alignment. To combat this, we use several key features:
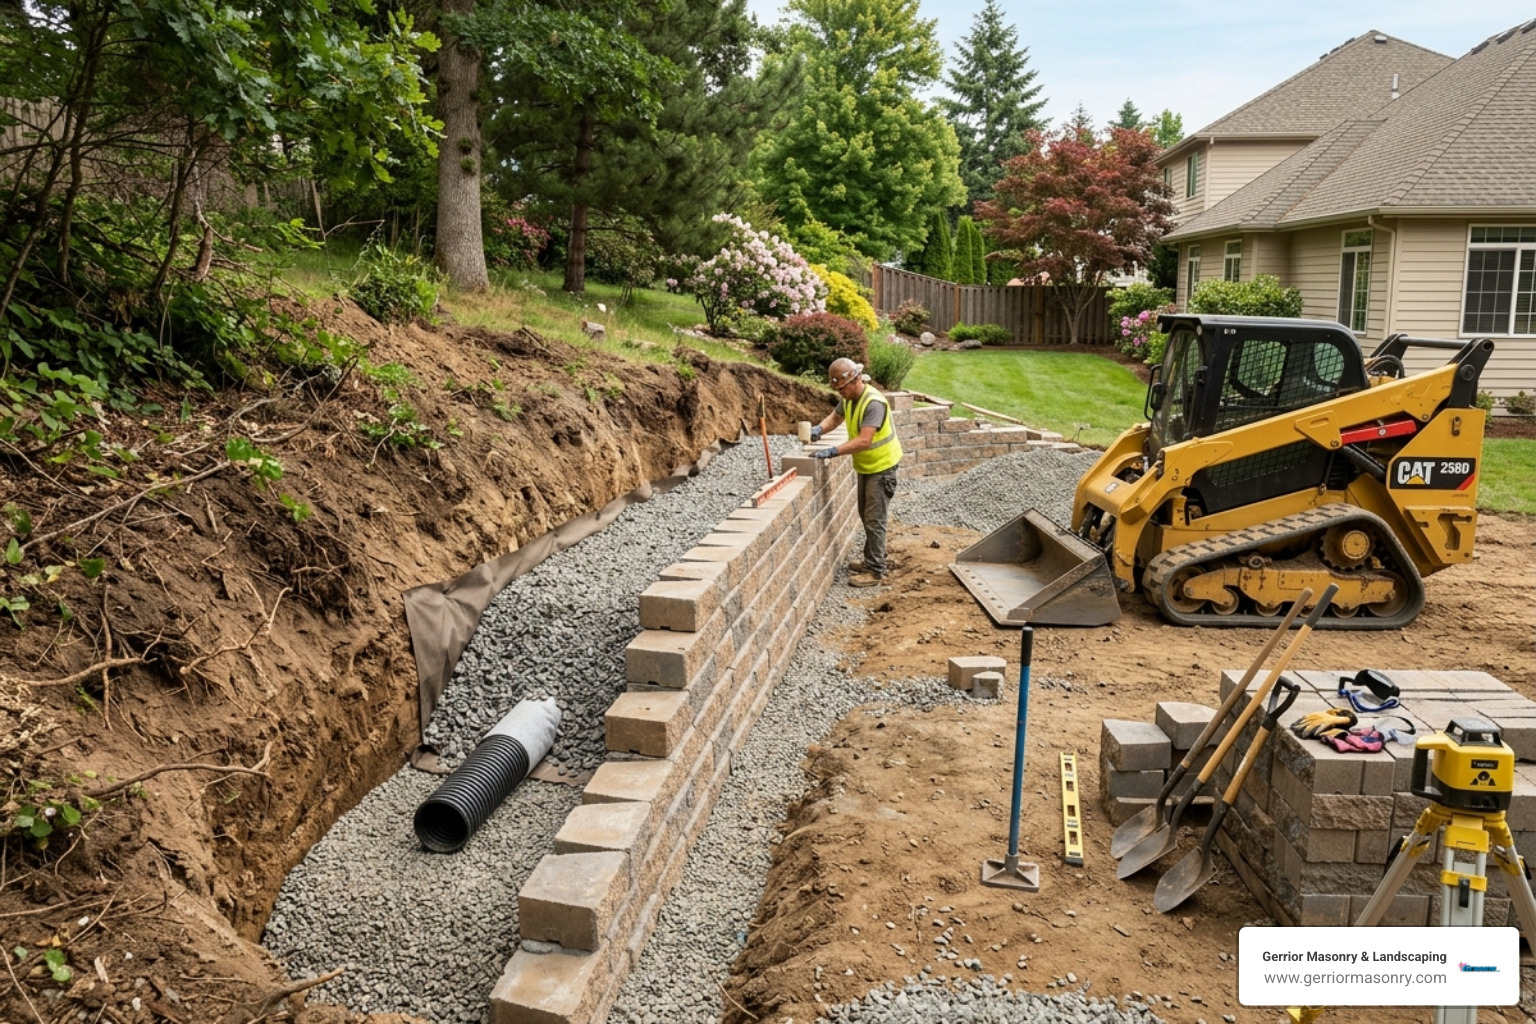
Perforated Drain Pipes: A Perforated Drain Pipe Retaining Wall system sits at the base of the wall (behind the stones) to collect water and channel it away to a safe exit point.
French Drains: We often install a Retaining Wall With French Drain which uses a trench filled with gravel to redirect surface water and groundwater away from the wall’s structure.
Weep Holes: In certain types of walls, small openings called weep holes are left in the face of the wall to allow trapped water to escape. As we like to say, Dont Weep Just Drain Your Guide To Retaining Wall Perforations is the best philosophy for a wall that lasts a lifetime.
By preventing soil saturation, we ensure the wall stays upright and the soil remains stable, protecting your property from erosion and foundation damage.
Installation, Costs, and Professional Services
Installing Custom Retaining Walls is not a weekend DIY project for most. It involves heavy machinery, precise grading, and a deep understanding of soil mechanics.
The Process
The timeline for a custom wall typically begins with a site assessment. We look at the slope, the soil type (sandy soil drains better than clay!), and the proximity to existing structures. Once the design is finalized and any necessary permits are pulled, the physical work begins with site grading and excavation.
Homeowners should also be aware of local building codes. In many Massachusetts municipalities, any wall over 4 feet in height requires a building permit and a design stamped by a licensed structural engineer. We handle the coordination of these professional services to ensure your project is fully compliant with local safety regulations, protecting your liability and your investment for decades to come.
A professional installation ensures that the wall isn’t just a “face.” It’s a system. This includes the compacted base, the drainage stone, the filter fabric (to keep dirt out of your gravel), and the structural blocks or stones themselves. When done right, these walls can last 50 to 100 years.
Popular Styles and Functional Custom Retaining Walls
In 2026, the trend is “multifunctionality.” People don’t just want a wall; they want a destination.
Integrated Seating: We often design walls at “seat height” (roughly 18-20 inches) around fire pits or patios. This eliminates the need for extra furniture and creates a cozy, built-in feel.
Tiered Gardens: Instead of one massive 8-foot wall, which can feel overwhelming, we often recommend “terracing.” This involves two or three smaller walls with flat planting areas in between. It’s much more visually appealing and easier to maintain.
Stairs and Walkways: A wall is a great place to integrate Walkways and stairs. Using matching stone for the steps ensures a seamless flow from the top of the slope to the bottom.
Outdoor Living Integration: Many of our projects involve a full Patio design and installation where the retaining wall serves as the frame for the entire outdoor room. Adding low-voltage LED lighting into the “cap” stones of the wall provides safety and a stunning nighttime aesthetic.
Estimating the Cost of Your Project
We know that budget is a major factor for every homeowner. While every site is unique, we can provide some general ranges based on internet data averages. Please note: These are average costs based on general internet data and are not actual costs for Gerrior Masonry services.
The cost of Custom Retaining Walls is influenced by material choice, the height of the wall, site accessibility (can we get a bobcat back there?), and the complexity of the drainage system.
Average Cost Range: $25 to $160 per square foot (installed).
Standard Concrete Block Walls: Often fall in the $25 to $60 per square foot range.
Natural Stone Masonry: Typically ranges from $80 to $160 per square foot due to the labor-intensive nature of the work.
High-End Custom Masonry: For complex, multi-tiered designs using premium materials like imported granite or intricate brickwork, costs can exceed $480 per square foot.
Because the range is so wide, the best way to get an accurate number is through a professional estimate. We provide detailed quotes that break down the costs of excavation, materials, and labor so there are no surprises.
Choosing a Professional Contractor
A retaining wall is a massive weight-bearing structure. If it fails, it can cause thousands of dollars in damage to your home’s foundation or your neighbor’s property. This is why choosing a contractor with a proven track record is vital.
At Gerrior Masonry & Landscaping, we bring About Gerrior Masonry over 30 years of local experience to every job. What makes us different?
Owner Oversight: Joe Gerrior is personally involved in our projects, ensuring that the high standards we’ve set for three decades are met every single day.
Skilled Craftsmanship: Our masons aren’t just laborers; they are artisans who understand how to work with stone and brick to create something beautiful.
Full-Service Capability: From initial Retaining Wall Installation to the final landscaping touches, we handle the entire process. You won’t have to coordinate between three different companies to get your yard finished.
If you’re ready to transform your property with Custom Retaining Walls, we are here to help. Whether you’re in Woburn, Burlington, or Newton, we can design a solution that fits your land and your lifestyle.
Gerrior Masonry & Landscape Construction is based in Woburn, MA, and services Middlesex and Essex County, Massachusetts.